The Best Homemade Lemon Bars Recipe: A Classic, Easy, & Irresistibly Tart Treat
Prepare to fall in love with these classic, easy lemon bars! Featuring a perfectly buttery shortbread crust, a luscious and perfectly tart lemon filling, and a delicate dusting of powdered sugar, they are an undeniable crowd favorite. Every bite offers a delightful balance of sweet and tangy, making them a perfect dessert for any occasion, especially as the seasons change and fresh citrus calls.

My Journey to the Perfect Lemon Bar Recipe
Just earlier this week, an intense craving for lemon bars struck me. As spring approaches, I always find myself drawn to bright, citrusy treats, and lemon bars felt like the absolute perfect fix. It was then that I realized a surprising truth: despite my love for baking, I didn’t have a go-to traditional lemon bar recipe in my repertoire. In fact, I couldn’t even recall ever baking a batch from scratch before! It was clearly time to rectify this oversight and embark on a mission to create the ultimate lemon bar.
After several rounds of dedicated testing and fine-tuning, I finally perfected this recipe, which I confidently declare produces the best lemon bars you’ll ever taste. What makes them stand out? They feature a wonderfully tender, melt-in-your-mouth buttery crust that provides the ideal foundation. The lemon filling is incredibly silky, smooth, and bursts with just the right amount of tartness to awaken your taste buds. These bars are rich and utterly luscious, yet surprisingly simple and straightforward to make. Trust me, once you try this recipe, you won’t need another!
Table of Contents
- Ingredients You’ll Need
- How to Make Lemon Bars
- Tips for Baking the Best Lemon Bars
- The Best Way to Store Lemon Bars
- Frequently Asked Questions (FAQ) about Lemon Bars
- Other Lemon Desserts You May Like
- Get the Full Recipe
Key Ingredients You’ll Need for Perfect Lemon Bars
Crafting these irresistible lemon bars requires a few simple, high-quality ingredients. Here’s a breakdown of what you’ll need and why each component is essential:
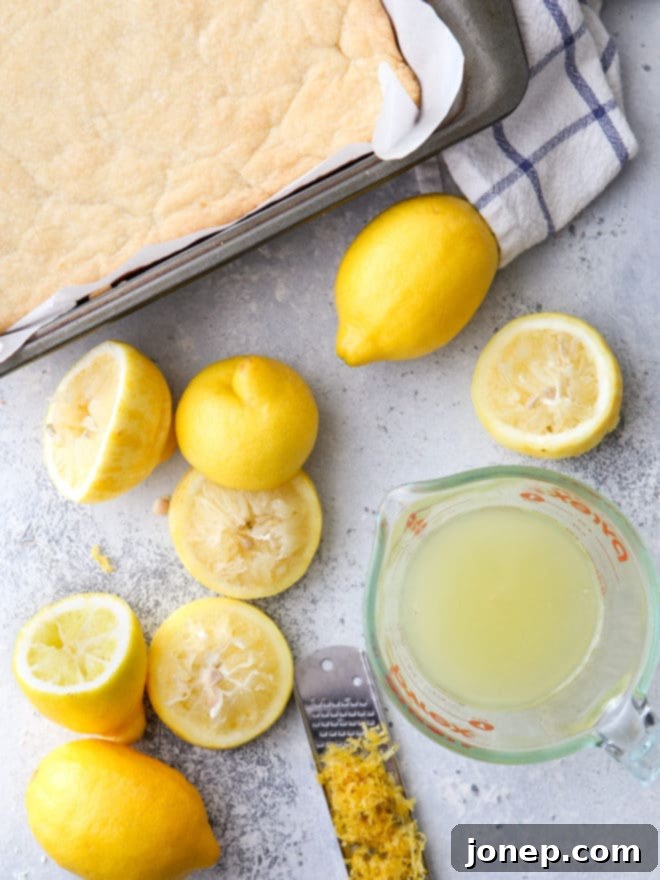
- Freshly squeezed lemon juice and lemon zest: This is non-negotiable for that vibrant, authentic lemon flavor. Bottled juice simply won’t yield the same bright, zesty results. The zest contains essential oils that deepen the lemon aroma and taste.
- Unsalted butter: Crucial for the rich, tender shortbread crust. Using unsalted butter allows you to control the overall salt content of the recipe. Ensure it’s softened to room temperature for easier creaming.
- Granulated sugar: Provides sweetness to both the crust and the tart filling, balancing the intense lemon flavor.
- Eggs: Act as a binder and thickener for the lemon filling, giving it that classic smooth and silky texture. Large eggs are typically used in baking recipes unless otherwise specified.
- All-purpose flour: Forms the structural base of both the shortbread crust and helps to slightly thicken the lemon filling, preventing it from becoming too runny.
- Salt: A pinch of salt in the crust enhances the buttery flavor and balances the sweetness.
- Powdered/confectioners sugar: The finishing touch! A delicate dusting of powdered sugar adds a beautiful aesthetic and an extra hint of sweetness that melts delightfully on your tongue.
How to Make Lemon Bars: A Simple Step-by-Step Guide
Making these delightful lemon bars is easier than you might think! Follow these steps for a perfect batch every time. The process is divided into preparing the crust, making the filling, and then allowing them to set beautifully.
- Prepare Shortbread Crust: Start by creaming together softened butter and granulated sugar until light and fluffy. Then, incorporate the all-purpose flour and a pinch of salt to form a crumbly dough. Press this dough evenly into a parchment-lined 9-inch square baking pan. Bake this crust until it’s just lightly golden brown around the edges. This par-baking step is crucial for preventing a soggy crust.
- Prepare Lemon Filling: While the crust cools slightly, whisk together the eggs, granulated sugar, fresh lemon juice, lemon zest, and a touch of flour until the mixture is smooth and well combined. This combination creates the signature tart and sweet filling. Carefully pour this vibrant yellow mixture onto the pre-baked and cooled crust. Return the pan to the oven and bake until the filling is fully set. You’ll know it’s ready when you can gently jiggle the pan, and the center no longer wobbles.
- Cool Completely: Patience is key here! It’s vital to let the lemon bars cool completely to room temperature. This allows the filling to fully set and firm up, ensuring clean, beautiful slices. For even firmer bars and easier cutting, you can transfer them to the refrigerator to chill for an hour or two after they’ve reached room temperature.
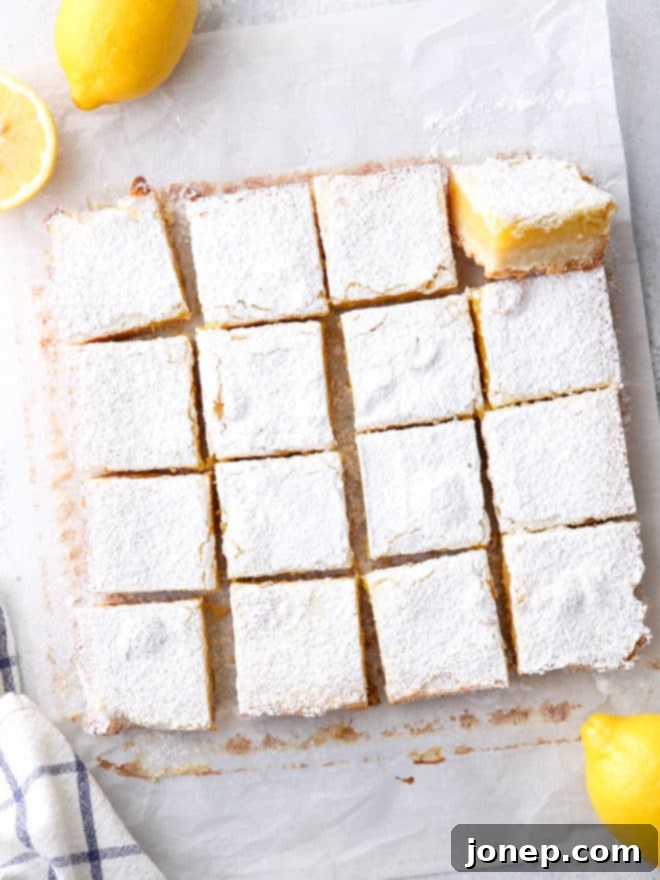
- Top with Powdered Sugar: Once the bars are thoroughly cooled, use a fine mesh strainer or a powdered sugar duster to evenly sprinkle a generous layer of confectioners’ sugar over the top. This adds a lovely finish and a delicate sweetness that complements the tart lemon.
- Slice & Serve: For the cleanest, most professional-looking slices, use a sharp knife. For each cut, wipe the knife blade clean with a damp cloth to prevent the filling from sticking and creating messy edges. Arrange your perfectly sliced lemon bars on a platter and enjoy!
Essential Tips for Baking the Best Lemon Bars Ever
Achieving bakery-quality lemon bars at home is entirely possible with a few expert tips. Pay attention to these details, and you’ll be rewarded with a batch of perfectly balanced, utterly delicious treats.
- Use the Right Pan Size: While a 9×13-inch pan is common, opting for a 9-inch square baking pan is a game-changer for this recipe. Using a smaller pan ensures that your lemon bars are thicker, more substantial, and have a more satisfying texture-to-filling ratio. This prevents them from being too thin and delicate.
- Line Your Pan Properly: Always line your baking pan with parchment paper or greased foil. Make sure to leave extra parchment paper overhanging the sides. This simple trick creates “handles” that allow you to easily lift the entire slab of cooled bars out of the pan. This makes slicing incredibly easy and mess-free, preserving the pristine edges of your bars.
- Par-Bake the Crust: This step is absolutely critical! Baking the shortbread crust first, *before* adding the lemon filling, creates a protective barrier. This prevents the crust from becoming soggy from the moist lemon filling, ensuring it remains wonderfully crisp and buttery. Don’t skip it!
- Only Use Fresh Lemon Juice and Zest: For an unparalleled, vibrant lemon flavor, always use freshly squeezed lemon juice and the zest of fresh lemons. Bottled lemon juice often contains preservatives and lacks the bright, nuanced flavor and aromatic oils found in fresh lemons. The zest adds an extra layer of intense lemon essence that makes all the difference.
- Cool the Bars Completely Before Slicing: This cannot be stressed enough! Allowing the lemon bars to cool completely to room temperature, and ideally chilling them in the refrigerator, gives the lemon filling ample time to fully set and firm up. Attempting to slice them while warm will result in a messy, unset filling. Chilling them ensures the cleanest, most precise cuts and a perfect structural integrity for each bar.
- Wipe Your Knife Between Cuts: For those picture-perfect slices, keep a damp cloth nearby and wipe your sharp knife clean after each cut. This prevents any sticky residue from the filling from transferring to the next slice, ensuring every piece looks as good as it tastes.

The Best Way to Store Lemon Bars for Freshness
Refrigeration is Key: Due to their dairy and egg-based filling, lemon bars are best stored in the refrigerator. Place them in an airtight container to prevent them from drying out or absorbing other food odors. If stacking layers, place parchment paper in between to prevent sticking. They will remain fresh and delicious for up to 5 days.
Freezing for Longer Enjoyment: Yes, you can freeze lemon bars! This is a fantastic option for making them ahead or enjoying them over a longer period. First, ensure the bars are completely cooled. Wrap individual bars or small sections tightly in plastic wrap, then place them in a freezer-safe container or freezer bag. They can be stored in the freezer for up to 3 months. When ready to serve, simply defrost them in the refrigerator for a few hours before bringing them to room temperature or enjoying chilled.
Frequently Asked Questions (FAQ) about Lemon Bars
Q: Can I use bottled lemon juice instead of fresh?
A: While technically possible, it is strongly recommended to use freshly squeezed lemon juice. Bottled lemon juice often contains preservatives and lacks the bright, complex, and vibrant flavor that fresh lemons provide. The zest from fresh lemons also adds crucial aromatic oils that cannot be replicated with bottled juice.
Q: Why is my lemon bar filling runny?
A: A runny filling is usually due to insufficient baking time or not allowing the bars to cool completely. The filling needs to bake until it’s set (it shouldn’t wobble significantly when the pan is gently shaken). Also, the filling continues to set as it cools, so patience during the cooling and chilling phases is crucial for a firm, sliceable bar.
Q: Can I make these lemon bars ahead of time?
A: Absolutely! Lemon bars are an excellent make-ahead dessert. You can bake them a day or two in advance and store them in an airtight container in the refrigerator. They often taste even better the next day as the flavors have had time to meld.
Q: How can I tell if the crust is par-baked enough?
A: The crust should look lightly golden around the edges and feel firm to the touch. You’re not looking for a deep brown, but rather a hint of color that indicates it’s cooked through and has developed a nice, buttery aroma.
Q: Can I double the recipe?
A: Yes, you can double the recipe. If you do, you’ll need a larger baking pan, such as a 9×13-inch pan. Be sure to adjust the baking times accordingly for both the crust and the filling, as they will likely take longer to cook through in a larger quantity.
Other Zesty Lemon Desserts You May Like
If you love the bright, refreshing flavor of lemon, explore these other delicious citrus-infused treats:
Get the Full Lemon Bar Recipe Here

Classic Lemon Bars
Pin Recipe
Leave a Review
Ingredients
Crust:
- 1 cup (226 grams) unsalted butter , softened to room temperature
- ½ cup (100 grams) granulated sugar
- 2 cups (240 grams) all-purpose flour
- ½ teaspoon coarse salt
Filling:
- 4 large eggs
- 1 ½ cup (300 grams) granulated sugar
- ⅔ cup (190 ml) freshly squeezed lemon juice (, 2-3 lemons)
- Zest of 2 lemons
- ½ cup (60 grams) all-purpose flour
- Powdered sugar , for dusting
Instructions
To make the crust:
-
Preheat oven to 350°F (175°C) and line a 9-inch square baking pan with parchment paper or greased foil, leaving an overhang on two sides for easy removal.
-
In a large bowl, using an electric mixer, beat the softened butter and granulated sugar together on high speed until the mixture is light and creamy, which typically takes 2-3 minutes.
-
Gradually add the all-purpose flour and coarse salt to the butter mixture, mixing on low speed until the dough just comes together and is crumbly.
-
Press the dough evenly into the bottom of the prepared baking pan. Bake in the preheated oven for 15-20 minutes, or until the edges just begin to turn a light golden brown.
-
Remove the crust from the oven and let it cool in the pan for about 15 minutes before proceeding to add the filling.
To make the filling:
-
While the crust is cooling, whisk together the large eggs, granulated sugar, freshly squeezed lemon juice, lemon zest, and the remaining all-purpose flour in a medium bowl until the mixture is completely smooth and free of lumps.
-
Carefully pour the lemon filling mixture over the cooled, par-baked crust in the pan.
-
Return the pan to the oven and bake for an additional 30-35 minutes, or until the filling is fully set. To check for doneness, gently jiggle the pan; the center of the filling should no longer move or wobble.
-
Let the bars cool in the pan for at least 15 minutes. Then, using the parchment paper overhang, carefully lift the entire slab of bars out of the pan and transfer it to a wire rack to cool completely to room temperature. For firmer bars and cleaner slices, you can chill them in the fridge for 1-2 hours.
-
Once thoroughly cooled, dust the top of the bars generously with powdered sugar using a fine-mesh strainer. Slice with a sharp knife (wiping the blade clean between cuts for perfect edges) and serve.
Video
Notes
