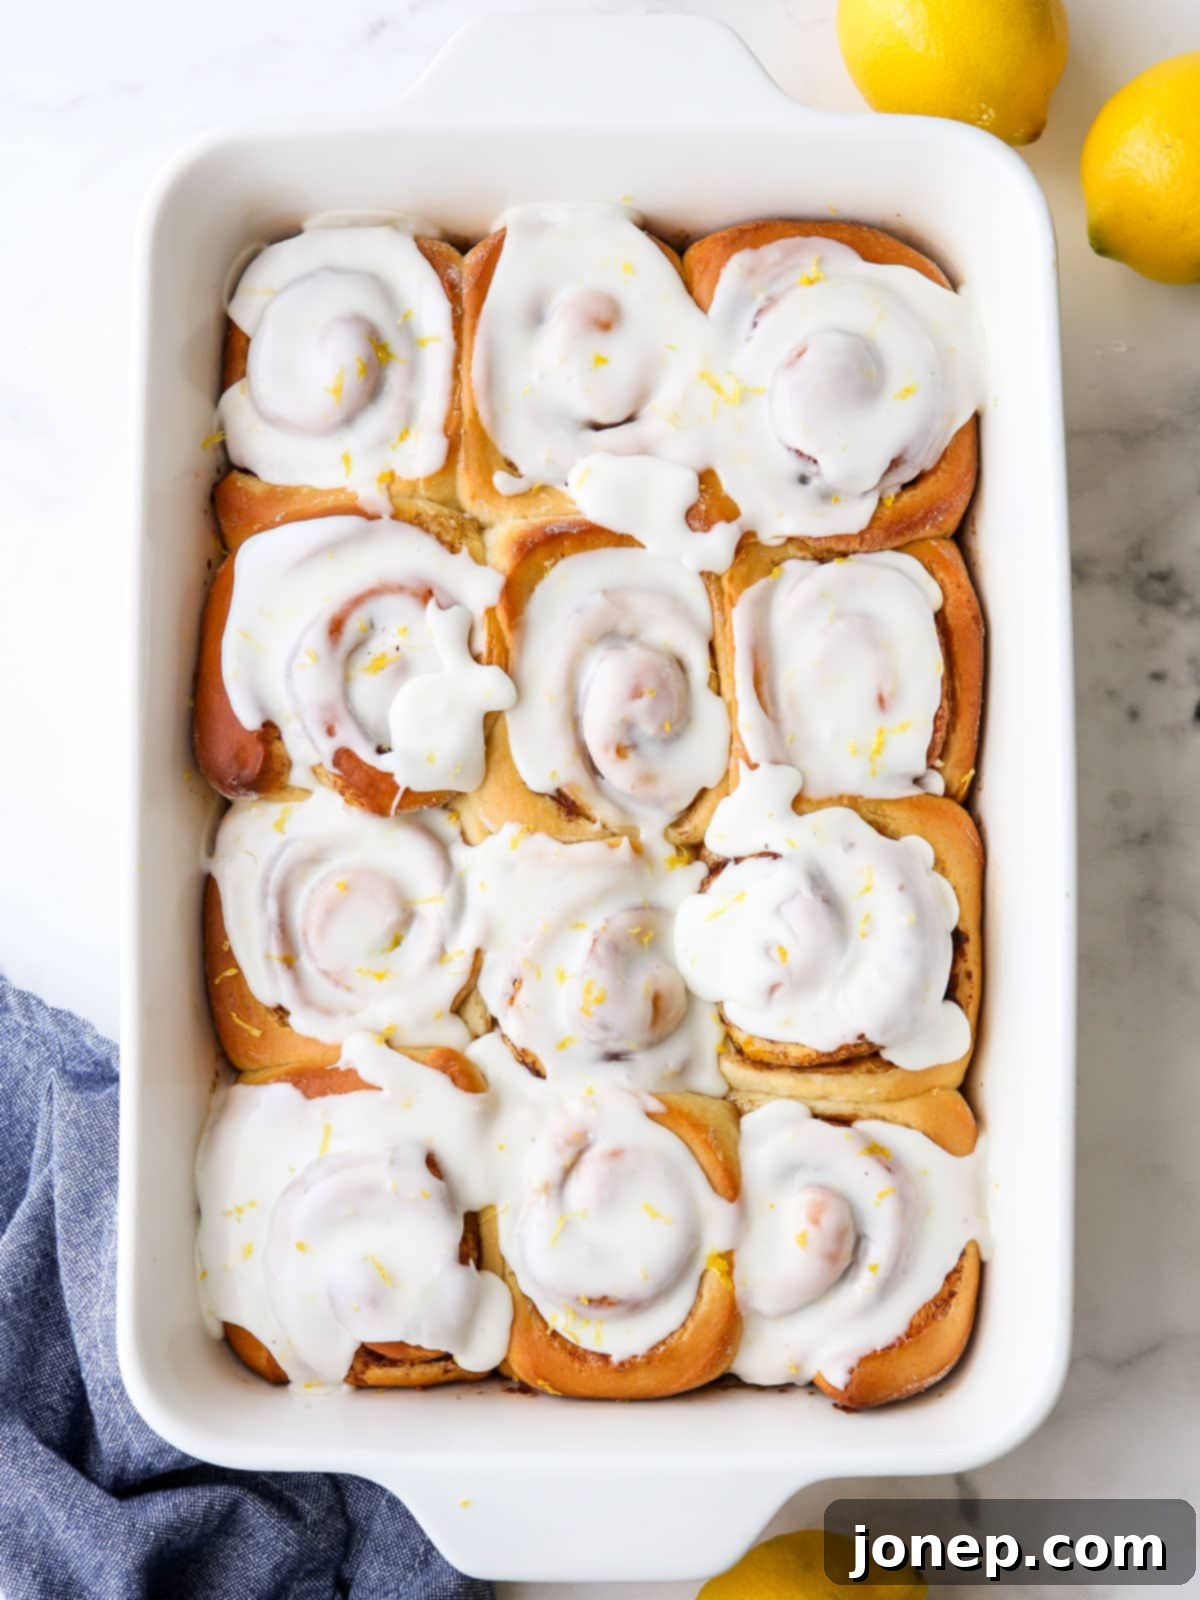
Bright & Zesty Lemon Cinnamon Rolls: Your Ultimate Guide to the Perfect Spring Treat
Imagine the comforting aroma of freshly baked cinnamon rolls wafting through your kitchen, but with an unexpected twist – a vibrant burst of lemon that brightens every bite. These Lemon Cinnamon Rolls are a delightful fusion, taking a beloved classic and infusing it with sunny, zesty flavor. Each roll is incredibly soft, wonderfully gooey, and topped with a luscious lemon glaze, making them an absolutely perfect treat, especially as spring approaches. While often associated with cozy winter mornings, this citrus-kissed version brings a refreshing lightness that makes them suitable for any season.
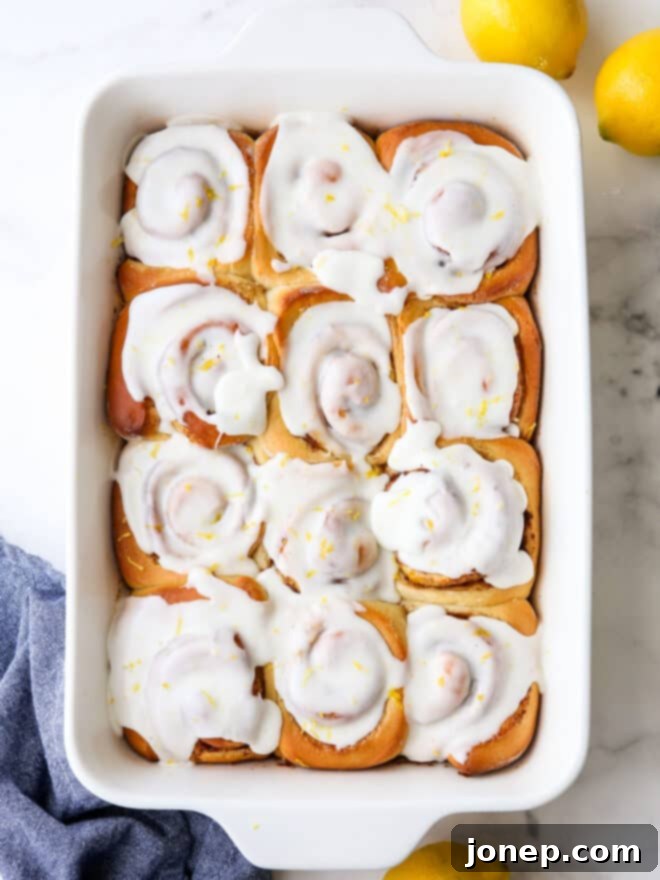
Let’s clarify one crucial detail: these are not simply lemon sweet rolls. These are truly lemon-scented cinnamon rolls! We’ve taken the beloved framework of classic cinnamon rolls and elevated them by incorporating generous amounts of fresh lemon zest directly into the warm, gooey cinnamon filling. After baking, each roll is generously finished with a sweet, tangy, and irresistibly zesty lemon glaze that perfectly complements the spiced interior. The combination creates a harmonious balance of flavors that is both familiar and excitingly new.
And for those who might be skeptical, trust me when I say: lemon and cinnamon are a match made in culinary heaven. The warm, inviting spice of cinnamon beautifully contrasts with the bright, acidic notes of lemon, creating a flavor profile that is both cozy and invigorating. This unique pairing makes these rolls simply divine, ideal for those transitional days when you crave comfort but also a hint of freshness. While they are a perfect fit for chilly spring mornings or a festive Easter brunch, these lemon cinnamon rolls are a delicious delight that can be enjoyed any time of the year, for any special occasion or simply to brighten an ordinary day.

Table of Contents
- The Magic of Lemon and Cinnamon
- Ingredients You’ll Need to Bake Perfection
- How to Make Homemade Lemon Cinnamon Rolls
- Pro Tip: The Best Way to Slice Cinnamon Rolls
- How to Help Your Dough Rise Faster
- Make-Ahead Instructions for Convenience
- Exciting Flavor Variations to Try
- Lemon Cinnamon Roll Recipe FAQs
- More Irresistible Cinnamon Roll Recipes
- Get the Full Lemon Cinnamon Roll Recipe
The Magic of Lemon and Cinnamon: A Flavor Symphony
While some might initially question the combination of bright citrus and warm spice, lemon and cinnamon share a surprising synergy that creates an incredibly balanced and appealing flavor. Lemon provides a clean, acidic counterpoint that cuts through the richness of the dough and the sweetness of the filling, preventing the rolls from being overly heavy. Its zest carries potent aromatic oils that release a refreshing fragrance, enhancing the overall sensory experience. Cinnamon, on the other hand, grounds the flavor with its familiar warmth, depth, and comforting notes. Together, they create a profile that is simultaneously invigorating and reassuring, making these rolls a truly unique and memorable treat. It’s this beautiful interplay that makes these lemon cinnamon rolls not just another variation, but a standout recipe worth adding to your baking repertoire.
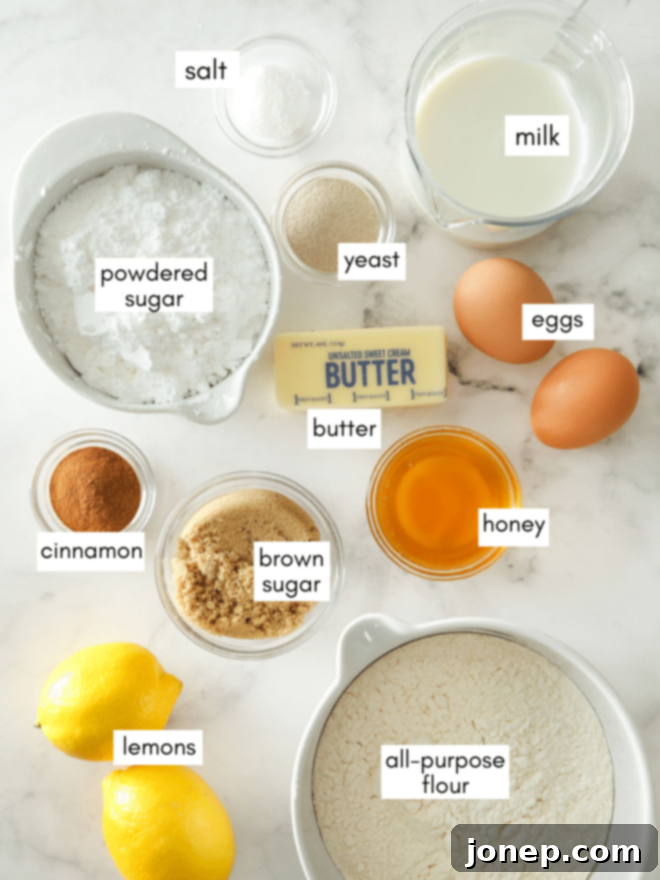
Ingredients You’ll Need to Bake Perfection
Crafting these delectable lemon cinnamon rolls begins with selecting quality ingredients. Each component plays a vital role in achieving that perfect fluffy texture, gooey center, and bright, zesty finish. Below is a breakdown of what you’ll need, along with a few tips to ensure the best results for your homemade lemon cinnamon rolls.
How to Make Homemade Lemon Cinnamon Rolls: A Step-by-Step Guide
Baking homemade cinnamon rolls might seem intimidating, but with this clear and simple guide, you’ll be creating bakery-worthy treats in no time. Follow these steps carefully to achieve perfectly soft, zesty, and utterly delicious lemon cinnamon rolls.
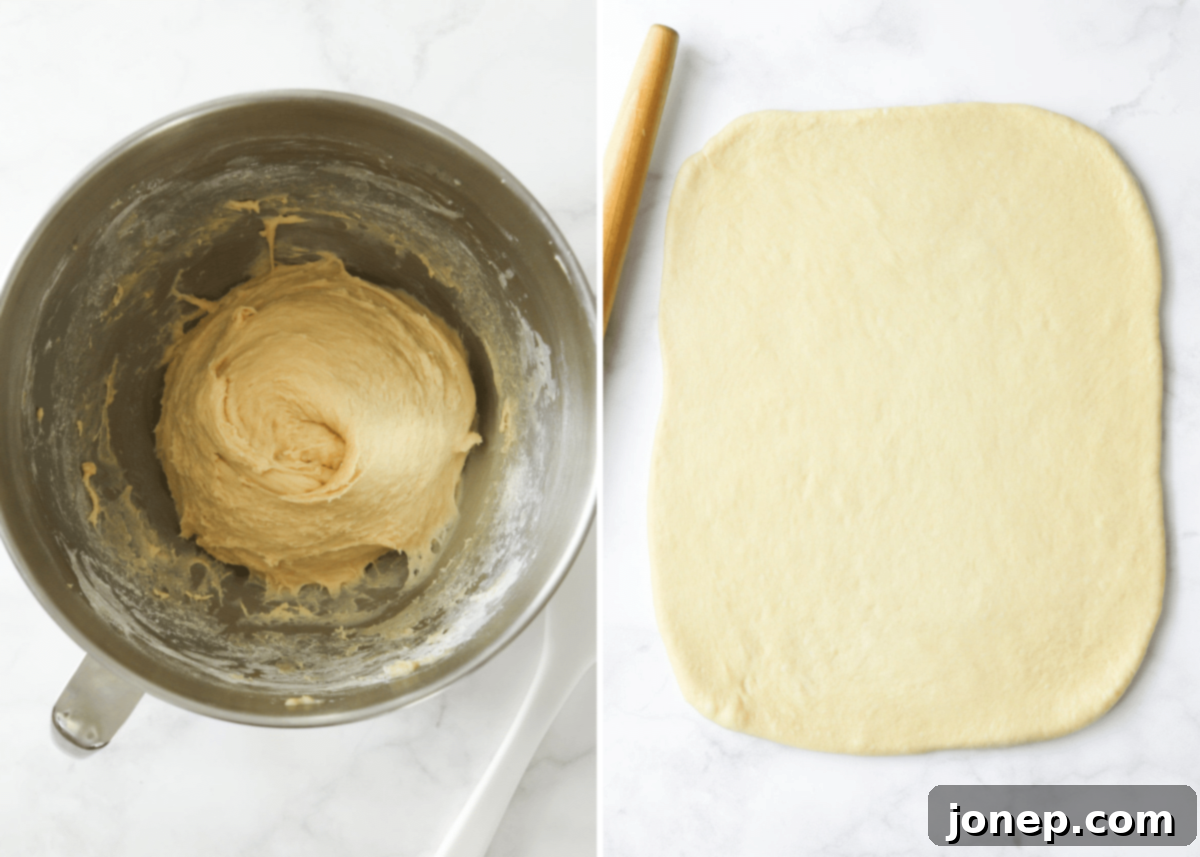
- Prepare the Dough Base: Begin by melting the butter in a small saucepan. Once melted, stir in the milk and honey. Heat this mixture gently for just a minute or two, ensuring the temperature reaches between 120-130°F (49-54°C). This specific temperature is crucial for activating the yeast without killing it. In a large mixing bowl (or the bowl of a stand mixer), combine a portion of your all-purpose flour with the active-dry yeast and salt. Gradually add the warmed milk mixture and the eggs, mixing until a shaggy dough forms.
- Knead to Perfection: Attach a dough hook to your mixer, or prepare to knead by hand. Gradually incorporate the remaining flour, a quarter cup at a time, until the dough comes together. You’re looking for a dough that is smooth and elastic, pulling away from the sides of the bowl but still feeling soft and slightly tacky to the touch. Avoid adding too much flour, as this can result in tough rolls. Continue kneading for several minutes to develop the gluten.
- First Rise for Fluffy Texture: Once kneaded, place your dough into a lightly greased bowl, turning it once to coat. Cover the bowl tightly with plastic wrap or a clean kitchen towel. Let it rise in a warm, draft-free place until it has doubled in size, which usually takes about 1 hour. This initial rise is fundamental for developing the light and airy texture of your finished rolls.

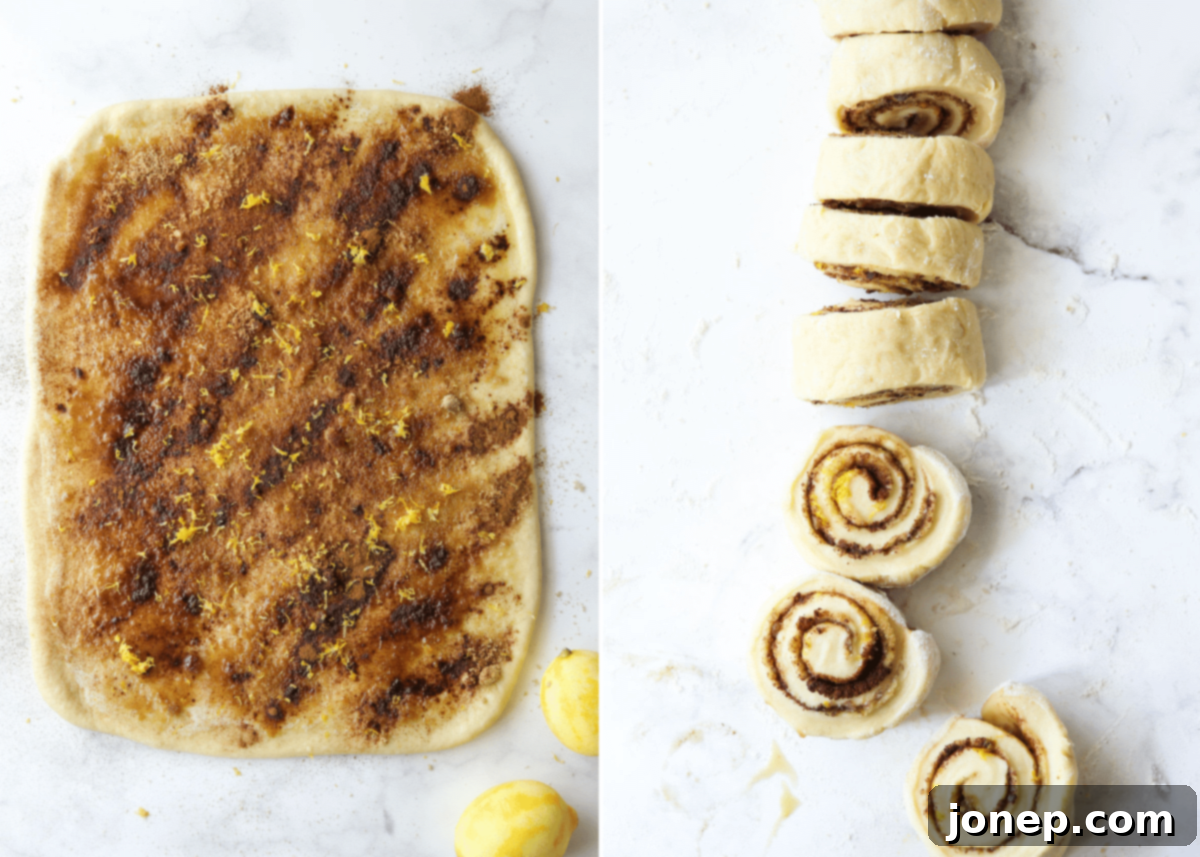
- Fill with Zesty Goodness: Once the dough has doubled, gently punch it down to release the air. On a lightly floured surface, roll the dough out into a large rectangle, approximately 10×15 inches. Brush the entire surface evenly with melted butter. Then, generously sprinkle with a mixture of brown sugar, ground cinnamon, and, most importantly, plenty of fresh lemon zest. The lemon zest will infuse every layer with its bright aroma.
- Roll and Slice into Rolls: Starting from one of the longer ends, carefully and tightly roll the dough into a snug log. This tight roll is key to achieving those beautiful, distinct swirls. Once rolled, use a sharp knife or, for best results, unscented dental floss (see our tip below!) to slice the log into 12 even rolls, each about 1.25 inches thick.

- Second Rise and Bake: Arrange the sliced rolls in a greased 9×13-inch baking dish, leaving a little space between each one to allow for expansion. Cover the dish with plastic wrap and let the rolls rise again in a warm spot until they are puffed up and nearly doubled in size, typically 30-45 minutes. While they are rising, preheat your oven to 350°F (175°C). Bake the rolls for about 20-25 minutes, or until their tops are golden brown and the rolls are cooked through. They should look soft and inviting.
- Glaze and Serve: While the rolls are cooling slightly (they’re best glazed warm!), prepare your lemon glaze. In a small bowl, whisk together powdered sugar, more fresh lemon zest, and just enough fresh lemon juice to achieve a thick yet pourable consistency. Pour this glorious glaze generously over your warm or slightly cooled lemon cinnamon rolls.
- Enjoy Immediately! For the ultimate experience, lemon cinnamon rolls are best enjoyed freshly baked and still slightly warm, allowing the flavors to truly shine.
Baking Tip: The Best Way to Slice Cinnamon Rolls
My absolute favorite and most effective method for slicing cinnamon rolls is to use unscented dental floss or a piece of clean, strong thread. Here’s how: measure out about 12-15 inches of floss or thread. Slide it underneath your dough log at the point where you want to make your first cut, ensuring it’s centered. Wrap the ends of the floss/thread around the top of the dough, cross them over, and then pull them tight in one quick, decisive motion. The floss will cut cleanly and effortlessly right through the soft dough, creating perfectly round, un-squashed rolls every time. Repeat this process at even intervals to get uniformly sized rolls. This simple trick makes a significant difference in the presentation and texture of your baked goods!
How to Help Your Dough Rise Faster
Yeast dough needs warmth to rise effectively. While simply covering your dough with a towel or plastic wrap and letting it sit on the kitchen counter works just fine, cooler ambient temperatures can significantly slow down the rising process. If you’re short on time or your kitchen is a bit chilly, here are a few warm, cozy suggestions to help your dough proof more quickly and reliably:
- Using Your Oven: A slightly warmed oven can create the perfect environment. Heat your oven to its absolute lowest setting (often around 170-200°F or 75-95°C) for just a few minutes, then turn it completely off. Place your covered bowl of dough on the center rack and close the door. The residual warmth will encourage the yeast to work its magic without over-heating. Just be sure the oven is off to prevent baking the dough!
- Utilizing Your Microwave: The microwave offers a surprisingly effective warm, moist environment. Heat 1 cup of water in your microwave for 2 minutes on high. Once the water is hot and steamy, carefully remove it (the water creates humidity). Immediately place your covered dough into the microwave and close the door. Do NOT turn the microwave on; the residual heat and moisture will create an ideal proofing box.
- Other Warm Spots: Get creative with other warm areas in your home! I’ve successfully risen bread dough on top of a warm oven (while something else was baking), near a running dryer machine, or even on a chair positioned over a heater vent during colder months. The key is consistent, gentle warmth without direct high heat that could kill the yeast.

Make-Ahead Instructions for Convenience
Want to enjoy fresh, warm lemon cinnamon rolls for breakfast or brunch without having to wake up at the crack of dawn? Good news! This recipe is incredibly adaptable for make-ahead convenience. You can prepare your rolls the night before, allowing for a stress-free morning.
After you have shaped and placed the individual rolls into your baking pan (before their second rise), simply cover the pan tightly with plastic wrap. You can then transfer them to the refrigerator for up to about 12 hours. This slow, cold proofing actually enhances the flavor of the dough.
When you’re ready to bake, remove the rolls from the fridge about 1-2 hours before you plan to put them in the oven. It’s crucial that they come completely back to room temperature and undergo their final rise until they are noticeably puffed and almost doubled in size. This can take longer than a typical room temperature rise due to the cold dough, so make sure to factor in this extra time. Once they’ve reached their full potential, bake as directed, and enjoy your fresh, delicious, and effortless morning treat!
Exciting Flavor Variations to Try
One of the joys of baking is the ability to customize recipes to your liking. While these lemon cinnamon rolls are fantastic as is, the base recipe for cinnamon rolls is incredibly versatile. Don’t be afraid to experiment and create your own unique flavor combinations. Here are a few additional variations I can think of to inspire your culinary creativity:
- Explore Other Citrus: Instead of lemon, try infusing your rolls with the zest of other citrus fruits. Orange zest will lend a sweeter, more floral note; blood orange will offer a beautiful hue and distinct flavor; and grapefruit zest can provide a bolder, slightly bitter, yet refreshing twist. Each will create a distinct and delicious experience.
- Include Additional Spices: Deepen the warmth of the filling by adding other complementary spices. A pinch of freshly grated nutmeg can add a subtle, comforting dimension, while cardamom, with its aromatic and slightly floral notes, pairs wonderfully with both cinnamon and citrus. Allspice or a touch of ground ginger could also be intriguing additions.
- Add Fresh or Frozen Berries: For a burst of fruity flavor and a pleasing texture, consider folding in fresh or frozen blueberries (no need to thaw) into the filling before rolling. Raspberries or chopped strawberries would also work beautifully, adding a lovely tartness that complements the lemon and cinnamon. Just be mindful that berries can release moisture, so a slightly firmer dough might be beneficial.
- Nutty Crunch: For added texture and a rich, earthy flavor, sprinkle chopped pecans or walnuts over the buttered dough before adding the cinnamon-lemon mixture.
- Different Glazes: While lemon glaze is key here, you could also try a cream cheese glaze (with lemon zest added for extra zing), or even a simple vanilla bean glaze for a different but equally delicious topping.
Lemon Cinnamon Roll Recipe FAQs
Both active-dry yeast and instant yeast (often labeled as quick-rise or rapid-rise) will work beautifully for this recipe. If you opt for instant yeast, you might notice that the dough rises a bit faster, potentially cutting the rising time in half. Otherwise, the end results in terms of flavor and texture are generally the same. This particular recipe has not been tested with fresh yeast, so for consistent results, I recommend sticking to active-dry or instant yeast.
Traditionally, many recipes instruct you to “proof” active-dry yeast by dissolving it in warm water with a pinch of sugar first. However, I learned the efficient “dry blend method” for this type of recipe from Red Star Yeast, and it’s a fantastic time-saver! If you are confident that your yeast is fresh and hasn’t expired, you can bypass this pre-dissolving step. When you combine all the dry ingredients with liquids that are properly heated to 120-130°F (which is significantly warmer than just “warm water”), it effectively accomplishes the same rapid activation of the yeast, integrating it seamlessly into the dough. This method simplifies the process without compromising on the rise.
The precise amount of flour you’ll need for these rolls can vary significantly due to several factors, including humidity levels in your kitchen, the exact size of your eggs, and even how accurately you measure your flour (scooping vs. spooning). This is why I provide a range of 3 to 3½ cups. The key is to add flour gradually until you achieve the right consistency: the dough should still be very soft and slightly tacky to the touch, but manageable and no longer excessively sticky to your hands. Resist the urge to add too much flour, as this is a common pitfall that can lead to tough, dense, and dry cinnamon rolls. Always err on the side of slightly sticky rather than too dry.
These lemon cinnamon rolls are undoubtedly at their peak flavor and texture when served warm, directly from the oven. However, if you have leftovers, they will keep beautifully in an airtight container at room temperature for up to 3 days. To revive their soft, fluffy texture and warm gooeyness, I highly recommend warming individual rolls in the microwave for a few seconds (15-20 seconds) before serving. This brings back their fresh-baked appeal, making them almost as good as new!
More Irresistible Cinnamon Roll Recipes
If you’ve fallen in love with the magic of homemade cinnamon rolls, there’s a whole world of variations to explore! From seasonal twists to classic comforts, here are a few more recipes to keep your baking adventures going:
Get the Full Lemon Cinnamon Roll Recipe
Ready to bake these incredible lemon cinnamon rolls? Here’s the complete recipe card, including all ingredients, step-by-step instructions, and helpful notes to guide you through the process. Enjoy the delightful experience of baking and savoring these bright and cozy treats!

Lemon Cinnamon Rolls
Pin Recipe
Leave a Review
Ingredients
For the Dough:
- ¼ cup (60 grams) unsalted butter
- ¼ cup (85 grams) honey (85 grams)
- ⅔ cup (182 grams) whole milk (160 ml)
- 3-3 ½ (360-420 grams) all-purpose flour (see Notes)
- 1 packet (7 grams) active-dry yeast (2 ¼ teaspoons)
- 1 teaspoon salt
- 2 large eggs
For the Filling:
- ¼ cup (60 grams) unsalted butter , melted
- ⅓ cup (66 grams) packed light or dark brown sugar
- Zest of 2 lemons
- 2 teaspoons ground cinnamon
For the Glaze:
- 1 ½ cups (170 grams) powdered sugar
- 2-4 tablespoons fresh lemon juice
- Zest of 1 lemon
Equipment
Instructions
To Make Cinnamon Rolls:
-
Melt butter in a small saucepan set over medium-low heat. Add honey and milk and heat for just a minute more, or until the temperature is between 120-130°F (49-54°C). For the most accuracy, use an instant-read thermometer to ensure the liquid is warm enough to activate yeast but not so hot that it kills it.
-
In the bowl of a stand mixer fitted with a dough hook, combine 1 ½ cups of the all-purpose flour with the active-dry yeast and salt. Add the warmed milk mixture and mix on low speed until just combined. Incorporate the large eggs one at a time, mixing thoroughly after each addition until fully incorporated.
-
With the mixer still on low speed, gradually add the remaining flour ¼ cup at a time. Continue adding flour until the dough begins to clear the sides of the bowl, but still feels slightly sticky to the touch. You may not need all 3 ½ cups of flour, so add just enough to achieve the desired consistency (refer to the Notes section for more guidance). Continue to knead the dough in the mixer for a few more minutes until it becomes smooth, elastic, and has a springy feel.
-
Lightly grease a large bowl. Place the kneaded dough into the bowl, turning it once to coat all sides with oil. Cover the bowl tightly with plastic wrap or a clean kitchen towel, and let it rise in a warm, draft-free place until it has visibly doubled in size, which should take approximately 1 hour.
-
Once the dough has completed its first rise, gently punch it down to deflate the air. Briefly knead it a few times on a lightly floured surface. Cover it again with the plastic wrap and let it rest for 15 minutes. This short rest allows the gluten to relax, making the dough easier to roll out. In the meantime, prepare all your delicious filling ingredients.
-
On a lightly floured surface, roll the rested dough into a large rectangle, aiming for dimensions of approximately 10×15 inches (25×38 cm). Drizzle the entire surface with the melted butter, ensuring it’s evenly distributed. Then, generously sprinkle with the packed brown sugar, the vibrant fresh lemon zest, and the ground cinnamon. Starting with one of the longer ends, tightly roll up the dough into a long, uniform log. Using a very sharp knife or, for perfectly shaped rolls, unscented dental floss or thread, cut the dough log into 12 even rolls, each about 1¼ inches (3 cm) thick.
-
Arrange the cut rolls in a greased 9×13-inch baking pan. Ensure there’s a little space between each roll to allow for expansion during the final rise. Cover the pan loosely with plastic wrap and let the rolls rise again in a warm spot until they are noticeably puffed and almost doubled in size, which typically takes about 30-45 minutes. While the rolls are completing their second rise, preheat your oven to 350°F (175°C).
-
Bake the lemon cinnamon rolls in the preheated oven for approximately 20-25 minutes, or until their tops are golden brown and they are cooked through. The rolls should feel soft and springy to the touch. Let them cool slightly in the pan for about 5-10 minutes before drizzling generously with the prepared lemon glaze.
To Make Glaze:
-
In a medium bowl, whisk together the sifted powdered sugar with enough fresh lemon juice to achieve a thick but pourable glaze consistency. Start with 2 tablespoons of juice and add more in small increments (½ teaspoon at a time) until you reach your desired thickness. Finally, stir in the vibrant fresh lemon zest. This adds an extra layer of bright citrus flavor and aroma to the glaze.
Notes
- What kind of yeast is best? For this lemon cinnamon roll recipe, both active-dry yeast and instant yeast (also known as quick-rise or rapid-rise yeast) will yield excellent results. If you opt for instant yeast, be aware that your dough may only require about half of the indicated rising time. The final texture and flavor will be quite similar regardless of which type you choose. Please note that this specific recipe has not been tested with fresh yeast.
- Why is there a range for the flour amount? The precise amount of flour needed for these rolls can fluctuate due to various factors, such as the humidity in your kitchen, the brand of flour you use, and how accurately you measure it. This is why I provide a flexible range of 3 to 3½ cups. The crucial indicator for sufficient flour is when the dough remains very soft and still slightly tacky to the touch, but you can handle it without it sticking excessively to your hands. Over-flouring your dough will result in tough, dense, and less enjoyable cinnamon rolls, so always use only as much flour as is truly necessary to achieve the correct consistency.
- Do not heat liquids to over 140°F (60°C). When warming the butter, milk, and honey mixture, it is critically important to keep the temperature below 140°F (60°C). Exceeding this temperature will kill the active yeast, preventing your rolls from rising properly and resulting in a dense, heavy dough. An instant-read thermometer is your best friend here for accuracy.
This recipe for Lemon Cinnamon Rolls was originally published in March 2015. It has since been updated with refreshed photos, improved wording, and additional helpful tips to enhance your baking experience.
