Soft & Flavorful Apple Cranberry Bread: The Ultimate Yeast Bread Recipe Guide
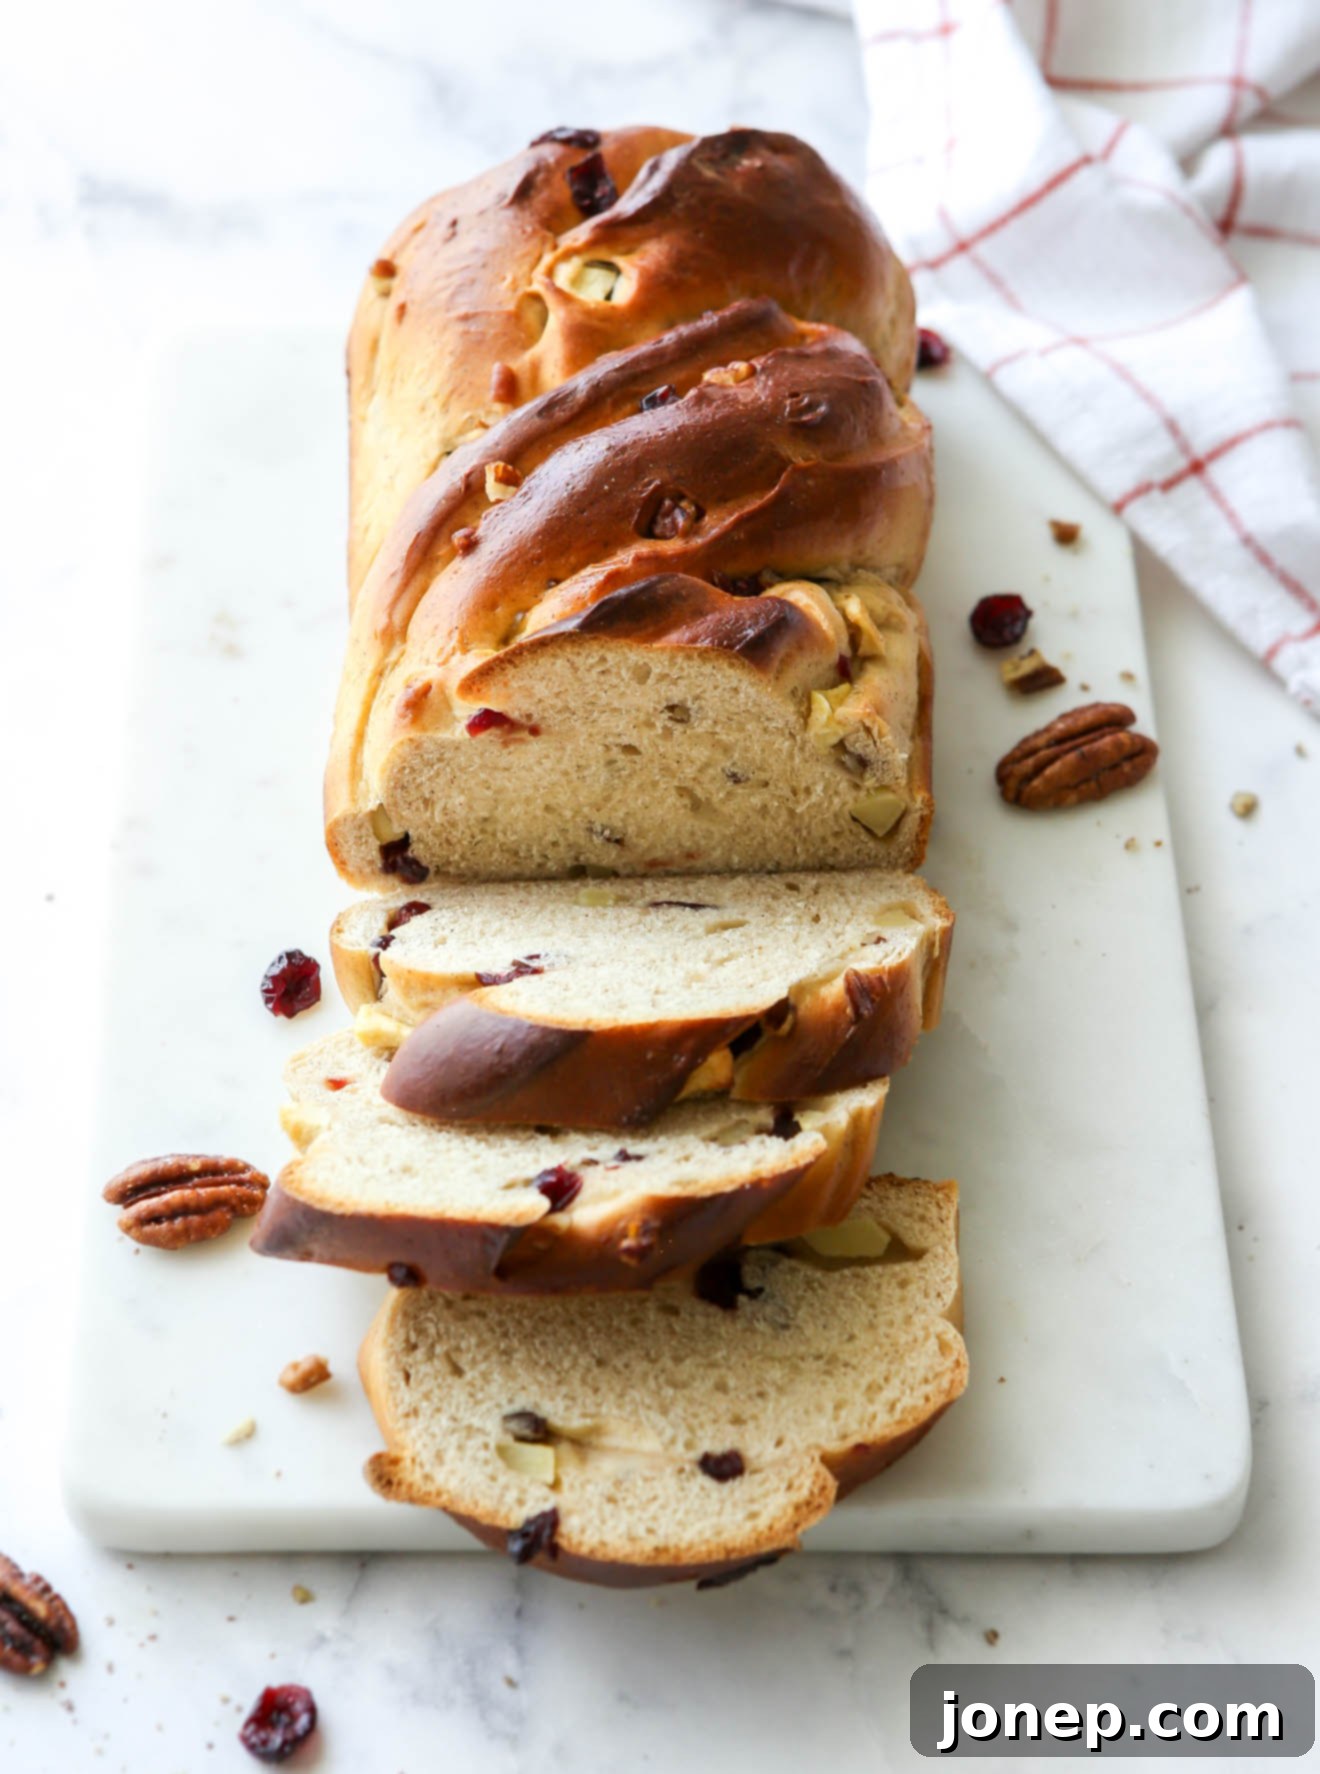
Imagine a bread so incredibly soft and tender, it practically melts in your mouth. This yeast-raised apple cranberry bread is exactly that—a true delight for your senses. It strikes the perfect balance of sweetness, enhanced by the delightful crunch of pecans, the burst of juicy dried cranberries, and the tender bits of chopped apple woven throughout. Subtle hints of warm cinnamon and creamy vanilla elevate this loaf, making it an irresistible treat that embodies the cozy spirit of fall and winter.
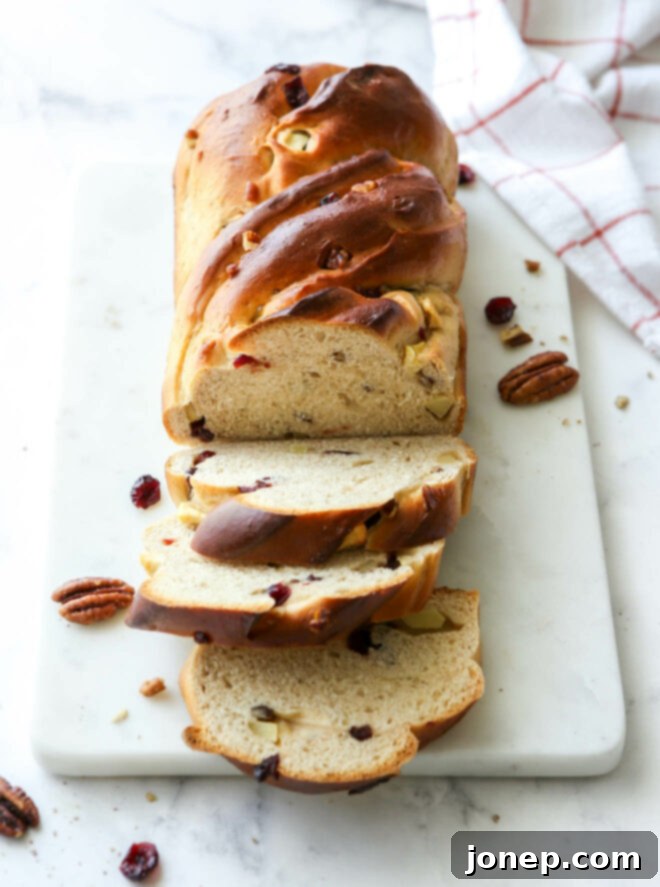
Many aspiring home bakers might feel intimidated by the thought of creating a beautiful, bakery-quality loaf of bread at home. You might walk past a bustling bakery or specialty bread shop and think, “There’s no way I can bake something this exquisite in my own kitchen.” I’ve certainly been there, gazing at perfectly braided challah or fluffy cinnamon rolls with a mix of awe and trepidation. But I’m here to tell you that this perception is often wrong!
If you’ve ever successfully baked a simple loaf of bread or mastered the art of fluffy cinnamon rolls, then you possess all the skills necessary to absolutely conquer this braided apple cranberry bread recipe. This guide is designed to be your trusted companion, walking you through each step with clear, concise instructions and helpful tips. I promise you, making this bread is far simpler and more rewarding than you might imagine, culminating in a truly impressive and delectable result.
While this bread is made with yeast, which requires a bit more time for rising compared to a quick bread (like banana bread), the extra wait is undeniably worth every minute. The magic of yeast transforms the dough, imbuing the bread with its characteristic light, airy, and fluffy texture. It’s perfectly sweet, but not overly so—it’s a bread, not a dessert, making it versatile for various occasions. The harmonious blend of crisp apples, chewy cranberries, and crunchy pecans creates a flavor profile that is simply divine, making it the quintessential loaf for autumn and winter baking, perfect for holiday gatherings or a comforting treat on a chilly day.
This versatile apple cranberry bread can be served in a multitude of ways. Enjoy it as a delightful snack on its own, a fantastic accompaniment to your morning coffee, or a stellar side for breakfast or brunch. Beyond that, its robust yet tender structure makes it an excellent base for more elaborate dishes like rich French toast or a comforting bread pudding. Don’t limit its potential—it’s truly a bread for all occasions.
Table of Contents
- Ingredients You’ll Need for Apple Cranberry Bread
- Step-by-Step Guide: How to Make Apple Cranberry Bread
- Creative Shaping Options for Your Apple Cranberry Loaf
- Common Bread Baking FAQs & Troubleshooting
- Get the Full Apple Cranberry Bread Recipe
Baking Tip: Understanding Enriched Yeast Bread
The term “enriched yeast bread” or “enriched yeast dough” refers to a type of dough that goes beyond the basic four ingredients (flour, water, yeast, and salt). It includes additional components like sweeteners (sugar, honey), fats (butter, oil), and often eggs. These added ingredients play a crucial role in transforming the bread’s texture and flavor profile.
Unlike lean doughs, which produce crusty, chewy breads (like baguettes), enriched doughs yield loaves that are significantly softer, more tender, and richer in flavor. The fats tenderize the crumb by interfering with gluten development, while sugars contribute to browning, moisture retention, and a subtly sweet taste. Eggs add richness, structure, and a beautiful golden hue. Classic examples of enriched yeast breads include luxurious brioche, spiraled babka, and the beautiful braided challah. This apple cranberry bread, with its butter, milk, sugar, and egg, perfectly exemplifies the delicious characteristics of an enriched yeast bread, promising a remarkably soft and flavorful experience.
More Baking Tips »
Indeed, this particular apple cranberry bread is a prime example of an enriched yeast bread. Its unique composition contributes to its incredibly soft, pillowy texture and profoundly flavorful profile. Every bite is a testament to the magic of enriched dough, making it an exceptionally delicious and satisfying homemade treat that you’ll be proud to share (or keep all to yourself!).
Essential Ingredients for Your Apple Cranberry Bread
Ready to dive into the wonderful world of homemade bread baking? Let’s gather our ingredients and get started on this delightful apple cranberry loaf!
Step-by-Step Guide: How to Bake the Perfect Apple Cranberry Bread
Follow these detailed instructions to create your own perfectly soft and delicious apple cranberry bread. Precision and patience are key for yeast bread, but the process is more forgiving than you might think!
- Prepare the Wet Dough Base. Begin by melting the unsalted butter in a small saucepan over low heat. Once melted, add the milk and gently heat the mixture for just about a minute, or until it reaches a warm temperature—ideally between 120-130°F (50-55°C). It’s crucial not to overheat, as temperatures above 140°F (60°C) can kill the yeast, preventing your bread from rising. In the spacious bowl of a stand mixer, or a large mixing bowl if you’re working by hand, combine 2 cups of the bread flour with the active dry yeast, rich brown sugar, fragrant ground cinnamon, and a pinch of salt. Pour in the warmed milk and butter mixture, crack in the large egg, and add the vanilla extract. Use a dough whisk or a sturdy spatula to stir until these ingredients are just combined and form a wet, shaggy dough. This initial mix creates the perfect environment for your yeast to begin its work.
- Develop a Smooth and Elastic Dough. Now, it’s time for kneading. If using a stand mixer, attach the dough hook and begin mixing on low speed. If kneading by hand, turn the shaggy dough out onto a lightly floured surface. Gradually add more bread flour, a tablespoon or two at a time, until the dough transforms into a smooth, elastic consistency that mostly pulls away from the sides of the bowl (or your hands). It should still feel distinctly very soft and tacky to the touch, but not overly sticky. You’ll typically need between 2 ½ to 3 cups of total flour, but remember, the exact amount can vary based on humidity and flour type. Be mindful not to add too much flour; an over-floured dough will result in a dense, dry, and less flavorful loaf. It’s always better to err on the side of slightly sticky, as you can add a touch more flour when rolling it out later if needed.

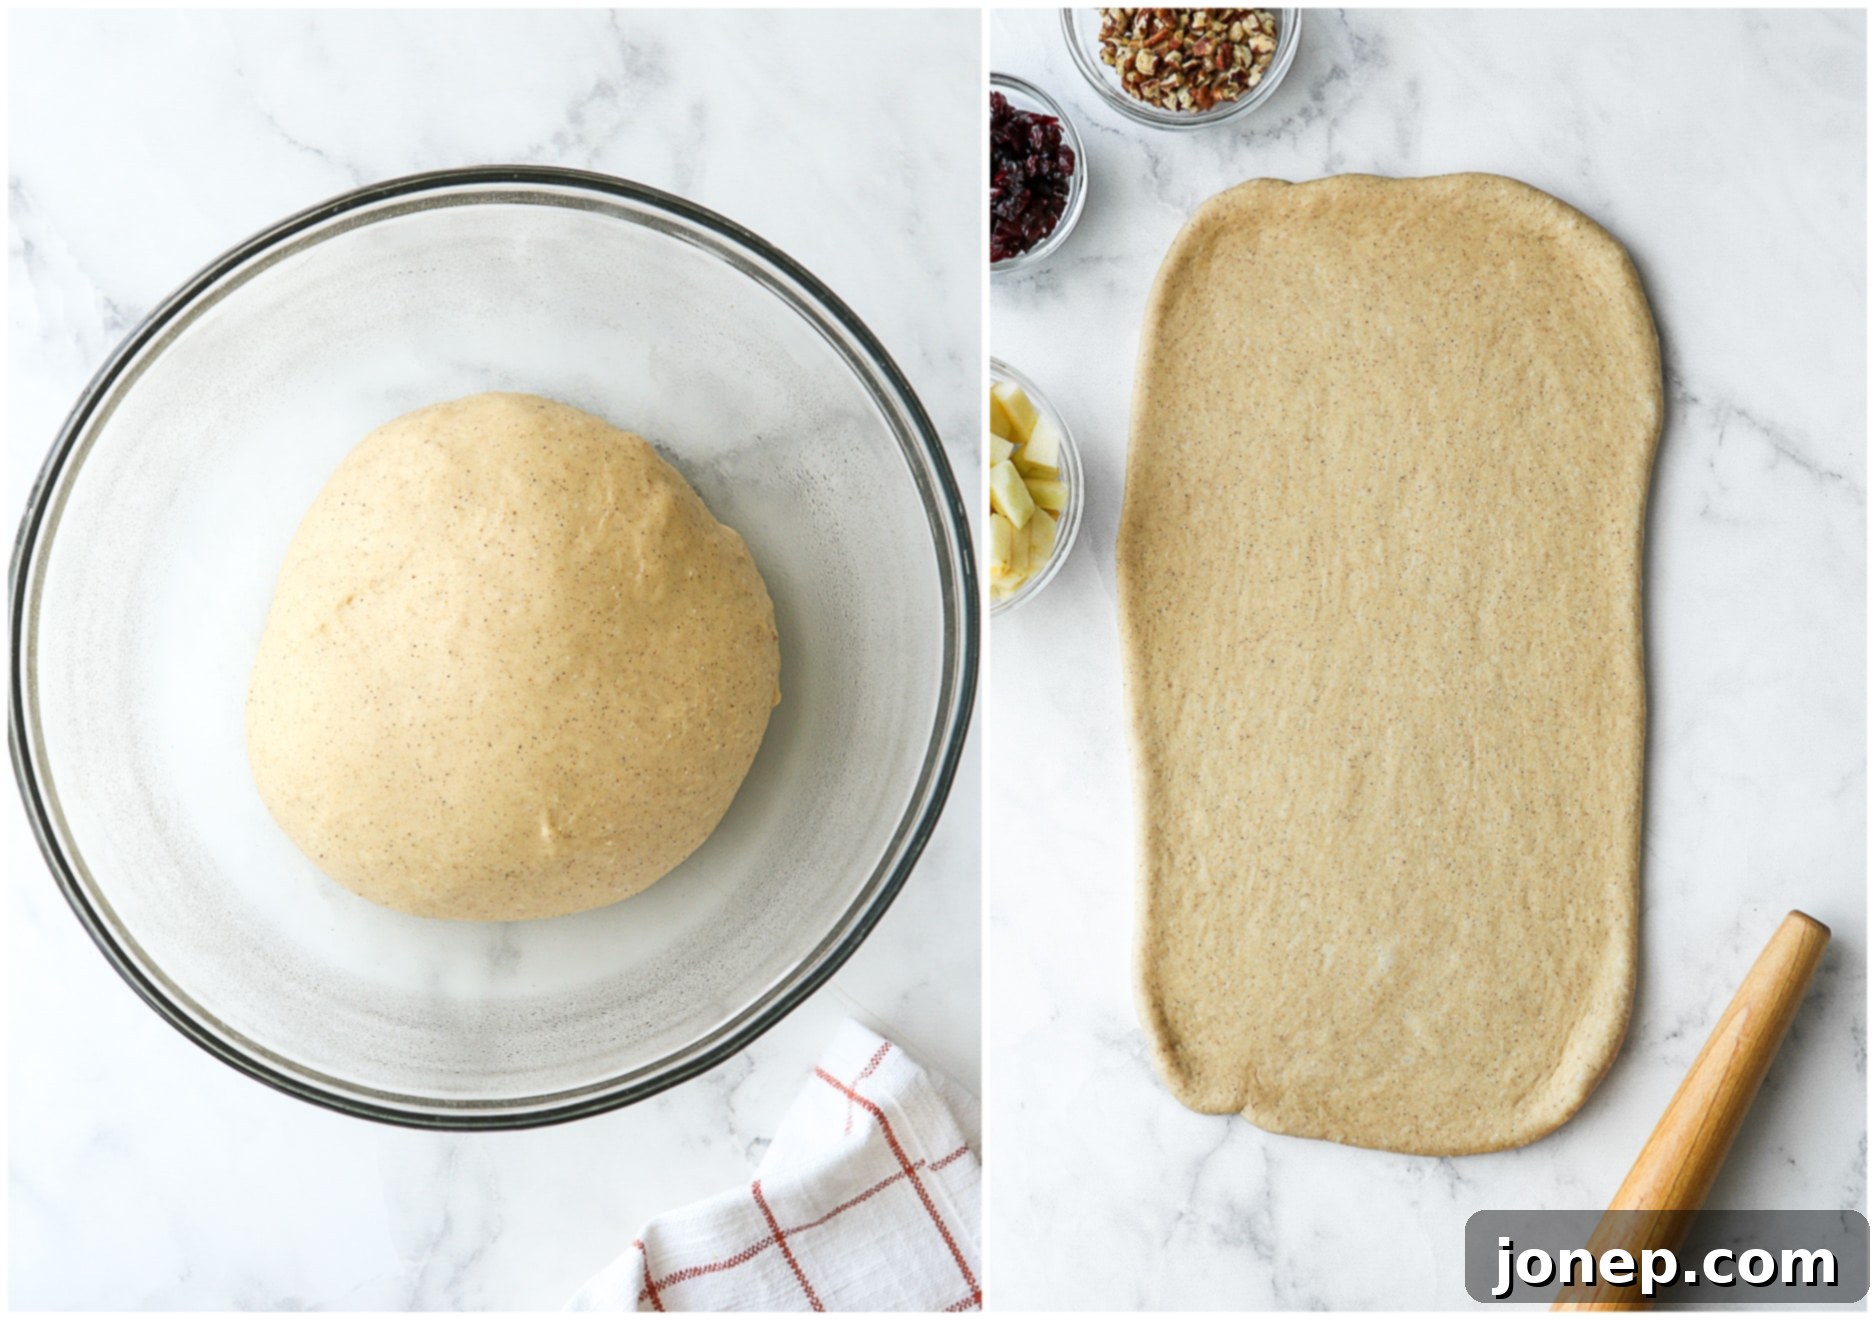
The dough transitions from a rough mix to a smooth, elastic ball. - First Rise: Letting the Dough Prove. Once kneaded, gently shape the dough into a neat round ball. Place it back into the clean, lightly greased mixing bowl, ensuring it’s covered tightly with plastic wrap or a damp kitchen towel. This prevents the dough from drying out. Find a warm, draft-free place in your kitchen – like a slightly warmed oven (turned off!), near a sunny window, or on top of a warm appliance. Let the dough rise for approximately one hour, or until it has nearly doubled in size. This first rise is crucial for developing flavor and creating that signature airy texture.
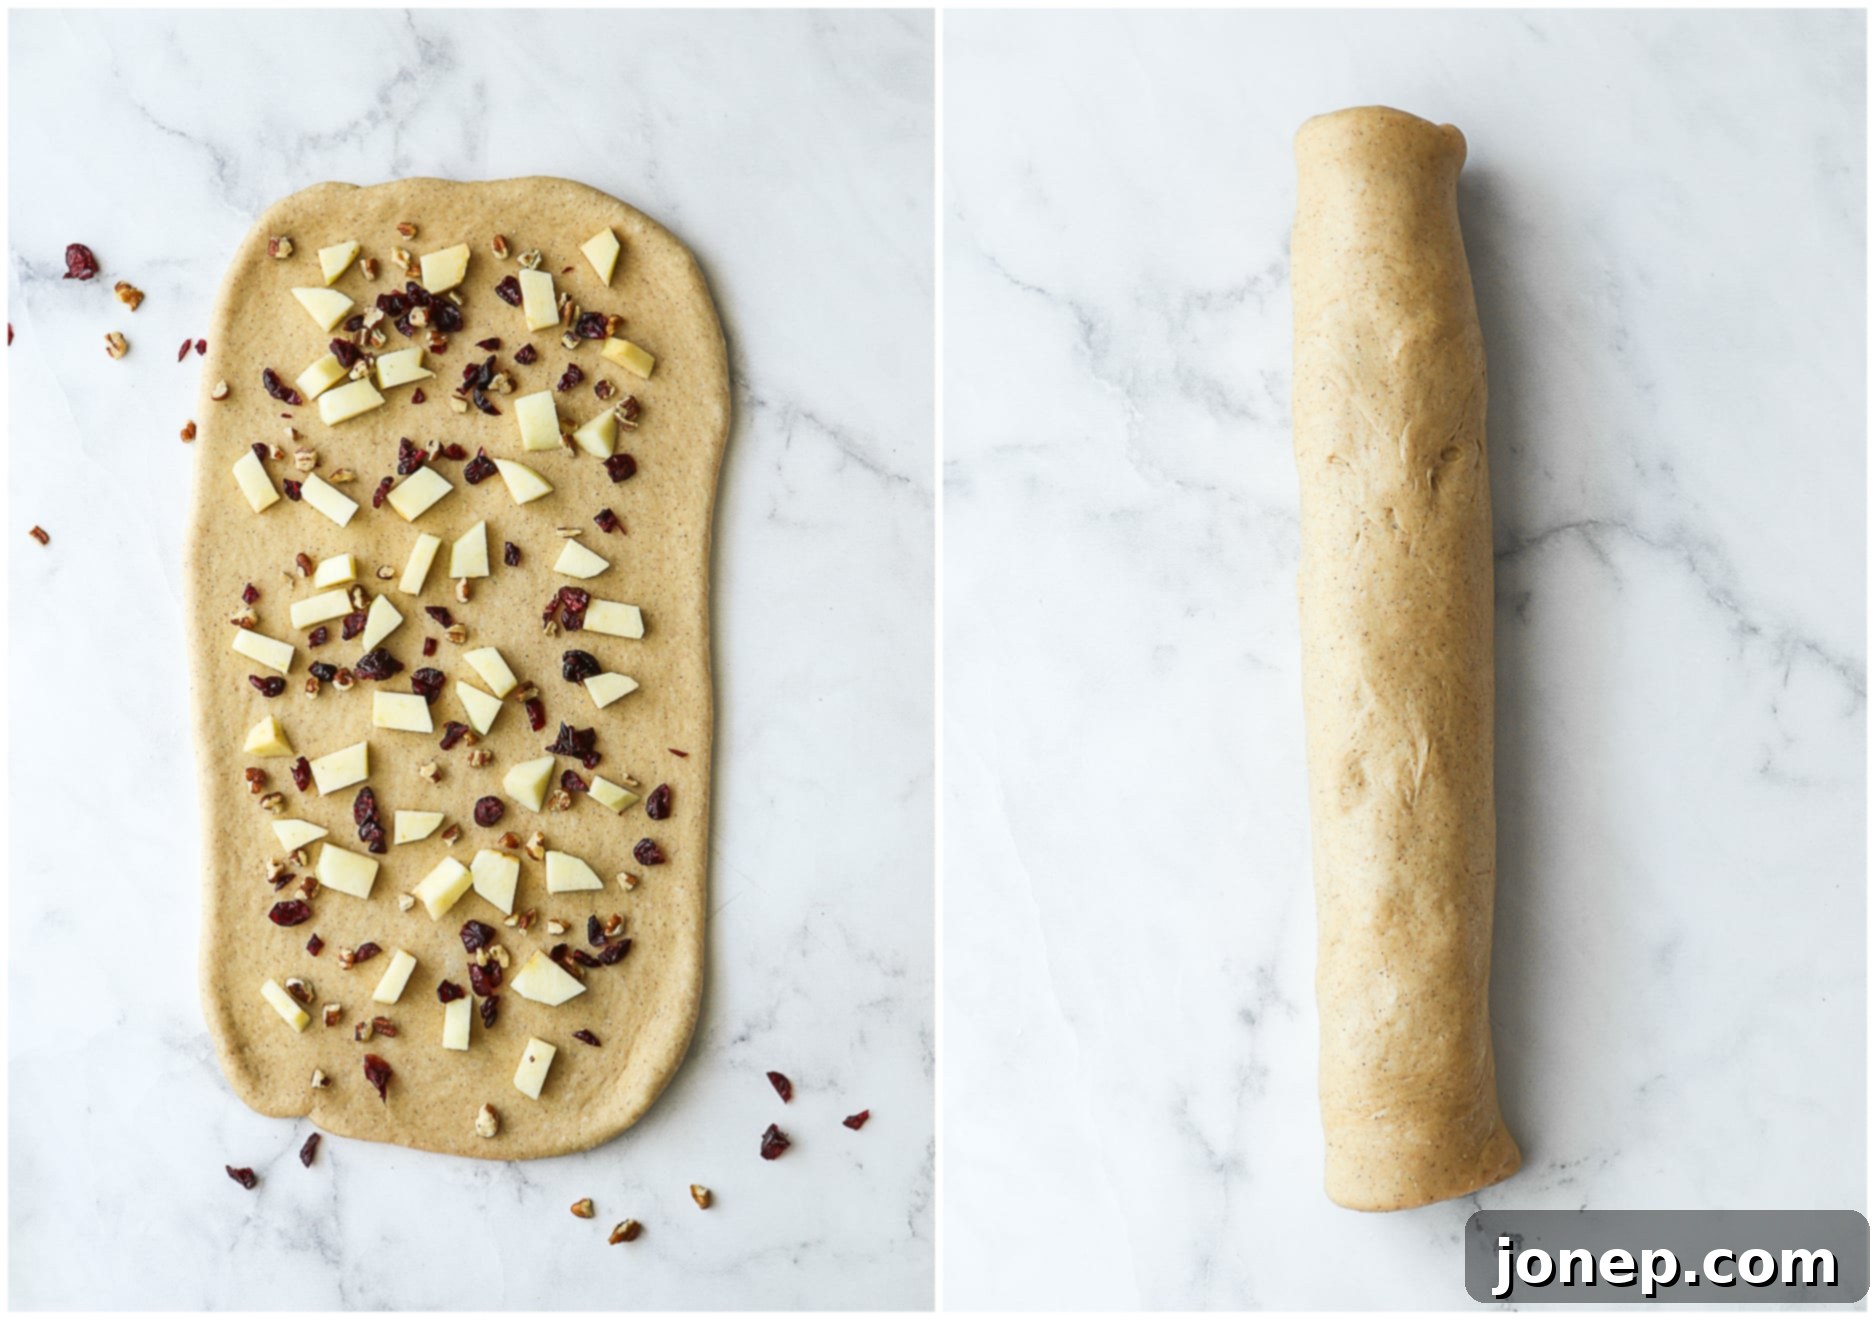
- Roll Out and Incorporate the Mix-ins. After the first rise, gently “punch down” the dough to release the accumulated gases. Knead it a few times on a lightly floured surface to bring it back together. Allow it to rest for about 10 minutes; this helps relax the gluten, making the dough easier to roll. Then, using a rolling pin, roll the dough out into a large rectangle, roughly 8×14 inches in size. Evenly sprinkle your generous toppings: the finely chopped apples, vibrant dried cranberries, and crunchy pecans across the surface of the dough, leaving a small border free along one of the long edges.

The delicious filling spread over the dough before rolling. - Shape into a Braid or Classic Loaf. Starting from one of the long ends, begin tightly rolling up the dough, creating a log shape. Be careful to roll firmly but gently, ensuring the delicious toppings don’t get squished out! Once rolled, you have two primary options for shaping:
- Traditional Loaf: Simply tuck the ends of the dough log underneath to create a neat seam, then transfer it seam-side down to a greased 9×5-inch loaf pan.
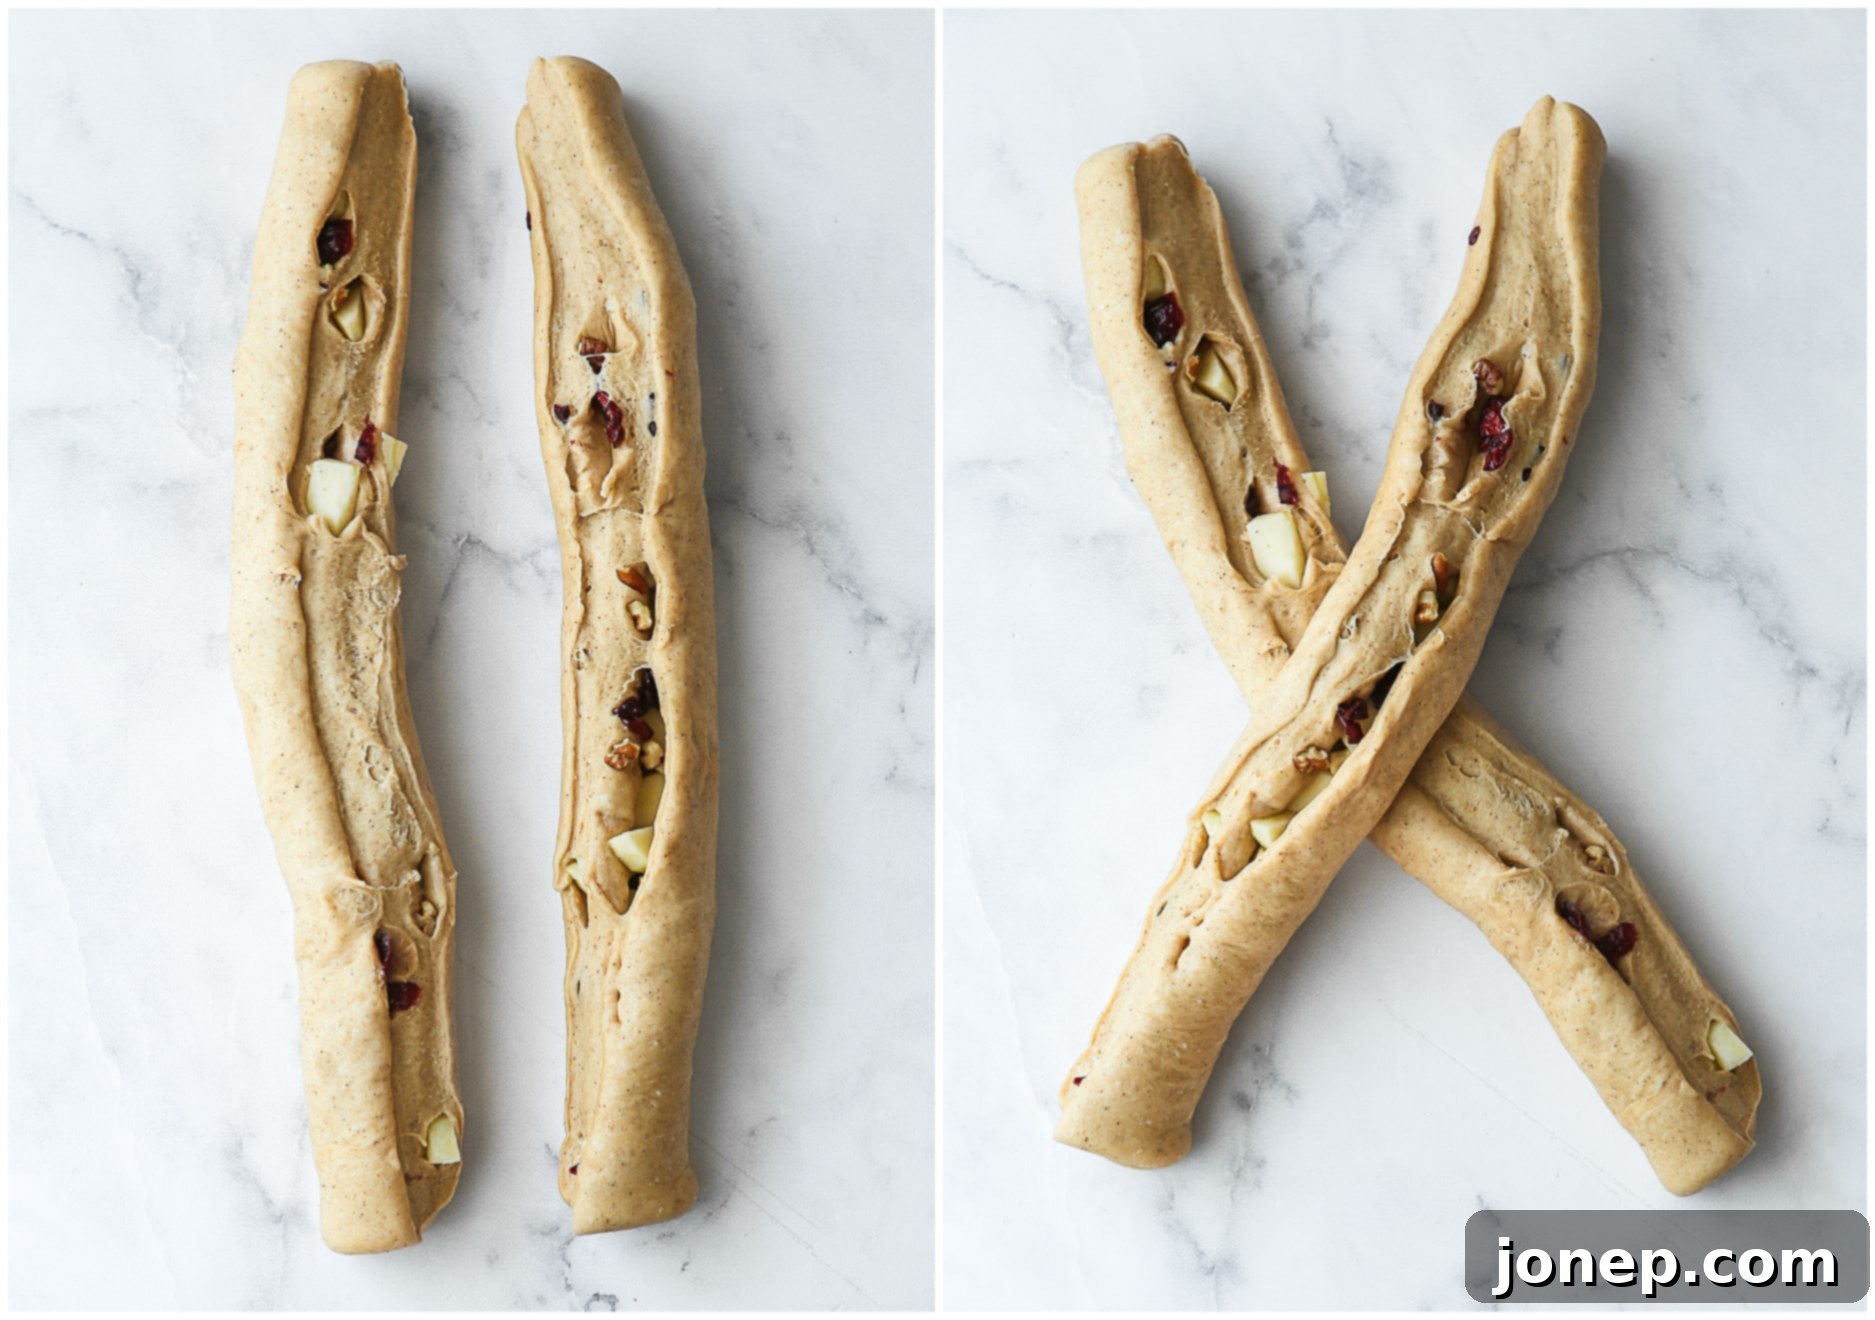
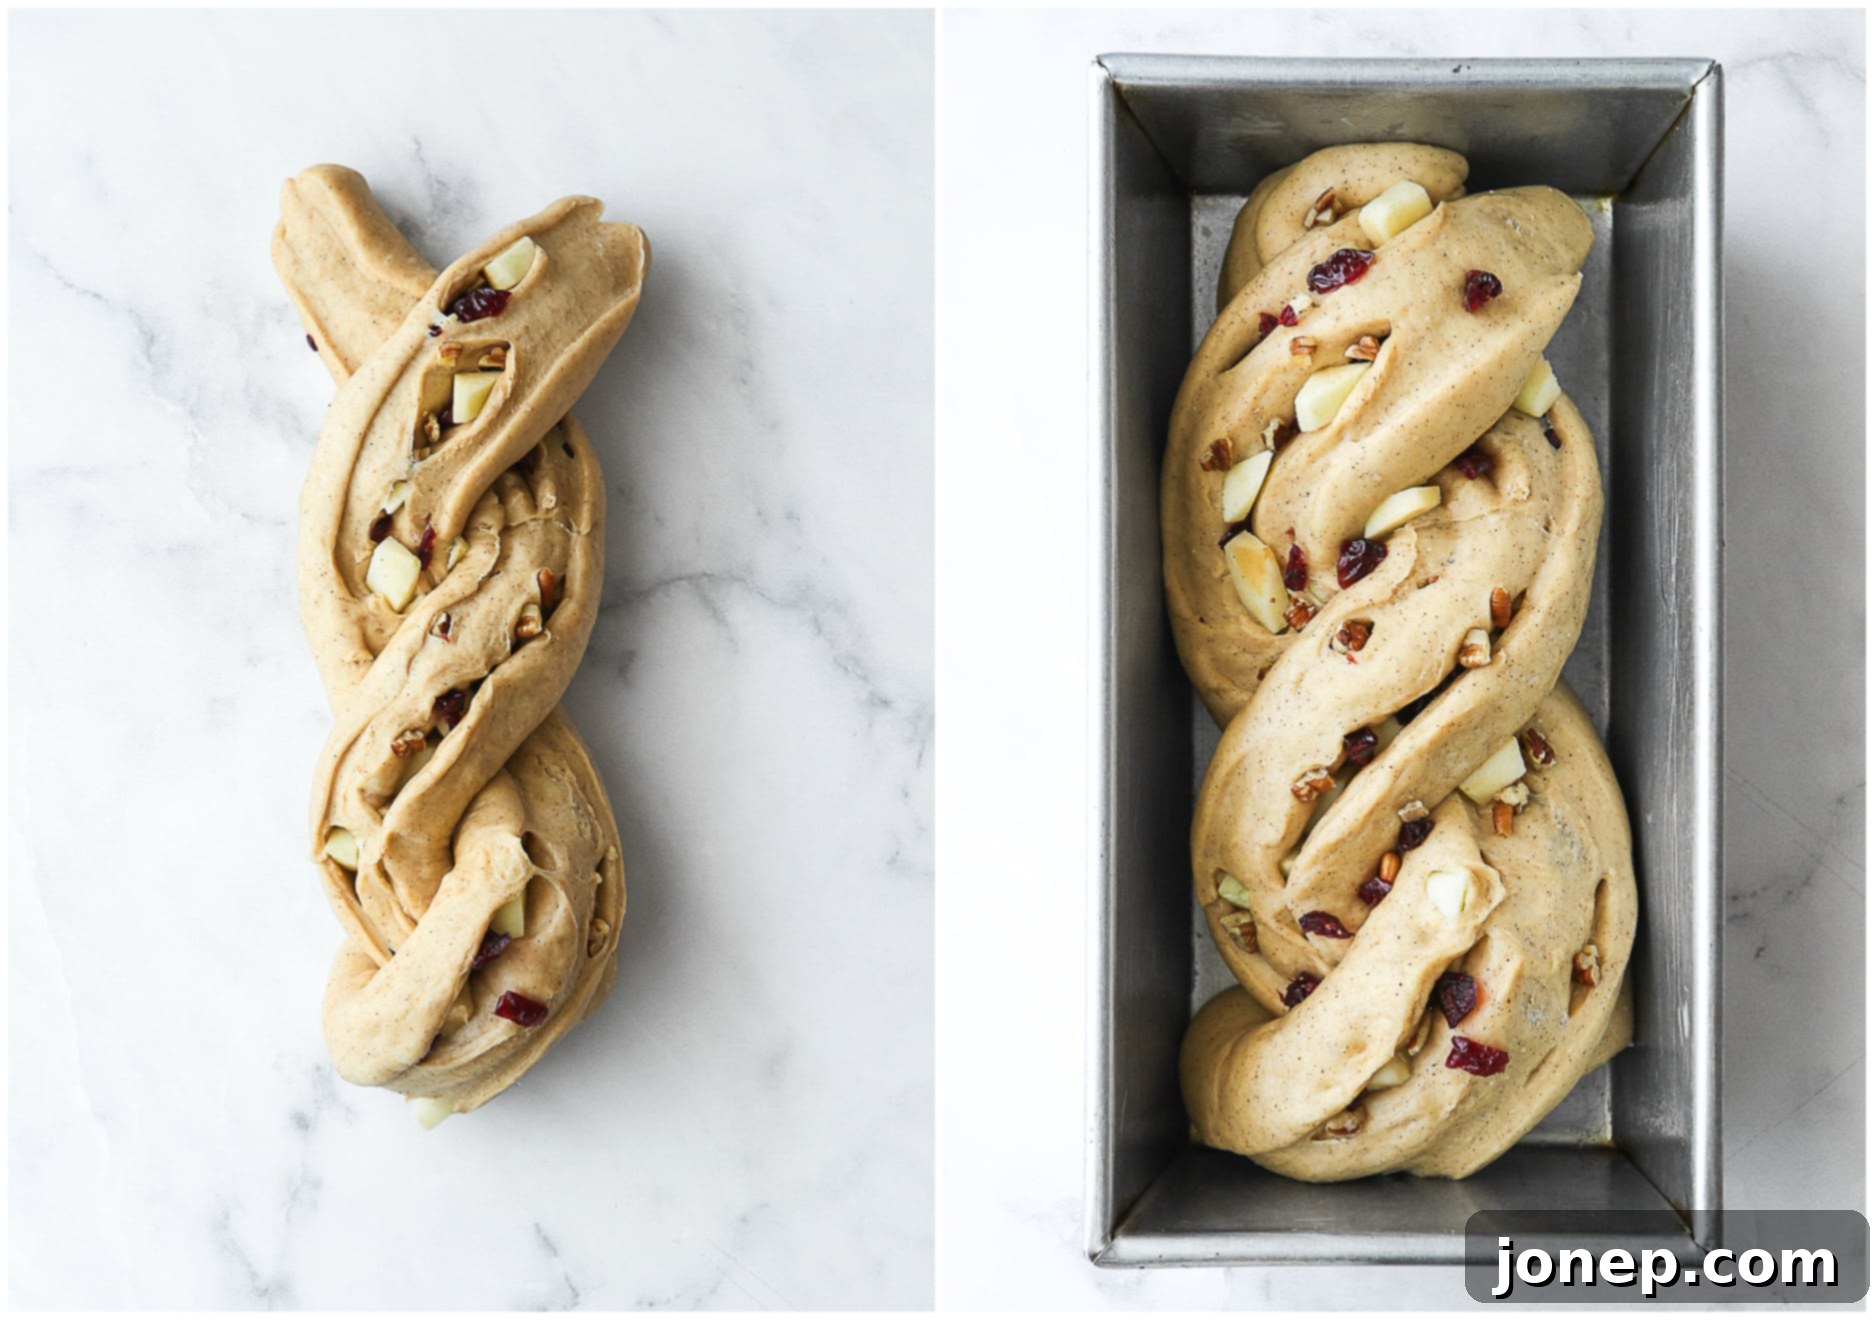
- Braided Loaf: For a visually stunning loaf, take the rolled dough log and, using a sharp knife or a bench scraper, carefully slice it lengthwise down the middle. This exposes the beautiful layers of filling. Arrange the two strands into an “X” shape. Then, begin twisting the ends over each other from the center outward, maintaining the exposed filling side up as much as possible. Once braided, tuck the ends neatly underneath and carefully transfer the braided loaf to your greased loaf pan.

The art of shaping a braided loaf, showcasing the filling.
- Second Rise & Preheat Oven. Cover your shaped loaf loosely with plastic wrap or a damp towel and let it begin its final rise in a warm spot. At the same time, preheat your oven to 350°F (175°C). This second rise usually takes about 30 minutes, or until the bread looks slightly puffy and expanded. It won’t necessarily double in size this time, but you should notice a definite increase in volume and lightness. This final proof ensures a tender crumb and excellent structure.

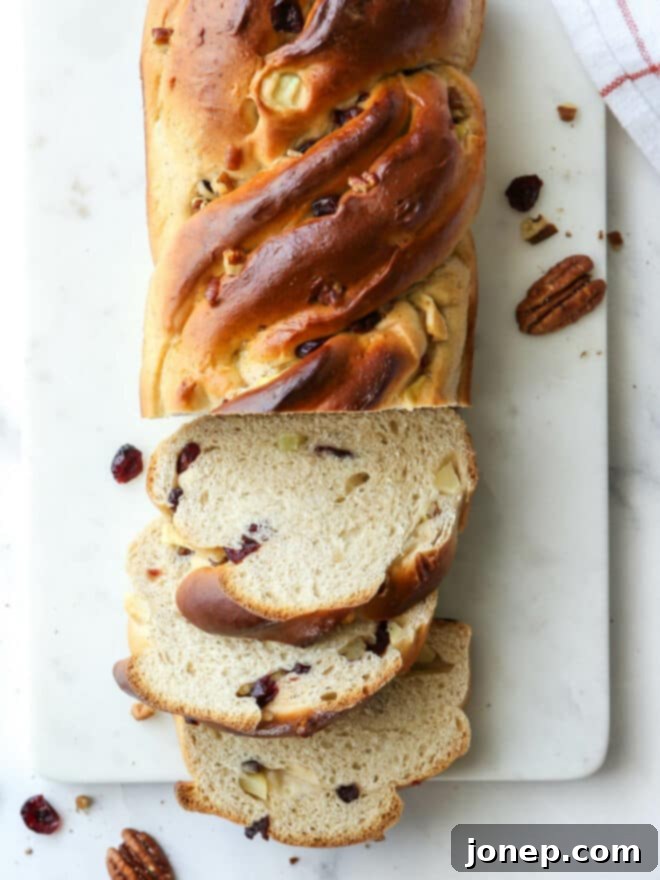
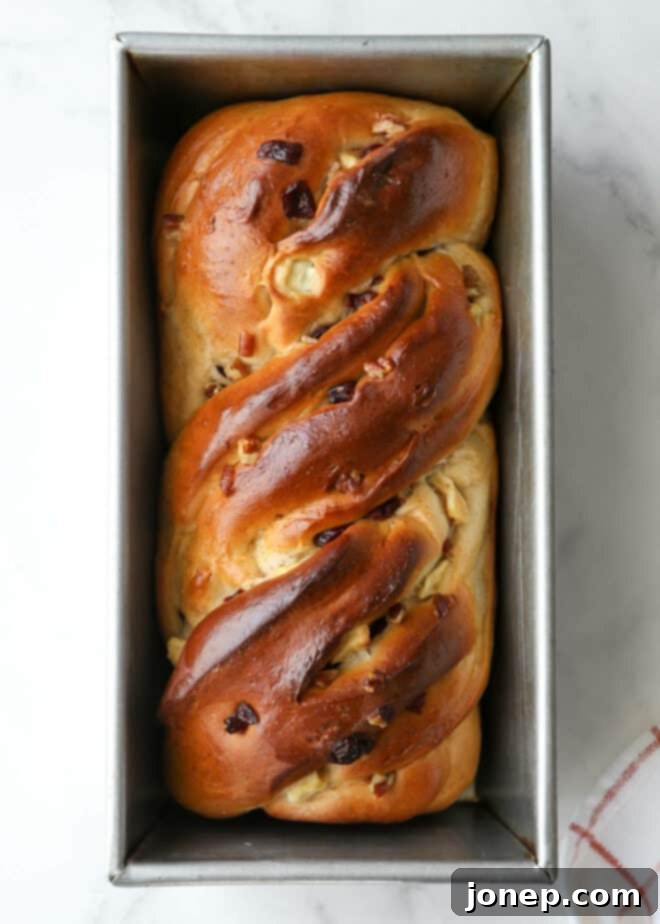
The loaf, beautifully risen and ready for the oven. - Bake to Golden Perfection. For that irresistible, shiny golden crust (as beautifully captured in the photos), gently brush the top of your loaf with an egg wash (one large egg beaten with 1 tablespoon of water) just before placing it in the oven. Bake for approximately 30-40 minutes. The bread is done when it’s gloriously golden brown on top and sounds hollow when tapped on the bottom. To be absolutely sure, insert a wooden skewer or toothpick into the center; if it comes out clean, your bread is perfectly baked.
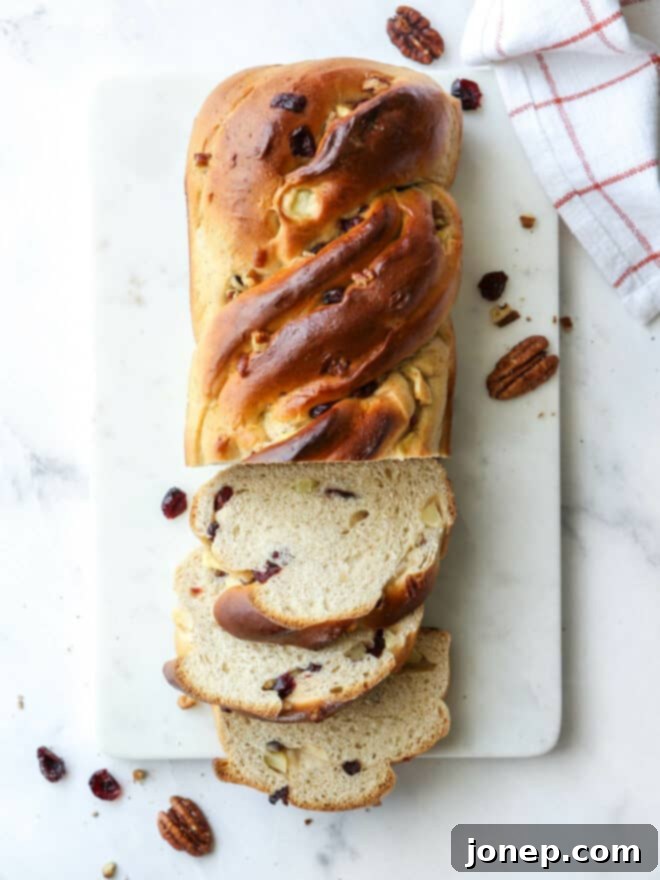
- Cool and Savor Your Creation. Once baked, remove the bread from the oven and allow it to cool in the loaf pan for 5-10 minutes. This crucial resting period allows the loaf to firm up and prevents it from collapsing. Then, carefully remove the bread from the pan and transfer it to a wire rack to cool completely. Pro Tip: It’s important to cool bread completely on a wire rack because leaving it in the hot pan for too long can trap steam, creating condensation that makes the bottom of your beautiful loaf soggy. Once fully cooled (patience is key here!), slice and serve this magnificent apple cranberry bread as desired. Enjoy the fruits of your labor!
Creative Shaping Options for Your Apple Cranberry Loaf
As you’ve seen in the detailed instructions above, you have a few wonderful options when it comes to shaping this delicious apple cranberry bread. Each method offers a slightly different aesthetic and level of effort, allowing you to choose what best suits your mood and desired final presentation:
- Traditional Loaf (Effortless Elegance). If you’re looking for simplicity without compromising on taste, there’s absolutely no need to cut or braid your dough. Simply roll it into a neat log, tuck the ends under, and place it directly into your greased 9×5-inch loaf pan. While it might not have the intricate visual flair of a braid, it will still bake into a wonderfully beautiful, rustic, and undeniably delicious loaf that’s perfect for slicing. It’s the ideal choice for busy days or when you prefer straightforward baking.
- Braided Loaf in a Loaf Pan (Classic Bakery Look). This is the method showcased in the step-by-step photos and offers a fantastic balance of visual appeal and structural integrity. Once you’ve braided your dough, carefully nestle it into a standard loaf pan. Baking it in the pan helps the bread rise vertically, resulting in a taller, more compact, and classically “loaf-like” shape. The pan supports the delicate braid, ensuring it holds its form beautifully during the rise and bake, creating a stunning presentation every time.
- Braided Loaf on a Sheet Pan (Artisan Spread). For a more artisan-style, free-form look, you can also bake your braided loaf directly on a baking sheet lined with parchment paper. When baked this way, the dough has more room to spread outwards as it rises and bakes. This will result in a wider, slightly flatter, and shorter loaf compared to one baked in a pan. This method can create lovely, crusty edges and a unique, rustic appearance, making it perfect for serving as a centerpiece or tearing apart to share.
No matter which shaping option you choose, the delicious flavors of apple, cranberry, and pecan will shine through, delivering a consistently tender and flavorful bread that will impress your family and friends.
Common Bread Baking FAQs & Troubleshooting for Yeast Loaves
For this delicious apple cranberry bread, both active dry yeast and instant yeast (also known as quick-rise or rapid-rise yeast) will work beautifully. If you opt for instant yeast, you might find that your dough rises in about half the time specified in the recipe, as it’s designed to activate more quickly. Otherwise, you can expect similar fantastic results with either type. Please note that this specific recipe has not been tested with fresh yeast, so for best results, stick to active dry or instant yeast.
While many traditional recipes call for “proofing” active dry yeast in warm water before mixing, I’ve learned a fantastic, time-saving method from Red Star Yeast that skips this step! If you’re confident that your yeast is fresh and hasn’t expired (always check the date!), you can directly combine all dry ingredients with liquids heated to 120-130°F (which is significantly warmer than just “warm water”). This warmer liquid efficiently hydrates and activates the yeast within the dough itself, accomplishing the same goal as pre-soaking. This method streamlines the process without sacrificing yeast activity or the quality of your bake.
Kneading bread by hand is a wonderfully tactile experience, though it’s certainly more hands-on than using a stand mixer! It’s not difficult, but it does require a bit of technique. To knead effectively, you’ll repeatedly fold, press, and stretch the dough to develop the gluten. A good technique involves pressing down with the heels of your hands, pushing the dough away, folding it back towards you, and rotating it slightly before repeating the motion. This process strengthens the gluten strands, which are essential for your bread’s structure and chewiness. If you’re new to hand kneading, this tutorial on how to knead bread by hand is an excellent visual guide to help you master the technique.
There are a couple of primary culprits when your dough refuses to rise as expected, which can be frustrating for any baker:
- Expired or Inactive Yeast: The most common reason is inactive yeast. Yeast is a living organism, and like all living things, it has a shelf life. Always check the expiration date on your yeast packaging. If you’re unsure, you can test its viability: Dissolve 1 packet (2 ¼ teaspoons or 7 grams) of yeast in ½ cup of warm water (105-115°F or 40-46°C) with 1 teaspoon of sugar. Let it sit for 10 minutes. If the mixture becomes foamy and visibly increases in volume, your yeast is active and good to go. If not, it has expired and won’t work.
- Incorrect Liquid Temperature: Yeast is sensitive to temperature. If your melted butter and milk mixture was too hot (above 140°F or 60°C), you likely killed the yeast. Conversely, if the liquid was too cold, the yeast wouldn’t activate properly. For optimal yeast activity, always aim for liquids to be between 120-130°F (50-55°C) when combining with dry ingredients, and a thermometer is a baker’s best friend for this!
A dense loaf is a common sign of issues during the rising or kneading process. Here’s what to check:
- Yeast Problems: First, refer to the solutions above regarding inactive or killed yeast. If your yeast isn’t working, your bread won’t rise.
- Too Much Flour: This is a very frequent culprit! Adding too much flour results in a stiff, dry dough that can’t expand properly, leading to a dense loaf. Aim for a dough that is firm yet still very soft and tacky to the touch. It should mostly clear the sides of the bowl during kneading, but if it’s completely dry and not sticking to anything, it’s probably too much flour. When in doubt, err on the side of slightly less flour; you can always incorporate a little more during the shaping stage if it’s too sticky.
- Insufficient Rising Time or Environment: Yeast needs a warm, draft-free environment to thrive and rise. If your kitchen is too cool, or if you didn’t give the dough enough time for its two rises, it won’t develop the airy structure needed. Ensure your rising spot is consistently warm (around 75-80°F or 24-27°C), and allow the dough to almost double in size during each proofing stage. Patience is key!
To maintain its optimal freshness, homemade apple cranberry bread should be stored at room temperature in an airtight container. Good options include a clean plastic bag, tightly wrapped plastic cling film, or a dedicated bread box. Avoid storing homemade bread in the refrigerator, as the cool temperatures actually accelerate the staling process, making your bread dry and tough more quickly. If you need to store it for longer than a few days, freezing is a much better option.
For the absolute freshest flavor and most delightful texture, I highly recommend enjoying this homemade apple cranberry bread within 1-2 days of baking. However, if stored correctly in an airtight container at room temperature (as described above), it will generally remain fresh and enjoyable for 3-5 days. If you find yourself with extra, sliced bread freezes exceptionally well for up to 2-3 months. Simply wrap individual slices or the entire loaf tightly in plastic wrap, then aluminum foil, and thaw at room temperature or toast directly from frozen for a quick treat.
Get the Full Apple Cranberry Bread Recipe
This delightful recipe was originally published in December 2012, born from a wonderful partnership with Red Star Yeast. Over the years, I’ve made a few minor tweaks with the aim of simplifying the baking process and enhancing the overall experience. Notably, I’ve adjusted the size of the chopped apples, cranberries, and pecans to be much smaller, ensuring they blend seamlessly and consistently throughout the bread rather than sinking. I also transitioned from using fresh cranberries to dried cranberries, which I’ve found offers a more consistent texture and sweetness, and prevents excess moisture in the dough. These small changes have only made this classic apple cranberry bread even more enjoyable and accessible for home bakers!
Apple Cranberry Bread
Pin Recipe
Leave a Review
Ingredients
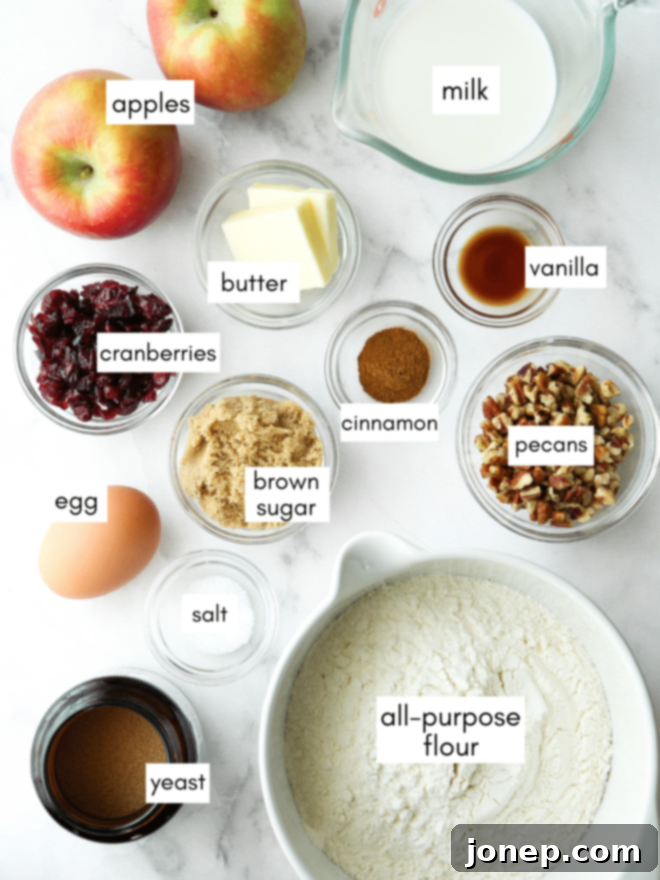
- 2 ¼ teaspoons active dry yeast (1 envelope, 7 grams)
- 2 ½-3 cups bread flour , as needed (300-360 grams)
- ¼ cup packed light or dark brown sugar (53 grams)
- 1 teaspoon ground cinnamon
- 1 teaspoon salt
- ½ cup milk , whole or 2% preferred (113 grams)
- 2 tablespoons unsalted butter (30 grams)
- 1 large egg
- 1 teaspoon vanilla extract
- 1 apple , peeled and diced (about 125 grams)
- ¼ cup chopped dried cranberries (28 grams)
- ¼ cup chopped pecans (28 grams)
- 1 large egg + 1 tablespoon water , for egg wash (optional)
Equipment
Instructions
-
1Melt butter in a saucepan over low heat. Add milk and heat for just a minute until warmed (an instant-read thermometer should read 120-130°F / 50-55°C). Do not heat too much or the mixture will be too hot and kill the yeast.
-
2In the bowl of a stand mixer, or a large bowl if mixing by hand, combine 2 cups of the bread flour with yeast, brown sugar, cinnamon and salt. Add the warm milk and butter mixture, egg, and vanilla extract. Stir with a dough whisk or spatula to form a wet shaggy dough.
-
3Begin working the dough, either by hand or with a mixer and dough hook on low speed, adding more flour a few tablespoons at a time until the dough is smooth, elastic and mostly clears the bowl. It should still feel very soft and tacky to the touch. You’ll need between 2 ½ to 3 cups flour, though the exact amount will vary. (Don’t add too much or your dough will be dense and dry. Always error on the side of adding too little; more can be added when you roll it out if it’s too sticky.)
-
4Shape the dough into a round, cover the bowl, and let it rise in a warm place for about an hour until the dough has almost doubled in size.
-
5Gently punch down the dough and knead it a few times. Let it rest for about 10 minutes, then roll out to a large rectangle about 8×14 inches. Top with chopped apples, dried cranberries and pecans.
-
6Starting at one long end, tightly roll up the bread (don’t let the toppings get squished out!). Either tuck ends under and transfer to a greased 9×5-inch loaf pan for a traditional loaf, or shape into a braid.
-
7To shape into a braid (optional): Cut the roll of dough down the middle, exposing the inside. Set 2 strands into an “x” and then twist ends over each other from the center outward. Tuck ends under and place in loaf pan.
-
8Cover the shaped loaf and let it rise more while you preheat the oven to 350°F, about 30 minutes. The bread is ready to bake when it looks slightly puffy (it won’t exactly double in size).
-
9If you want a shiny golden crust (as shown in these photos), brush the dough with an egg wash before baking. Then, bake for about 30-40 minutes until golden brown. Test for doneness with a toothpick, if it’s clean then the bread is done.
-
10Let the loaf finish setting up in the pan for 5-10 minutes, then remove it and let it cool completely on a wire rack. (If you let the bread cool completely in the pan it creates condensation and actually makes the bottom a bit soggy.) Once the bread is cool, slice and serve as desired.
Have you tried this recipe?
I’d love to hear about it! Leave a rating and review below, or take a photo and tag it on Instagram @completelydelicious with #completelydelicious.
