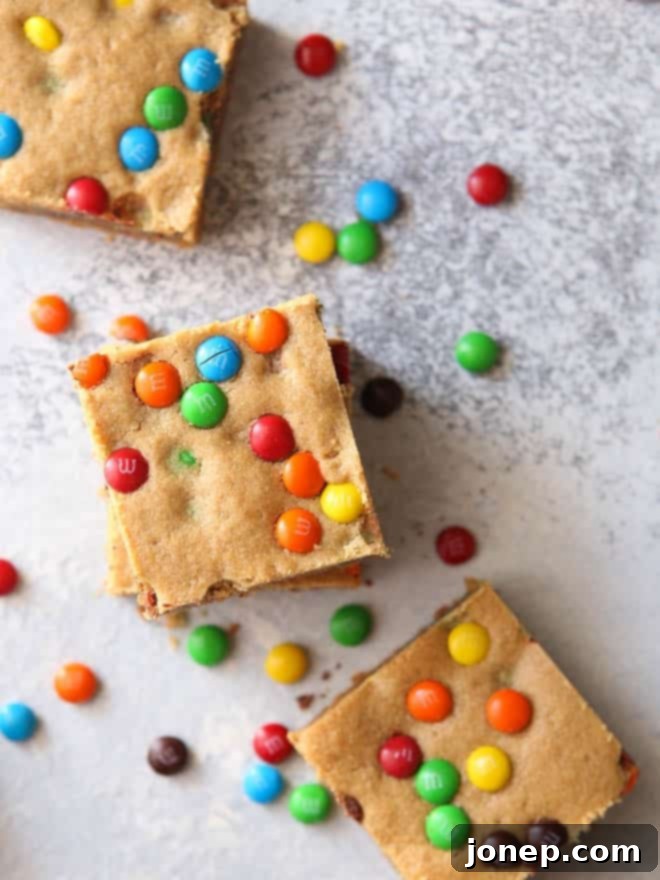
Irresistible Peanut Butter M&M Cookie Bars: Chewy, Colorful, and Oh-So-Easy!
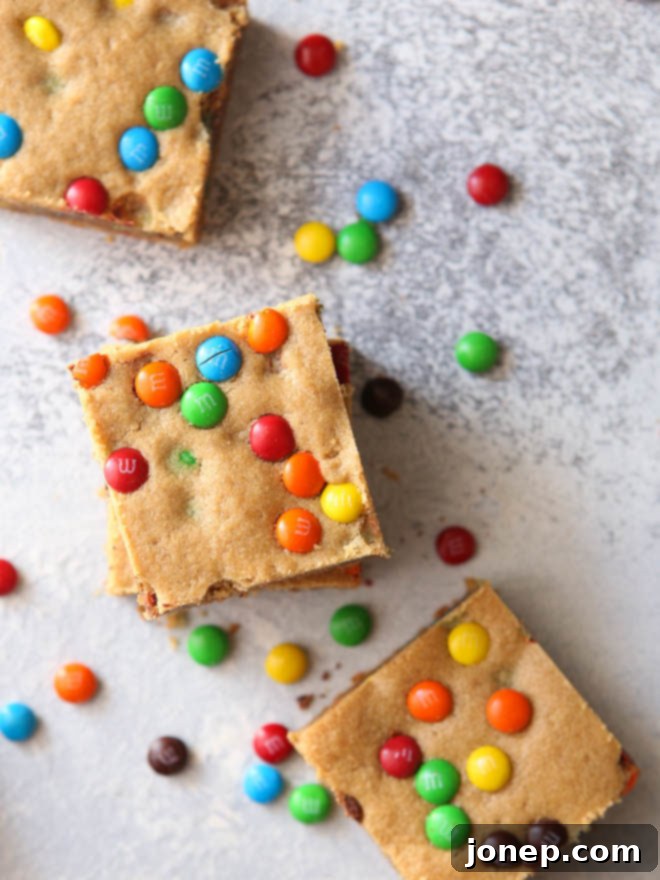
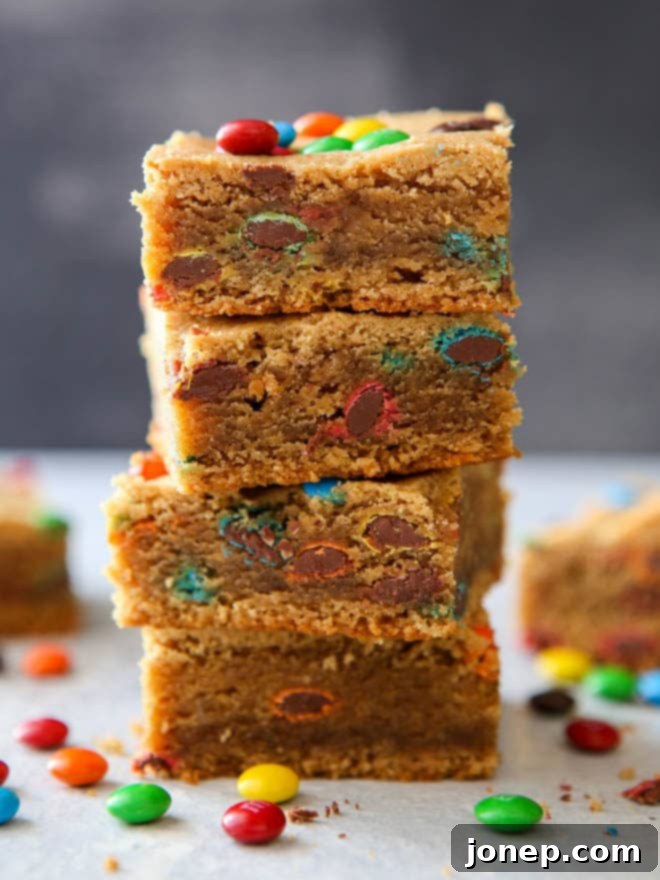
Get ready to meet your new favorite dessert! These simple, fun, and utterly delicious Peanut Butter M&M Cookie Bars are here to satisfy your deepest sweet craving. Combining the timeless appeal of peanut butter cookies with the joyful crunch and vibrant colors of M&Ms, these bars are not just a treat for your taste buds but also a feast for your eyes. They are incredibly easy to make, require minimal fuss, and are perfect for sharing with family and friends—or keeping all to yourself!
The Sweet Inspiration: A Trip to the M&M Factory
Every great recipe often has a story, and these delightful cookie bars are no exception. Our inspiration comes from a memorable family weekend spent in the bustling city of Las Vegas. With kids in tow, a stop at the iconic M&M Factory was an absolute must. Walking into that vibrant, chocolate-filled wonderland was an experience in itself! We were mesmerized by the sheer variety of colors, flavors, and M&M merchandise. Naturally, we left with bags upon bags of these colorful candies – far more than we could possibly eat in a single sitting!
Back home, our kitchen counter was piled high with various M&M assortments. We’ve been slowly, but surely, working our way through our haul, enjoying them as a quick snack or a fun addition to movie nights. It was only a matter of time before these delightful little chocolate candies made their way into my baking endeavors. What better way to use them than to combine them with another beloved classic: peanut butter cookies?
Why These Peanut Butter M&M Cookie Bars Will Become Your Go-To Treat
There’s something inherently comforting and satisfying about a homemade cookie, but sometimes, you want all the flavor without all the fuss. That’s where cookie bars truly shine! Our Peanut Butter M&M Cookie Bars offer all the chewy goodness of a classic cookie, but with the added convenience of baking them in a single pan. This simple approach makes them an ideal choice for busy weeknights, last-minute gatherings, or when you just need a quick, comforting dessert.
Simplicity is Key to Deliciousness
One of the biggest appeals of this recipe is its straightforward nature. You don’t need to roll individual cookies or worry about perfectly shaped dough balls. Instead, you simply spread the rich, peanut buttery dough into a baking pan, sprinkle with M&Ms, and let your oven do the rest. This “lazy” approach, as I affectionately call it, yields perfectly uniform bars every single time, making slicing and serving a breeze. It’s the kind of recipe that lets you enjoy the baking process without any stress, culminating in a truly satisfying result.
The Irresistible Flavor Combination
Peanut butter and chocolate are a match made in heaven, and M&Ms take this classic pairing to a new level. The creamy, salty-sweet richness of the peanut butter cookie dough provides the perfect backdrop for the crunchy, milk chocolatey M&Ms. Each bite offers a delightful contrast in textures and a burst of color that makes these bars incredibly appealing to both kids and adults. We’ve found that the M&Ms retain their shape and a slight chewiness, adding a wonderful dimension that chocolate chips sometimes can’t quite achieve.
Perfect for Any Occasion
Whether you’re packing them in lunchboxes, bringing them to a potluck, serving them at a birthday party, or simply enjoying them with a cup of coffee or a glass of milk, these cookie bars fit right in. Their sturdy yet soft texture makes them easy to transport, and their crowd-pleasing flavor ensures they disappear quickly. They are a fantastic family-friendly dessert that everyone will ask you to make again and again.
The journey to these bars began by borrowing the foundational recipe from my favorite peanut butter chocolate chip cookies. It’s a tried-and-true recipe that consistently delivers chewy, flavorful results. The simple swap of chocolate chips for M&Ms was a natural progression, and spreading the dough into a baking pan instead of scooping individual cookies was a spur-of-the-moment decision born out of a desire for ease. The result? These incredibly simple and profoundly perfect bars were born, solidifying their place as a go-to quick homemade treat in our household.
As expected, the kids absolutely adored them, finding the colorful candies and the familiar taste of peanut butter irresistible. But what truly surprised us was how much the adults loved them too! They evoke a nostalgic feeling while offering a fresh twist on a classic, making them a hit across all age groups.
Essential Baking Tips for Perfect Cookie Bars Every Time
While this recipe is incredibly forgiving, a few simple tips can elevate your baking game and ensure your Peanut Butter M&M Cookie Bars turn out perfectly chewy, delicious, and easy to handle. These are techniques that seasoned bakers swear by and that newcomers will find immensely helpful.
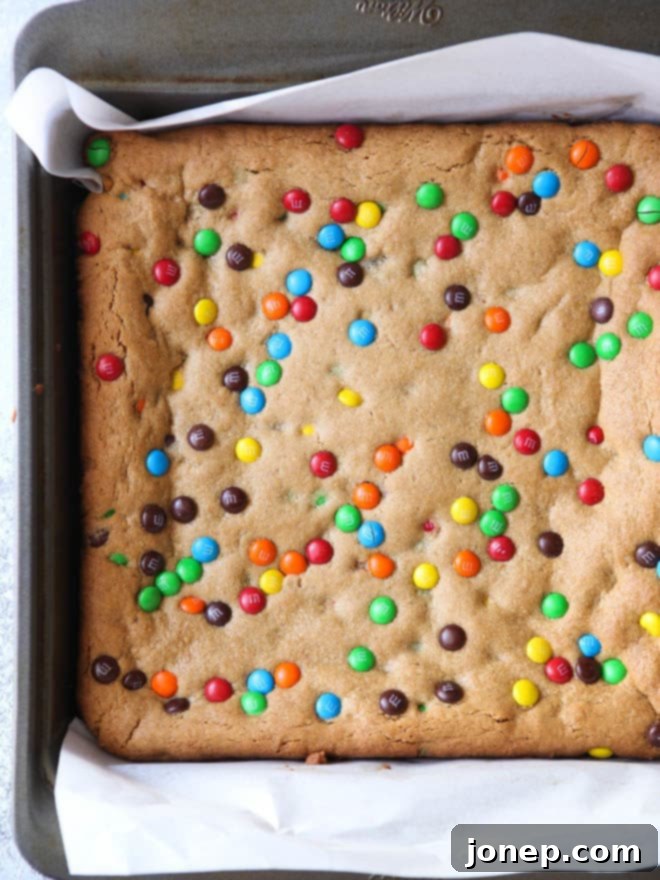
baking tip:Line your pan with parchment paper overhang
When baking anything in a square, rectangle, or loaf pan (think brownies, bars, breads, etc.), it’s always a good idea to line it with parchment paper so there’s a few inches of overhang on either side. This simple trick is a game-changer! Not only will it prevent sticking, ensuring your precious treats come out cleanly, but you can also use the overhanging parchment as a convenient sling to easily lift your goodies out of the pan for slicing. This eliminates the struggle of trying to dig out the first piece and potentially ruining your beautiful presentation.
For breads, let them cool only for a few minutes before using the parchment sling to transfer them out of the pan to a wire rack to cool completely. For desserts like these cookie bars, it’s crucial to let them cool completely in the pan first. This allows them to firm up and become sturdy enough to lift without buckling or crumbling. Once cool, transfer them to a cutting board and slice into neat, perfect pieces. Say goodbye to messy slices and hello to baking perfection!
Don’t Overbake!
One of the most common mistakes in baking cookies or bars is overbaking. For these Peanut Butter M&M Cookie Bars, you want them to be set around the edges and slightly puffed in the middle, but still look a little soft in the very center when you pull them out of the oven. They will continue to cook and set as they cool, leading to that wonderfully chewy texture we all love. Overbaking will result in dry, crumbly bars, so keep a close eye on them during the last few minutes of baking.
The Importance of Cooling
As mentioned in our parchment paper tip, patience is a virtue when it comes to cooling. Allowing your cookie bars to cool completely in the pan before slicing is paramount for neat, attractive cuts and a stable bar. If you try to slice them while warm, they will likely be too soft and fall apart. The cooling process allows the fats to solidify and the structure of the bars to set, making them much easier to handle and slice cleanly. For the prettiest slices, wait until they are fully at room temperature.
Storage Solutions for Freshness
Once your bars are baked and sliced, storing them properly will ensure they remain fresh and delicious for days. Keep them in an airtight container at room temperature. A piece of parchment paper between layers can prevent sticking if you stack them. These bars are so good, they rarely last long, but properly stored, they’ll stay soft and delightful for up to 3-4 days.
Ingredients Spotlight: What Makes These Bars Shine
Every ingredient in these Peanut Butter M&M Cookie Bars plays a crucial role in creating their signature flavor and texture. Understanding these components can help you make the best bars possible and even inspire variations.
The Peanut Butter Choice
This recipe calls for either smooth or crunchy peanut butter, giving you a delicious choice! Smooth peanut butter will yield a uniform, melt-in-your-mouth texture, allowing the M&Ms to be the star crunch element. Crunchy peanut butter, on the other hand, will add an extra layer of nutty texture, making the bars even more complex and satisfying. I recommend using a conventional, shelf-stable peanut butter (like Jif or Skippy) rather than natural peanut butter, as the oil separation in natural varieties can affect the dough’s consistency and final texture of the bars.
M&M Variations and Customization
While classic M&M’s are fantastic for their vibrant colors and milk chocolate goodness, don’t hesitate to experiment! I specifically used mini M&M’s in this recipe, which distribute beautifully throughout the bars, ensuring chocolate in every bite. You could also try peanut M&M’s for an extra peanut boost, or even seasonal M&M’s to match a holiday theme. Dark chocolate M&M’s or crispy M&M’s could also offer exciting new dimensions. Feel free to mix and match or use whatever M&M’s you have on hand from your own “M&M Factory” haul!
Frequently Asked Questions (FAQ)
Got questions about baking these delightful cookie bars? Here are some common queries and their answers to ensure your baking experience is smooth and successful.
Can I use other candies instead of M&Ms?
Absolutely! While M&Ms offer a classic look and taste, you can certainly substitute them with other chocolate candies or even chocolate chips. Reese’s Pieces would be a fantastic choice for an extra peanut butter punch. Chopped Snickers or Heath bars could also add a delicious twist. Just ensure the candy pieces are roughly similar in size to M&Ms for even distribution and baking.
How do I store these cookie bars?
To keep your Peanut Butter M&M Cookie Bars fresh and chewy, store them in an airtight container at room temperature for up to 3-4 days. For best results, place a piece of parchment paper between layers if you need to stack them, to prevent sticking. You can also refrigerate them for slightly longer storage, but bring them to room temperature before serving for optimal texture.
Can I freeze Peanut Butter M&M Cookie Bars?
Yes, these cookie bars freeze beautifully! Once cooled completely, slice the bars and arrange them in a single layer on a baking sheet. Freeze until solid, then transfer the frozen bars to an airtight freezer-safe container or a heavy-duty freezer bag. They can be frozen for up to 2-3 months. Thaw them at room temperature for a few hours before serving, or warm them slightly in the microwave for a fresh-baked feel.
What if I don’t have a 9-inch pan?
A 9×9-inch square baking pan is ideal for this recipe, yielding bars of a good thickness. If you only have an 8×8-inch pan, your bars will be thicker and may require an extra 5-10 minutes of baking time. Conversely, if you use a 9×13-inch pan, the bars will be thinner and may bake faster, so start checking for doneness around 20 minutes. Adjust baking time accordingly based on pan size, looking for golden brown edges and a puffed center.
My bars are dry/crumbly. What went wrong?
Dry or crumbly bars are usually a sign of overbaking. Remember to pull the bars out of the oven when the edges are golden brown and the middle is just set but still looks a little soft. The carryover heat will finish cooking them as they cool. Another factor could be too much flour or not enough fat (butter/peanut butter), so ensure accurate measurements using a kitchen scale if possible, especially for flour.
Shop for this recipe
(Affiliate links below)

Peanut Butter M&M Cookie Bars
Pin Recipe
Leave a Review
Ingredients
- ½ cup unsalted butter (113 grams), softened to room temperature
- ¾ cup smooth or crunch peanut butter (200 grams)
- 1 ¼ cup light or dark brown sugar (265 grams)
- 1 teaspoon vanilla extract
- 2 large eggs
- 2 cups all-purpose flour (240 grams)
- ¾ teaspoon baking soda
- ¾ teaspoon coarse salt
- 1 cup M&M candies (210 grams), I used mini
Instructions
-
Preheat oven to 350 degrees F. Grease a 9-inch baking pan and line with parchment paper.
-
With an electric mixer beat the butter, peanut butter, and brown sugar until light and creamy. Add vanilla extract and eggs, mixing after each.
-
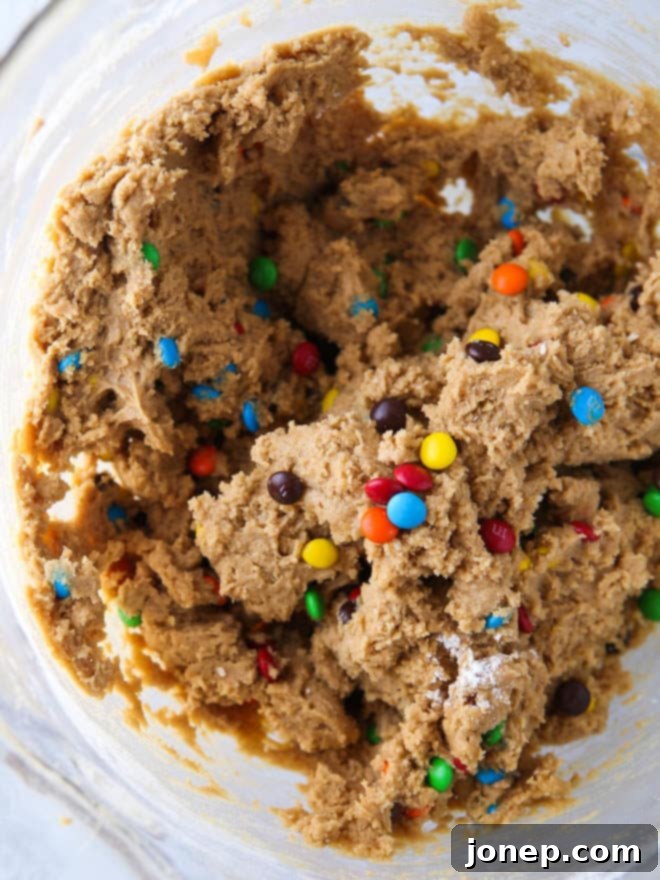
Add the flour, baking soda, and salt and mix until just combined. Add the M&Ms.
-
Spread the cookie dough into the prepared pan and bake until edges are golden brown and middle is puffed, 25-30 minutes.
-
For best results and prettiest slices, let cool completely before slicing. Once cool, use parchment paper to lift bars out of pan and transfer to a cutting board. Cut into 16 equal pieces.
We truly hope you enjoy making and devouring these Peanut Butter M&M Cookie Bars as much as we do. They represent the perfect blend of simplicity, vibrant fun, and comforting flavor. Whether you’re baking them for a special occasion or just to brighten an ordinary day, these chewy, colorful bars are sure to bring smiles to everyone’s faces. Happy baking!
