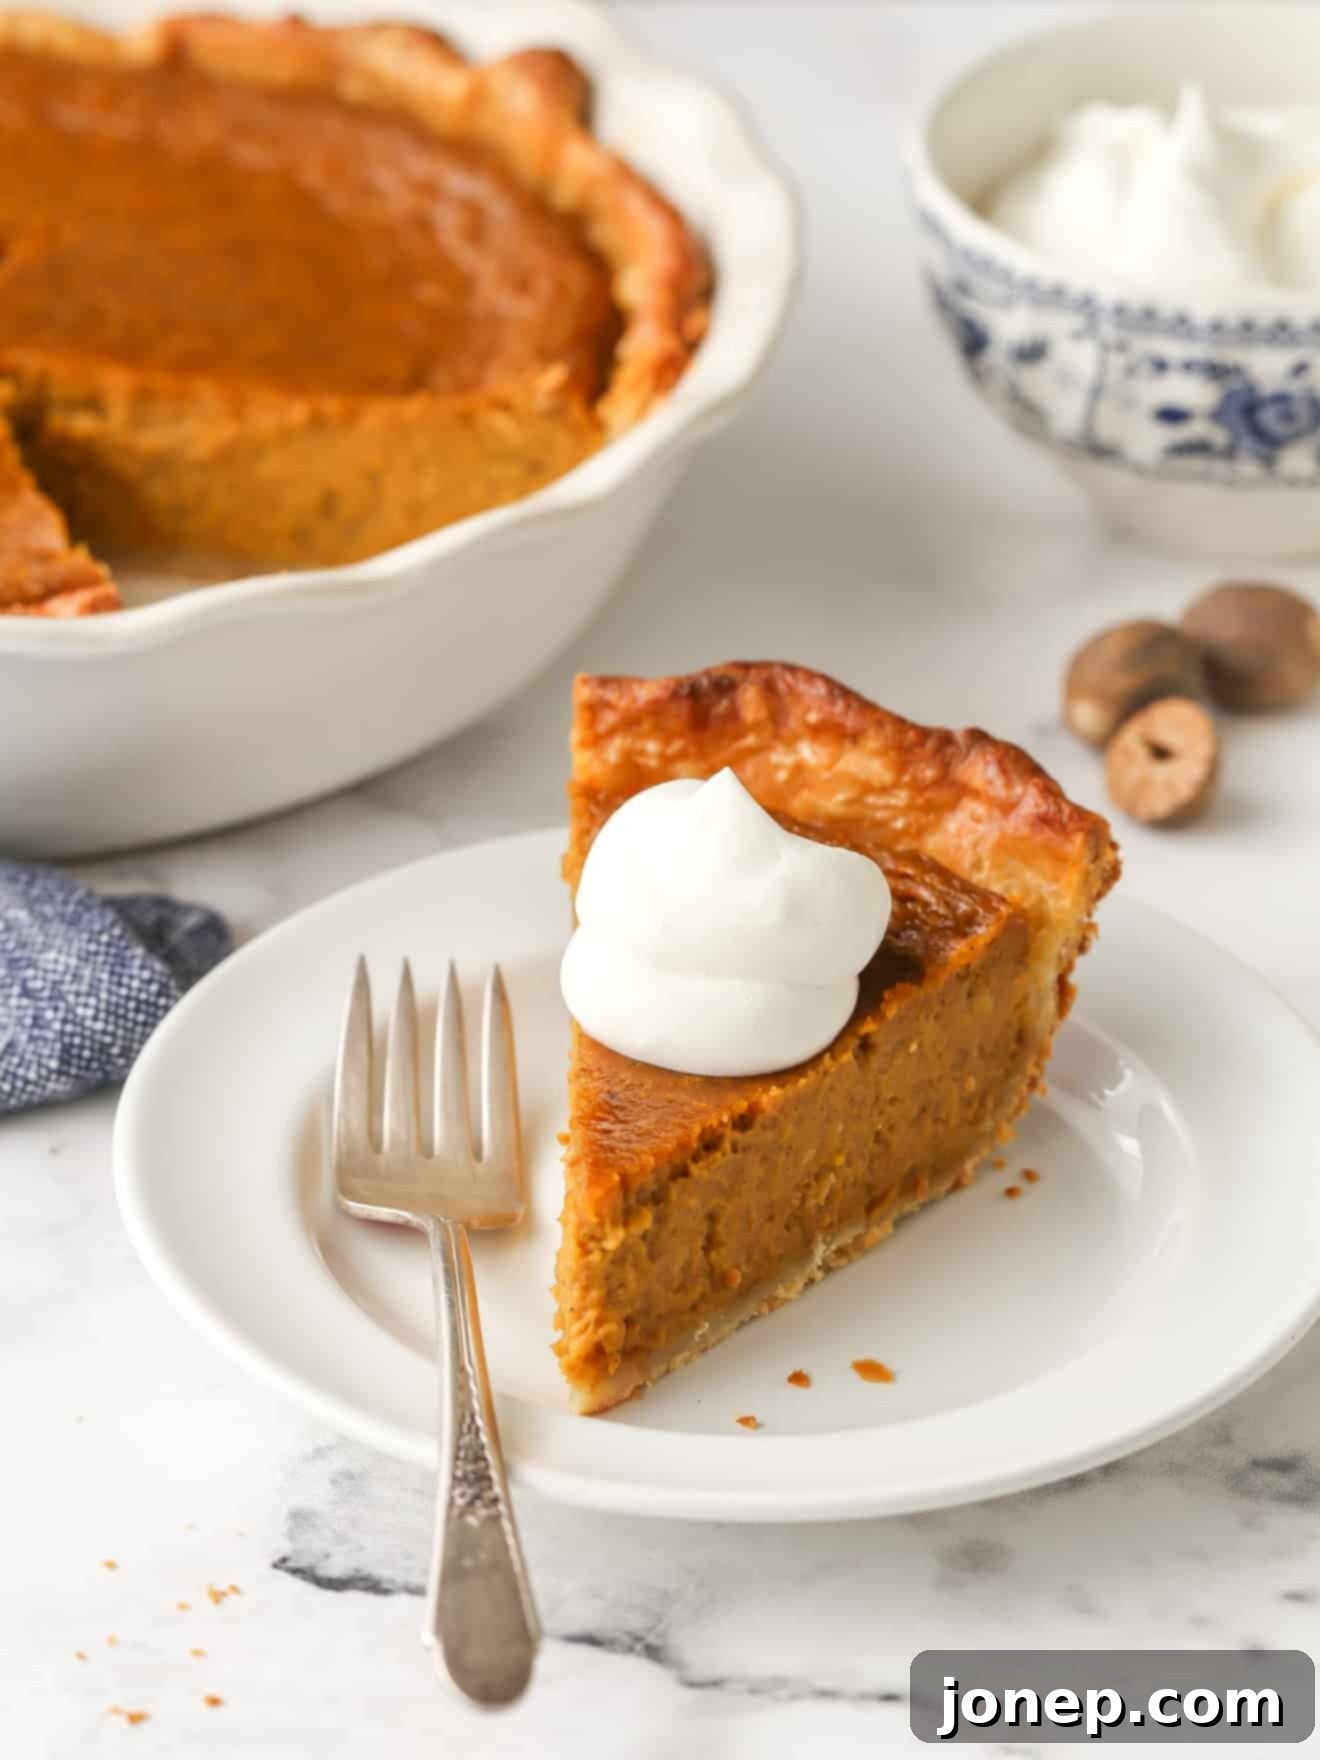
The Best Classic Homemade Pumpkin Pie Recipe: Your Ultimate Guide for Thanksgiving & Beyond
There’s an undeniable magic in a perfectly crafted homemade pumpkin pie, especially when it takes center stage at your holiday gatherings. This isn’t just another recipe; it’s your comprehensive guide to baking a pumpkin pie that consistently delivers. Expect an incredibly smooth and creamy texture, a deep, authentic pumpkin flavor, and a rich, aromatic blend of warm spices, all encased in a wonderfully flaky, buttery pie crust. Say goodbye to guesswork and hello to your new go-to recipe for the ultimate seasonal dessert.
For those familiar with my kitchen adventures, you might know that pumpkin isn’t always my first choice for every baked good. However, when the crisp air of autumn descends and the spirit of Thanksgiving fills the air, my resistance to pumpkin pie crumbles. It’s a timeless classic for a reason, embodying the very essence of holiday tradition and comfort. This recipe steadfastly honors that tradition, offering no unnecessary frills or complex variations, simply pure, unadulterated pumpkin pie perfection.
What truly elevates this recipe is its dedication to fundamental quality. The filling is luxuriously rich and silky, perfumed with the enchanting aroma of cinnamon, ginger, cloves, and nutmeg. While convenience might tempt you towards a store-bought option, I firmly believe that a homemade pie crust is absolutely indispensable for a truly exceptional pumpkin pie. Its delicate, crisp layers and rich butter flavor provide the perfect contrast to the creamy, spiced filling. And, as a final touch of indulgence, a generous dollop of homemade whipped cream is, in my opinion, a non-negotiable accompaniment.
Whether you’re a lifelong devotee of pumpkin pie or someone who savors it only during special occasions, this classic recipe is designed to captivate everyone. It’s the quintessential dessert, ideal for Thanksgiving feasts, Christmas celebrations, and any cozy gathering throughout the festive season. Prepare to create a dessert that will not only satisfy cravings but also evoke cherished memories and create new ones.
Table of Contents
- The Essence of Classic Pumpkin Pie: Why This Recipe Shines
- Essential Ingredients for Your Perfect Pie
- Step-by-Step Guide: How to Make Classic Pumpkin Pie
- Preventing Cracks: Secrets to a Smooth Pumpkin Pie Top
- Say Goodbye to Soggy Bottoms: Tips for a Flaky Crust
- Expert Tips for the Best Pumpkin Pie Experience
- Serving & Storage Suggestions
- Helpful Pie Resources for Your Baking Journey
- More Delightful Holiday Pie Recipes
- Get the Full Recipe
The Essence of Classic Pumpkin Pie: Why This Recipe Shines
A truly classic pumpkin pie is more than just a dessert; it’s an experience. This recipe captures that timeless appeal with a filling that is both richly decadent and surprisingly light, deeply flavorful without being overwhelming. The careful blend of pure pumpkin puree, the warm sweetness of brown sugar, and a thoughtfully selected array of aromatic spices creates a symphony of comforting autumn flavors. The inclusion of heavy cream is paramount for achieving that luxurious, velvety texture that simply melts in your mouth, while the eggs provide essential structure, ensuring the pie sets beautifully and slices cleanly without any rubbery consistency.
When combined with a tender, golden, and undeniably flaky homemade butter crust, this pie offers a delightful interplay of textures that is simply irresistible. Every bite transports you to a place of warmth and nostalgia, making it the perfect centerpiece for any celebration. This recipe isn’t just about following instructions; it’s about understanding the nuances that transform good ingredients into an extraordinary dessert, a true testament to the simple yet profound joys of homemade baking.
Essential Ingredients for Your Perfect Pie
The journey to the perfect pumpkin pie begins with selecting the right ingredients. Here’s a detailed look at everything you’ll need for this classic recipe, along with important notes to ensure your success. Remember, precise measurements are always available in the recipe card at the very end of this article:
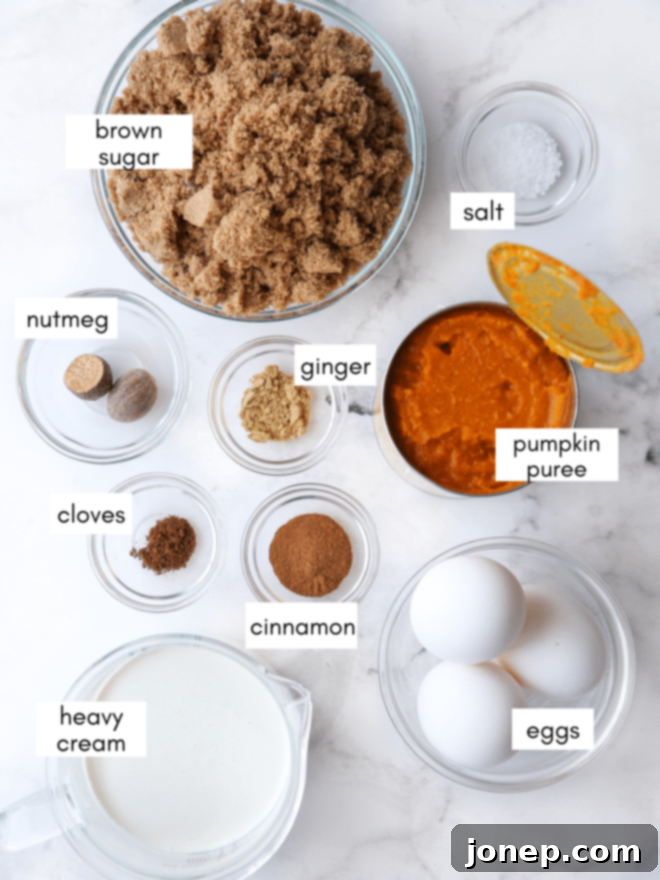
- Homemade Pie Crust: This is absolutely foundational for the best results. A rich, buttery, and flaky homemade crust provides an incomparable base for your pie. You’ll typically only need one half of a standard double pie crust recipe for a single 9-inch pie.
- Pumpkin Puree: This is a non-negotiable. Ensure you are using 100% pure pumpkin puree and not pumpkin pie filling. Pie filling comes pre-spiced and sweetened, which will throw off the carefully balanced flavors of this recipe. Canned pumpkin puree is perfectly acceptable and often offers the most consistent texture for baking.
- Light or Dark Brown Sugar: Brown sugar adds not just sweetness but also a wonderful depth of flavor with its inherent molasses notes. This complements the earthy pumpkin beautifully. You can opt for light brown sugar for a milder sweetness or dark brown sugar for a richer, more caramel-like undertone.
- Ground Cinnamon: The cornerstone spice, providing classic warmth and that instantly recognizable pumpkin pie aroma.
- Ground Ginger: Introduces a delightful touch of peppery warmth and a subtle zesty kick, significantly enhancing the overall complexity of the spice blend.
- Freshly Grated Nutmeg: While pre-ground nutmeg can be used, freshly grated nutmeg offers an unparalleled aromatic intensity, a brighter flavor, and a more complex fragrance. It’s a small step that makes a significant difference.
- Ground Cloves: Used sparingly, cloves contribute a deep, pungent warmth that perfectly rounds out the spice profile, giving the pie its characteristic holiday flavor.
- Large Eggs: These are crucial binding agents. They give the pumpkin filling its necessary structure, allowing it to set beautifully, and contribute to its smooth, creamy texture.
- Heavy Cream: The secret behind an irresistibly silky-smooth and luxurious filling. Heavy cream (or full-fat whipping cream) creates a decadent mouthfeel that lower-fat milk products simply cannot replicate.
- Salt: A small amount of salt is vital. It acts as a flavor enhancer, balancing the sweetness and brightening all the other ingredients, preventing the pie from tasting flat or overly sugary.
Step-by-Step Guide: How to Make Classic Pumpkin Pie
Creating a truly spectacular pumpkin pie is easier than you think when you follow these detailed steps. Precision and patience are your best allies!
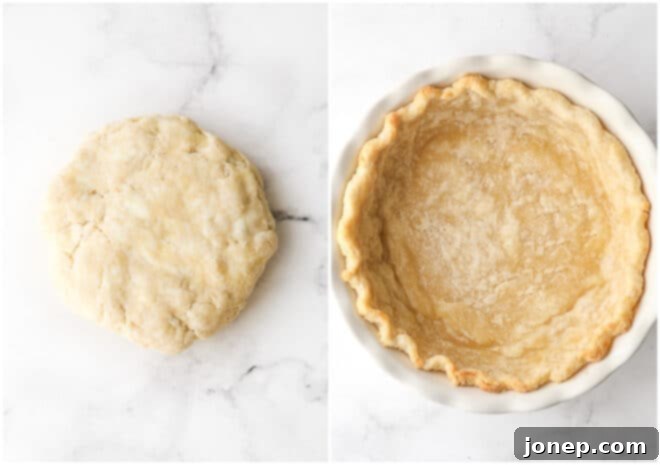
- Prepare Your Pie Crust to Perfection: The foundation of an outstanding pie is undoubtedly its crust. Begin by preparing your favorite homemade pie dough. If you’re looking for a reliable recipe, I highly recommend my foolproof flaky pie dough recipe for consistent, buttery results. Roll your chilled dough into an approximate 12-inch circle. Carefully transfer this delicate circle into a standard 9-inch pie plate. Trim any excess dough, leaving about a 1-inch overhang, then fold this overhang under itself and crimp the edges decoratively using your fingers or a fork. This not only adds visual appeal but also helps prevent the crust from shrinking excessively during baking. Place the prepared crust in the freezer for at least 30 minutes to ensure it’s thoroughly chilled.

- Blind Bake the Pie Crust for a Crisp Bottom: This crucial step is your best defense against a soggy pie bottom. While your crust is chilling in the freezer, preheat your oven to 400°F (200°C). Once the crust is firm, line the pie pan with a piece of greased aluminum foil (ensure the greased side faces down towards the crust to prevent sticking) and fill it with pie weights, uncooked rice, or dried beans. Bake for approximately 20 minutes, or until the edges of the crust are set and have just begun to turn a light golden brown. This par-baking cooks the crust enough to seal it, preventing moisture from the filling from making it soggy. Carefully remove the foil and weights. Let the crust cool for 5 minutes before proceeding, then reduce your oven temperature to 375°F (190°C).
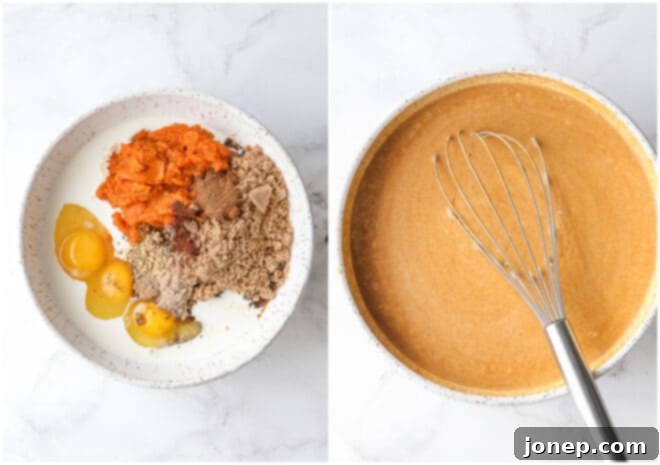
- Craft the Silky Pumpkin Filling: With your crust cooling, turn your attention to the luscious filling. In a large mixing bowl, combine the pumpkin puree, large eggs, heavy cream, packed light or dark brown sugar, salt, and all your chosen aromatic spices: ground cinnamon, ground ginger, freshly grated nutmeg, and ground cloves. Whisk these ingredients together vigorously until the mixture is completely smooth and thoroughly combined. Pay attention to ensure there are no lumps of brown sugar and that the spices are evenly distributed for consistent flavor in every bite.

- Bake to Achieve Perfect Creaminess: Carefully pour the prepared pumpkin filling into your partially baked pie crust. Be mindful not to overfill it; the filling should reach just up to the crimped edges of your crust. If you have any leftover filling due to a smaller pie dish or crust shrinkage, it’s best to discard it rather than risk an overflowing pie. Transfer the pie to the preheated 375°F (190°C) oven and bake for approximately 45-50 minutes. The pie is done when the edges of the filling appear set, but the very center still exhibits a slight, gentle wobble or jiggle when you delicately shake the pie plate. This subtle movement is the key indicator; resist the urge to overbake, as this is the primary cause of cracks forming as the pie cools.
- Ensure Gradual Cooling for a Flawless Surface: Once your pumpkin pie reaches the perfect doneness (edges set, center slightly wobbly), immediately turn off your oven. Crucially, leave the oven door slightly ajar (you can prop it open with a wooden spoon) and allow the pie to remain inside. This technique, known as “carry-over cooking” and gradual cooling, is vital for preventing unsightly cracks and ensures the filling sets completely into a perfectly smooth, unblemished surface. The slow decrease in temperature prevents the rapid contraction that leads to cracking. This cooling process within the oven can take at least 1-2 hours, sometimes longer, until the pie has reached room temperature. Patience here is truly rewarded.
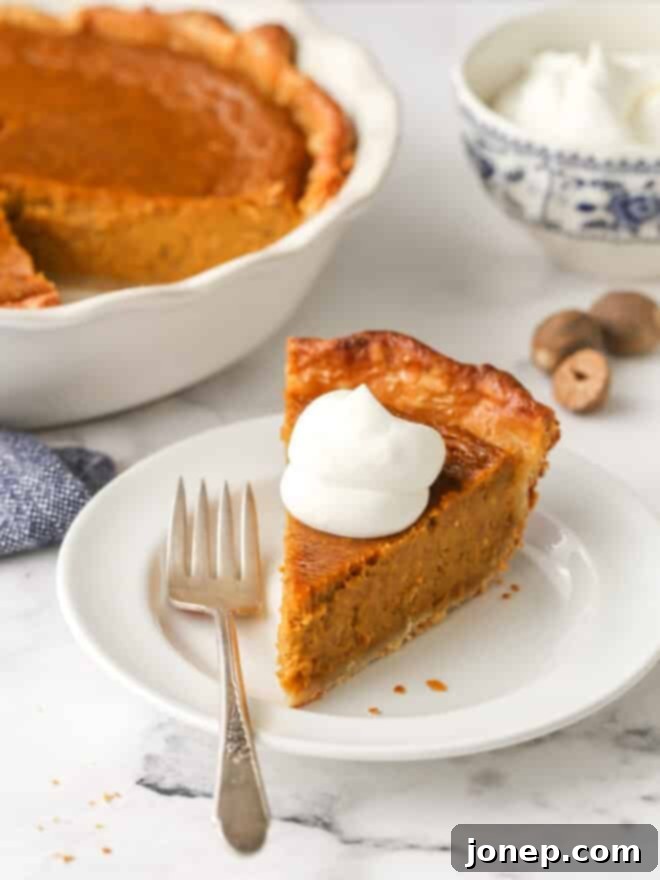
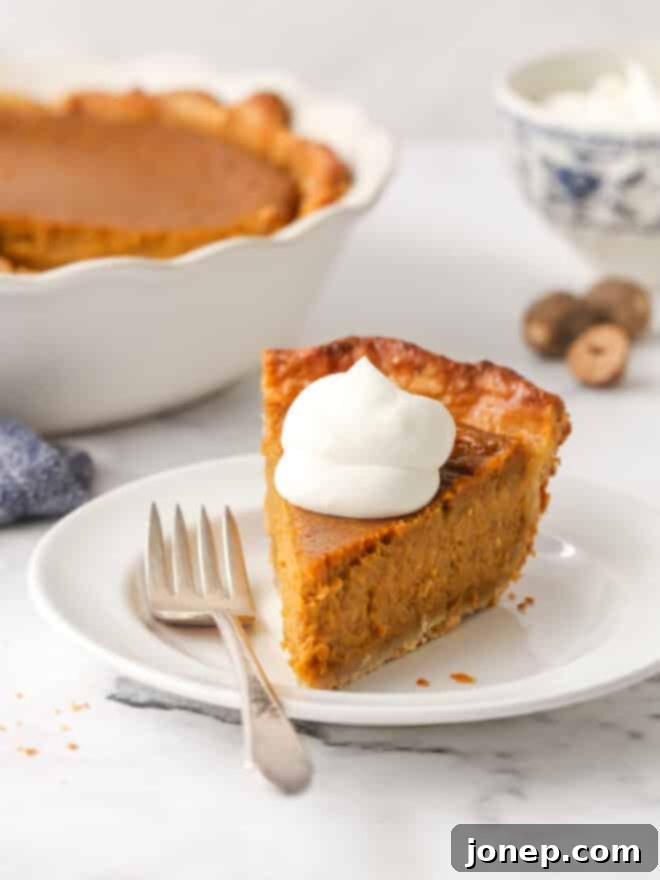
- Slice, Serve, and Savor Every Moment: Once your magnificent pumpkin pie has completely cooled to room temperature and its filling is fully set, it’s ready to be enjoyed. Use a sharp, clean knife to cut neat, elegant slices. Serve each delectable portion as desired – the classic pairing is, of course, a generous dollop of homemade whipped cream. For an extra touch of flair, consider a light dusting of freshly grated nutmeg or cinnamon, or a drizzle of rich caramel sauce. Enjoy every comforting, spiced bite!
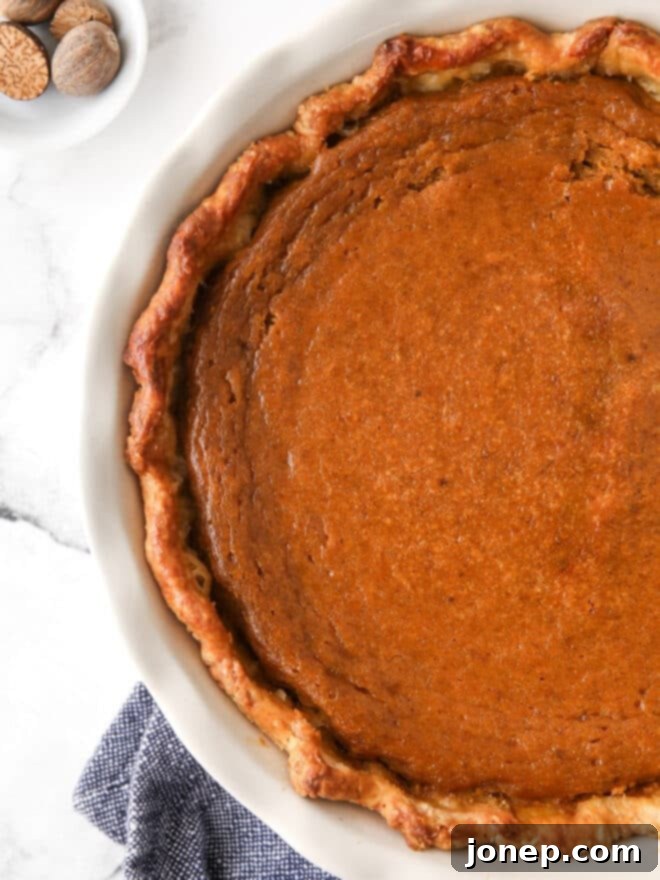
Preventing Cracks: Secrets to a Smooth Pumpkin Pie Top
A perfectly smooth, unblemished pumpkin pie surface is a source of immense satisfaction for any baker. The two most critical factors in achieving this ideal finish are to never over-bake the pie and to ensure a slow, gradual cooling process. During baking, actively watch for the “jiggle test”: the center of the pie filling should still exhibit a slight, gentle wobble when you delicately shake the pie plate. It should not be completely firm and motionless, as this indicates over-baking.
Over-baking causes the custard proteins to tighten excessively, leading to stress and eventual cracking as the pie cools. Once your pie passes the jiggle test, immediately turn off the oven. Critically, leave the oven door slightly ajar (propped open) and allow the pie to remain inside. This technique capitalizes on “carry-over cooking,” where the residual heat in the oven gently finishes setting the filling. More importantly, this slow, controlled decrease in temperature prevents the rapid contraction of the filling that causes unsightly cracks. Moving a hot pie directly from a searing oven to a cool countertop creates a sudden thermal shock, almost guaranteeing a cracked surface. Be patient during this cooling period; allowing it to cool slowly within the oven is the best guarantee for a silky-smooth, crack-free masterpiece. For those who prefer precision, an instant-read thermometer inserted into the center of the pie should register around 175°F (79°C) for perfect doneness.
Say Goodbye to Soggy Bottoms: Tips for a Flaky Crust
A soggy pie crust is a common culinary disappointment, particularly with high-moisture fillings like pumpkin pie custard. The liquid from the filling can easily migrate into an uncooked crust, turning it dense, gummy, and unappetizing. To effectively combat this, blind baking (also known as par-baking) the pie crust before adding the filling is not just recommended, it’s virtually essential. This process involves partially baking the empty crust with pie weights, which serves two vital purposes:
First, it cooks the dough just enough to set its structure, preventing it from becoming a sponge for the wet filling. Second, it creates a crucial barrier, sealing the delicate pastry and forming a shield against moisture absorption. During blind baking, the crust develops a light, golden hue and a crisp, flaky texture that can proudly support the creamy pumpkin filling. While it is theoretically possible to skip this step, the outcome will almost certainly be a noticeably less firm and potentially very soggy bottom crust, significantly detracting from the overall enjoyment of your pie. For a comprehensive, step-by-step guide on mastering this indispensable technique, you can learn how to blind bake pie crust here. Investing a small amount of extra time in this stage guarantees a golden, crisp, and utterly delicious foundation for your pumpkin pie.
Expert Tips for the Best Pumpkin Pie Experience
Elevate your pumpkin pie from great to unforgettable with these additional insights and expert tips:
- Canned vs. Fresh Pumpkin Puree: For consistent results and the smoothest possible texture in baking, I typically lean towards using high-quality canned pumpkin puree. It’s reliably smooth and has a stable moisture content. However, if you have access to fresh pumpkins and prefer a more rustic approach, you can certainly use homemade pumpkin puree. Just ensure it is very well-drained to prevent any excess moisture from making your pie filling watery.
- Customizing Your Spice Blend: The carefully chosen blend of cinnamon, ginger, freshly grated nutmeg, and cloves in this recipe creates a deeply aromatic and perfectly balanced flavor profile. I especially adore the profound intensity and nuanced depth that freshly grated nutmeg contributes. If you prefer a more straightforward approach, you can substitute the individual spices with 2 teaspoons of a good quality, pre-mixed pumpkin pie spice blend. Feel free to adjust the quantities to suit your personal taste, but remember that a generous hand with the spices is key to that iconic, comforting pumpkin pie flavor!
- Mind the Filling Level: When it’s time to pour the delicious pumpkin filling into your partially baked pie crust, exercise caution and avoid overfilling. The filling should ideally reach just up to the crimped edges of your crust. If your pie dish happens to be slightly smaller than standard, or if your homemade crust has shrunk a little during its blind bake, you might find yourself with a small amount of leftover filling. It is always better to discard any excess than to risk an overflowing pie, which can lead to a messy oven and a less-than-perfect presentation.
- The Unrivaled Joy of a Homemade Crust: While the convenience of a store-bought crust might be tempting, it simply cannot replicate the delicate flakiness, rich texture, and unparalleled buttery flavor of a homemade pie crust. Taking the time and effort to prepare your own crust genuinely transforms this pie from merely good to truly extraordinary. The slight extra effort pays immense dividends in the final taste, texture, and overall enjoyment of your magnificent dessert.
Serving & Storage Suggestions
Once your culinary masterpiece is baked and perfectly cooled, here’s how to best enjoy and preserve its deliciousness:
- Optimal Serving Temperature: Pumpkin pie is absolutely delightful when served either slightly warm or at room temperature. A gentle warmth enhances the aromatic spices and contributes to a more luscious, comforting texture. Avoid serving it straight from the fridge, as the flavors and textures can be dulled.
- Perfect Pairings and Garnishes: The classic and arguably best accompaniment is, without a doubt, a generous dollop of freshly made whipped cream. For an added touch of elegance and flavor, consider a light sprinkle of extra cinnamon or freshly grated nutmeg, a decadent drizzle of homemade caramel sauce, or even a scoop of high-quality vanilla bean ice cream.
- Refrigeration is Essential: Due to its custard-like filling made with heavy cream and eggs, pumpkin pie is a perishable dessert. It must be stored in the refrigerator to maintain its freshness, quality, and food safety. While it’s generally safe to leave it out at room temperature for a few hours if serving immediately, for any longer period, prompt refrigeration is crucial.
- Storage Duration: For the absolute best flavor and texture, pumpkin pie is ideally enjoyed within 2 to 3 days of baking. However, if stored correctly, it will keep well in the refrigerator for up to a week. Always ensure it’s covered loosely with plastic wrap or aluminum foil to prevent it from drying out, developing a skin, or absorbing unwanted odors from other foods in your fridge.
- Freezing Pumpkin Pie: Yes, pumpkin pie freezes remarkably well, making it an excellent make-ahead option! To freeze, ensure the pie is completely cooled to room temperature. Wrap it tightly in several layers of plastic wrap, followed by an additional layer of heavy-duty aluminum foil to protect against freezer burn. It can be frozen for up to 1 month. To thaw, simply transfer the wrapped pie to the refrigerator overnight before serving.
Helpful Pie Resources for Your Baking Journey
Eager to further refine your pie-making prowess and tackle other delicious creations? Explore these invaluable resources designed to help you become a pie master:
- How to Make Perfectly Flaky Pie Crust: Dive deep into the techniques for achieving the ultimate tender and flaky pastry.
- How to Make Pie Crust in a Food Processor: Discover a convenient and quick method for preparing your pie dough using modern kitchen tools.
- 8 Common Pie Mistakes & How to Fix Them: Arm yourself with knowledge to troubleshoot common pie problems and ensure perfect results every time.
- Best Pie Tools: Get recommendations for essential equipment that will make your pie-baking experience smoother and more enjoyable.
More Delightful Holiday Pie Recipes
If you’re looking to diversify your holiday dessert spread beyond pumpkin, or simply love a good pie, consider these other fantastic options:
- Classic Pecan Pie: A rich, sweet, and nutty classic, perfect for any festive table.
- Mile High Apple Pie: A towering masterpiece filled with tender, spiced apples.
- Pumpkin Pie with Nut Praline: A delightful twist on the traditional pumpkin pie, adding an irresistible crunch.
- Cranberry Blueberry Pie: A vibrant and fruity pie offering a burst of flavor, great for adding color to your dessert table.
Get the Full Recipe
Classic Pumpkin Pie
Pin Recipe
Leave a Review
Ingredients
- 1 pie crust recipe
- 2 cups (425 grams) pumpkin puree (15-oz can)
- 3 large eggs
- 1 ¼ cup (275 grams) packed light or dark brown sugar
- ½ teaspoon salt
- 1 teaspoon ground cinnamon
- ½ teaspoon ground ginger
- ¼ teaspoon freshly grated nutmeg
- ¼ teaspoon ground cloves
- 1 ¼ cup (340 grams) heavy cream
Instructions
-
Roll out one disk of homemade pie crust into an approximate 12-inch circle. Carefully transfer it to a 9-inch pie dish. Fold the edges over and crimp them decoratively as desired. Place the pie crust in the freezer for at least 30 minutes to ensure it’s thoroughly chilled. While the pie crust is in the freezer, preheat your oven to 400°F (200°C).
-
Line the chilled pie crust with buttered aluminum foil (buttered side down) and fill with pie weights, uncooked rice, or dried beans. Prebake the crust just until it appears set and the edges are lightly golden brown, which should take about 20 minutes. Let it cool for 5 minutes, then carefully remove the weights and foil. Reduce your oven temperature to 375°F (190°C).
-
In a large bowl, whisk together the pumpkin puree, eggs, brown sugar, salt, ground cinnamon, ground ginger, freshly grated nutmeg, and ground cloves until completely smooth and well combined. Gently whisk in the heavy cream until it is just incorporated. Pour this creamy mixture into your prebaked pie crust, making sure not to overfill it (the filling should reach just up to the crimped edges). Bake for approximately 45-50 minutes, or until the edges of the filling are set but the center still exhibits a slight, gentle jiggle when gently shaken. It’s crucial not to overbake to prevent cracking.
-
Once baked, turn off the oven and leave the oven door slightly ajar with the pie still inside. Allow the pie to cool completely to room temperature within the oven. This slow, gradual cooling process is essential for preventing cracks and ensures the filling sets perfectly smooth. Serve the pie warm or at room temperature, ideally with a generous dollop of homemade whipped cream. Store any leftovers securely covered in the refrigerator.
Notes
NOTES
- This recipe specifically calls for only one half of a standard double pie crust recipe. You can either use the other half for another delicious pie or store it in the refrigerator for up to 5 days, or in the freezer for up to 2 months for future baking.
- This recipe is perfectly scaled to yield one beautiful 9-inch pie, making it ideal for serving 10-12 generous slices.
- For an even more intense and nuanced flavor, consider toasting your whole spices lightly in a dry skillet before grinding them, or always opt for freshly ground spices for maximum aroma and potency.
- Remember, the key to a perfect pumpkin pie is patience, especially during the crucial cooling phase. Don’t rush it!
This recipe for Classic Pumpkin Pie was originally published in November 2015 in partnership with Go Bold With Butter. It has since been updated and significantly expanded in [Current Year – e.g., 2023/2024] for enhanced clarity, improved SEO optimization, and even greater baking success for you.
