The Ultimate Dry-Brined Roasted Turkey: Achieve Unforgettable Flavor and Crispy Skin
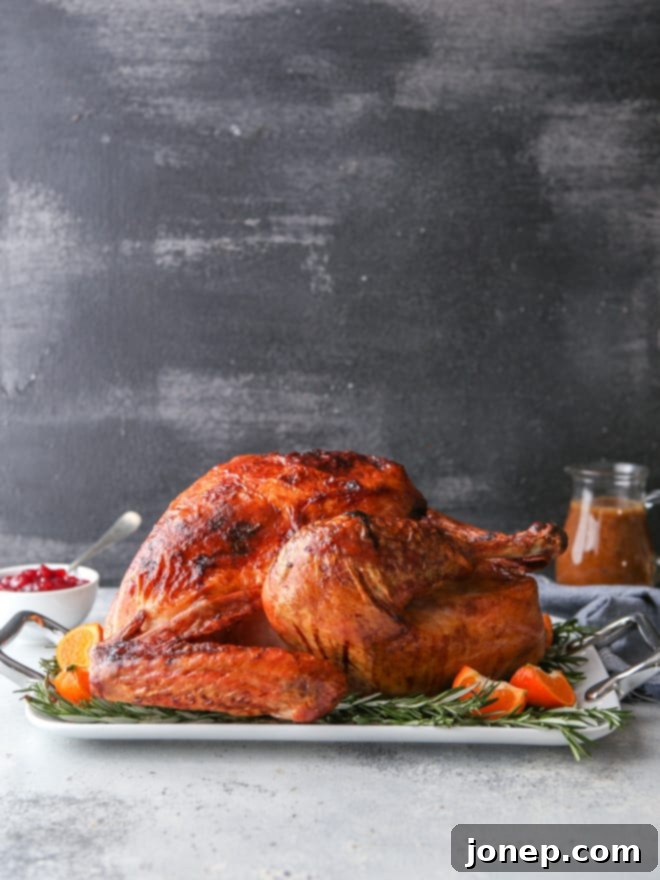
Prepare to amaze your guests with this dry-brined roasted turkey – a recipe so consistently delicious, it might just be the only turkey recipe you’ll ever need! Bursting with incredible flavor, every bite is super moist and juicy, all crowned with the most beautiful, irresistibly crispy skin. This isn’t just a meal; it’s the perfect show-stopping centerpiece for your next holiday feast or special gathering.
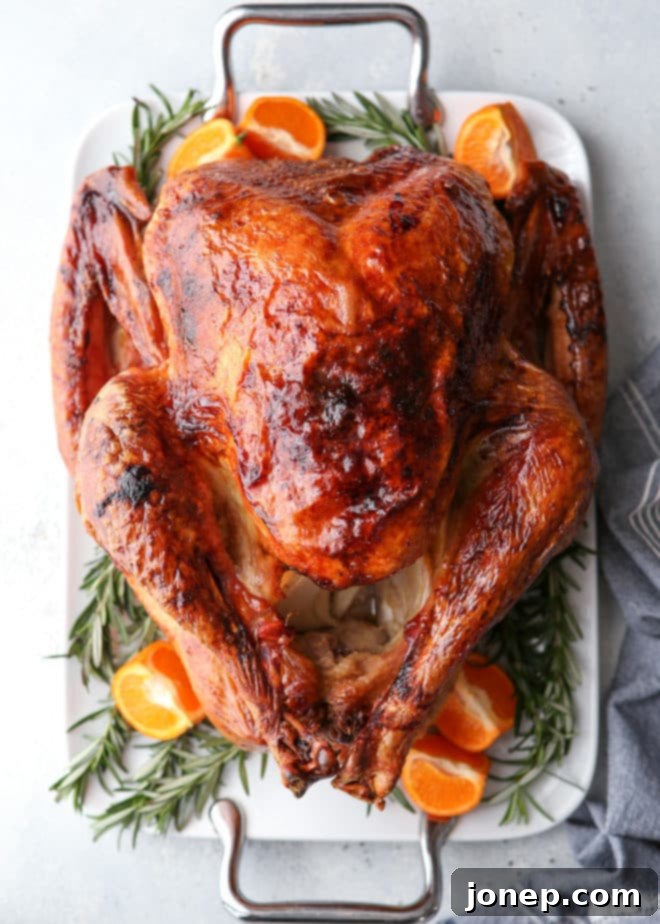
Roasting a turkey for a significant holiday like Thanksgiving or Christmas can feel like a high-stakes culinary challenge. But there’s absolutely no need to feel scared or intimidated. With this meticulously crafted dry-brine method and roasting guide, you can approach your main dish with complete confidence, knowing it will not only taste absolutely amazing but also look stunningly perfect on your dining table.
This exceptional dry-brined turkey recipe is a refined version of a technique I discovered years ago in Bon Appetit. It was a game-changer for me, transforming the way I prepare Thanksgiving turkey forever. Over the years, I’ve subtly tweaked and perfected it, and I’m thrilled to finally share my ultimate version with you. Get ready to elevate your turkey game!
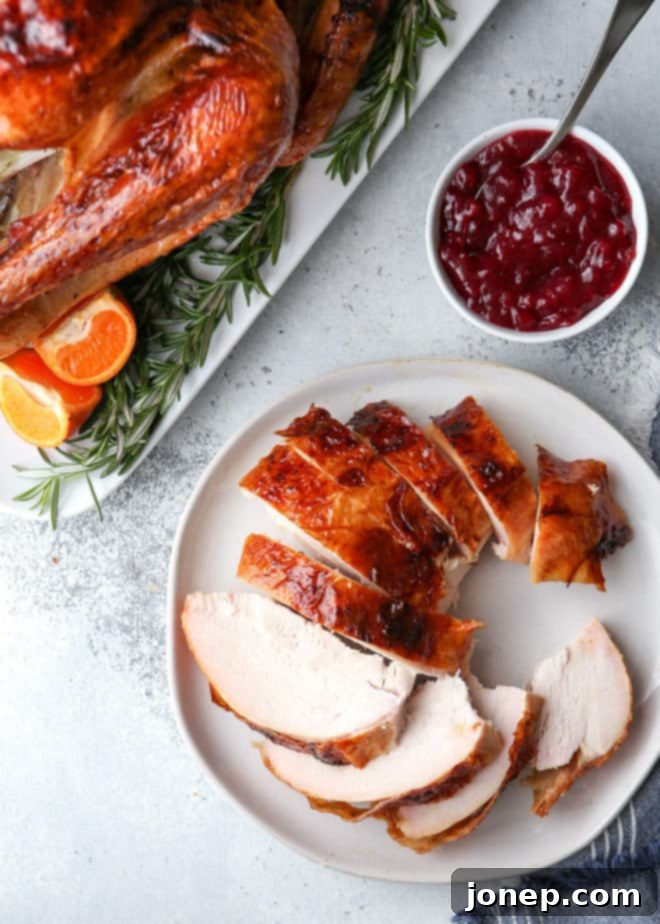
This dry-brined roasted turkey is truly in a league of its own! It achieves a perfect golden-brown hue, is incredibly flavorful throughout, and boasts a wonderfully moist and tender texture that will impress everyone at your table.
Table of Contents
- Why This Is the Best Roasted Turkey Recipe
- What Exactly is a Dry Brine?
- Dry Brine vs. Wet Brine: The Clear Winner
- Essential Ingredients for Your Perfect Turkey
- Step-by-Step: How to Dry Brine a Turkey
- The Best Method for Roasting a Turkey
- Preparing Your Turkey for Roasting
- Roasting and Basting for Golden Perfection
- Resting and Serving Your Masterpiece
- Frequently Asked Questions (FAQs)
- Delicious Side Dishes to Complete Your Holiday Meal
- Get the Full Dry-Brined Roasted Turkey Recipe
Why This Is the Best Roasted Turkey Recipe
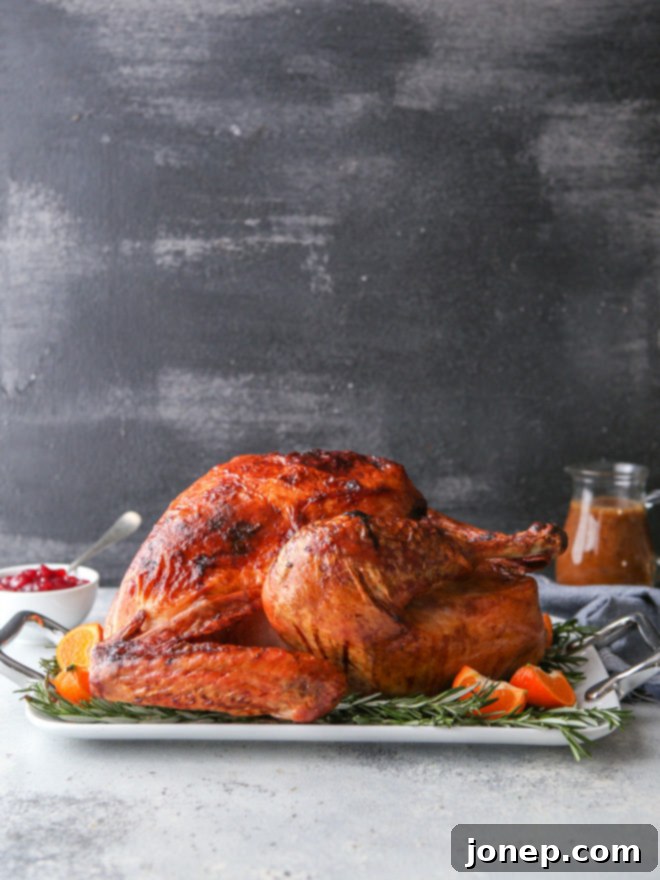
Beyond being a truly gorgeous, show-stopping centerpiece for any holiday table, this turkey is renowned for its exceptional moistness, juiciness, and deep, unforgettable flavor. What sets this recipe apart and makes it the absolute best? It’s all in the careful technique:
- The Power of a Dry Brine: We kick things off with a “dry brine,” a simple yet incredibly effective method that infuses the turkey with flavor right from the start. This isn’t just about seasoning; it’s about transforming the meat at a molecular level.
- Overnight Flavor Infusion & Tenderizing: Allowing the flavorful rub to sit on the turkey overnight ensures those aromatic spices and salt penetrate deeply into the bird. This process not only builds incredible flavor but also tenderizes the meat, making it exceptionally succulent and helping it retain moisture during the long cooking process.
- Uncovered Refrigeration for Ultimate Crispy Skin: A crucial step involves leaving the turkey uncovered in the refrigerator. This cleverly dries out the skin, setting it up perfectly to become unbelievably golden and crispy in the oven – no more flabby turkey skin!
- Honey Glaze for Enhanced Flavor and Shine: As the turkey roasts, we repeatedly baste it with a special honey glaze. This step adds layers of savory-sweet flavor and is the secret to achieving that beautiful, glossy, golden-brown exterior that is simply picture-perfect.
While these steps might sound extensive, I promise this recipe is entirely achievable for cooks of all skill levels. I first attempted it years ago when I was much less experienced, and the pride and excitement I felt pulling that perfectly roasted turkey from the oven were immense. You’ll experience that same thrill and satisfaction!
What Exactly is a Dry Brine?
A dry brine is essentially a simple yet powerful rub, typically made from a mixture of coarse salt, sugar, and various spices, applied directly to the surface of the turkey and left to sit for approximately 24 hours before cooking. As the turkey rests with this dry brine, it draws out moisture from the meat through osmosis. This moisture then mixes with the salt and is reabsorbed, carrying the salt and flavors deep into the turkey. The salt also works to break down muscle proteins, making the meat more tender and significantly increasing its capacity to retain moisture, resulting in an incredibly juicy bird.
This method stands in contrast to a wet brine, where the turkey (or other meat) is submerged and allowed to rest in a large container of liquid, typically infused with salt, sugar, and other aromatic ingredients.
Dry Brine vs. Wet Brine: The Clear Winner
Here’s a compelling look at why you should absolutely choose a dry brine over a traditional wet brine for your next turkey:
- Simplicity and Convenience: Dry brining is remarkably simpler! Say goodbye to the headache of finding a giant pot or cooler large enough to submerge a whole turkey, and no more logistical nightmares trying to fit it into your refrigerator.
- Minimal Mess: Avoid the drama and potential cross-contamination of handling and dumping out gallons of wet brine filled with raw turkey juices in your kitchen sink. Dry brining keeps things much cleaner.
- Unrivaled Crispy Skin: This is where dry brining truly shines! A wet brine can leave the turkey skin waterlogged, making it incredibly challenging to achieve that coveted golden-brown, crispy texture. With a dry brine, the skin dries out beautifully overnight, guaranteeing a perfectly crisp finish.
- Superior Flavor and Moisture: I can confidently promise that your dry-brined turkey will be just as flavorful, moist, and juicy as, if not more so than, any wet-brined bird you’ve ever had. The salt penetrates the meat more effectively without adding excess water.
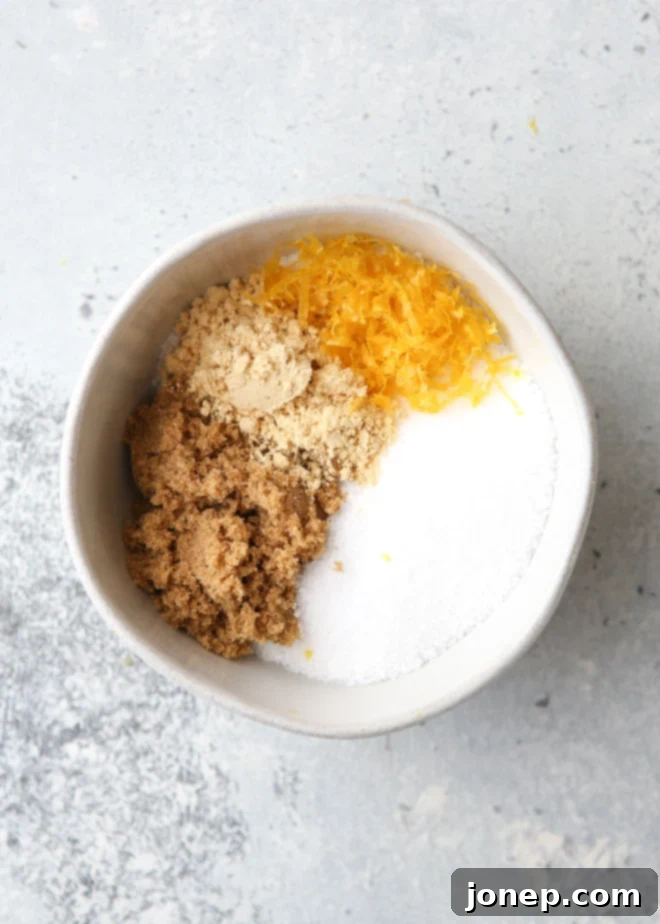
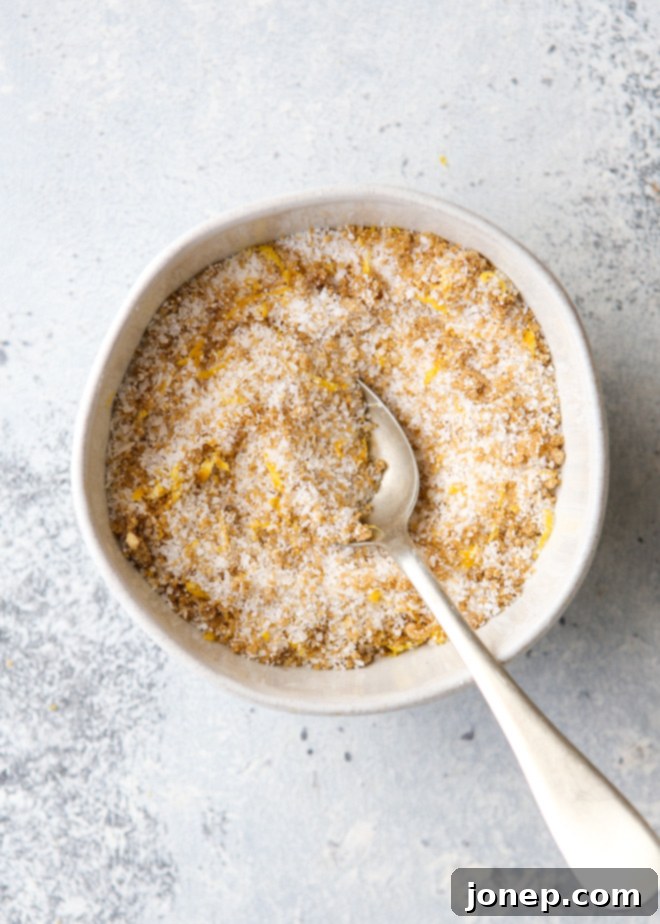
My signature dry brine rub recipe is a harmonious blend of coarse salt, rich brown sugar, pungent ground mustard, and bright, fresh lemon zest. It’s a powerful flavor kick-starter that delivers a big, delicious impact!
Additional Spices to Customize Your Dry Brine: Feel free to experiment by adding 1/2 to 1 teaspoon of other complementary spices to your dry brine mixture. Excellent choices include garlic powder, onion powder, dried or fresh chopped herbs (like thyme, sage, or rosemary), paprika for color and depth, and freshly ground black pepper for a subtle kick.
Now that you’re convinced of the magic of dry brining, let’s gather our ingredients and get started on crafting your most memorable turkey!
Essential Ingredients for Your Perfect Turkey
- 12-15 lb Turkey: The cornerstone of your feast! The source and whether it’s fresh or frozen (and properly thawed) are entirely up to your preference and availability.
- Coarse Salt: Specifically, Diamond Crystal or Morton kosher salt are highly recommended. These brands offer superior quality, and the coarse texture makes it significantly easier to distribute the salt evenly across the turkey’s surface, ensuring consistent brining.
- Light or Dark Brown Sugar: A vital ingredient that not only enhances the overall flavor profile but also plays a key role in keeping the turkey moist and promotes that beautiful, desirable golden-brown skin during roasting.
- Lemon: Poultry and citrus are a match made in culinary heaven. We utilize lemon zest in the dry brine for bright flavor and place lemon halves inside the turkey cavity for aromatic infusion from the inside out.
- Mustard Powder: Adds a unique, savory depth of flavor to the dry brine. It also acts as an excellent binder, helping the rub adhere effectively to the turkey’s skin.
- Onion and Fresh Garlic: These aromatic powerhouses are essential for rounding out and profoundly enhancing the overall savory flavor of the turkey, both in the cavity and in the basting glaze.
- Fresh Herbs (Rosemary, Thyme, Sage): A fresh herb blend is non-negotiable for that classic holiday aroma and taste. I prefer a combination of all three, but even just one or two will work wonders. Look for “Poultry Herb Blend” at most grocery stores for convenience.
- Salted Butter: Used generously, butter is crucial for both the basting glaze and for rubbing all over the turkey before roasting. Its primary purpose is to infuse rich flavor and contribute to that coveted crispy, golden skin.
- Honey: This natural sweetener contributes both a lovely depth of flavor to the basting glaze and helps achieve that irresistible shiny, golden-brown crust.
- Red Wine Vinegar and Worcestershire Sauce: These two ingredients are secret weapons in the basting glaze, adding complexity, a tangy depth of flavor, and a perfect balance to the sweetness of the honey.
Step-by-Step: How to Dry Brine a Turkey
- Thaw Your Turkey Completely (If Frozen): This is a critical first step – you absolutely cannot dry brine a frozen turkey. Plan well in advance! A general rule of thumb for defrosting in the refrigerator is 24 hours per 4-5 pounds. For a 12-15 lb turkey, this means a minimum of 2-3 days. Ensure the turkey is mostly, if not completely, defrosted before proceeding.
- Prepare the Dry Brine Mixture: In a small bowl, combine your coarse salt, brown sugar, ground mustard, and fresh lemon zest. Mix thoroughly until all ingredients are well incorporated. This is your powerful flavor rub!
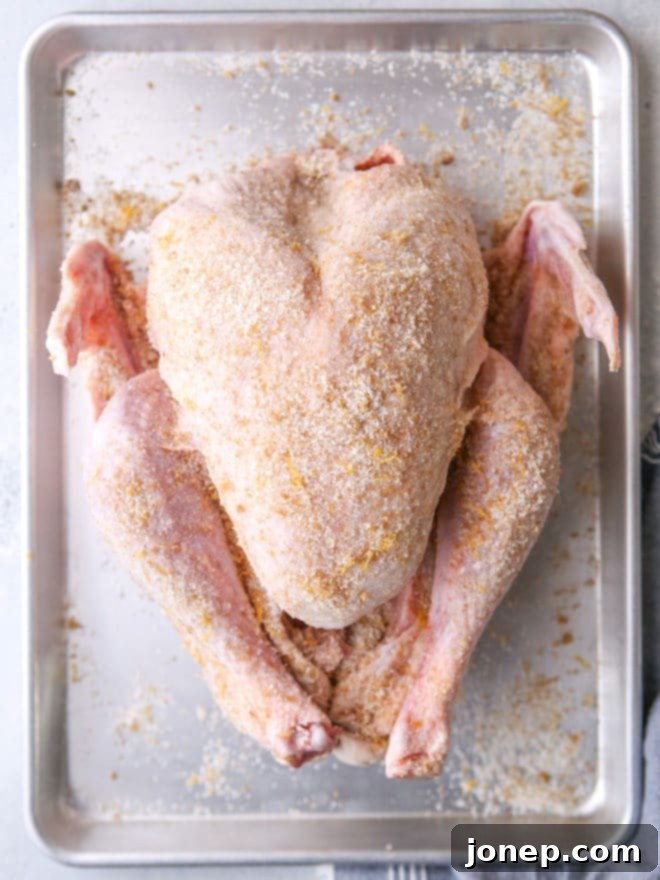
- Apply the Rub Evenly to the Turkey: Place the thawed and patted dry turkey on a large, rimmed baking sheet lined with a wire rack. The wire rack is essential as it allows air to circulate freely around the entire turkey, promoting even drying of the skin. Using your hands, generously rub the dry brine mixture all over the turkey’s exterior, ensuring even coverage. Don’t worry if some falls onto the pan – you want plenty on the bird.
- Refrigerate Uncovered for 24 Hours: Position the baking sheet with the turkey, uncovered, on the bottom shelf of your refrigerator. Placing it on the bottom shelf is a food safety measure to prevent any potential drips from contaminating other foods below it. Allow the turkey to dry brine for a minimum of 12 hours, but ideally for about 24 hours. If you have a larger turkey (closer to 15 lbs), you can extend this period up to 36 hours for maximum flavor penetration and tenderness.
The Best Method for Roasting a Turkey
Dry brining your turkey is the fantastic first step in building incredible flavor and texture. Now that your turkey is perfectly seasoned and prepped, it’s time to transform it into a golden-brown masterpiece in the oven. Follow these precise steps for the ultimate roasted turkey that will be the highlight of your meal:
Preparing Your Turkey for Roasting
- Preheat Oven and Bring Turkey to Room Temperature: Preheat your oven to a high 450°F (230°C). While the oven heats, remove the dry-brined turkey from the refrigerator and let it sit at room temperature for 30-60 minutes. This crucial step helps remove some of the chill from the meat, allowing it to cook more evenly. Importantly, keep the turkey on the same wire-lined sheet pan; using a traditional roasting pan with high sides can prevent the bottom third of the turkey from browning properly.
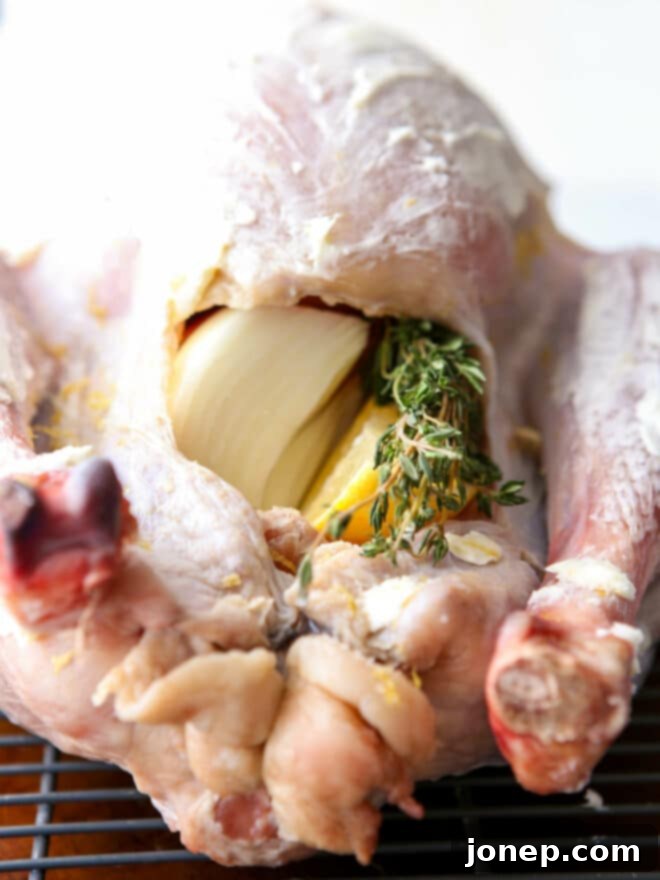
- Butter Rub and Cavity Stuffing: Gently rub softened butter all over the entire surface of the turkey, working some under the skin, especially over the breast meat. This butter will infuse flavor and promote magnificent browning. Next, stuff the turkey cavity with quartered onion, halved lemon, and a small bunch of fresh herbs. These aromatics will add another layer of delicious flavor from the inside out as the turkey roasts. Finally, tie the legs together with kitchen twine and tuck the wings underneath the bird to help it cook evenly and maintain a compact shape.
Roasting and Basting for Golden Perfection
- Initial High Heat Roast: Place the prepared turkey into the preheated 450°F (230°C) oven and roast for an initial 30 minutes. This high heat blast is key to kickstarting the browning process and achieving that beautiful crispy skin. Pour 1 cup of water into the bottom of the sheet pan to prevent drippings from burning and smoking excessively.
- Continue Roasting at Lower Temperature: After 30 minutes, reduce the oven temperature to 325°F (160°C). Continue cooking the turkey until an instant-read thermometer inserted into the thickest part of the thigh (without touching bone) registers 160°F (71°C). The internal temperature will continue to rise to the safe recommended 165°F (74°C) while the turkey rests. Depending on the size of your bird, this can take an additional 60-120 minutes. A reliable instant-read thermometer is your best friend for accuracy!
- Regular Basting with Honey Glaze: While the turkey roasts, prepare your simple yet incredible basting glaze. In a small saucepan over low heat, gently melt butter with honey, red wine vinegar, minced garlic, Worcestershire sauce, and a few fresh herb stems. Keep this glaze warm. Every 30 minutes or so during the lower temperature roasting phase, generously brush the turkey with this flavorful glaze. This frequent basting will imbue the turkey with even more delicious flavor and is precisely how we achieve that stunning, shiny, golden-brown exterior.
Resting and Serving Your Masterpiece
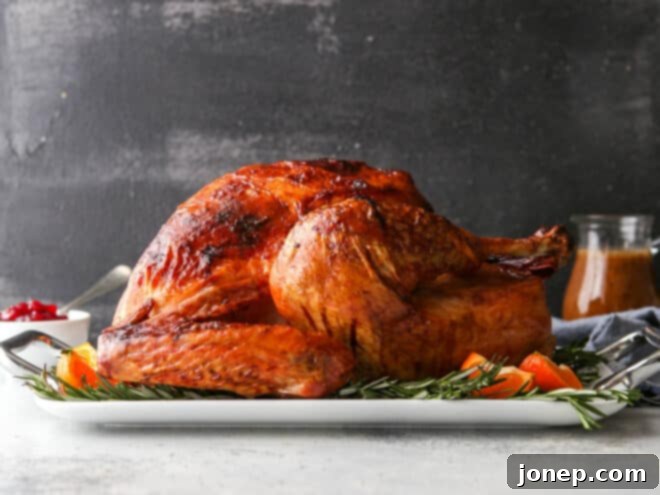
- The Essential Rest: Once the turkey reaches 160°F (71°C), carefully remove it from the oven. Transfer it to a cutting board or serving platter and loosely tent it with foil. Allow the turkey to rest for a full 30 minutes before carving. This resting period is absolutely critical; it allows the juices, which have been driven to the center during cooking, to redistribute evenly throughout the meat. Cutting too soon will result in those precious juices leaking out, leaving you with dry turkey slices.
- Make Homemade Gravy (Optional, but Highly Recommended!): Use the turkey’s resting time wisely to whip up an incredible homemade gravy. This easy homemade turkey gravy recipe, made from the flavorful pan drippings, is the perfect accompaniment.
- Carve and Enjoy: After resting, carve your perfectly roasted, juicy turkey. Serve it with your favorite holiday side dishes for a truly memorable meal. See below for some delicious side dish suggestions to complete your festive spread!
Frequently Asked Questions (FAQs)
No, absolutely not! A key benefit of the dry brine method is that it gives the turkey skin ample time to dry out while in the refrigerator, which is essential for achieving that beautifully even browning and ultimate crispiness in the oven. Rinsing the bird before baking would completely undo this critical step. Don’t worry about it being too salty; the salt penetrates the meat rather than just sitting on the surface.
I promise, it won’t be! The salt in a dry brine is distributed over a wide surface area and gradually penetrates throughout the entire turkey. This slow, even absorption prevents any single part from becoming overly concentrated with salt. It’s a scientific process designed for perfect seasoning, not excessive saltiness. For those interested in the fascinating science behind dry brining, this article from Serious Eats offers a lot of great information.
Yes, absolutely! The dry-brining method works wonderfully for turkey breast as well. However, you will need to adjust the recipe proportions. A good general ratio for dry brine is approximately 1/2 teaspoon of coarse salt per pound of meat. So, for a 6lb turkey breast, you would typically need about 1 tablespoon of salt, 1 teaspoon of brown sugar, 1 teaspoon of lemon zest, and 1/4 teaspoon of ground mustard. Adjust the brining time accordingly for a smaller cut.
If you find yourself in a bind with a frozen turkey, you can speed up the thawing process by submerging it in cold water, ensuring you change the water every 30 minutes. For a 12-pound turkey, this method might take approximately 2-3 hours. However, if you use this quick-thaw method, it’s generally not recommended to then proceed with a dry brine, as the turkey needs to be cooked immediately after thawing to minimize bacterial risk. In this scenario, skip the dry brine steps and proceed directly to the roasting instructions in this recipe.
Leaving the dry brine on the turkey for a period significantly longer than recommended can lead to undesirable results. The turkey might become overly salty, and surprisingly, it can also end up dry or even mushy due to excessive protein breakdown. It’s crucial to adhere to the proper brining time specified for your recipe. For a 12-15lb turkey, aim for a total brining time of 12-24 hours, with a maximum of 36 hours for larger birds to ensure perfect results.
If your turkey achieves that perfect golden-brown color much sooner than the internal temperature reaches 160°F, you can easily prevent burning by loosely covering it with aluminum foil. This acts as a shield, protecting the beautifully browned skin while allowing the inside to finish cooking. Regularly basting the turkey every 30 minutes also provides a great opportunity to check on its color and tent it with foil if needed, ensuring you catch it before any burning occurs.
The most common reason for a dry turkey is overcooking. To prevent this unfortunate outcome, it is absolutely essential to use a reliable meat thermometer and monitor the internal temperature throughout the roasting process. Remove the turkey from the oven promptly when it reaches 160°F (71°C) in the thickest part of the thigh. Remember, the turkey will continue to cook and reach the recommended safe temperature of 165°F (74°C) as it rests.
Making a rich, flavorful gravy from your turkey drippings is an absolute must! I have a dedicated recipe that guides you through how to make quick homemade turkey gravy. The best part is you can easily prepare it while your beautifully roasted turkey rests, ensuring a piping hot gravy ready right when you carve!
The secret to successfully reheating leftover turkey without it drying out is to add moisture, use a low and slow heat, and carefully avoid overcooking. To reheat turkey slices or pieces in the oven: Place them in a baking dish, add a few tablespoons of gravy or broth to the bottom, and cover tightly with foil. Warm in a 325°F (160°C) oven for about 20 minutes, or until heated through. To reheat in the microwave: Place turkey in a microwave-safe dish, add a splash of gravy or broth, and cover with a damp paper towel. Microwave at 50% power in 1-minute intervals, stirring occasionally, until warm.
Delicious Side Dishes to Complete Your Holiday Meal
A magnificent dry-brined roasted turkey deserves an equally impressive array of side dishes. Here are some of our favorite recipes that perfectly complement the rich flavors of your holiday bird, making your festive meal truly unforgettable:
Get the Full Dry-Brined Roasted Turkey Recipe
This recipe was originally published in November 2019 and has been refined for even better results.

Dry-Brine Roasted Turkey
Pin Recipe
Leave a Review
Ingredients
For the Dry Brine Rub
- 6 tablespoons coarse salt , Diamond Crystal or Morton Kosher preferred for best results
- 3 tablespoons light or dark brown sugar
- Zest of 1 lemon
- 1 teaspoon ground mustard
For the Turkey and Cavity
- 12-15 lb turkey , neck and giblets removed
- 1 onion , peeled and quartered
- 1 lemon , halved
- 1 small bunch fresh herbs , such as rosemary, thyme and sage
- 6-8 tablespoons butter , as needed, softened to room temperature
For the Basting Glaze
- ¼ cup butter
- 2 tablespoons honey
- ¼ cup red wine vinegar
- 1 tablespoon Worcestershire sauce
- 3 cloves garlic , minced
- A few herb stems , such as rosemary, thyme and sage
Equipment
Instructions
To Apply the Dry Brine Rub:
-
1. Ensure your turkey is completely thawed (if frozen), then place it on a large sheet pan lined with a wire rack. Pat the turkey thoroughly dry with paper towels – this is crucial for crispy skin.
-
2. In a small bowl, combine the coarse salt, brown sugar, lemon zest, and ground mustard. Mix well. Using your hands, generously apply this rub all over the entire surface of the bird. Don’t be shy; there should be plenty of rub, and it’s perfectly fine if some of it falls off onto the pan.
-
3. Carefully place the sheet pan with the brined turkey, uncovered, into the refrigerator. Allow it to sit for a minimum of 12 hours, but for optimal flavor and crispy skin, aim for about 24 hours. For larger turkeys (around 15 lbs), you can extend this to up to 36 hours.
To Roast the Turkey:
-
1. Preheat your oven to 450°F (230°C). Adjust the oven rack to the center position so the turkey will fit comfortably without touching the top element. While the oven preheats, remove the dry-brined turkey from the fridge and let it sit at room temperature for 30-60 minutes to take off the chill.
-
2. Keep the turkey on the wire rack and sheet pan; do not rinse the rub off. Generously rub the softened butter all over the turkey’s skin, working some underneath the breast skin for extra moisture and flavor. Stuff the cavity with the quartered onion, halved lemon, and fresh herbs.
-
3. Tie the turkey legs together with kitchen twine and tuck the wing tips underneath the breasts. Transfer the entire sheet pan with the turkey to the preheated oven. Pour 1 cup of water into the bottom of the sheet pan to prevent drippings from burning.
-
4. Roast at 450°F (230°C) for 30 minutes, rotating the pan halfway through to ensure even browning.
-
5. While the turkey is in its initial roast, prepare the basting glaze: Combine butter, honey, red wine vinegar, Worcestershire sauce, minced garlic, and herb stems in a small saucepan. Cook over medium-low heat for a few minutes until it begins to bubble gently and thickens slightly. Keep the glaze warm.
-
6. After 30 minutes, reduce the oven temperature to 325°F (160°C). Continue to roast the turkey, basting every 30 minutes with the warm honey glaze, until a reliable instant-read thermometer inserted into both the thickest part of the thigh and breast registers 160°F (71°C). (The temperature will continue to rise to a safe 165°F (74°C) as the bird rests.) This will typically take an additional 60-90 minutes, depending on your turkey’s size. The skin should be beautifully golden brown, crisp, and shiny. If you notice the turkey browning too quickly, loosely tent it with aluminum foil.
-
7. As the turkey roasts, regularly check the water level in the pan and add more as needed to maintain about 1 cup to prevent drippings from burning.
-
8. Once the turkey reaches 160°F (71°C), carefully remove it from the oven, being mindful not to spill any flavorful juices from the pan.
-
9. Transfer the magnificent roasted turkey to a large cutting board or serving platter and loosely tent it with foil. Let it rest undisturbed for 30 minutes before carving – this is a critical step for a juicy turkey!
-
10. While the turkey rests, use the flavorful pan drippings to make homemade turkey gravy. Carve your perfectly roasted turkey and serve immediately with the delicious gravy and your favorite holiday sides! Enjoy!
Notes
- Check Your Turkey’s Packaging: Before starting, ensure your turkey is not pre-salted or pre-brined (e.g., kosher turkeys often are). Always check the ingredient list on the packaging to confirm it does not include salt.
- Thawing Time is Key: For a frozen turkey, allow ample time for thawing in the refrigerator—approximately 24 hours for every 4-5 pounds. Depending on the size of your turkey, this could take 2-3 full days. It’s acceptable if the turkey isn’t entirely thawed internally when you begin the dry brine (mine sometimes has a bit of ice remaining), but it should be mostly defrosted.
- Adjusting for Smaller Birds: If you plan to roast a smaller turkey or just a turkey breast, this recipe can still be used! A good general guideline for the dry brine ratio is ½ teaspoon of coarse salt per pound of turkey. Adjust the other brine ingredients proportionally from there.
- Recipe Inspiration: This recipe is gratefully adapted from a fantastic dry-rubbed roast turkey recipe found on Bon Appetit.
- Nutritional Information: The provided nutritional information is calculated based on a 12lb turkey and is an approximate estimate.
