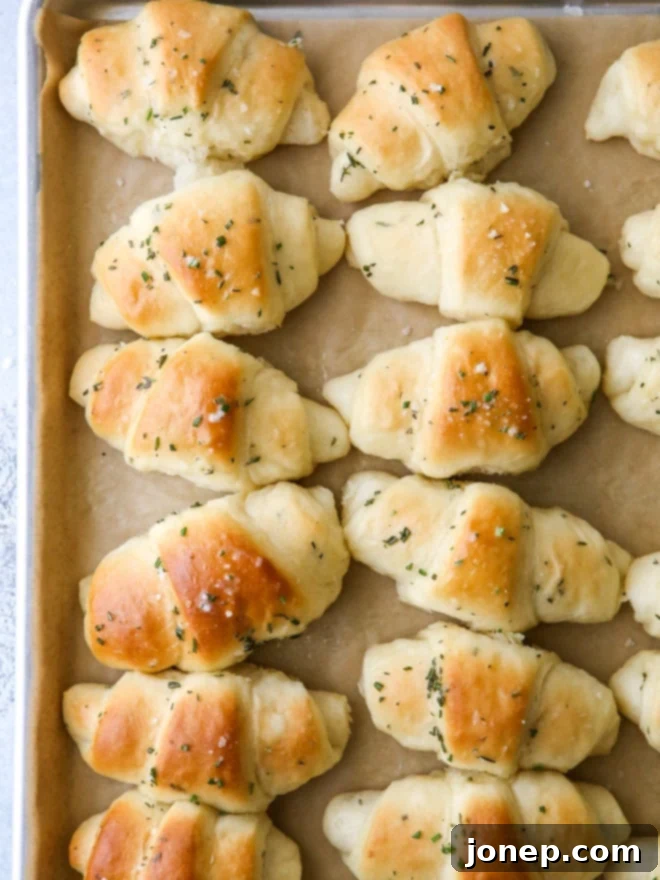
Get ready to elevate your dinner table with these spectacular garlic and herb crescent rolls. Imagine biting into a roll that’s unbelievably soft, rich with butter, and bursting with savory flavors from fresh garlic and fragrant herbs. What makes them even better? They’re made with a simple no-knead recipe, meaning less effort for you and more time to enjoy the delightful aroma filling your kitchen!
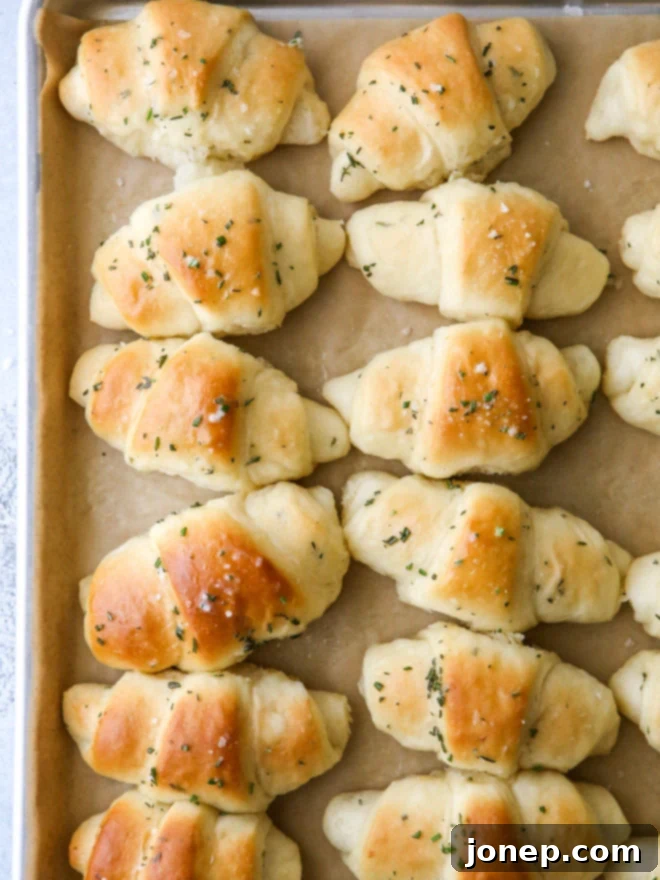
Sometimes, a classic recipe is so perfect, you hesitate to change it. For years, that was the case with my mom’s beloved easy no-knead fairy crescent rolls. Their delicate lightness, incredible softness, and melt-in-your-mouth buttery goodness made them untouchable. They were, and still are, truly magical.
But every now and then, inspiration strikes! I decided to take that cherished family recipe and give it a savory twist, transforming it into something equally wonderful but with a whole new depth of flavor. These no-knead dinner rolls are every bit as tender and fluffy as the original, but they’re infused with the irresistible taste of garlic and a fragrant medley of fresh herbs, making them an instant sensation.
The secret lies in incorporating fresh rosemary, thyme, and minced garlic directly into the dough, ensuring every bite is packed with aromatic goodness. But we don’t stop there! As soon as these golden beauties emerge from the oven, they’re brushed generously with a garlic and herb infused butter, creating an extra layer of richness and a glossy finish. A final sprinkle of flaky sea salt adds a delightful textural contrast and enhances all the flavors. These rolls aren’t just a side dish; they’re a highlight that perfectly complements any meal, from a simple weeknight dinner to a festive holiday feast.
The Magic of No-Knead Dough: Effortless Perfection
If the thought of baking yeast breads intimidates you, let these no-knead garlic herb crescent rolls be your introduction to the wonderful world of homemade baking. The “no-knead” method is a game-changer, eliminating the intensive kneading typically required for yeasted doughs. This means less active time in the kitchen and more time enjoying the process and the delicious results.
How does it work? By allowing the dough to rise slowly, typically for a shorter initial period, the gluten develops naturally with minimal intervention from you. This results in an incredibly tender crumb and a beautiful texture, often surpassing traditionally kneaded breads in terms of softness. It’s perfect for busy schedules, beginner bakers, or anyone who simply wants to streamline their baking process without compromising on quality or flavor. You get all the satisfaction of homemade bread with a fraction of the effort!
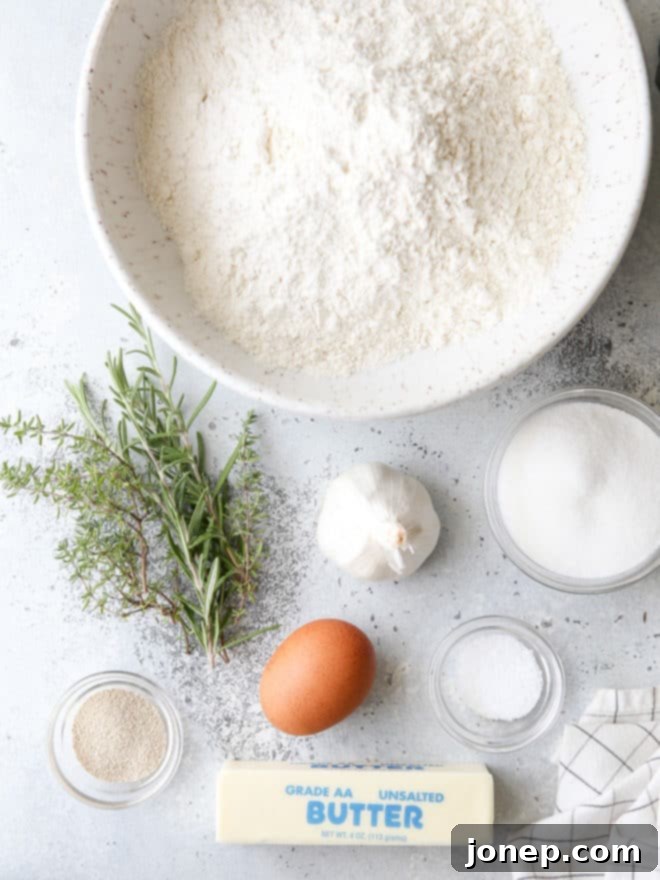
What Essential Ingredients Make These Crescent Rolls Shine?
Crafting these extraordinary garlic herb crescent rolls requires a selection of fresh, high-quality ingredients. Here’s a detailed look at what you’ll need and why each component is crucial for achieving that perfect taste and texture:
- All-purpose flour: This forms the foundational structure of our rolls. Its balanced protein content ensures a tender crumb that is still sturdy enough to hold its shape.
- Granulated sugar: While not a sweet roll, a touch of sugar is vital. It feeds the active dry yeast, promoting a healthy rise, and also contributes to the beautiful golden-brown crust.
- Salt: Essential for flavor, salt balances the richness and enhances the savory notes of the garlic and herbs. It also plays a role in regulating yeast activity.
- Active-dry yeast: Our primary leavening agent! This tiny microorganism works its magic, creating air pockets that make the rolls light and fluffy. Ensure your yeast is fresh for the best rise.
- Large egg: An egg enriches the dough, adding a lovely golden color, extra tenderness, and a slightly richer flavor profile. It also helps bind the ingredients together.
- Melted unsalted butter: Butter is key for that signature melt-in-your-mouth texture and incredible flavor. Using unsalted butter gives you control over the overall saltiness of the rolls. Make sure it’s melted and cooled slightly before adding.
- Warm water: The ideal temperature for activating your yeast is crucial – typically between 105-115°F (40-46°C). Water that’s too hot will kill the yeast, while water that’s too cold won’t activate it properly, resulting in dense rolls.
- Minced garlic: The star of our savory flavor! Using fresh minced garlic provides the most potent and delicious garlic punch. Avoid garlic powder if possible for this recipe; fresh truly makes a difference.
- Fresh herbs like rosemary and thyme: These aromatic herbs bring a beautiful fragrance and a robust, earthy flavor that pairs perfectly with garlic. Fresh is highly recommended over dried for maximum impact. You can also experiment with other fresh herbs like chives or oregano if you prefer.
And let’s not forget the delightful garlic herb butter that gets brushed on at the end – a simple combination of melted butter, more minced garlic, and fresh herbs, finished with a sprinkle of flaky sea salt for an irresistible crust!
Crafting Your Delicious Garlic and Herb Crescent Rolls: A Simple Guide
Follow these straightforward steps to create your own batch of these incredible no-knead rolls. You’ll be surprised how easy it is to achieve such impressive results!
1. Activate the Yeast
In a large bowl, combine the warm water and the active dry yeast. Give it a gentle stir and let it sit for about 5 minutes. You should see the yeast bloom and become foamy, indicating it’s active and ready to work its magic. If it doesn’t foam, your water might have been too hot or too cold, or your yeast may be old. It’s best to start over with fresh yeast.
2. Mix the Dough
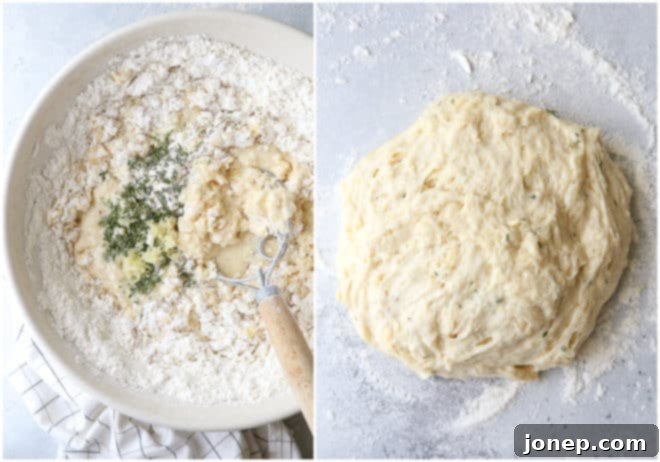
Once your yeast is active, add the melted and cooled butter, granulated sugar, and the large egg to the yeast mixture. Stir them together until well combined. Then, gradually add the all-purpose flour, baking powder, salt, minced garlic, and the chopped fresh herbs. Stir with a sturdy wooden spoon or a spatula until all the ingredients are just combined and form a wet, shaggy dough. Remember, this is a no-knead recipe, so there’s no need to work the dough vigorously; just ensure everything is incorporated.
3. First Rise: Let the Magic Happen
Cover the bowl with a clean kitchen towel or plastic wrap and allow the dough to rise in a warm, draft-free place. This initial rise usually takes about 30 minutes, or until the dough has noticeably expanded. A warm spot near a sunny window, on top of a warm oven, or even in a slightly warmed (but turned off) oven can work wonders. For more detailed tips and suggestions on achieving the perfect rise, check out this helpful guide on rising and proofing yeast breads.
4. Roll and Slice
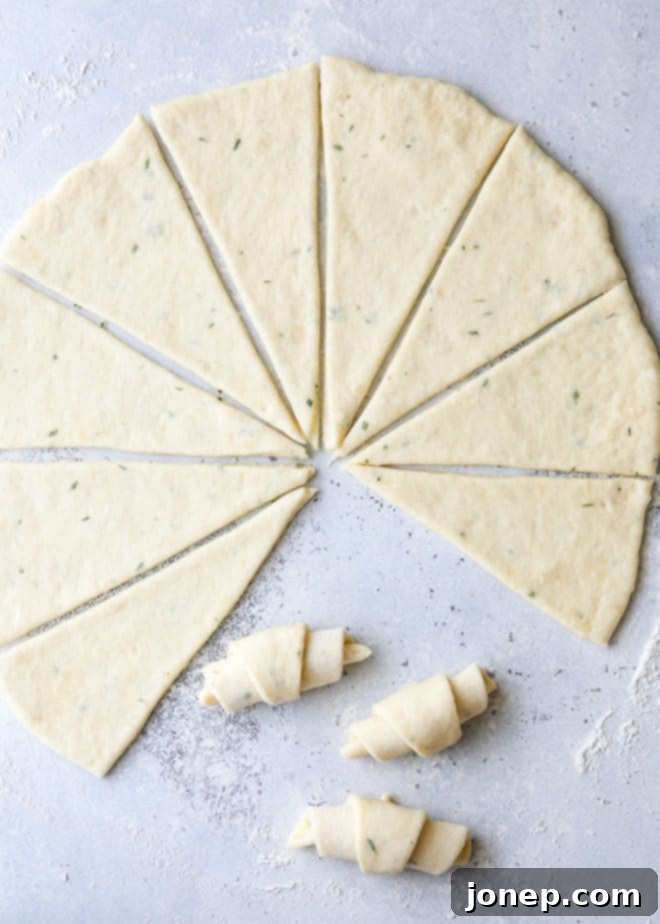
After the first rise, gently divide the dough into two equal halves. Work with one half at a time, keeping the other covered. Lightly flour your work surface and roll out the dough into a large circle, approximately 12-15 inches in diameter. Aim for an even thickness. Using a sharp knife or a pizza wheel, cut the circle into 12 equal triangles, similar to how you’d slice a pizza.
5. Shape into Crescents
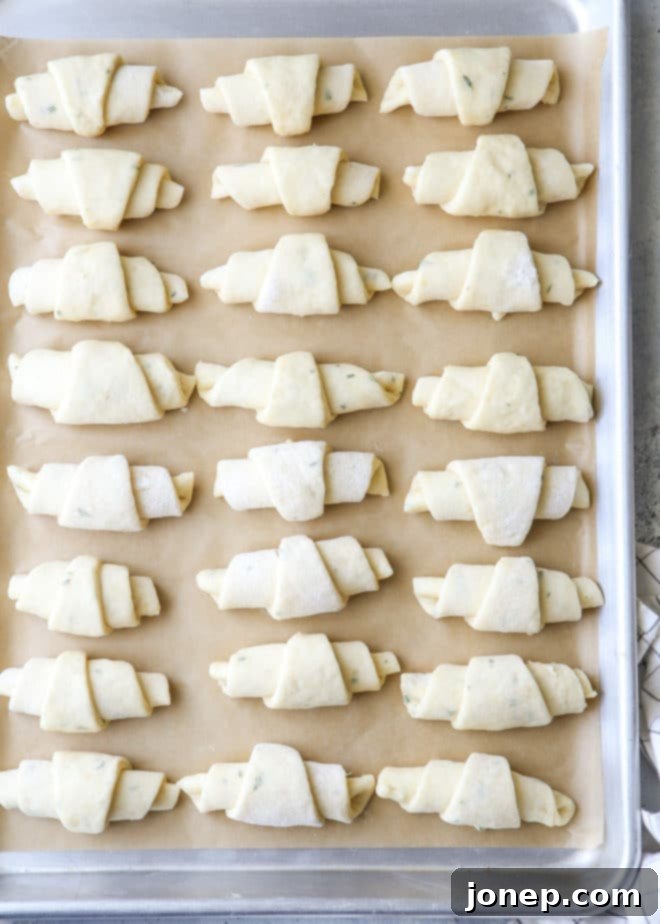
Starting from the wide end of each triangle, gently roll it up towards the pointed tip. Once rolled, lightly curve the ends to form the classic crescent shape. Place your shaped rolls into a lightly buttered baking pan, leaving a little space between each one to allow for their final rise.
6. Second Rise & Preheat Oven
Cover the baking pan with a kitchen towel and let the shaped rolls rise again in a warm spot for an additional 20-30 minutes. During this time, the rolls will become puffy and airy. About halfway through this second rise, preheat your oven to 375°F (190°C), ensuring it’s at the correct temperature when the rolls are ready to bake.
7. Bake to Golden Perfection
Bake the rolls in your preheated oven for approximately 20 minutes, or until they turn a beautiful golden brown and are cooked through. Keep an eye on them towards the end of the baking time, as oven temperatures can vary.
8. Brush with Garlic Herb Butter & Serve
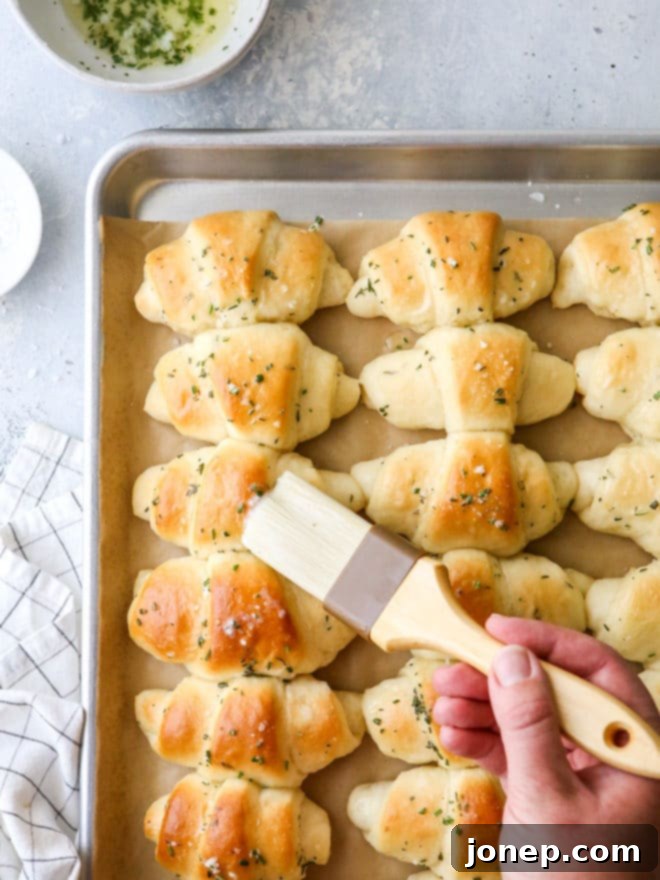
While the rolls are baking, prepare your garlic herb butter by combining the melted butter, minced garlic, and chopped fresh herbs. As soon as the hot rolls come out of the oven, brush them generously with this fragrant butter mixture. The warmth of the rolls will help the butter melt into every crevice, infusing them with even more savory flavor. Finish with a delicate sprinkling of flaky sea salt for an extra touch of perfection.
Then, all that’s left to do is savor every single bite! I can absolutely guarantee that these rolls are so incredibly delicious, they’ll disappear fast. Serve these garlic herb crescent rolls at your next holiday gathering, dinner party, or casual potluck. Everyone is sure to love them and ask for the recipe!
Make-Ahead Tips for Stress-Free Serving
Planning a big meal or just want to get ahead? These garlic herb crescent rolls can be prepared in advance, making your life much easier. Whether you want to prep the dough the night before or partially bake them, there are several clever strategies to ensure fresh, warm rolls without last-minute rush. For comprehensive guidance, explore my detailed tips on 4 ways to prepare rolls in advance, covering everything from refrigerating dough to freezing baked rolls.
Why These Garlic Herb Crescent Rolls Are a Must-Try
Beyond their incredible flavor and ease of preparation, these no-knead garlic herb crescent rolls offer a multitude of reasons to become a staple in your recipe collection:
- Unbeatable Flavor Profile: The combination of fresh garlic, aromatic rosemary, and earthy thyme creates a savory symphony that’s both comforting and exciting.
- Perfect Texture: Despite being no-knead, these rolls boast an incredibly soft, fluffy, and tender crumb that practically melts in your mouth, thanks to the careful balance of ingredients and proper rising.
- Effortless Elegance: They look sophisticated and taste gourmet, yet the no-knead method makes them accessible to bakers of all skill levels. They’re perfect for impressing guests without the stress.
- Versatile Pairing: These rolls complement an astonishing array of dishes. From hearty stews and roast chicken to light salads and pasta, they’re the perfect bread accompaniment.
- Crowd-Pleaser: Everyone loves a good dinner roll, and these garlic herb versions are universally adored. Expect rave reviews and requests for seconds!
- Homemade Goodness: There’s simply nothing like the taste and aroma of freshly baked bread, and these rolls deliver that comforting, homemade experience every time.
Tips for Perfect Rolls Every Time
Achieving bakery-quality rolls at home is simpler than you think with a few key tips:
- Yeast Temperature is Key: Ensure your warm water is between 105-115°F (40-46°C). Too hot and it kills the yeast; too cold and it won’t activate.
- Don’t Over-flour: When rolling out the dough, use just enough flour to prevent sticking. Too much flour will result in dry, dense rolls.
- Use Fresh Herbs and Garlic: While dried herbs can be substituted in a pinch (use 1/3 the amount of fresh), fresh garlic and herbs provide a much more vibrant and aromatic flavor.
- Don’t Skip the Butter Brush: Applying the garlic herb butter immediately after baking is crucial. The hot rolls absorb the butter, locking in moisture and flavor, and creating that irresistible sheen.
- Gentle Handling: After the dough has risen, handle it gently to preserve the air pockets that contribute to its light texture.
- Consistent Shape: Try to roll and cut your triangles as evenly as possible for consistent baking results.
- Storage: Store leftover rolls in an airtight container at room temperature for up to 3 days, or freeze for longer storage. Reheat gently in the oven or microwave.
Creative Variations to Explore
While the classic garlic herb combination is phenomenal, feel free to experiment and make these rolls your own:
- Cheesy Garlic Herb Rolls: Fold in a half cup of grated Parmesan, sharp cheddar, or Gruyère cheese when you add the flour.
- Spicy Kick: Add a pinch of red pepper flakes to the dough or the finishing butter for a subtle heat.
- Different Herb Blends: Experiment with other fresh herbs like chopped chives, oregano, or a touch of parsley for varied flavor profiles.
- Lemon Zest Infusion: A teaspoon of lemon zest can add a bright, zesty note that complements the herbs beautifully.
- Garlic Confit: For an even richer, mellow garlic flavor, use mashed garlic confit instead of raw minced garlic in the dough.
Other Delightful Roll Recipes to Try
If you’ve fallen in love with homemade rolls, here are a few more fantastic recipes from my kitchen to yours:
- No-Knead Fairy Crescent Rolls: The beloved original that inspired this savory twist.
- Potato Dinner Rolls: Incredibly soft and moist rolls thanks to the addition of mashed potato.
- Honey Whole Wheat Rolls: A wholesome yet tender option with a hint of natural sweetness.
- Sweet Potato Rolls with Honey Butter: A uniquely flavored roll, perfect for autumn and holiday tables.
Shop Essential Tools for This Recipe
To help you create these perfect garlic herb crescent rolls, here are some recommended tools that will make the process even smoother:

Garlic Herb Crescent Rolls
Pin Recipe
Leave a Review
Ingredients
Rolls
- 1 cup warm water (237 ml)
- 2 ¼ teaspoons active dry yeast (1 envelope)
- ½ cup unsalted butter , melted and cooled (1 stick, 113 grams)
- ⅓ cup granulated sugar (66 grams)
- 1 large egg
- 4 cups all-purpose flour (480 grams)
- ½ teaspoon baking powder
- 1 teaspoon salt
- 2 garlic cloves , minced
- 1 tablespoon chopped fresh rosemary and thyme
Garlic Herb Butter
- ¼ cup butter , melted
- 1 garlic clove , minced
- 1 teaspoon chopped fresh rosemary and thyme
- Flaky sea salt , for sprinkling
Instructions
-
Combine the warm water and yeast and allow to sit for five minutes until foamy.
-
In a large bowl, combine the yeast mixture, ½ cup melted butter, sugar, and egg. Add the flour, baking powder, salt, 2 minced garlic cloves, and 1 tablespoon chopped fresh herbs (rosemary and thyme). Stir with a wooden spoon until just combined and comes together into a wet, shaggy ball of dough.
-
Cover the bowl with a towel or plastic wrap and allow to rise in a warm place for 30 minutes, or until noticeably expanded.
-
Split the dough into two equal pieces and place one half back in the bowl, covered. On a lightly floured surface, roll out the other half of the dough to about 12-15 inches in diameter.
-
Use a knife or pizza wheel to cut the circle into 12 equal triangles. Starting with the wide end, roll up each triangle and shape into a crescent. Place the shaped rolls in a buttered baking pan. Repeat with the second half of dough.
-
Cover the baking pan with a towel and let the rolls rise again for an additional 20-30 minutes, until puffy. Meanwhile, preheat oven to 375°F (190°C).
-
Bake rolls until golden brown, about 20 minutes.
-
While rolls are baking, prepare the garlic herb butter: combine ¼ cup melted butter, 1 minced garlic clove, and 1 teaspoon chopped fresh herbs. Brush generously on the rolls right when they come out of the oven. Sprinkle with flaky sea salt.
-
Rolls will keep in an airtight container at room temperature for up to 3 days, or can be frozen for longer storage.
