Sausage Gravy Stuffed Biscuits: Your Ultimate Freezable & Portable Breakfast Solution
Say goodbye to chaotic mornings and hello to delicious, homemade convenience! These incredible buttermilk biscuits, generously stuffed with creamy, savory sausage gravy, offer a fantastic twist on a beloved classic. What’s even better? They are perfectly freezable and wonderfully portable, making them the ultimate make-ahead breakfast for even the busiest of weekdays.

This post is proudly sponsored by Challenge Butter.
Transform Your Mornings with Easy Stuffed Biscuits
As another school year kicks off, I find myself in that familiar sprint to get everyone ready before 8 AM. Gone are the days of leisurely breakfasts, morning cartoons, and staying in pajamas as long as we pleased. Now, it’s a race against the clock, and the struggle to find quick, satisfying, and wholesome breakfast options is real. If you’re a parent or anyone with a busy schedule, you know exactly what I’m talking about. Please tell me it gets easier, or better yet, let me share a recipe that makes it feel that way!
Last week, I shared my homemade buttermilk pancake mix – a great step towards simplifying breakfast. This week, I’m thrilled to introduce another game-changing shortcut: these amazing sausage gravy stuffed biscuits! Imagine the comforting flavors of classic biscuits and gravy, but in a convenient, handheld package. It’s truly a revelation for hectic mornings.


The Genius of Gravy on the Inside: A Delicious Twist
These aren’t just any biscuits; they’re a clever adaptation of my popular biscuits and gravy recipe, thoughtfully tweaked for ultimate ease and enjoyment. It took a few attempts to perfect, but the result is absolutely worth it. The idea of having rich, creamy sausage gravy baked directly inside a fluffy buttermilk biscuit is not only incredibly fun but also incredibly practical. My kids absolutely adored them, and I’m confident yours will too!
But the real magic of preparing biscuits and gravy in this unique way lies in their newfound superpower: they are now both **FREEZABLE and PORTABLE**. This is a complete game-changer for anyone looking to enjoy a wholesome, satisfying breakfast without the fuss of cooking from scratch every morning. No more messy plates or cutlery needed – just grab and go, making them ideal for busy families or individuals on the move.
Make-Ahead Breakfast Perfection: Freezable & Portable Sausage Gravy Biscuits
Picture this: a freezer stocked with these delicious gravy-stuffed biscuits, ready to rescue you on a busy morning. Just a few minutes in the microwave, and bam! You have a warm, hearty, homemade breakfast ready to fuel your day. Running late? No problem at all. These biscuits are designed to be taken with you. My husband, for instance, has become a big fan of grabbing one on his way out the door, turning a hurried exit into a moment of pure comfort.
I recently spent some time browsing the freezer aisle at my local grocery store, searching for quick breakfast options. What I found was, frankly, disheartening. So many products were loaded with excessive sugar, artificial preservatives, and a long list of ingredients I couldn’t pronounce. This experience further solidified my resolve to create more homemade, freezable, and genuinely wholesome breakfast solutions like these sausage gravy stuffed biscuits. It’s about offering real food made with simple, quality ingredients, directly to your table, or into your hand, no matter how busy life gets. These stuffed biscuits are the perfect example of how you can prioritize both health and convenience in your morning routine.


The Secret to Superior Flavor: Using Quality Ingredients, Like Challenge Butter
One of the aspects I love most about this recipe is its simplicity, requiring only 10 core ingredients. The quality of these ingredients makes all the difference, and that’s why I proudly use Challenge Butter. Challenge Butter is made with fresh, hormone-free milk from cows that are well-cared for, and it’s completely free of artificial flavors, dyes, or fillers. For me, using high-quality ingredients isn’t just a preference; it’s a cornerstone of good cooking and baking. I appreciate that Challenge Butter shares this commitment to purity and excellence, ensuring that every bite of these fluffy buttermilk biscuits is as delicious and wholesome as possible. The rich, creamy texture and superior flavor of Challenge Butter truly elevate the taste of both the biscuits and the gravy, making this comfort food experience unforgettable.

Essential Baking Tips for Perfect Stuffed Biscuits Every Time
baking tip:How to Freeze Biscuits and Scones for Future Enjoyment
Mastering the art of freezing biscuits and scones is a fantastic way to get ahead and enjoy fresh-baked goodness whenever the craving strikes. This technique is especially useful for these stuffed biscuits, ensuring you always have a convenient and delicious breakfast ready. You have two main options for freezing:
Option 1: Freeze Unbaked Dough to Bake Fresh Later
For ultimate freshness, prepare your unbaked biscuits or scones and arrange them on a sheet pan lined with parchment paper. If you plan to bake them within 24 hours, simply cover the pan tightly with plastic wrap and refrigerate. For longer storage, up to 1-2 months, transfer the frozen unbaked biscuits to a freezer-safe ziplock bag once they are solid. Don’t forget to label with the date! When you’re ready to bake, simply place them on a prepared baking sheet and follow your recipe’s baking instructions, adding a few extra minutes (usually 3-5 minutes) to account for them being frozen. This method yields the flakiest, freshest-tasting biscuits.
Option 2: Freeze Baked Biscuits or Scones for Quick Reheating
This method is perfect for incredibly fast breakfasts or snacks, especially for our stuffed biscuits. Allow your baked biscuits or scones to cool completely at room temperature. Once cooled, wrap them tightly individually or in groups with plastic wrap, then place them in a freezer-safe ziplock bag or airtight container. Label them with the date and freeze for up to 1 month. To serve, you can thaw them at room temperature for a quick bite, or for that warm, just-baked feel, reheat them in a preheated 350°F (175°C) oven for 10-15 minutes until they are thoroughly warmed through and slightly crisp again. For an even quicker reheat, a microwave works wonders in about 2 minutes.

Instructions
Step-by-Step Gravy Preparation:
-
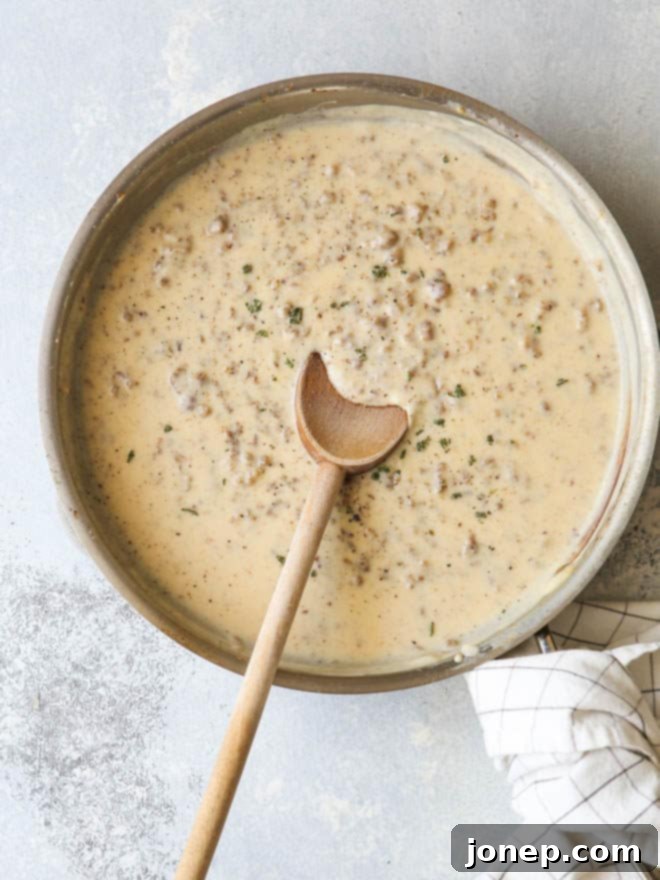
In a large skillet, cook the bulk country breakfast sausage over medium-high heat. Break it up into small, pea-sized pieces as it browns and cooks through. Once fully cooked, transfer the sausage to a plate lined with paper towels to drain any excess grease. This step ensures your gravy isn’t too oily and has the perfect texture.
-
Return the skillet (with any remaining flavorful drippings, if desired) to the heat. Melt the Challenge butter in the skillet. Once melted, add the all-purpose flour and whisk constantly for 1-2 minutes to create a light roux. This forms the essential base of your creamy, rich gravy.
-
Gradually add the milk, a little at a time, while continuously whisking to prevent any lumps from forming. Continue whisking until all the milk is incorporated and the gravy becomes smooth and starts to thicken. Season generously with coarse salt and ground black pepper to taste, adjusting to your preference. Cook for an additional 1-2 minutes until the gravy reaches your desired thickened consistency. Finally, stir in the drained cooked sausage, ensuring it’s evenly distributed throughout the creamy mixture.
-
Transfer the finished sausage gravy to a shallow dish and chill it in the freezer for approximately 15 minutes. This quick freeze will help the gravy firm up significantly, making it much easier to scoop and effectively stuff into the biscuits without it becoming too runny or soaking into the dough prematurely. Begin preparing your biscuit dough while the gravy chills.
Crafting and Stuffing the Buttermilk Biscuits:
-
Preheat your oven to 400°F (200°C). Prepare a large sheet pan by lining it with parchment paper or lightly greasing it with butter to prevent any sticking and ensure easy cleanup.
-
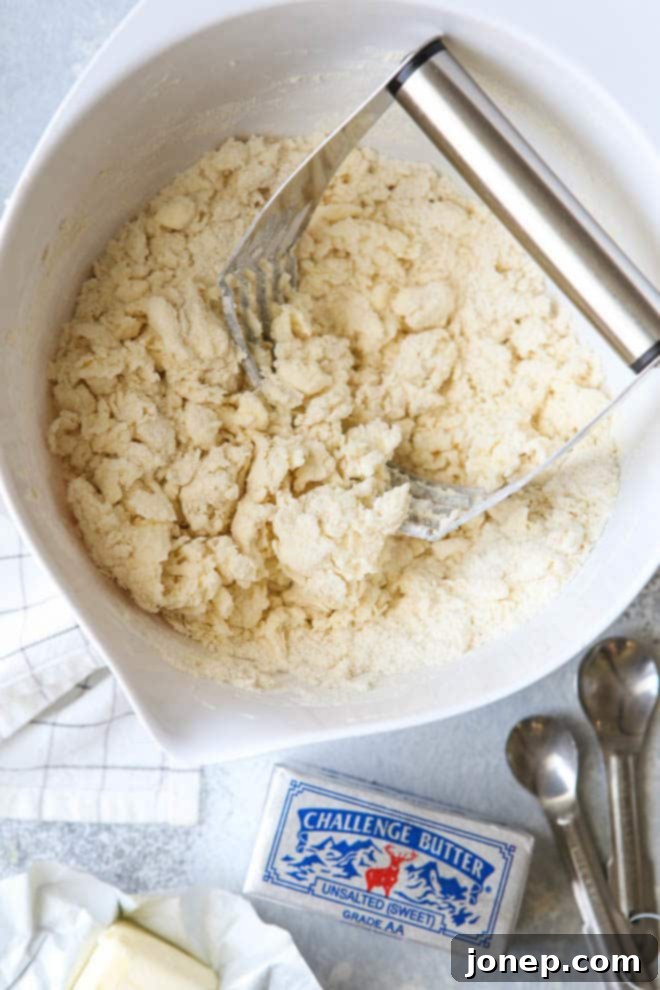
In a spacious mixing bowl, combine the all-purpose flour, baking powder, baking soda, and coarse salt. Add the cold, cubed Challenge unsalted butter to the dry ingredients. Using a fork or a pastry blender, cut the butter into the flour mixture until it resembles coarse crumbs with some pea-sized pieces of butter remaining. This step is crucial for creating the signature flaky layers in your biscuits!
-
Pour in the cold buttermilk. Use a spoon initially, then switch to your hands to gently bring the dough together. Be careful not to overmix! Turn the mixture out onto a clean, lightly floured surface and knead it just a few times until any dry bits are incorporated and the dough comes together into a cohesive mass. The dough might seem quite dry after adding the buttermilk, and you may be tempted to add more liquid, but resist! A few gentle kneads with your hands will bring it to the perfect, slightly shaggy consistency.
-
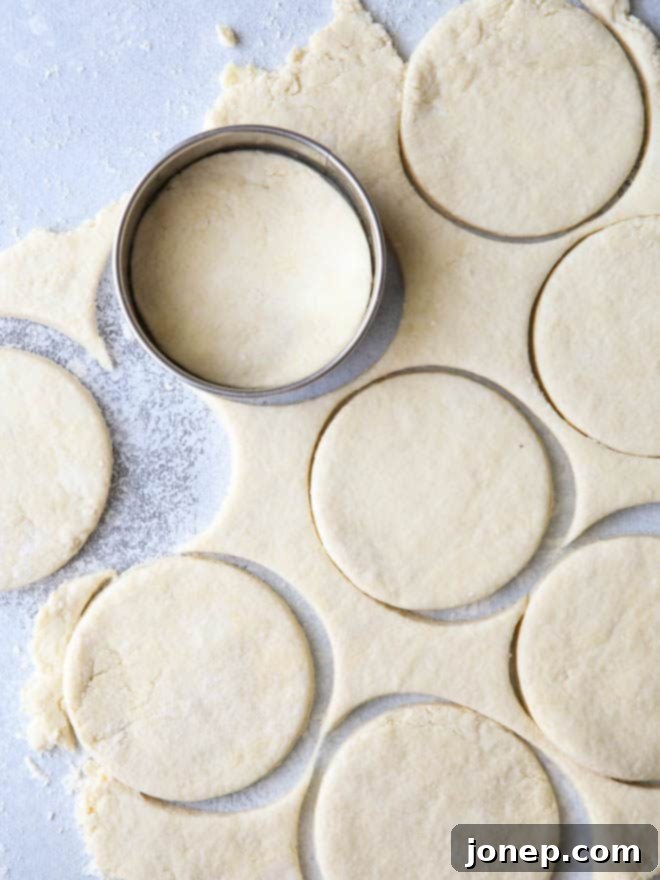
Lightly flour your work surface once more and roll the biscuit dough out to an even 1/2 inch thickness. This consistent thickness is key for uniform baking.
-
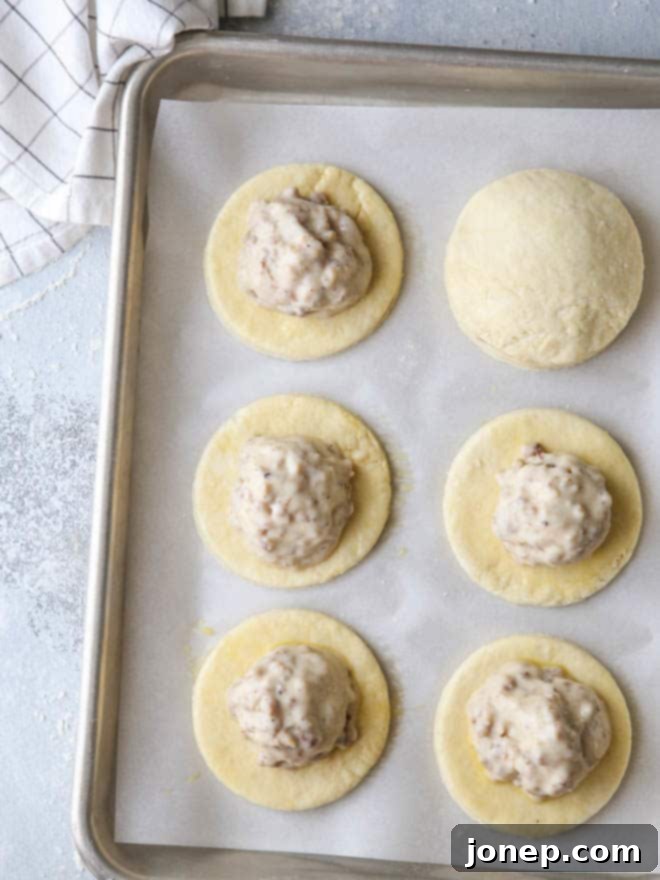
Using a 3-inch round cutter, cut out 12 biscuit rounds. Carefully place half (6 rounds) of the cut biscuits onto your prepared sheet pan, ensuring they are slightly spaced apart. In a small bowl, whisk together the large egg and 1 teaspoon of water to create an egg wash. Lightly brush the tops of the biscuits already on the pan with this egg wash; this will help the top biscuit adhere.
-
Now for the stuffing! With a spoon or a small cookie scoop, place a generous dollop (about 2 tablespoons) of the chilled, firm sausage gravy onto the center of each biscuit round on the pan. The gravy should be firm enough to hold its shape well. If it still feels too loose, pop it back into the freezer for a few more minutes until it’s more solid – this prevents leakage.
-
Take the remaining 6 biscuit rounds and gently stretch each one out a bit with your fingers, making them slightly larger in diameter. Brush the underside of these stretched biscuits with egg wash (this acts as a “glue” for sealing) and carefully place them egg wash-side down on top of the gravy-filled biscuits. Gently but firmly press the edges of the top and bottom biscuit rounds together all around, completely sealing the delicious sausage gravy inside. Ensure there are no gaps for the gravy to escape during baking.
-
Brush the tops of the sealed, stuffed biscuits with more egg wash for a beautiful, glossy golden-brown finish once baked. Bake in the preheated oven for 22-25 minutes, or until the biscuits are gorgeously golden brown and cooked through, and the gravy inside is heated. Serve these glorious sausage gravy stuffed biscuits immediately for the best experience, or allow them to cool completely. Once cooled, store them well-wrapped in the fridge for up to 3 days, or individually wrapped in the freezer for up to 1 month, ready for a quick and satisfying breakfast whenever you need one!
Helpful Notes & Tips for Stuffed Biscuits
- You might find yourself with a bit of leftover sausage gravy. Don’t let this flavorful excess go to waste! It’s fantastic spooned over any extra plain baked biscuits, a slice of buttered toast, or even alongside scrambled eggs before serving, if desired.
- To reheat these delightful stuffed biscuits from frozen, simply place one in the microwave and heat on high for approximately 2 minutes, or until thoroughly warmed through. For a crispier exterior, you can also reheat them in a preheated oven at 350°F (175°C) for 15-20 minutes (after thawing slightly), or until heated through to your liking.
- For the flakiest, most tender biscuits, always ensure your butter and buttermilk are as cold as possible. Cold ingredients prevent the butter from melting too quickly into the dough, which is essential for creating those wonderful steam pockets that result in a light, airy texture.
- Avoid overworking the biscuit dough at all costs. Over-kneading can develop the gluten too much, leading to tough, dense biscuits instead of the tender, melt-in-your-mouth kind. Just a few gentle folds are all it takes to bring the dough together.
- If you don’t have buttermilk on hand, you can easily make a substitute by adding 1 tablespoon of white vinegar or lemon juice to a measuring cup, then filling the rest of the way to 1 cup with regular milk. Let it sit for 5-10 minutes until it slightly curdles before using.
Recommended Tools for Making Delicious Stuffed Biscuits
(Affiliate links below)
Disclosure: This delicious recipe was created in partnership with Challenge Dairy, Inc. as part of a long-term ambassadorship. My sincere thanks for supporting the partnerships with brands I truly love and believe in, which are essential in making Completely Delicious possible. All opinions and culinary insights shared are always 100% my own. To discover more about Challenge Dairy and their commitment to quality, you can visit their official website here. You can also connect with them on social media: Facebook, Instagram, YouTube, and Pinterest.
