Homemade Peach Apple Galette: The Ultimate Late Summer & Fall Dessert
As summer’s sweet bounty of peaches begins to wane and the crisp promise of autumn apples fills the air, there’s a magical dessert that perfectly bridges the seasons: the Peach Apple Galette. This incredibly easy and utterly delicious recipe is a simple pleasure to prepare and an absolute showstopper for any gathering, from casual backyard BBQs to elegant fall dinner parties.
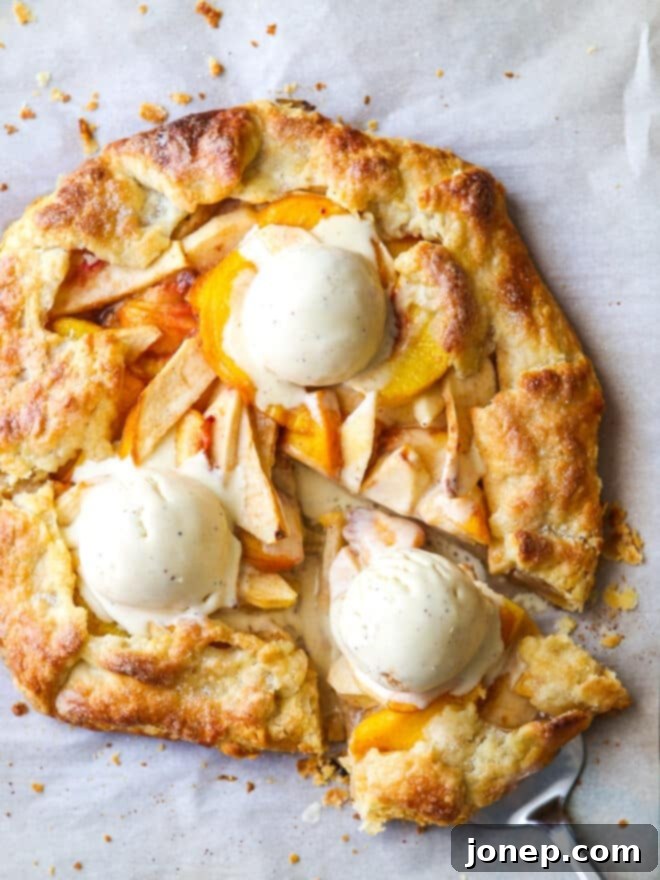
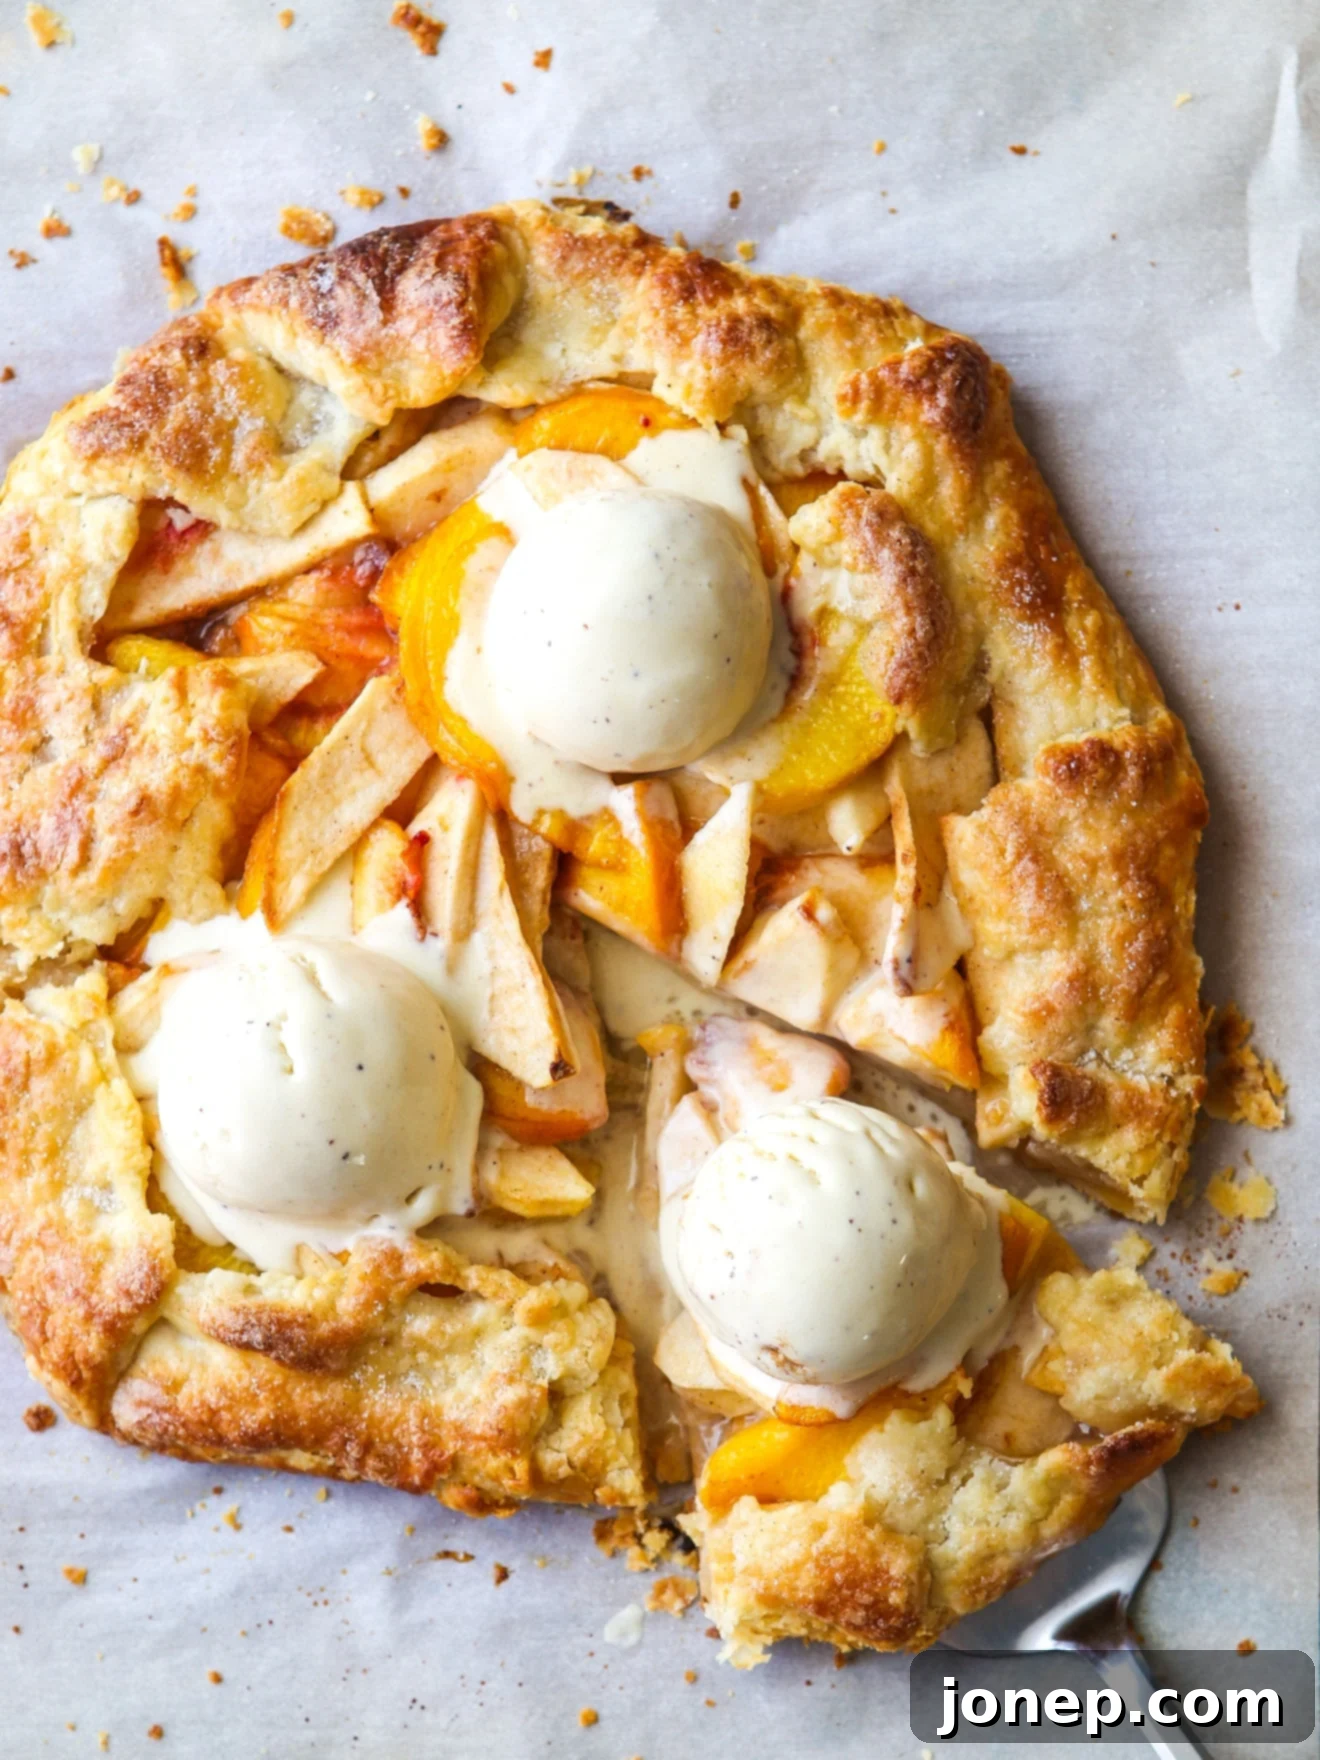
For me, this peach apple galette is a seasonal ritual, my absolute favorite dessert to bake in the transitional months of August and September. It’s when the last of the juicy, sun-ripened peaches are still available, just as the first crunchy, tart apples make their grand entrance. The harmonious blend of sweet peaches and slightly tangy apples, warmly spiced with cinnamon, all nestled within a buttery, flaky, homemade (or high-quality store-bought!) pastry crust, is truly divine. And if you want to elevate it to pure dessert heaven, a generous scoop of creamy vanilla ice cream melting over a warm slice is an absolute must-try experience! The combination of peaches, apples, and cinnamon inside a flaky all-butter pastry is so incredibly delicious, especially with a scoop of vanilla ice cream!
One of the many reasons to adore this rustic pie is its straightforward nature. It requires just a handful of essential ingredients – typically six core items for the filling and crust – and comes together with minimal fuss. If you’re a seasoned baker who keeps an extra pie crust stashed in your freezer, preparing this galette becomes a lightning-fast affair. It’s the perfect spontaneous treat, whether you’re whipping up something special for an outdoor dinner party with friends or simply craving a comforting dessert on a cozy weeknight. Every time I share this late-summer, early-fall delight with guests, it disappears in record time – it’s truly a crowd-pleaser that everyone raves about!
Table of Contents
- The Charm of a Rustic Galette
- Essential Ingredients for Your Peach Apple Galette
- Peeling Peaches and Apples: To Peel or Not to Peel?
- Step-by-Step: How to Make This Peach Apple Galette
- Expert Tips for a Perfect Galette
- Get the Full Peach Apple Galette Recipe

baking tip:What is a galette?
Essential Ingredients for Your Peach Apple Galette
Crafting this delightful peach apple galette requires a few high-quality, yet easily accessible ingredients. Each component plays a vital role in achieving that perfect balance of sweet, tart, and flaky texture. Below is a detailed list of everything you’ll need to bake this incredible dessert (you’ll find the full, precise recipe measurements and instructions at the bottom of this article):
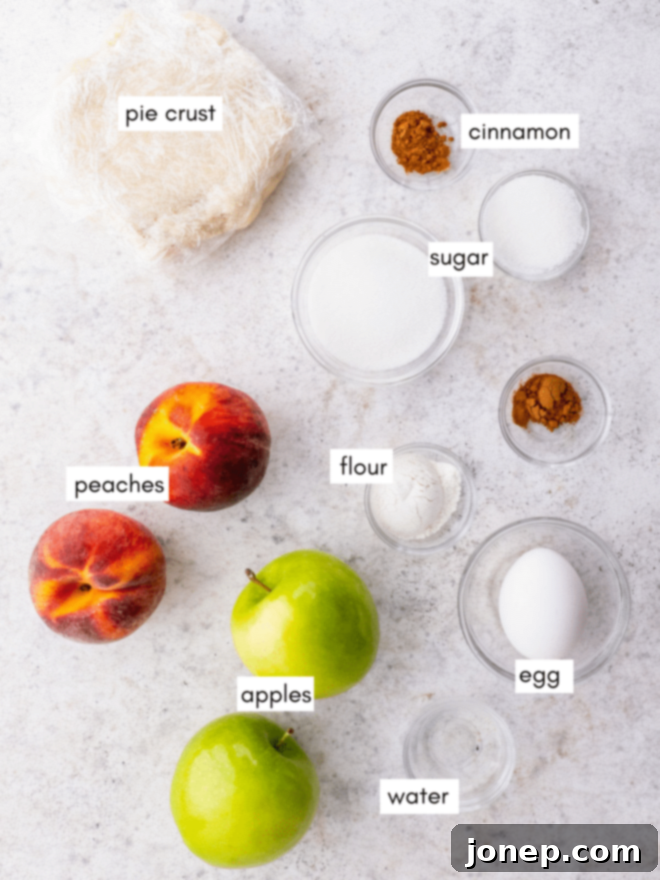
- Single Pie Crust: This is the foundation of your galette. Whether you opt for a homemade, all-butter pie crust for ultimate flakiness and flavor, or a high-quality store-bought crust for convenience, ensure it’s cold and ready to be rolled. A good, flaky crust provides the perfect contrast to the soft fruit filling.
- Fresh Peaches: Choose ripe, fragrant peaches that are slightly firm. They should yield a little when gently squeezed but not be mushy. The natural sweetness and juiciness of fresh peaches are irreplaceable, adding a burst of summer flavor to every bite. Freestone varieties are often easier to work with.
- Fresh Apples: The best apples for baking are those that hold their shape and offer a good balance of tartness. Varieties like Granny Smith, Honeycrisp, Fuji, or Braeburn work wonderfully, providing a firm texture and a complementary tang to the sweet peaches. A mix of sweet and tart apples can add complexity.
- Granulated Sugar: This sweetens the fruit filling and helps to create that delicious, bubbling syrup. Adjust the amount based on the sweetness of your fruit and personal preference.
- All-Purpose Flour: A small amount of flour is crucial for thickening the fruit juices, preventing a soggy galette. It acts as a binder, ensuring the filling stays perfectly jammy and contained within the crust, rather than becoming watery.
- Ground Cinnamon: The quintessential spice for autumn and fruit desserts. Cinnamon adds a warm, aromatic depth that beautifully complements both peaches and apples, enhancing their natural flavors and adding a cozy, inviting aroma to your kitchen.
- Egg and Water (for Egg Wash): A simple egg wash (one large egg beaten with a tablespoon of water) brushed over the crust before baking provides a beautiful golden-brown sheen and a slightly crispier texture, making your galette look as professional as it tastes.
Quick Tip: The quality and freshness of your fruit truly make a difference in this recipe. Select the ripest, most flavorful peaches and apples you can find for an unparalleled taste experience!
Peeling Peaches and Apples: To Peel or Not to Peel? That is the Question!
When preparing your peaches and apples for this galette, one common question arises: should you peel them? The answer, delightfully, is entirely up to your personal preference! Both approaches yield a delicious result, but they do impact the final texture and appearance of your dessert.
Leaving the skins on both the peaches and apples offers the easiest and quickest assembly, saving you valuable prep time. This rustic approach contributes to a more homemade, unrefined look, which perfectly suits the charming nature of a free-form galette. Furthermore, fruit skins are packed with beneficial nutrients and fiber, so keeping them on adds a healthy boost. The skins can also help the fruit maintain a bit more structure during baking, preventing it from becoming overly soft or mushy. However, some people find the texture of cooked fruit skins a bit chewy or simply prefer a smoother, more uniform filling. It truly is a matter of individual taste, so feel free to choose what you enjoy most.
If you decide to go for a smoother, peel-free filling, here’s how to tackle each fruit:
To peel the apples: This is usually the simpler task. Grab a sharp vegetable peeler and carefully remove the skins. Work systematically around the apple until all skin is removed. You can also use a small paring knife for this if you prefer, especially for any stubborn bits.
To peel the peaches: Peaches have a more delicate skin that can be trickier to remove cleanly with a peeler. The easiest and most effective method for peeling peaches involves a quick blanching process:
- Using a sharp knife, carefully score a small “x” at the bottom of each peach. This small cut will help the skin separate easily after blanching.
- Bring a pot of water to a rolling boil. Carefully immerse the peaches into the boiling water for about 30 to 60 seconds. You’ll often notice the skin around the “x” begin to pucker and loosen.
- Immediately transfer the blanched peaches to a bowl filled with ice water. This “shocking” process stops the cooking, preserves the fruit’s texture, and further helps the skin separate from the flesh.
- Once the peaches are cool enough to handle, use your fingers to easily peel off the skins, starting from the “x” at the bottom. The skins should slip off effortlessly.
Whichever method you choose, ensure your fruit is sliced thinly and uniformly. This consistency is key for even baking and a delightful, consistent texture throughout your finished peach apple galette.
Step-by-Step: How to Make This Peach Apple Galette
Making this peach apple galette is a wonderfully straightforward process, perfect for bakers of all experience levels. Follow these simple steps to create a beautiful and delicious rustic fruit tart that will impress everyone:
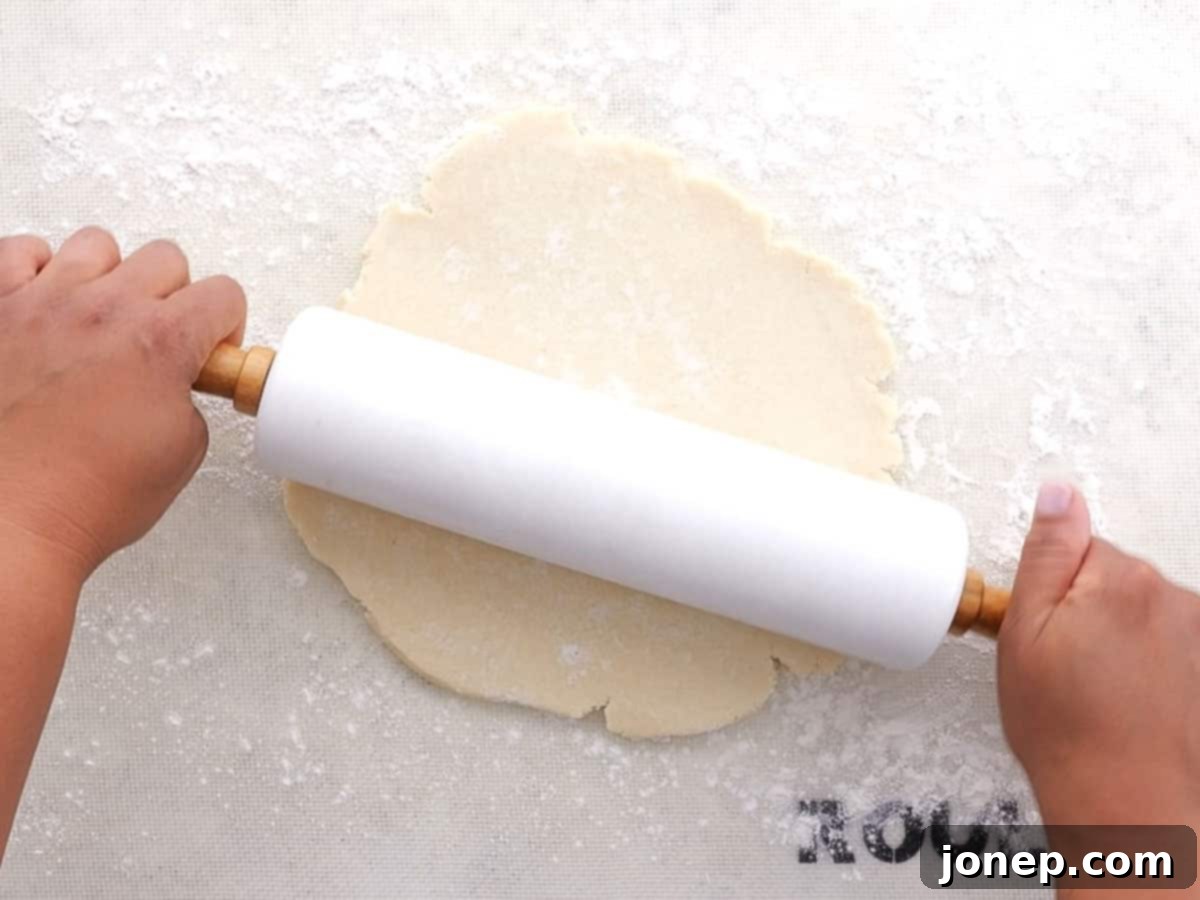
- Prepare and Roll Out Your Pie Crust. Begin by lightly flouring a clean work surface to prevent sticking. Place your chilled single pie dough in the center and, using a rolling pin, gently roll it out into a rough 12-inch circle. Don’t worry about achieving a perfectly symmetrical circle – the charm of a galette lies in its rustic, free-form nature! Aim for a thickness of about 1/8 to 1/4 inch, ensuring it’s not too thin to tear. Carefully transfer your rolled-out dough to a baking sheet that you’ve lined with parchment paper. This parchment paper will prevent sticking and make cleanup a breeze after baking.

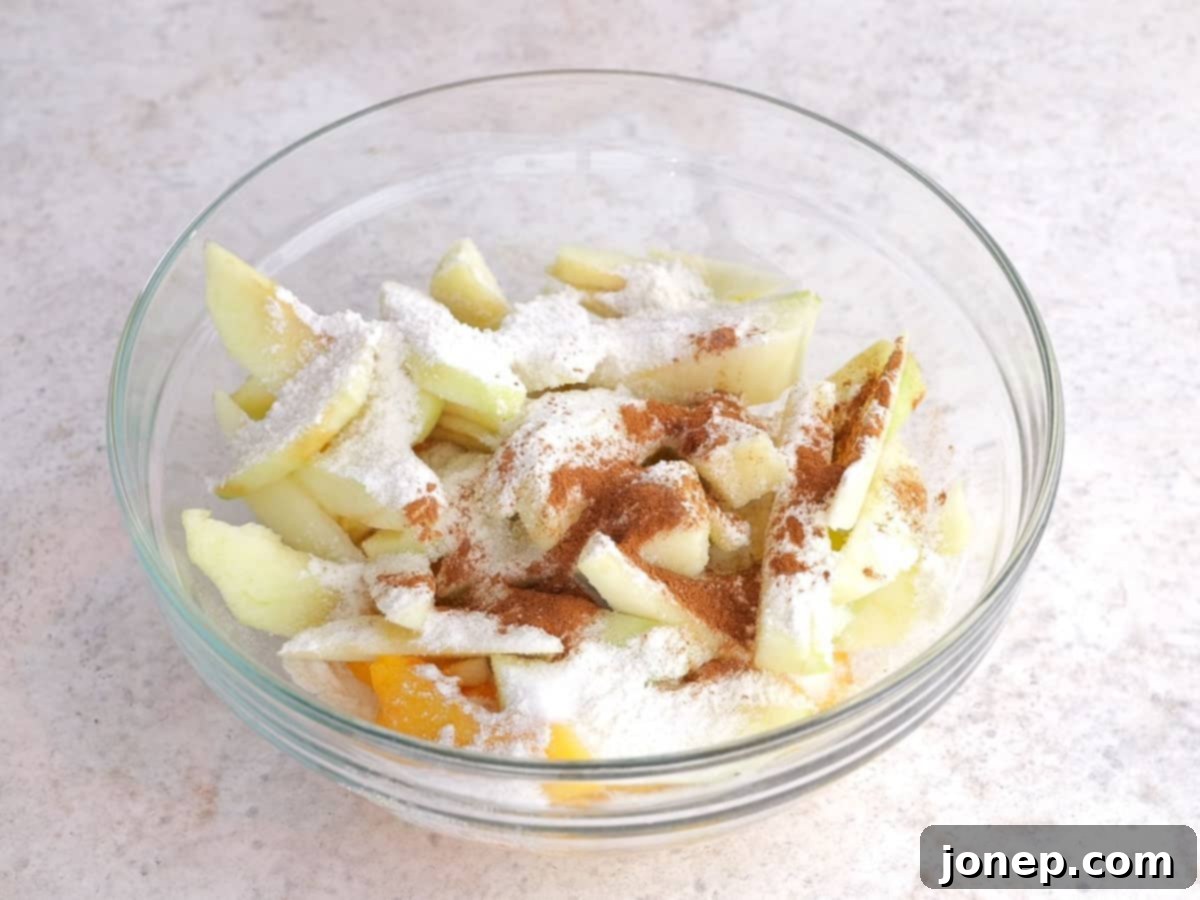
- Prepare the Fruit Filling. In a large mixing bowl, combine your thinly sliced peaches and apples. Add the granulated sugar, all-purpose flour, and ground cinnamon. Gently toss everything together using a spatula or your hands until the fruit is evenly coated with the sugar and spice mixture. This coating not only flavors the fruit but also helps to thicken the juices released during baking, preventing a soggy bottom crust. Important Note: It’s crucial to perform this step right before you plan to assemble the galette. If the fruit sits with the sugar for too long, it will release excessive juices, which can lead to a watery filling and a soggy crust. Timing is key for a perfectly jammy, not watery, filling.

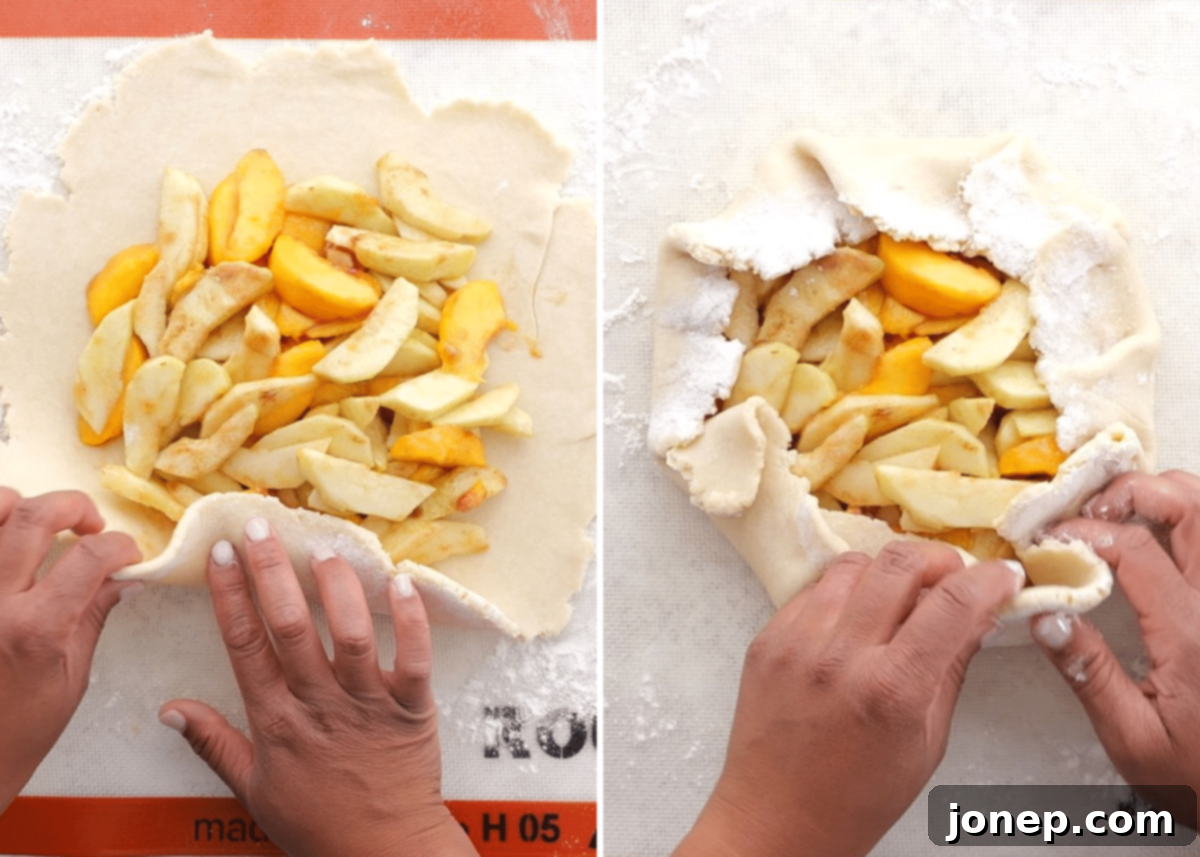
- Assemble Your Rustic Galette. Carefully pour the prepared fruit mixture into the center of your rolled-out pie crust. Arrange the fruit in an even layer, ensuring it’s not too piled up in one spot, and leaving a clear border of about 2 inches around the edges of the dough. This border is essential for folding the crust. Now, comes the fun, rustic part! Begin to gently fold the edges of the pie crust up and over the fruit filling, working your way around the circle in sections. Pleat the dough as you go, creating a natural, imperfect, and charmingly rustic look. Remember, a galette is meant to be free-form, so don’t strive for absolute perfection; embrace the homemade aesthetic!

- Bake to Golden Perfection. In a small bowl, whisk together the large egg and one tablespoon of water to create your egg wash. Lightly brush this mixture generously over the exposed edges of the pie crust. This will give your galette a beautiful golden-brown color and a lovely subtle shine as it bakes. If you like, you can sprinkle the crust with a bit of extra granulated sugar and a dash of cinnamon (or the optional cinnamon-sugar topping) for added sparkle, sweetness, and flavor. Carefully transfer the baking sheet with your assembled galette to a preheated 400°F (200°C) oven. Bake for approximately 30-35 minutes. You’ll know it’s done when the crust is a deep golden brown, and the fruit filling in the center is visibly bubbling and luscious. This bubbling indicates that the internal temperature has reached the point where the fruit juices have thickened properly.
- Cool and Serve with Delight. Once baked, carefully remove the galette from the oven. It will be very hot and the filling still quite loose. Allow it to cool on the baking sheet for at least 10-15 minutes (or even longer for easier slicing) before attempting to slice and serve. This crucial cooling time allows the filling to set further and makes for cleaner slices. While delicious on its own, a warm slice of peach apple galette truly shines when topped with a dollop of freshly whipped cream or a scoop of creamy vanilla ice cream. The delightful contrast of warm, spiced fruit and cool, rich dairy is simply irresistible. Enjoy this seasonal treat, a perfect ending to any meal!
Expert Tips for a Perfect Peach Apple Galette
While this peach apple galette recipe is designed to be straightforward, a few expert tips can elevate your baking experience and ensure a consistently perfect result every time. From mastering the crust to selecting the best fruit, these insights will help you create a truly unforgettable dessert.
- Mastering the Pie Crust – Homemade vs. Store-Bought: The crust is the backbone of any great galette, providing that essential flaky contrast to the soft fruit filling. While a good quality store-bought crust offers fantastic convenience and is perfectly acceptable, making your own can be incredibly rewarding and add an extra layer of flavor and texture. I have a wealth of resources to help you achieve pie crust perfection:
- For a classic, rich, and tender base, try my foolproof method for making an all-butter pie crust. The key here is using very cold butter, cutting it into the flour quickly, and not overworking the dough to ensure maximum flakiness.
- If you’re looking for a slight tang and even more tender texture, my favorite buttermilk pie crust variation is a must-try. Buttermilk adds a subtle depth of flavor that complements fruit fillings beautifully.
- Pressed for time but still want homemade? Learn how to make a quick pie crust in a food processor. This method significantly cuts down on prep time without sacrificing quality or that delicious homemade taste.
Whichever route you choose, ensure your pie crust is well-chilled before rolling; this helps prevent shrinkage during baking and maintains optimal flakiness.
- Selecting the Best Apples for Baking: Not all apples are created equal when it comes to baking. For a galette, you want varieties that will hold their shape, offer a good balance of tartness, and not turn into mush when cooked. Excellent choices include Granny Smith (classic tartness and firm texture), Jonagold (sweet-tart, great flavor balance), Jonathan (tangy, firm), Gala (mildly sweet, crisp), Honeycrisp (sweet, incredibly crisp texture), and Pink Lady/Cripps Pink (sweet-tart, firm, and holds up well). Using a mix of a tart apple (like Granny Smith) and a sweeter one (like Honeycrisp or Gala) can add wonderful complexity and depth of flavor to your filling.
- Choosing the Perfect Peaches: For the best results, opt for fresh, ripe peaches that are still slightly firm to the touch. Overly soft or bruised peaches will release too much liquid, potentially leading to a soggy crust, and may become overly mushy during baking. A firm-ripe peach will hold its shape better and provide a delightful textural contrast with the apples. Freestone peaches are generally easier to pit and slice, saving you some effort during preparation.
- Knowing When Your Galette is Perfectly Done: There are two key indicators to look for to ensure your galette is baked to perfection:
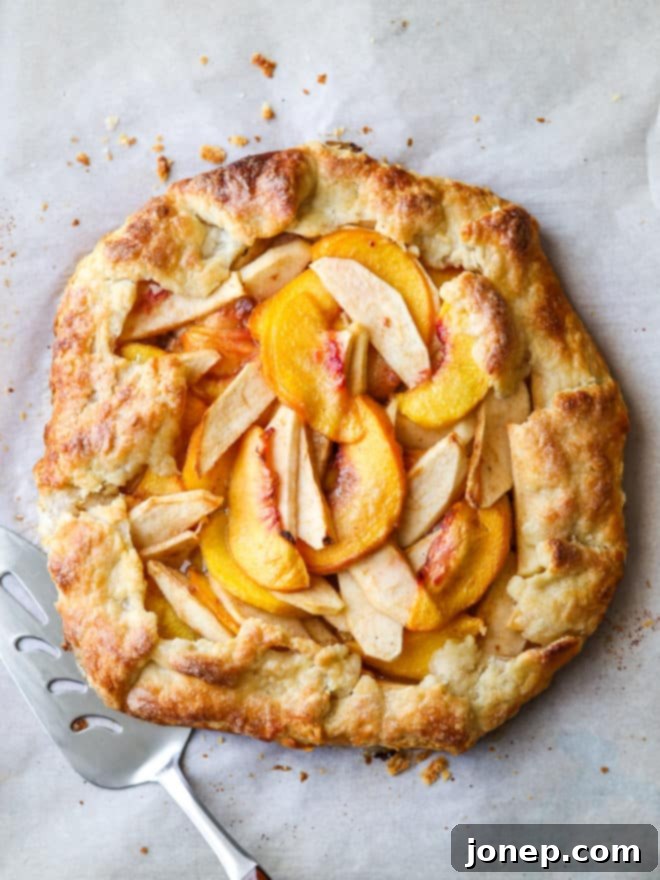
- Golden-Brown Crust: The pastry edges should be a deep, rich golden brown. This color signifies that the crust is fully baked through, crisp, and will have that desirable buttery flavor.
- Bubbling Filling: The fruit filling in the center should be visibly bubbling and thick. This bubbling confirms that the internal temperature has reached a point where the flour has fully activated its thickening properties, resulting in a perfectly set, jammy filling rather than a watery one.
If your crust appears to be browning too quickly before the filling is ready, you can loosely tent the galette with a piece of aluminum foil for the remaining baking time to prevent over-browning.
- How to Store Your Baked Galette: Once completely cooled to room temperature, store any leftover galette in the refrigerator, loosely covered with plastic wrap or aluminum foil. This helps maintain its freshness and prevents it from drying out. It will maintain its best quality for 2-3 days. While delicious cold, it’s often even better warmed up slightly.
- Reheating Your Galette for Optimal Enjoyment: To bring back that fresh-baked warmth and crispness, preheat your oven to 350°F (175°C). Place the whole galette (or individual slices) on a baking sheet. If reheating a whole galette, cover it loosely with aluminum foil for the first 15-20 minutes to prevent the crust from over-browning. Remove the foil for the last 5-10 minutes to allow the crust to crisp up again. Reheat until warmed through, about 20-30 minutes for a whole galette, or 10-15 minutes for individual slices.
- Variations and Customizations: Don’t hesitate to personalize your galette to suit your taste! A pinch of freshly grated nutmeg or a tiny splash of vanilla extract can further enhance the fruit flavors. For added texture and nutty flavor, consider sprinkling a tablespoon of finely chopped nuts (like almonds, pecans, or walnuts) over the fruit before folding the crust. For a beautiful crunchy finish, brush the crust with an egg wash and then sprinkle generously with turbinado sugar (raw cane sugar) before baking. A hint of lemon zest tossed with the fruit can also brighten the flavors beautifully.
Get the Full Peach Apple Galette Recipe
Ready to bake this seasonal masterpiece? Below you’ll find the complete, printable recipe card with all the precise measurements and detailed instructions you need to create your own delicious Peach Apple Galette. Gather your ingredients, and let’s get baking!

Peach Apple Galette
Pin Recipe
Leave a Review
Ingredients
- One single-crust pie crust recipe (homemade or store-bought)
- 2 (255 grams) large peaches , peeled (optional) and thinly sliced
- 2 (170 grams) large apples , peeled (optional) and thinly sliced (e.g., Granny Smith, Honeycrisp)
- ¼ cup (50 grams) granulated sugar
- 1 tablespoon all-purpose flour
- ¼ teaspoon ground cinnamon
- 1 large egg + 1 tablespoon water , for egg wash
Optional topping:
- 1 tablespoon granulated sugar
- ½ teaspoon ground cinnamon
- Ice cream or whipped cream , for serving
Instructions
-
Preheat oven to 400°F (200°C). Line a large baking sheet with parchment paper. This preparation ensures easy transfer and cleanup, preventing the galette from sticking.
-
On a lightly floured surface, carefully roll out the single pie crust dough to a rough 12-inch circle. The shape doesn’t need to be perfectly symmetrical, as the rustic aesthetic is part of the galette’s charm. Once rolled, gently transfer the dough to your prepared baking sheet.
-
In a large bowl, combine the thinly sliced peaches and apples. Add the granulated sugar, all-purpose flour, and ground cinnamon. Toss gently to ensure all the fruit is evenly coated. Spoon this delicious fruit mixture into the center of the pie crust, leaving a generous 2-inch border around the edges completely clear.
-
Carefully fold the edges of the pie crust up and over the fruit filling, pleating the dough as you go to create a charming, rustic edge. Once folded, brush the exposed crust with the prepared egg wash (1 large egg whisked with 1 tablespoon water). If desired, sprinkle the brushed crust with the optional cinnamon sugar topping for extra sparkle and flavor.
-
Bake in the preheated oven for 30-35 minutes, or until the crust is beautifully golden brown and the fruit filling is visibly bubbling and tender in the center. This bubbling indicates the filling has cooked through and thickened to perfection. Serve the galette hot or at room temperature. For an extra special treat, top individual slices with creamy vanilla ice cream or a dollop of freshly whipped cream. Enjoy your homemade delight!
Video
Notes
- Crust Flexibility: Don’t feel limited to homemade! Feel free to use your favorite store-bought pie crust for a convenient and equally delicious galette. Just ensure it’s a single crust rolled out to the appropriate size (about 12 inches in diameter).
- Fruit Firmness for Best Results: Since apples tend to be firmer and maintain their structure better during baking than peaches, it’s beneficial to select peaches that are ripe but still a little firm. This helps ensure that both fruits cook evenly and achieve a harmonious, tender, but not mushy, texture in your finished galette. Avoid overly soft or bruised peaches that are too ripe.
- Preventing a Soggy Bottom: To help prevent the bottom crust from becoming soggy, especially if your fruit is extra juicy, you can lightly sprinkle a teaspoon of breadcrumbs, crushed cornflakes, or finely ground nuts (like almond flour) over the bottom of the crust before adding the fruit filling. This creates a barrier that absorbs excess moisture. Alternatively, you can pre-bake or “blind bake” your pie crust for about 10-15 minutes before adding the filling, though this step is often skipped for a rustic galette.
This recipe was originally published September 2017.
