The Ultimate Guide to Baking Flaky Vanilla Bean Scones
Prepare yourself for an unforgettable baking experience with these classic vanilla bean scones. Imagine a pastry that is light, incredibly buttery, and boasts a wonderfully soft and flaky texture, all infused with the purest vanilla flavor. What makes them even better? They’re surprisingly easy to make, requiring only about 30 minutes from start to finish with basic ingredients you probably already have in your pantry. These delightful treats are more than just a recipe; they’re an invitation to bring a touch of simple elegance and exquisite taste into your home.

There’s a timeless appeal to simplicity, and nowhere is this more evident than in these vanilla bean scones. They are unfussy, inherently classy, and profoundly delicious. Whether you’re planning a lavish breakfast, a leisurely brunch, or simply craving a sweet snack or an afternoon treat, this scone recipe is an absolute masterpiece ready to be enjoyed any time of day! It’s the kind of recipe that quickly becomes a cherished staple, offering comfort and joy with every delicate bite.
Table of Contents
- Why You’ll Love Baking These Vanilla Bean Scones
- What Exactly Are Scones? An American Perspective
- Essential Ingredients for Your Vanilla Scones
- Vanilla Bean Paste vs. Vanilla Beans and Vanilla Extract: Choosing Your Flavor
- How to Make These Irresistible Scones: A Step-by-Step Guide
- Vanilla Scone Recipe FAQs
- Delicious Scone Variations to Try
- Explore More Scone Recipes
- Get This Vanilla Bean Scones Recipe
Why You’ll Love Baking These Vanilla Bean Scones
In the vast world of baked goods, scones are often seriously underrated. But once you bite into one of these heavenly vanilla bean scones, you’ll understand their magic. Here are compelling reasons why you should whip up a batch of these easy vanilla scones as soon as possible:
- Irresistible Buttery Texture and Flavor: Each scone is a testament to the perfect balance of rich butteriness, offering a melt-in-your-mouth experience that is both tender and delightfully flaky.
- An Abundance of Pure Vanilla: If you are a true vanilla enthusiast, prepare to be delighted! These scones are packed with intense vanilla flavor, not just in the dough but also generously infused into the sweet, drizzly icing. It’s a double dose of fragrant goodness.
- Quick and Effortless Preparation: Don’t let their elegant appearance fool you. These scones are incredibly fast to make, with a total time of approximately 30 minutes from mixing bowl to cooling rack, making them perfect for spontaneous baking cravings.
- Convenient for Planning Ahead: Need to save time? This recipe is incredibly versatile for meal prepping. You can easily prepare the dough in advance or even freeze unbaked scones, ensuring a fresh batch is always just a quick bake away.
Looking for a savory alternative? You might want to try my classic savory scones recipe! These are loaded with sharp cheese, fresh scallions, and crispy bacon for a delightful savory twist on the traditional scone.

What Exactly Are Scones? An American Perspective
In the simplest terms, American scones can be thought of as the richer, sweeter, and more indulgent cousin to the classic American biscuit. While their British counterparts are often less sweet and served with jam and clotted cream, American scones typically incorporate more sugar and are often glazed or include mix-ins. The fundamental technique for making both is remarkably similar: very cold butter is cut into dry ingredients, a crucial step that creates pockets of butter. As these pockets melt during baking, they release steam, which is what gives scones their characteristic rise and wonderfully flaky layers. Further leavened with baking powder and/or baking soda, scones achieve an airy lightness.
What truly distinguishes scones from biscuits, however, is the addition of richer liquids like heavy cream or half-and-half, and often an egg or two. These ingredients contribute to a more tender crumb and a richer flavor profile. The result is a pastry that, while structurally similar to a biscuit, offers a distinctly sweet and luxurious experience, perfect for pairing with coffee or tea, or enjoying on its own.
Essential Ingredients for Your Vanilla Scones
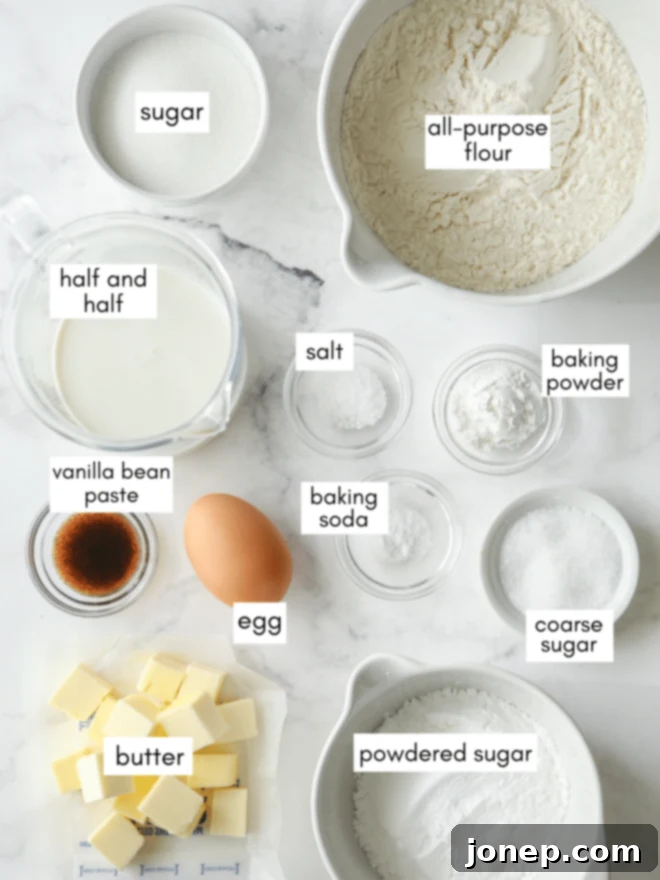
Crafting perfect vanilla bean scones starts with a few key ingredients. The beauty of this recipe lies in its simplicity, relying on common pantry staples to create something extraordinary. You’ll need all-purpose flour for structure, granulated sugar for sweetness, baking powder and baking soda for that crucial lift, and a pinch of salt to balance the flavors. The star of the show, of course, is cold unsalted butter, which is essential for flakiness, alongside cold half-and-half and an egg to bind everything together and add richness. And for that signature flavor, a good quality vanilla bean paste is paramount. Having these simple ingredients on hand means you’re always just a few steps away from a batch of warm, homemade scones.
Vanilla Bean Paste vs. Vanilla Beans and Vanilla Extract: Choosing Your Flavor
For these exquisite scones, I opted for vanilla bean paste to deliver an elevated flavor profile without the extra effort of scraping a full vanilla bean pod. Vanilla bean paste offers the flecks of real vanilla bean and a more complex flavor often associated with whole beans, but with the ease of use of an extract. It’s truly the best of both worlds, providing a rich, aromatic vanilla essence that permeates every bite.
However, the beauty of this recipe is its flexibility when it comes to vanilla flavoring. You can absolutely use whatever vanilla product you prefer or have readily available in your kitchen. Here’s a quick guide to help you choose:
- 1 1/2 tsp vanilla bean paste: This is my personal favorite for its rich flavor and visible specks of vanilla bean. This is the brand I always keep stocked in my pantry for its consistent quality.
- 1 vanilla bean: For the ultimate pure vanilla experience, scrape the seeds from one whole vanilla bean. This provides the most potent and authentic flavor, along with those beautiful little black specks.
- 1 1/2 tsp pure vanilla extract: A perfectly acceptable and widely available alternative. Ensure you use pure vanilla extract, not imitation, for the best flavor results. While it won’t offer the visible specks, it will still impart a lovely vanilla aroma and taste.
Whichever option you choose, the goal is to infuse these scones with a robust and delicious vanilla essence that complements their buttery goodness.
How to Make These Irresistible Scones: A Step-by-Step Guide
Creating these flaky vanilla bean scones is a rewarding process. Follow these detailed steps to achieve perfect results every time:
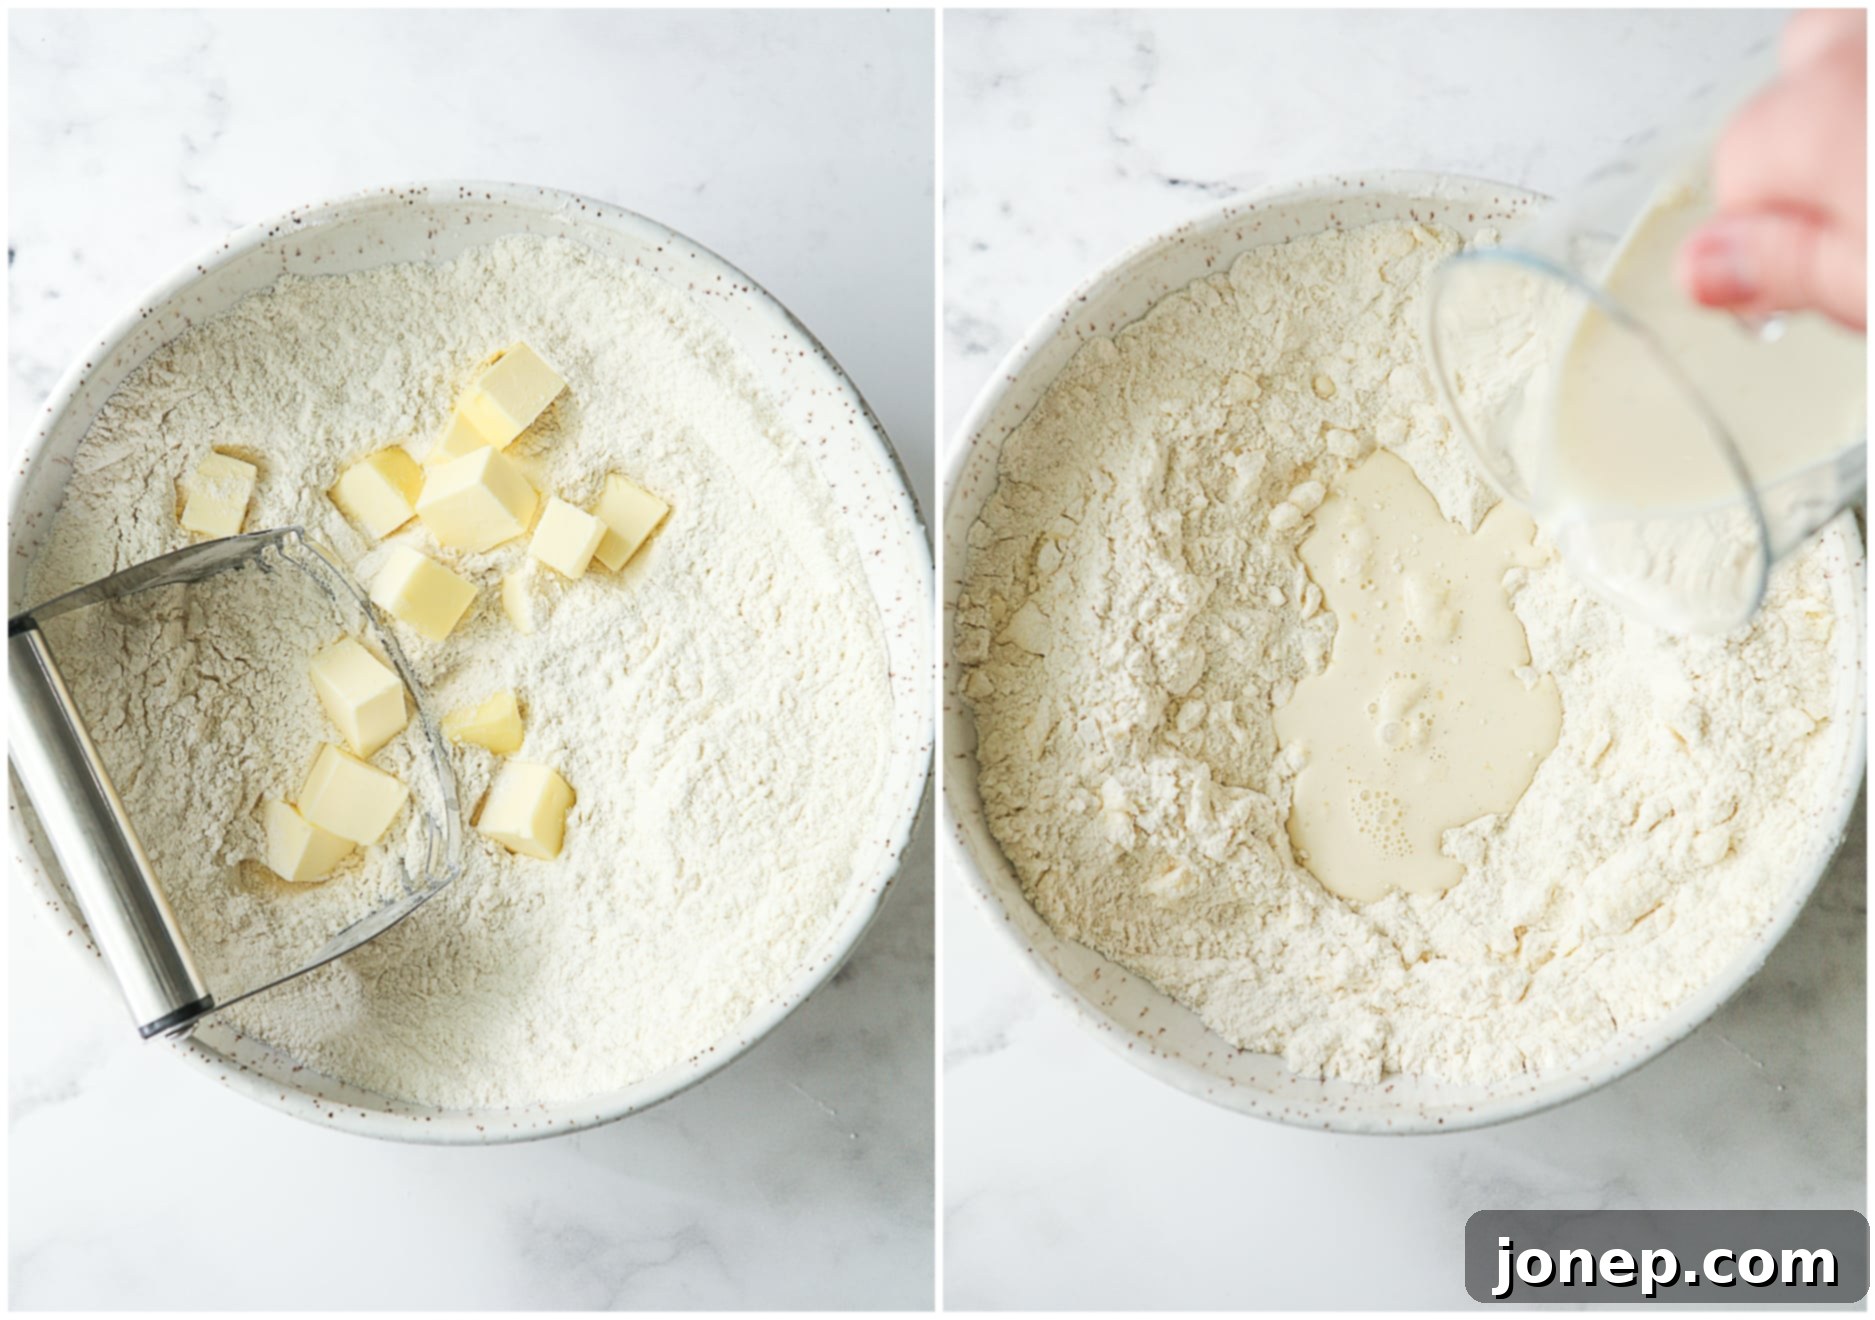
- Prepare the Dry Ingredients and Cut in Butter: In a large mixing bowl, combine the all-purpose flour, granulated sugar, baking powder, baking soda, and salt. Whisk them together until well combined. Next, add your cold, cubed butter. Using a pastry cutter or a food processor (pulsing carefully), cut the butter into the dry ingredients until the mixture resembles coarse crumbs with some pea-sized pieces of butter still visible. This is crucial for flaky scones.

Cutting butter into the dry mix creates the foundation for flaky layers, followed by incorporating the liquids. - Incorporate Liquid Ingredients: In a separate small bowl, gently whisk together the cold half-and-half, the large egg, and your chosen vanilla bean paste (or extract/bean seeds). Pour this liquid mixture evenly over the flour and butter mixture in the large bowl.
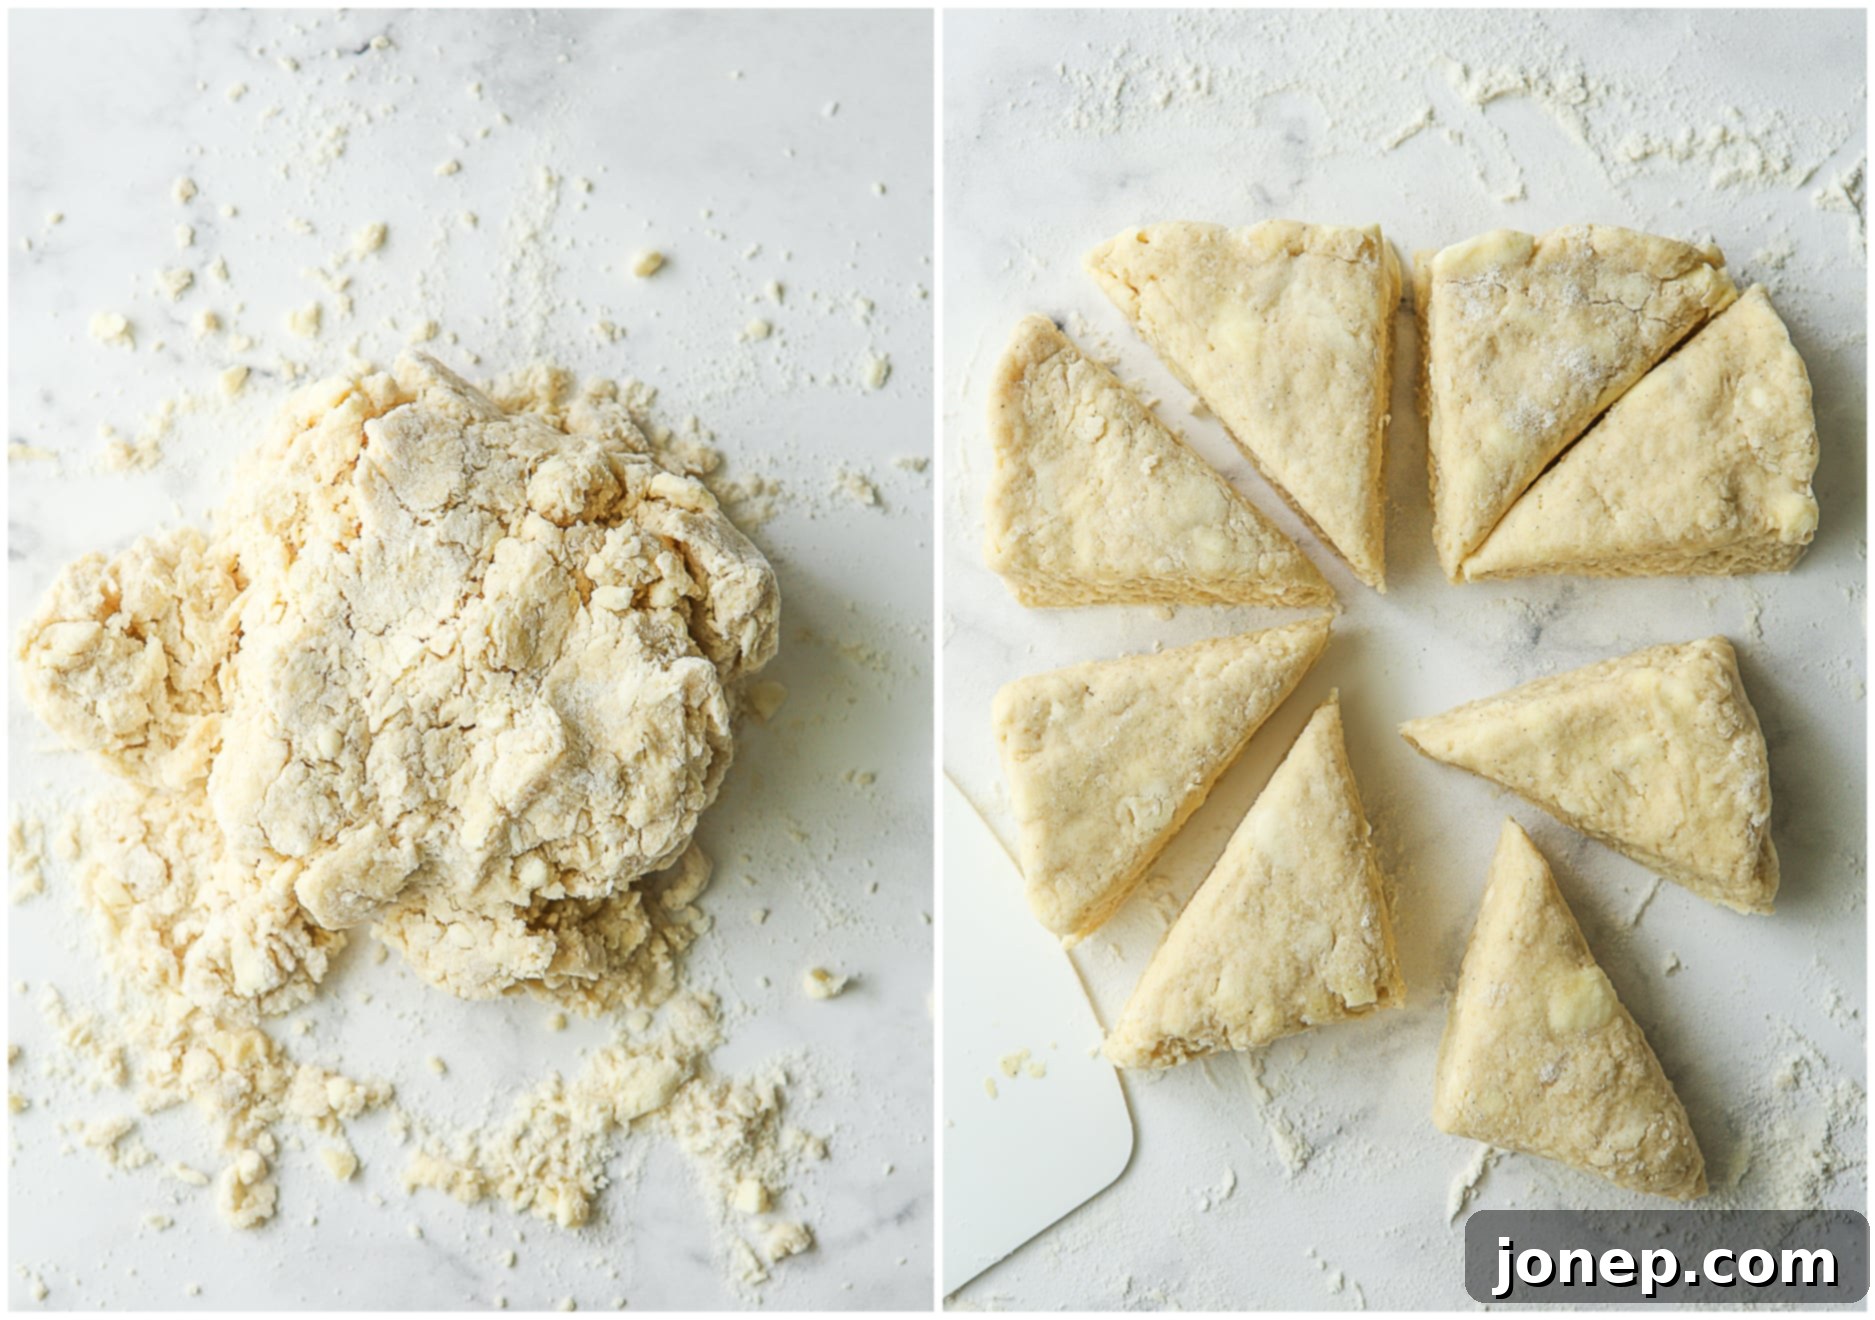
- Form a Uniform Dough: Use a sturdy spatula or your hands to gently incorporate the wet and dry ingredients. The mixture will initially appear very shaggy and crumbly. Turn it out onto a clean, lightly floured surface and continue to gently work the dough with your hands. The goal is to bring it together into a cohesive, uniform dough, being careful not to overwork it, which can lead to tough scones.
- Develop Flaky Layers with the “Fold and Flatten Method”: This step is vital for achieving those coveted flaky layers. Flatten the dough into a rough rectangle using your hands or a lightly floured rolling pin. Once flattened, fold one half of the dough over onto the other half, much like closing a book. Rotate the dough 90 degrees, flatten it again, and repeat the folding process. Perform this “flatten and fold” technique two more times, for a total of three folds. This action creates multiple thin layers of dough separated by pockets of cold butter, which will steam and create rise and incredible flakiness during baking. Do not skip this step!
- Slice into Triangles: After the folding, gently pat the dough into a rough 6-inch square that is approximately 1-inch tall. Using a sharp knife or a bench scraper, cut the square into four equal smaller squares. Then, cut each smaller square diagonally in half to create two triangles, resulting in 8 perfectly shaped scone triangles in total.

From shaggy mixture to perfectly cut scone triangles, ready for the oven. - Bake to Golden Perfection: Carefully transfer the scone triangles onto a baking sheet pan lined with parchment paper. For an extra golden crust and a touch of sweetness, brush the tops of the scones with a little more half-and-half and sprinkle them generously with coarse sugar (this step is optional but highly recommended for texture and sparkle). Bake in a preheated 400°F (200°C) oven for 17-20 minutes, or until the tops and bottoms are beautifully golden brown. Allow the baked scones to cool mostly on the pan before glazing.

The transformation: unbaked scones alongside their golden, baked counterparts. - Glaze with Vanilla Icing: While the scones are cooling, prepare your luscious vanilla icing. In a small bowl, whisk together the powdered sugar, 1-3 tablespoons of half-and-half (start with 1 and add more slowly until desired consistency is reached), and ½ teaspoon of vanilla bean paste. Whisk until the icing is completely smooth and pourable, yet thick enough to cling to the scones. Drizzle this exquisite icing generously over the mostly cooled scones.
- Serve and Enjoy: Allow the glazed scones to set for at least 10 minutes to allow the icing to firm up slightly. These vanilla bean scones are truly at their peak the day they are baked, offering the freshest texture and flavor. Store any leftovers in an airtight container at room temperature for 1-3 days to maintain their freshness.

baking tip:Why Biscuit and Scone Ingredients Need to Stay Cold for Perfect Flakiness
One of the most critical secrets to achieving tall, soft, and incredibly flaky biscuits and scones lies in keeping your ingredients, especially the butter, very cold. This isn’t just a minor detail; it’s a fundamental principle of scone making. Here’s why:
When tiny bits of cold butter are distributed throughout the dough, they remain solid until they hit the heat of the oven. As the scones bake, these cold butter pockets melt and release steam. This steam then pushes apart the layers of dough, creating those desirable airy, flaky layers that define a perfect scone. If the butter is too warm, it will fully incorporate into the dry ingredients before baking, forming a smoother, less textured dough. When this happens, those crucial little pockets of butter and steam disappear, resulting in a denser, tougher scone lacking that signature flakiness.
To ensure your vanilla bean scones are as tall, soft, and flaky as possible, always start with thoroughly chilled butter and cold liquid ingredients like half-and-half or milk. Work the dough quickly and efficiently to minimize the time the butter is exposed to warm hands or a warm environment. If your kitchen tends to be on the warmer side, consider placing your cut scones on the baking sheet into the freezer for 10-15 minutes before baking. This extra chill solidifies the butter even further, guaranteeing maximum steam production and an exquisite flaky texture.
Vanilla Scone Recipe FAQs
No worries at all! While vanilla bean paste is fantastic for its intense flavor and visual appeal, you have excellent alternatives. You can substitute it with the scraped seeds from 1 whole vanilla bean for the purest flavor, or simply use 1 to 1½ teaspoons of high-quality pure vanilla extract in place of the vanilla bean paste. The key is to use a good quality vanilla for the best results.
There are a few common culprits when scones turn out flat. The most frequent issue is the butter warming up too much while you’re working the dough. If the butter melts and absorbs into the dry ingredients, you lose those crucial pockets that create flaky layers and rise. Always ensure your butter and liquids are very cold, and work quickly to minimize handling the dough. Another factor could be overworking the dough, which develops gluten and results in a tougher, flatter scone. Finally, double-check the freshness of your baking powder and baking soda; expired leavening agents won’t provide the necessary lift.
Scones are wonderfully freezer-friendly, both unbaked and baked, making them perfect for advance preparation!
To freeze unbaked scones: Shape and cut your scones as directed, then place them in a single layer on a parchment-lined baking sheet. Cover with plastic wrap and freeze them solid. Once frozen, you can transfer them to an airtight freezer bag or container for up to 2-3 weeks. When ready to bake, place the frozen scones directly on a baking sheet (no need to thaw), brush with half-and-half, and bake as directed, adding a few extra minutes to the bake time (usually 20-25 minutes total) until golden.
To freeze baked scones: Allow freshly baked scones to cool completely. Freeze them in a single layer on a baking sheet, then transfer to an airtight container or ziplock bag. They can be frozen for up to a month. To serve, thaw them at room temperature for a few hours, then warm briefly in a low oven if desired, and glaze before serving.
For optimal freshness and flavor, these vanilla bean scones are best enjoyed on the same day they are baked. However, any leftovers can be stored in an airtight container at room temperature for 1 to 3 days. If they start to lose a bit of their tenderness, a quick zap in the microwave for 10-15 seconds or a few minutes in a toaster oven can bring back some of their lovely texture.
Delicious Scone Variations to Try
This vanilla scone recipe provides a fantastic base that is incredibly versatile and easy to adapt. Feel free to unleash your creativity and customize your batch with these fun and delicious variations:
- Berry Bliss Scones: Fold in 1 cup of fresh or frozen berries or other fruit (sliced into ½-inch pieces) into the dough after you’ve added the liquid ingredients. Delicate berries like raspberries and blackberries burst easily, so handle the dough gently. Blueberries, chopped strawberries, or even diced peaches would be wonderful additions.
- Chocolate and Nutty Creations: Elevate your scones by mixing in 1 cup of chocolate chips (dark, milk, or white), finely chopped chocolate, a blend of your favorite nuts (pecans, walnuts, almonds), or shredded coconut. You can even combine a few of these, just ensure the total amount doesn’t exceed 1 cup to keep the dough manageable.
- Bright Citrus Zest: For a refreshing twist, add 1 tablespoon of finely grated lemon, lime, or orange zest along with the dry ingredients. The zest will infuse the scones with a vibrant aroma and flavor. For an extra citrusy kick, consider replacing some of the half-and-half in the glaze with freshly squeezed citrus juice from your chosen fruit.
- Warm Spice Infusion: Introduce a comforting warmth by adding up to 1 teaspoon of your favorite ground spices. Cinnamon, cardamom, or a delightful pumpkin pie spice blend would all complement the vanilla beautifully, creating an entirely new flavor experience.
Explore More Scone Recipes
If you’ve fallen in love with these vanilla bean scones and are eager to explore more delightful variations, you’re in luck! The world of scones is incredibly diverse and full of exciting flavors waiting to be discovered. Here are some other fantastic scone recipes to inspire your next baking adventure:
- Classic Cinnamon-Sugar Scones
- Refreshing Lemon Blueberry Scones
- Bright Lemon Poppy Seed Scones
- Cozy Apple Cinnamon Scones
Get This Vanilla Bean Scones Recipe
Ready to bake the best vanilla bean scones you’ve ever tasted? This comprehensive recipe below provides all the precise measurements and detailed instructions you’ll need. Gather your ingredients, prepare your kitchen, and get ready to enjoy these light, buttery, and utterly delicious treats!

Vanilla Bean Scones
Pin Recipe
Leave a Review
Ingredients
Vanilla Scones:
- 2 cups all-purpose flour (260 grams)
- ¼ cup granulated sugar (50 grams)
- 2 teaspoons baking powder
- ¼ teaspoon baking soda
- ½ teaspoons salt
- 6 tablespoons cold unsalted butter (85 grams), cubed
- ½ cup cold half and half (114 grams))
- 1 teaspoon vanilla bean paste (or ½ vanilla bean, or 1 teaspoon vanilla extract)
- 1 large egg
- Additional half and half , for brushing
- Coarse sugar , for sprinkling (optional)
Vanilla Icing:
- 1 cup powdered sugar (114 grams)
- 1-3 tablespoons half and half
- ½ teaspoon vanilla bean paste (or ½ vanilla bean, or ½ teaspoon vanilla extract)
Instructions
Make the scones:
-
Preheat oven to 400°F (200°C) and line a half or quarter-sheet pan with parchment paper for easy cleanup and non-stick baking.
-
In a large mixing bowl, combine the flour, granulated sugar, baking powder, baking soda, and salt. Use a whisk to ensure all dry ingredients are evenly distributed. Add the cold, cubed butter and cut it into the dry ingredients using a pastry blender or a food processor until the mixture resembles coarse meal with some small, pea-sized pieces of butter remaining.
-
In a separate small bowl, whisk together the cold half-and-half, the large egg, and your preferred vanilla flavoring (vanilla bean paste, vanilla bean seeds, or vanilla extract). Pour this liquid mixture over the flour mixture. Mix with a spatula until the dough just begins to come together. Turn the shaggy mixture out onto a clean, lightly floured counter and use your hands to gently knead and form a uniform dough. Do not overwork.
-
Gently pat the dough into a rectangle about 1-2 inches thick. Fold one half of the dough over onto the other half. Flatten it again to 1-2 inches thick and repeat this “fold and flatten” process 2 more times (3-4 times total). This crucial step helps create those wonderful flaky layers.
-
Form the dough into an approximate 6-inch square that is about 1-inch tall. Using a sharp knife or bench scraper, cut the square into 4 smaller, equal squares. Then, cut each small square diagonally in half to create 2 triangles, resulting in a total of 8 scone triangles.
-
Arrange the scone triangles on your prepared sheet pan, leaving some space between them. Brush the tops with a little more half-and-half for a golden crust. If desired, sprinkle generously with coarse sugar for added sparkle and crunch.
-
Bake in the preheated 400°F (200°C) oven for 17-20 minutes, or until the tops and bottoms of the scones are beautifully golden brown and firm to the touch. Once baked, remove from the oven and let them cool on the pan for a while as you prepare the icing.
Make the icing:
-
In a medium bowl, whisk together the powdered sugar, starting with 1 tablespoon of half-and-half, and ½ teaspoon of vanilla bean paste. Continue whisking, gradually adding more half-and-half a teaspoon at a time, until you achieve a thick but pourable icing consistency.
-
Drizzle the finished icing generously over the mostly cooled scones. Allow the icing to set for a few minutes (at least 10 minutes) before serving to ensure it hardens slightly.
-
For the best taste and texture, these delicious vanilla bean scones are truly at their peak when served the day they are baked.
