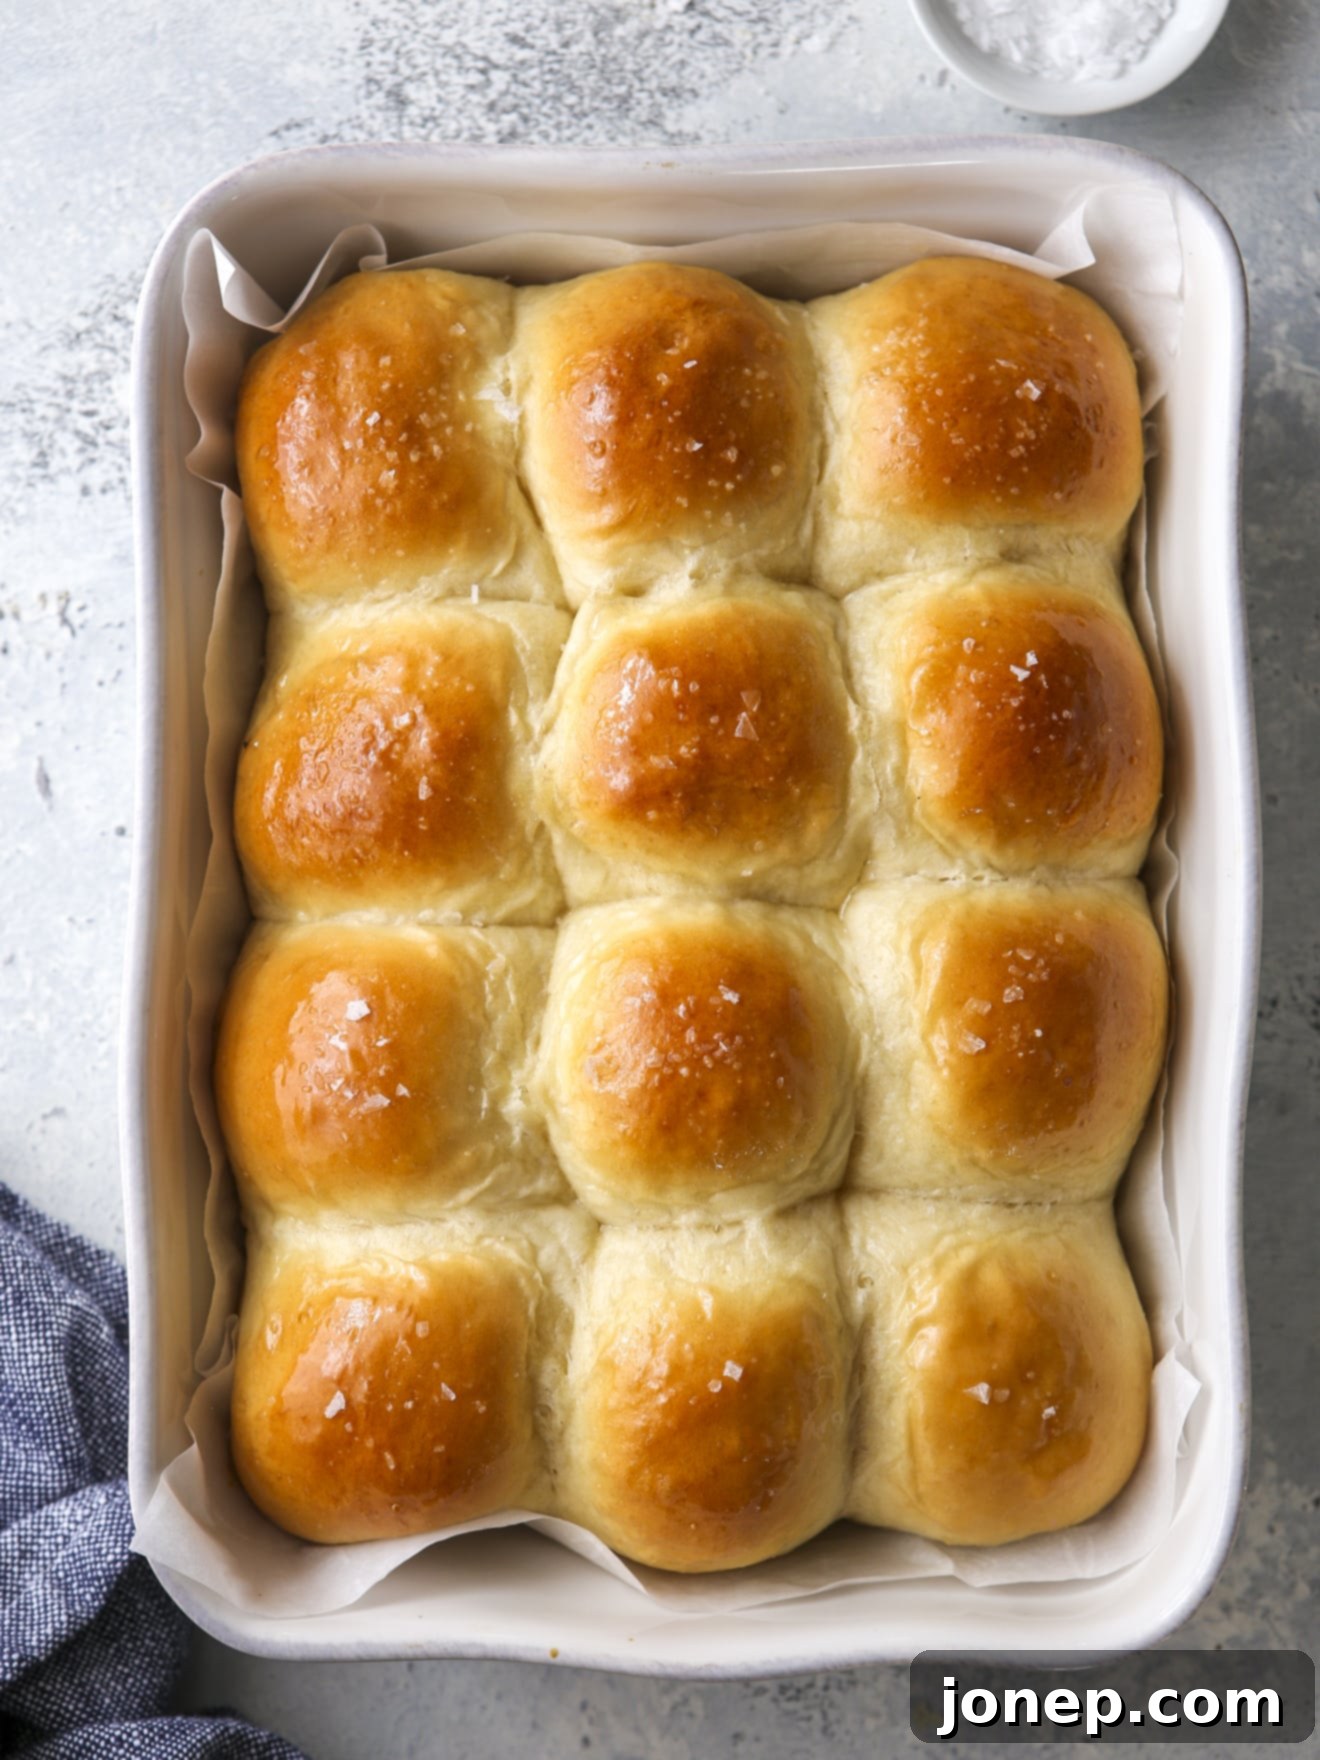
Homemade Soft White Dinner Rolls: Fluffy, Buttery, and Easy to Make
Imagine a basket of warm, tender, and impossibly soft dinner rolls, fresh from the oven, ready to soak up every last drop of gravy or simply melt in your mouth with a dollop of butter. These delightful soft white dinner rolls are not just an accompaniment; they’re often the star of any meal! This reliable yeast-risen white rolls recipe requires just seven core ingredients, making them surprisingly easy for anyone, even novice bakers, to master.
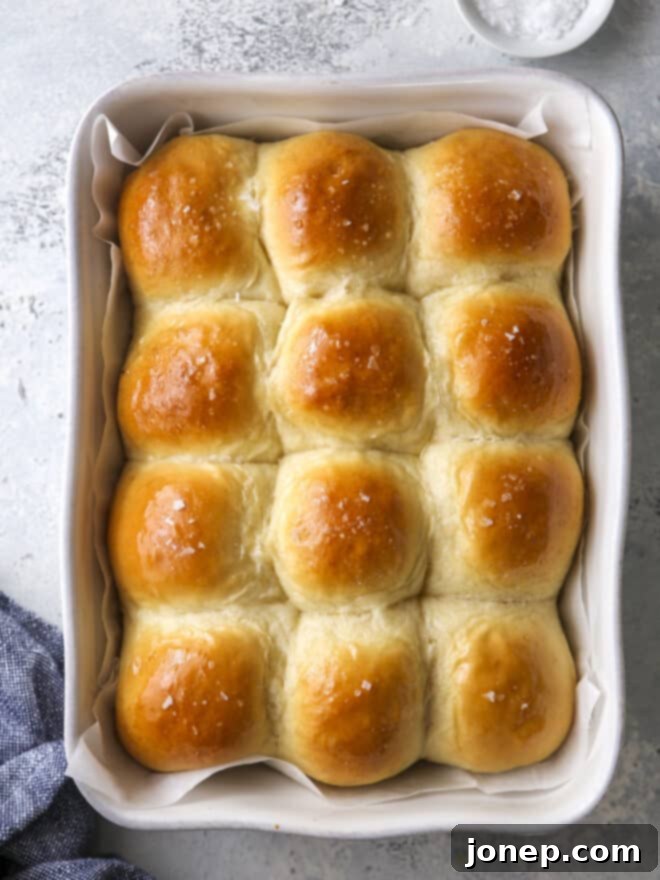
My journey into yeast baking began years ago with this very recipe, during the early days of establishing this website. It quickly became a foundational favorite in our household, a testament to its foolproof nature and incredible results. Whether it’s a comforting soup night, a bustling large family dinner, or an elaborate holiday feast, no table feels truly complete without a generous serving of these homemade rolls. This particular recipe consistently delivers perfect, pillowy results, making it the ideal choice for any occasion.
Each bite of these homemade dinner rolls offers a supremely soft and tender texture, infused with a rich, buttery flavor that is simply irresistible. They embody a classic appeal that is truly unbeatable! For a traditional experience, serve them alongside plenty of salted butter. Or, for an extra touch of indulgence and flair, brush them generously with melted honey butter and a delicate sprinkling of flaky sea salt as soon as they emerge, golden and fragrant, from the oven. These easy dinner rolls are guaranteed to impress your guests and become the most anticipated item on your next meal spread!
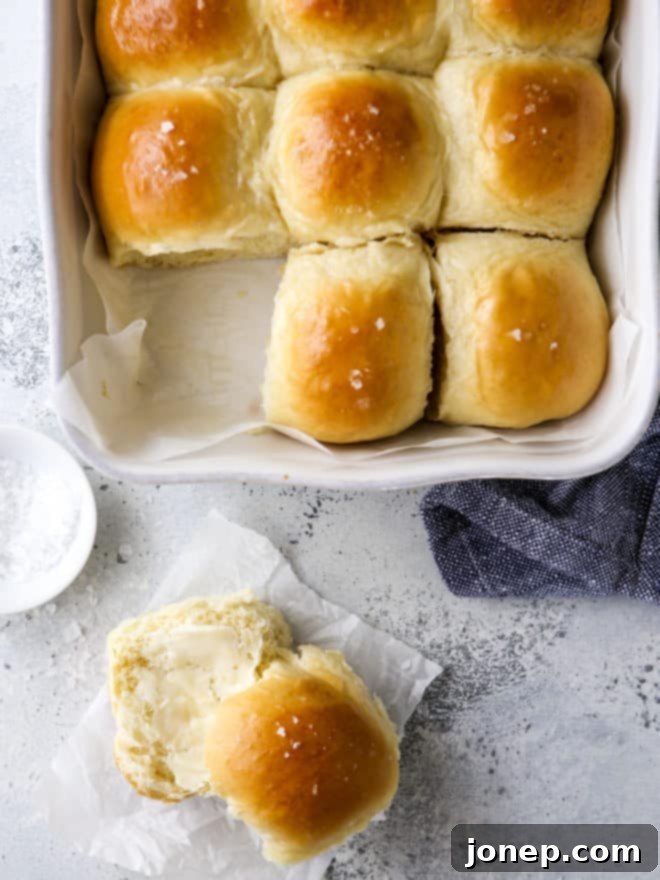
Table of Contents
- Ingredients You’ll Need for Soft Dinner Rolls
- How to Make Soft White Dinner Rolls: Step-by-Step Guide
- Mastering Roll Shaping Techniques
- A Great Beginner’s Recipe: Tips for Success
- Recipe FAQs: Your Common Questions Answered
- More Delicious Roll Recipes to Try
- Get the Full Recipe Card
“This is the best white roll recipe that I have ever made! Fluffy, soft, and delicious! Thank you!” — reader Shanna-Lee
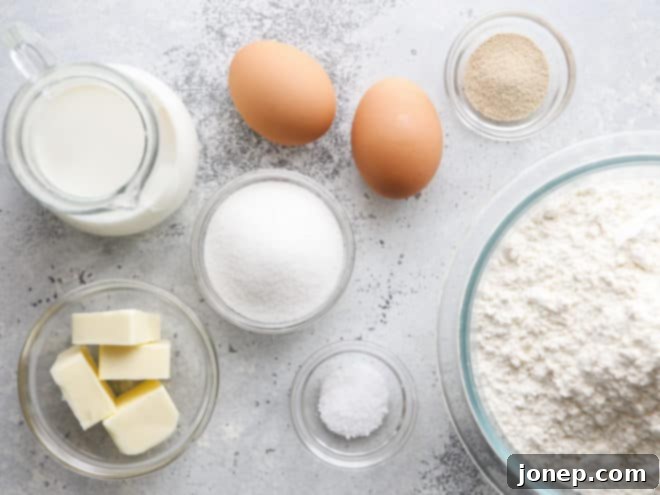
Ingredients You’ll Need for Soft Dinner Rolls
Crafting the perfect soft white dinner rolls starts with a few simple, high-quality ingredients. Each plays a crucial role in achieving that coveted fluffy texture and rich flavor:
- Bread flour— For the ultimate rise and a delightfully soft, yet slightly chewy texture, bread flour is your best choice due to its higher protein content. However, if you only have all-purpose flour on hand, don’t hesitate to use it; your rolls will still be incredibly delicious.
- Active-dry yeast— This is the magic behind the rise! Active dry yeast requires a warm liquid to activate. For a faster rise time, you can substitute with instant or quick-rise yeast, adjusting the proofing times accordingly as noted in the recipe tips.
- Butter— Unsalted butter is preferred as it allows you to control the salt content. It contributes significantly to the rolls’ rich flavor and tender crumb.
- Milk— Whole milk or 2% milk is recommended as the fat content enriches the dough, leading to a softer, more flavorful roll.
- Eggs— Eggs add richness, help with structure, contribute to a beautiful golden color, and keep the rolls tender and moist.
- Granulated sugar— More than just for sweetness, sugar provides food for the yeast, helping it activate and produce carbon dioxide, which makes the dough rise.
- Salt— A crucial ingredient for flavor balance, salt also helps to control the yeast activity and strengthens the gluten structure in the dough.
- Honey— (Optional, for the glaze) While not essential for the dough itself, a touch of honey in the glaze adds a lovely depth of flavor and sweetness to the baked rolls, enhancing their overall appeal.
How to Make Soft White Dinner Rolls: Step-by-Step Guide
Creating these heavenly soft white dinner rolls is a straightforward process. Follow these steps carefully for consistently perfect results:
- Warm liquids. Begin by melting the butter in a small saucepan over medium heat. Once melted, add the milk and continue to heat for about one additional minute. The ideal temperature range for activating yeast is 120°-130°F. If you have a kitchen thermometer, use it to ensure accuracy, as temperatures exceeding 140°F can unfortunately kill the yeast, preventing your dough from rising.
- Combine dry ingredients, liquids, and eggs. In a large mixing bowl, or the bowl of a stand mixer fitted with a dough hook, combine the first 2 cups of bread flour, granulated sugar, salt, and active dry yeast. There’s no need to proof the yeast in warm water beforehand with this method! Next, pour in the warm milk/butter mixture, followed by the eggs. Stir everything together until just combined.
- Add more flour and knead. Gradually incorporate the remaining flour, adding about ¼ cup at a time. After each addition, knead the bread dough until it begins to pull away from the sides of the bowl. The goal is to achieve a dough that is still slightly tacky to the touch but no longer sticks to your hands. Continue kneading until the dough is smooth, elastic, and feels supple. Be careful not to add too much flour, as this can result in dense, dry rolls.
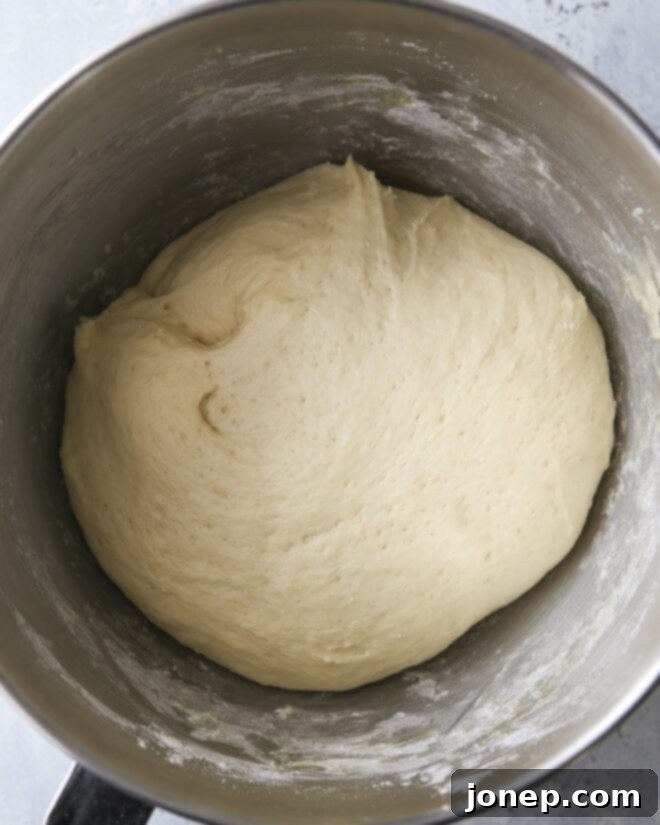
- Let dough rise (first rise). Form the dough into a ball and place it in a lightly greased bowl. Cover the bowl tightly with plastic wrap or a clean kitchen towel. Set it in a warm, draft-free place to rise until it has visibly doubled in size, which typically takes about 1 hour, depending on your room temperature.
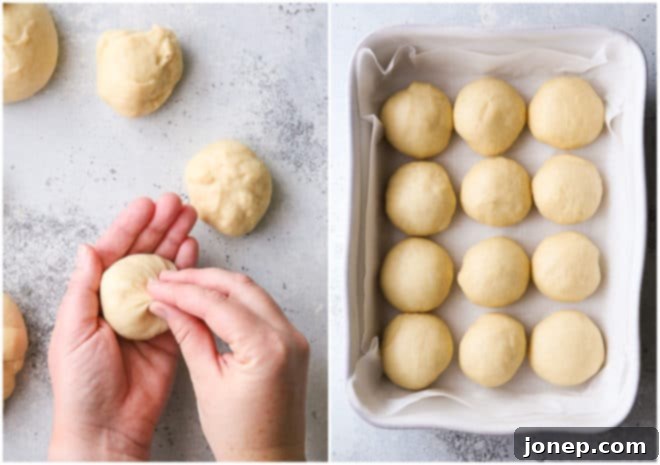
- Shape rolls. Once the dough has completed its first rise, gently punch it down to release the air. Turn it out onto a lightly floured surface and divide the dough into 12 equal pieces. For uniform rolls, a kitchen scale is incredibly helpful. Then, shape each piece into a smooth, round roll (refer to the “How to Shape Rolls” section below for detailed tips).
- Let dough rise again (second rise). Arrange the shaped rolls in a greased 9×13-inch baking pan, leaving a little space between each. Cover the pan again with plastic wrap or a clean towel and let the rolls rise for another 30 minutes while your oven preheats to 350°F. This second rise, known as proofing, ensures a lighter, finer texture in the final baked rolls.
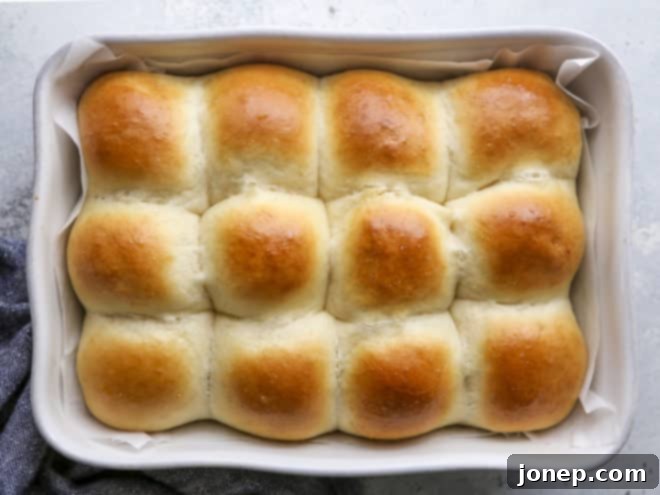
- Bake. For rolls with a beautiful, glossy golden-brown crust, brush them lightly with an egg wash (one large egg whisked with 1 tablespoon of water) just before baking. This step is optional but highly recommended for visual appeal. Bake the rolls in the preheated oven for 25-30 minutes, or until they are deeply golden brown on top and cooked through.
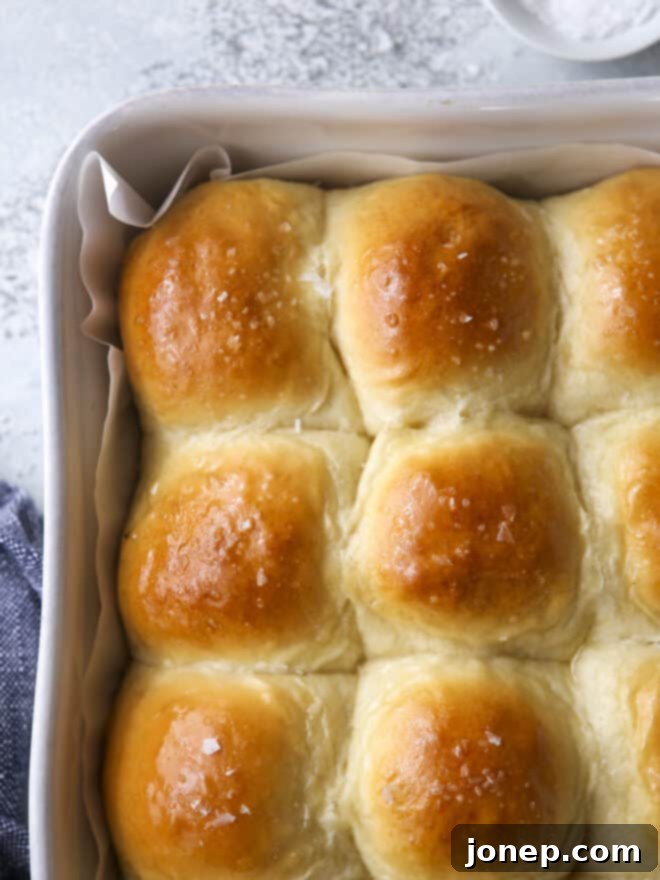
- Brush with honey butter (optional). As soon as the rolls come out of the oven, while they are still hot, generously brush them with a mixture of melted butter and honey. This adds an extra layer of flavor and shine. If desired, sprinkle with flaky sea salt for a delightful savory-sweet contrast.
- Serve. These soft white dinner rolls are truly at their best when served warm, fresh from the oven. However, they will remain delicious for several days when stored in an airtight container at room temperature. Enjoy them with your favorite meals!
Mastering Roll Shaping Techniques
Shaping uniform, smooth rolls is key to a beautiful presentation and even baking. Here’s how to do it effectively:
- Divide dough evenly. Precision in dividing the dough ensures that all your rolls bake uniformly. If you own a kitchen scale, this is the most accurate method: weigh the total dough, divide that number by 12, and then weigh each individual portion to match. Alternatively, you can divide the dough in half, then divide each half again, and finally divide those four pieces into thirds to yield 12 roughly equal rounds.
- Stretch and pinch. To create a smooth top surface, use your fingers to gently pull and stretch the dough from the top down, tucking and pinching it together at the bottom. This technique creates tension on the surface, resulting in a perfectly smooth top while any messy seams are hidden on the underside. This helpful video provides a visual demonstration of the technique!
- Roll into a ball. Once the dough is pinched on the bottom, gently cup your hand over the dough ball on a clean, unfloured countertop. With the pinched end facing down, roll the dough in a circular motion. This smooths out any remaining imperfections and helps create a perfectly even, round shape.
A Great Beginner’s Recipe: Tips for Success
If you’re new to the wonderful world of yeast baking, these soft white dinner rolls are an excellent starting point! Rolls are incredibly forgiving and often yield fantastic results even on your very first attempt. Still, keeping a few key tips in mind can ensure your baking journey is a resounding success:
- Check your yeast expiration date. Yeast is a living organism, and its potency declines over time. Always ensure your active dry yeast is fresh and within its expiration date for optimal rising power. Stale yeast is a common culprit for dough that fails to rise.
- Measure flour correctly. Too much flour is one of the most frequent reasons for heavy, dry, and dense rolls. To measure accurately, spoon your flour into the measuring cup and then level it off with the back of a knife, rather than scooping directly from the bag. This prevents compacting the flour and ensures you use the right amount. Learn more about correctly measuring flour here.
- Pay attention to rise time, but don’t stress. While rise times are important guidelines, they can vary based on your environment’s temperature and humidity. A good general rule of thumb is to let yeast dough rise in a warm, draft-free place for about 1 hour for the first rise (bulk fermentation), and then around 30-45 minutes for the second rise (proofing). The dough should visibly double in size and pass the “indentation test” (explained below).
baking tip:Why does yeast dough need to rise?
Letting dough made with yeast “rise” (often referred to as proofing or fermentation) is a critical step that allows the yeast to do its job effectively. Yeast is a microscopic, single-celled living organism that, when provided with warmth, moisture, and food (the sugars in flour), begins to metabolize these sugars through a process called fermentation. During fermentation, the yeast releases carbon dioxide gas and alcohol as byproducts.
The carbon dioxide gas gets trapped within the elastic network of gluten that forms when flour and water are kneaded together. As more gas is produced, it expands these gluten pockets, causing the dough to inflate and increase significantly in volume. This initial expansion, known as the first rise or bulk fermentation, contributes greatly to the overall volume and develops large, airy gas bubbles within the dough, which translate to a lighter final product.
The second rise, or proofing, occurs after the dough has been punched down and shaped into individual rolls. This step allows the yeast to redistribute and find new sources of food, leading to a further increase in volume. However, because the larger gas bubbles from the first rise have been gently deflated and redistributed, the second rise produces smaller, more uniform gas bubbles. This results in a finer, more tender, and consistent texture in the baked bread or rolls, giving them that desired soft, pillowy crumb. Without proper rising, yeast dough would be dense, heavy, and lack flavor development.
To check if your dough has risen enough, gently press it with your finger. If the indentation remains, your dough is ready for the next step. If it quickly springs back, it needs a little more time to fully proof.
Recipe FAQs: Your Common Questions Answered
Traditionally, active dry yeast is “proofed” by dissolving it in warm water with a pinch of sugar to activate it. However, for this recipe, I’ve adopted the “dry blend method” championed by Red Star Yeast, which is a fantastic time-saver! If you are confident that your yeast is fresh and hasn’t expired, you can combine it directly with the dry ingredients. When you then add liquids heated to the recommended 120-130°F (which is much warmer than typical “warm water” for proofing), it effectively activates the yeast without the extra step. This method simplifies the process while still ensuring robust yeast activity.
The most common reason for rolls turning out dense or heavy instead of light and fluffy is adding too much flour. When too much flour is incorporated, the dough becomes stiff and dry, making it difficult for the gluten structure to expand and trap the carbon dioxide gas produced by the yeast. It’s crucial to add just enough flour so that the dough is still soft and slightly tacky to the touch, but manageable and not overly sticky. Another vital factor is insufficient rising time; the yeast needs adequate time to ferment and create the airy texture. Ensure your dough doubles in size during both the first and second rises.
Making dinner rolls ahead of time is a fantastic way to streamline your meal prep! After shaping the rolls and placing them in their baking pan, cover them tightly with plastic wrap. You can then store them in the refrigerator for up to 18 hours, such as overnight. When you’re ready to bake, remove the pan from the fridge and allow the rolls to come to room temperature and get a bit puffy (this might take 1-2 hours) before baking as directed. This method is perfect if you want fresh rolls for a brunch without an early morning start, or to free up valuable oven space on a busy holiday like Thanksgiving morning.
Absolutely, dinner rolls freeze exceptionally well, making them ideal for meal planning or having homemade bread on demand! You can freeze already baked rolls by allowing them to cool completely, then placing them in a heavy-duty freezer-safe ziplock bag or airtight container. They will keep well in the freezer for about one month. To serve, simply thaw them at room temperature for a few hours. If you wish to rewarm them, place the thawed rolls on a baking sheet, cover them loosely with aluminum foil to prevent drying out, and warm them in a 350°F (175°C) oven for approximately 15-20 minutes until heated through and soft.
More Delicious Roll Recipes to Try
If you’ve fallen in love with making homemade rolls, here are a few other fantastic recipes to expand your baking repertoire:
Get the Full Recipe Card
Ready to bake the most incredible soft white dinner rolls? Below you’ll find the complete, printable recipe card with detailed ingredient measurements, step-by-step instructions, and helpful notes to guide you through the process. Happy baking!

Soft White Dinner Rolls
Pin Recipe
Leave a Review
Ingredients
- ¾ cup (170 grams) milk , whole or 2% preferred
- ¼ cup (56 grams) unsalted butter
- 3½ cups (438 grams) bread flour , see Notes
- ¼ cup (50 grams) granulated sugar
- 1 teaspoon salt
- 2 ¼ teaspoons (7 grams) active dry yeast (1 envelope)
- 2 large eggs
- 1 large egg + 1 tablespoon water , for egg wash (optional)
For the glaze (optional):
- 1 ½ tablespoons (20 grams) unsalted butter (20 grams)
- 1 teaspoon honey
- Flaky salt , for sprinkling
Equipment
Instructions
-
In a small saucepan over medium heat, melt the butter. Once melted, add the milk and continue to heat for 1 minute more. The liquid mixture should be very warm but not steaming. For optimal results and to ensure yeast activation, use a thermometer to check the temperature; it should be between 120-130°F (temperatures over 140°F will kill the yeast and prevent rising).
-
Meanwhile, in a large bowl or the bowl of a stand mixer fitted with a dough hook, combine 2 cups of the bread flour, granulated sugar, salt, and active dry yeast. Add the warmed milk/butter mixture, followed by the eggs, and stir with a spoon or a dough whisk until all ingredients are just incorporated and no dry spots remain.
-
Gradually add the remaining flour, ¼ cup at a time, kneading thoroughly after each addition. Continue adding flour until the dough starts to clear the sides of the bowl and is tacky to the touch but no longer sticks to your hands. (You might not need all 3½ cups of flour, or you may need a little more; the dough’s consistency is key.) Avoid adding excess flour, as this will result in tough and dry rolls! If necessary, knead the dough for a few minutes more until it becomes smooth and quite stretchy and elastic.
-
Shape the dough into a smooth ball. Lightly grease the mixing bowl, place the dough ball inside, and cover the bowl with plastic wrap or a clean kitchen towel. Set it in a warm, draft-free place to rise until it has clearly doubled in size, which should take approximately one hour.
-
Once the first rise is complete, gently punch down the dough to release the accumulated air. Turn the dough out onto a lightly floured surface. Divide the dough into 4 equal pieces, then further divide each of those pieces into 3 smaller, equal portions, yielding 12 rolls in total (or use a kitchen scale for precise division). Shape each portion into a smooth round and arrange them in a greased 9×13-inch baking dish.
-
Cover the baking dish loosely with plastic wrap or a clean towel. Let the rolls rise again in a warm place until an indentation remains when you lightly press the dough with your finger, indicating proper proofing. This second rise typically takes about 30-45 minutes. While the rolls are proofing, preheat your oven to 350°F (175°C).
-
For rolls with beautifully shiny, bright golden tops, prepare an egg wash by whisking together one large egg and one tablespoon of water. Gently brush this mixture lightly onto the tops of the rolls just before placing them in the oven. (Rolls baked without an egg wash will have a more matte, duller brown finish.)
-
Bake the rolls in the preheated oven for 25-30 minutes, or until they achieve a lovely golden brown color on top and are cooked through to perfection.
To make the glaze (optional):
-
In a small bowl, melt the unsalted butter and honey together until well combined. Immediately brush this warm honey butter glaze onto the tops of the rolls as soon as they come out of the oven. For an extra touch of flavor and texture, sprinkle with flaky sea salt if desired.
Notes
- You can also use instant yeast or quick-rise/rapid-rise yeast instead of active dry yeast. If using these, decrease the rising time for the bulk (first) rise to about 30 minutes, and for the second rise (proofing) to approximately 20 minutes, as they activate and work faster.
- For the best possible rise and a wonderfully soft, chewy texture, bread flour is highly recommended due to its higher protein content. However, if all-purpose flour is what you have on hand, your rolls will still turn out very delicious, though perhaps slightly less chewy.
- To prepare this recipe ahead of time: After you have shaped the rolls and placed them in their baking pan, cover the pan securely with plastic wrap. You can then refrigerate them for up to 18 hours (e.g., overnight). Before baking, remove the pan from the fridge and allow the rolls to come to room temperature and get a bit puffy, which might take 1-2 hours depending on your kitchen’s warmth, then proceed with baking as directed.
- This recipe has been adapted from a trusted method provided by Red Star Yeast.
This soft white dinner rolls recipe was originally published in November 2012, developed in a successful partnership with Red Star Yeast.
