Master the Art of Homemade Burger Buns: Soft, Fluffy & Irresistible Brioche Buns
Forget the bland, mass-produced burger buns from the grocery store. It’s time to elevate your burger game with something truly special: homemade burger buns! These incredibly soft, rich, and flavorful buns are a game-changer for any meal, whether you’re making classic hamburgers, mini sliders, deli sandwiches, or just enjoying a perfectly toasted piece of bread. The best part? They are surprisingly easy to make right in your own kitchen, even for beginner bakers, promising a rewarding experience and an unmatched taste.
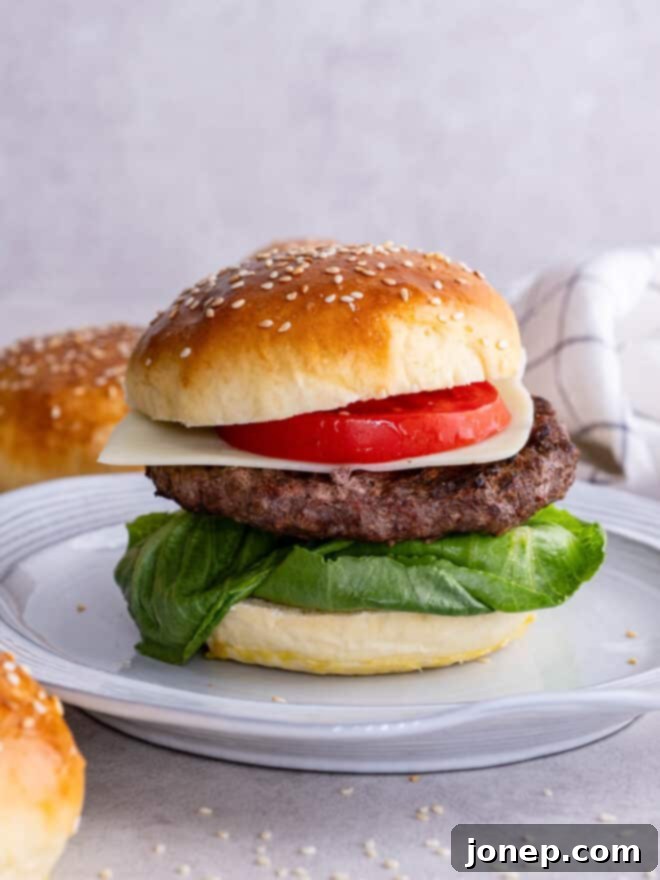
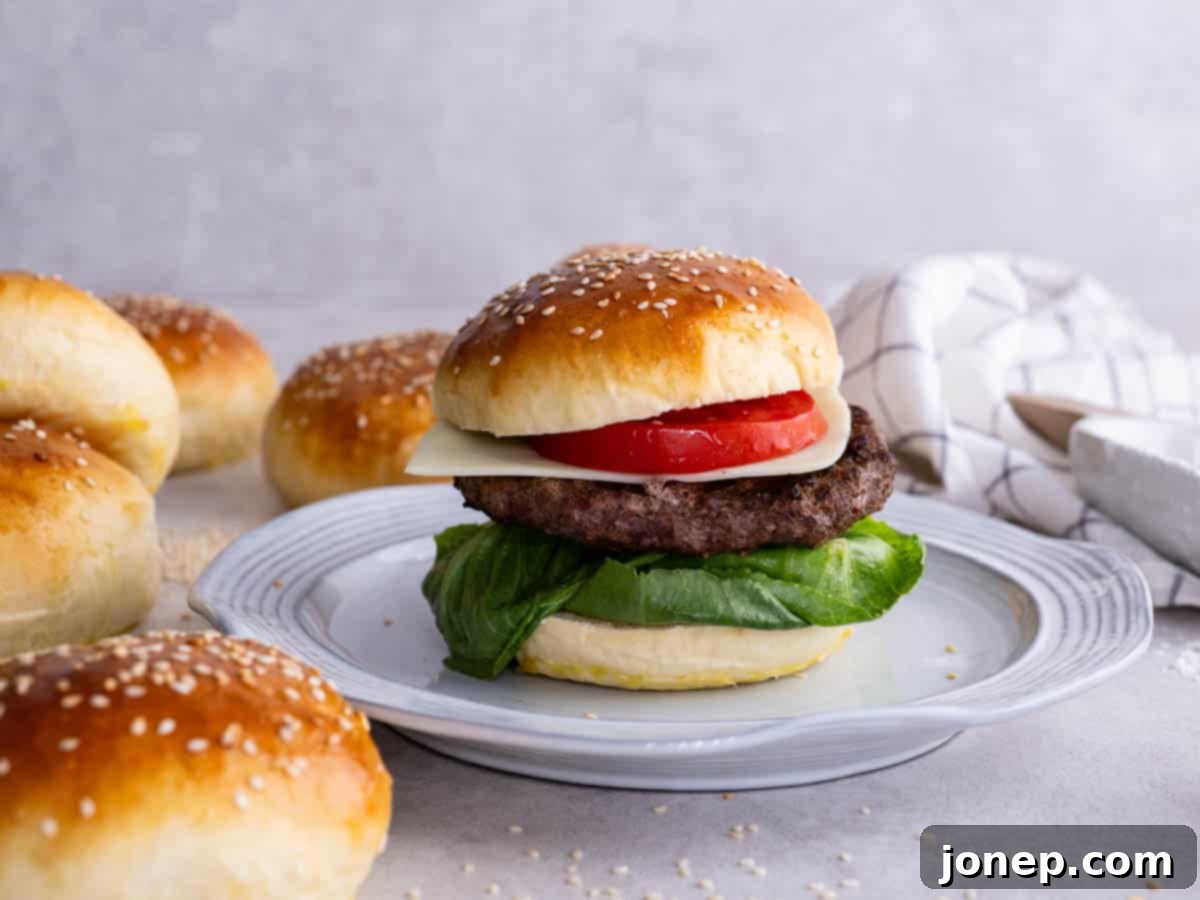
Are you looking for a delightful summer baking project, or perhaps a simple yet impactful way to impress guests at your next backyard cookout? Crafting your own hamburger buns is the ultimate solution! By opting for homemade, you bypass the often disappointing quality of store-bought alternatives and unlock a world of superior taste and texture. These buns aren’t just good; they’re SO MUCH better, transforming an ordinary burger into an extraordinary culinary experience.
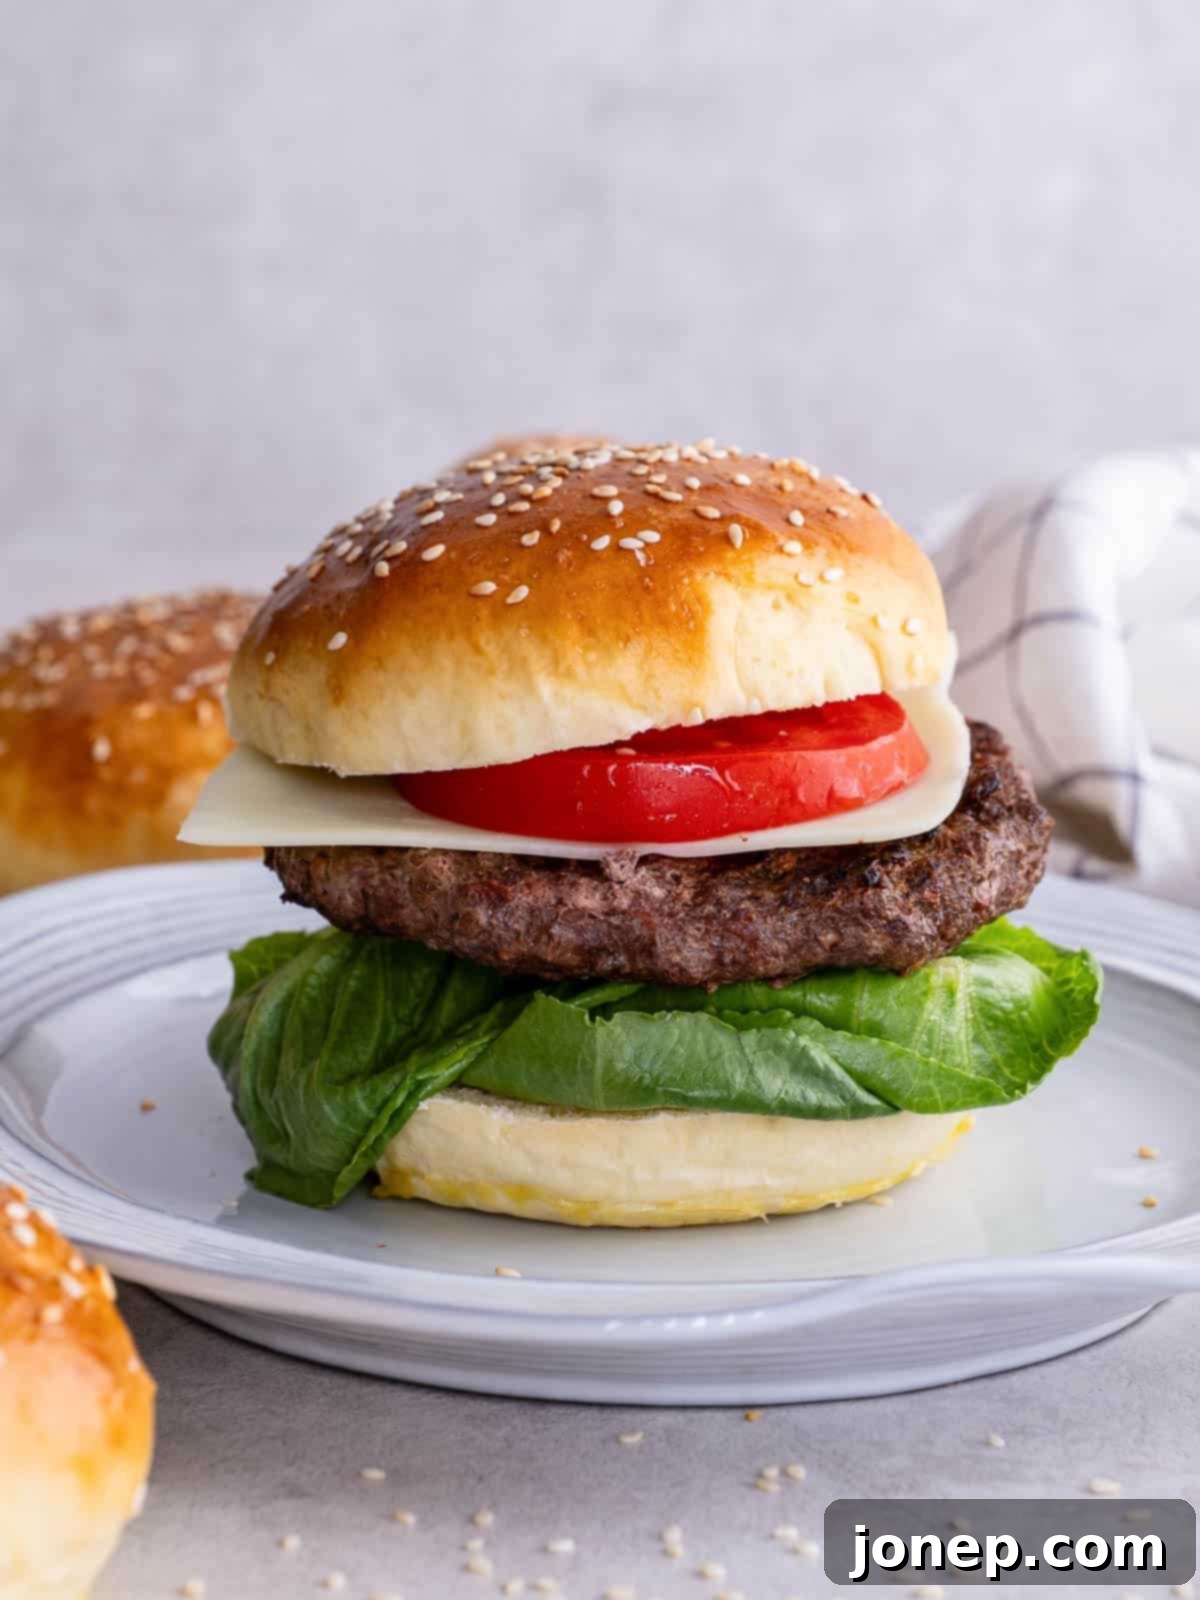
Our homemade burger buns are crafted from a basic brioche dough, which is the secret to their exceptional qualities. Brioche is an “enriched” dough, meaning it’s made with extra butter and eggs, resulting in an incredibly soft, tender crumb and a rich, buttery flavor that stands out. This inherent richness means these buns are delicious enough to enjoy on their own, but they truly shine as the ideal foundation for your favorite burger fillings, especially at a fun burger bar. But their versatility doesn’t stop there – use them for chicken sandwiches, pulled pork, or even a sophisticated breakfast sandwich! Keep reading to discover just how simple and rewarding it is to make these fantastic hamburger buns at home.
More homemade bread recipes to try: Expand your baking repertoire with my whole wheat brioche burger buns for a healthier twist, homemade sandwich and slider buns for ultimate versatility, savory cheesy herb burger buns, and classic homemade hot dog buns.
Table of Contents
- Ingredients You’ll Need for Homemade Buns
- How to Make Homemade Burger Buns: A Step-by-Step Guide
- Ways to Make Burger Buns in Advance
- Homemade Burger Buns Recipe FAQs
- Get the Full Recipe
baking tip:What is enriched yeast bread?
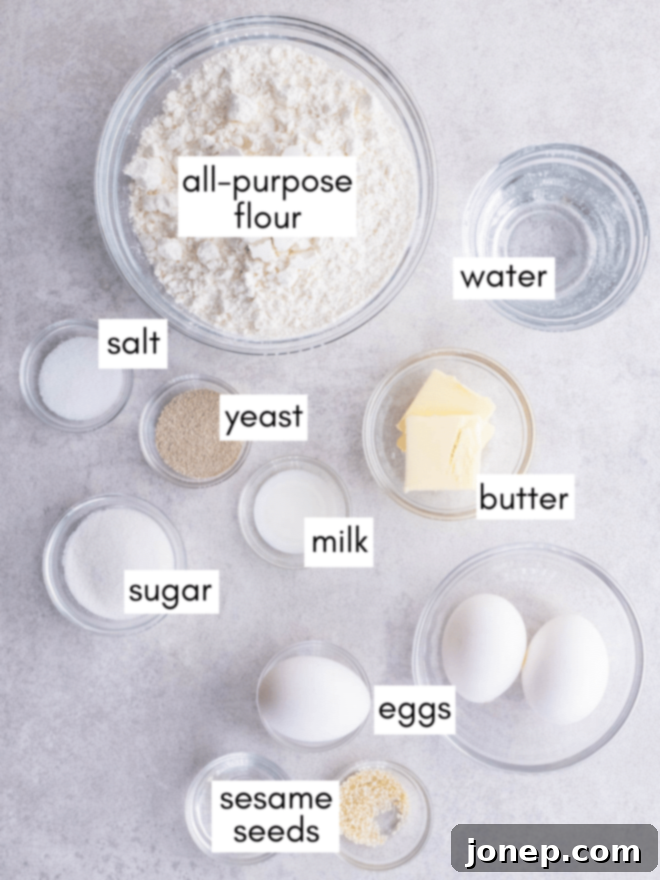
Ingredients You’ll Need for Homemade Buns
Crafting delicious homemade burger buns requires just a handful of basic, readily available ingredients. The quality of these components, particularly the flour and yeast, plays a significant role in the final texture and flavor of your buns. For the exact measurements, make sure to check the full recipe card at the end of this article:
- Bread flour: This is crucial for developing strong gluten, giving the buns their characteristic chewiness and structure. While all-purpose flour can work in a pinch, bread flour yields superior results.
- Butter: Adds richness, flavor, and contributes to the dough’s tender texture.
- Active-dry yeast or instant yeast: The leavening agent responsible for making your buns rise and become wonderfully airy.
- Eggs: Provide structure, richness, and a beautiful golden color to the dough.
- Sugar: Feeds the yeast, aids in browning, and enhances the overall flavor of the buns.
- Milk: Adds richness and helps create a soft crumb.
- Salt: Essential for flavor balance and controlling yeast activity.
- Water: Helps activate the yeast and hydrate the dough.
- Sesame seeds (optional): For that classic hamburger bun look and a touch of nutty flavor.
By understanding the role each ingredient plays, you’re well on your way to mastering these incredible homemade burger buns!
How to Make Homemade Burger Buns: A Step-by-Step Guide
Follow these detailed steps to bake the most perfect, fluffy burger buns you’ve ever tasted. Precision and patience are key for excellent results!
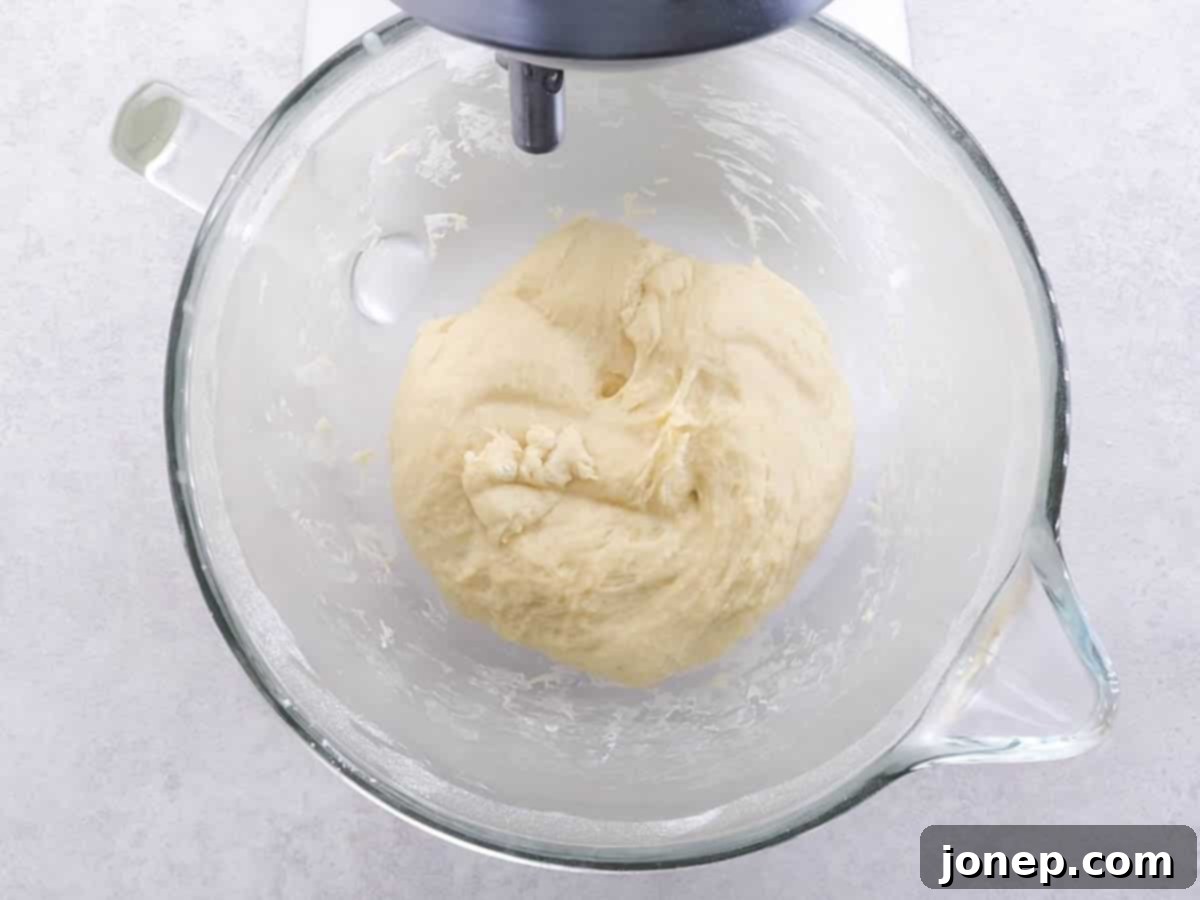
- Prepare the Brioche Dough. The foundation of these incredible buns is a rich brioche dough. Begin by warming your milk, water, and melted butter to the ideal temperature (120-130°F), ensuring it’s warm enough to activate the yeast but not so hot that it kills it. Combine your dry ingredients – bread flour, yeast, sugar, and salt – in the bowl of a stand mixer. Gradually add the warm liquid mixture and beaten eggs, mixing until just combined. Slowly incorporate the remaining flour, a tablespoon at a time, until the dough comes together. Brioche dough is quite soft and almost buttery to the touch. It should feel sticky but pull away from the sides of the bowl without excessively clinging to your fingers. Be careful not to add too much flour, as this is a common mistake that can lead to tough and dry buns. Knead the dough for several minutes until it becomes very smooth and elastic.
- First Rise: Let the Dough Rise. Once your dough is perfectly kneaded, gather it into a neat ball and place it back into a lightly greased bowl. Cover the bowl tightly with plastic wrap to prevent a skin from forming, and set it aside in a warm, draft-free place. Ideal spots include a slightly warmed oven (turned off!), a sunny windowsill, or near a heating vent. Allow the dough to rise for about an hour, or until it has visibly doubled in size. You can test if it’s ready by gently pressing a finger into the dough; if the indent remains, it’s proofed and ready for the next step.

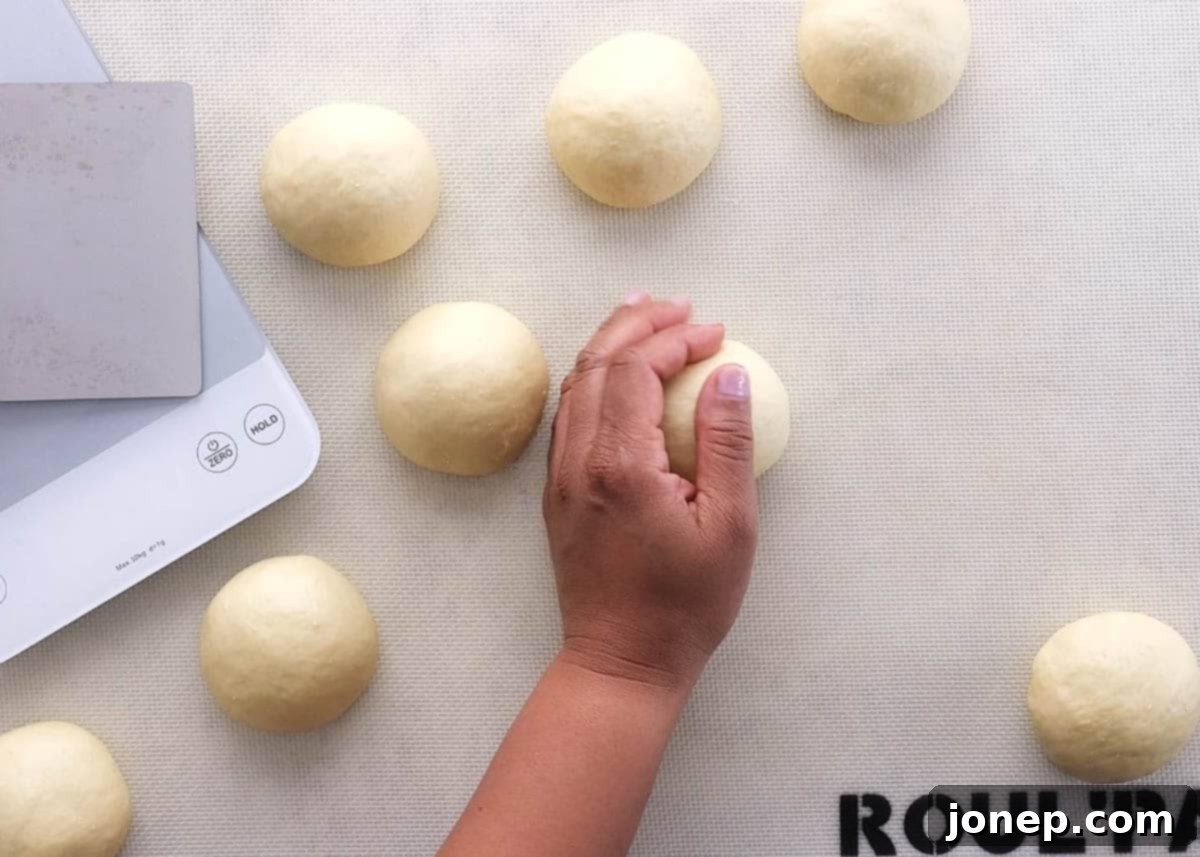
- Portion and Shape the Buns. After the first rise, gently punch down the dough to release the air. This makes it easier to work with. For uniformly sized buns, which is essential for even baking and a professional look, using a kitchen scale is highly recommended. Weigh the entire dough mass, then divide that total by 8 to get the weight for each individual bun. Once the dough is divided, take each piece and shape it into a smooth, tight ball. Achieve this by gently pulling and tucking the edges of the dough underneath itself, creating a taut surface on top. This technique builds surface tension, which helps the buns hold their shape and rise beautifully. If you need visual guidance, here’s a helpful video demonstration.

- Second Rise: Let Buns Rise Again. Arrange your shaped buns on a baking sheet lined with parchment paper, ensuring they have enough space between them to expand. Lightly spray a piece of plastic wrap with non-stick cooking spray and loosely drape it over the buns. Place the baking sheet back in a warm spot for their second and final rise. This usually takes about 30 minutes to 1 hour, during which time the buns will become visibly puffy. While the buns are undergoing their second rise, preheat your oven to 400°F (200°C) so it’s ready when they are.
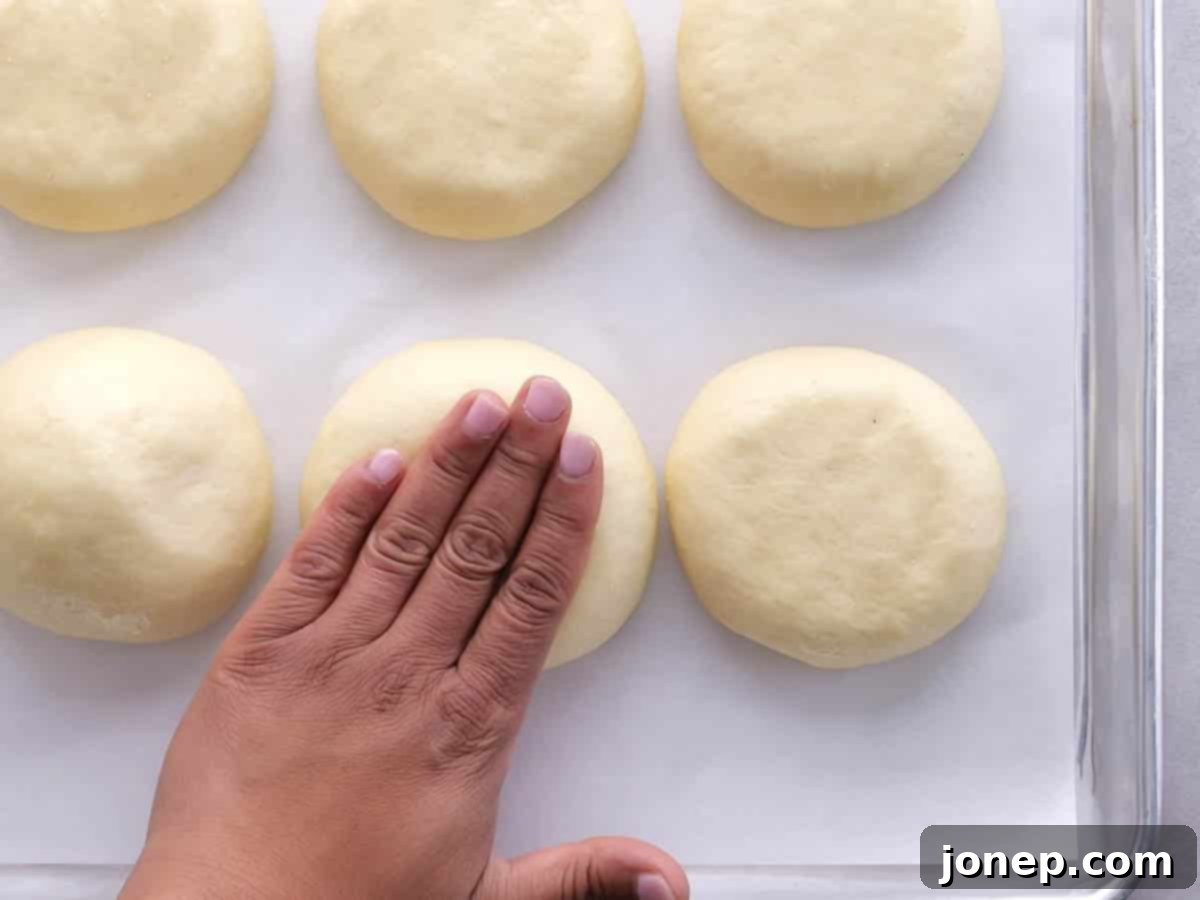
- Gently Flatten Tops for Classic Shape. During the second rise (or just before baking), very gently press down on the tops of the buns 2-3 times using the flat of your hand. This crucial step encourages the buns to expand outward rather than just upward, giving them their characteristic wider, flatter hamburger bun shape. The goal is to create that perfect ratio of bun to burger patty. Exercise extreme caution here: push too hard, and you’ll deflate the delicate air pockets, causing your buns to be dense and not rise properly.

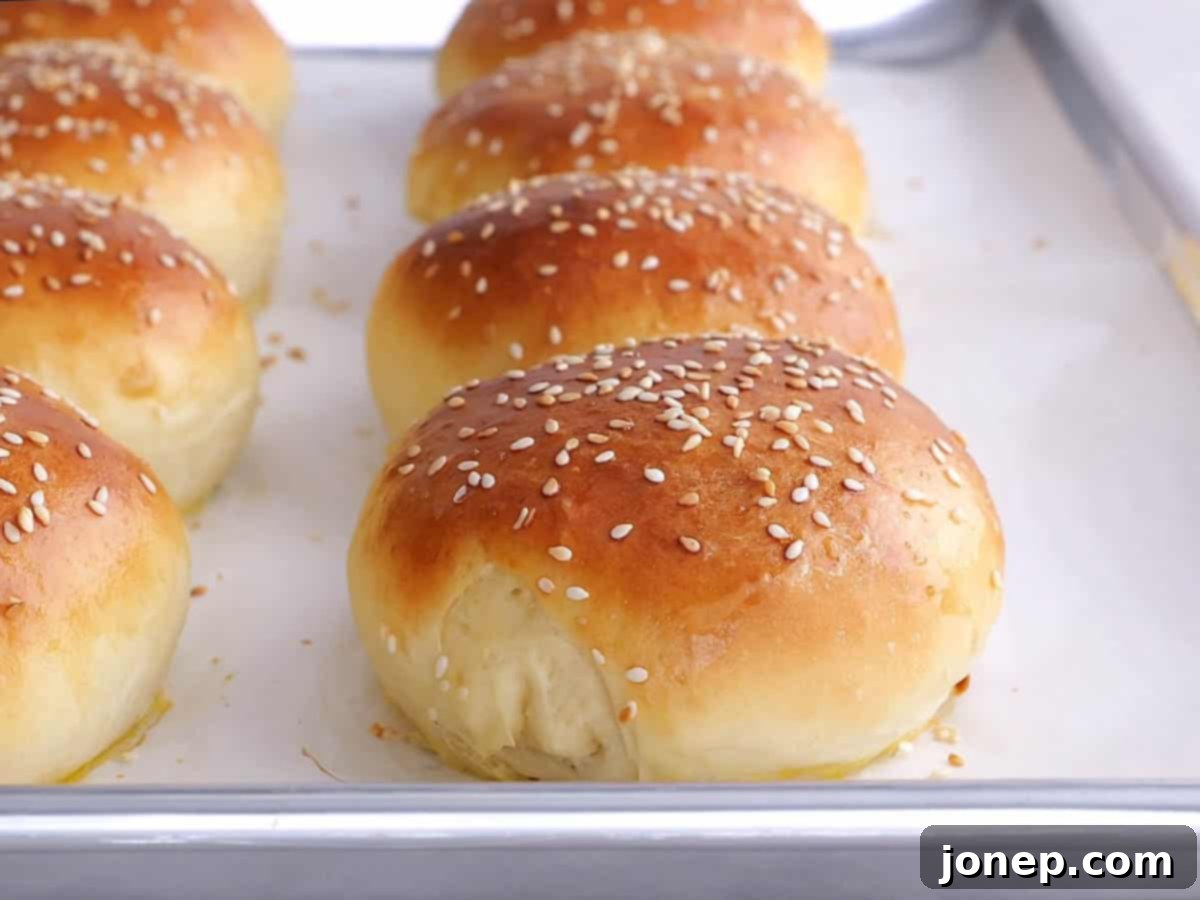
- Add Egg Wash and Sesame Seeds. Just before baking, prepare an egg wash by whisking one large egg with a tablespoon of water. This simple mixture is vital for giving your buns a beautiful, glossy, golden-brown crust and a professional appearance. Brush the egg wash evenly over the tops of each bun. If desired, immediately sprinkle sesame seeds (or other toppings like poppy seeds or everything bagel seasoning) onto the wet egg wash; the wash acts as an adhesive, ensuring they stick perfectly.
- Bake to Golden Perfection. Carefully transfer the baking sheet to your preheated 400°F (200°C) oven. Bake the buns for approximately 10 minutes, or until their tops are a deep golden brown. Keep a close eye on them, as oven temperatures can vary. Once baked, remove the buns from the oven and transfer them to a wire rack to cool completely. Allowing them to cool fully is essential, as this sets their internal structure and prevents them from becoming gummy.

- Slice, Fill, and Enjoy! Once completely cooled, slice your perfectly baked burger buns, load them up with your favorite burger patty, fresh toppings, and condiments. These homemade masterpieces are best served fresh on the day they are baked, offering an unparalleled taste and texture that will undoubtedly impress.

Ways to Make Burger Buns in Advance
While these buns are undeniably best enjoyed fresh from the oven, life happens! Luckily, there are excellent options for preparing them ahead of time, ensuring you can still enjoy delicious homemade buns without last-minute stress. Planning ahead can make your next barbecue or dinner party a breeze.
Chill or Freeze Unbaked Buns for Baking Later: This method allows you to bake fresh buns on demand. After shaping the buns as directed in Step 3, place them on a parchment-lined baking sheet. Cover the entire sheet pan securely with plastic wrap. You can then:
- Refrigerate: Chill the wrapped sheet pan in the fridge for up to 12 hours. When you’re ready to bake, remove the buns from the fridge and let them come to room temperature for at least 1 hour (or until visibly puffy again) before proceeding with the egg wash and baking instructions (Steps 6-8).
- Freeze Unbaked: For longer storage, place the wrapped sheet pan with shaped buns directly into the freezer for about 1 hour, or until the buns are firm. Once frozen, transfer the individual frozen buns to a freezer-safe ziplock bag or airtight container. They can be frozen for up to 1 month. To bake, thaw the buns in the refrigerator overnight or on the counter for a few hours. Once thawed, let them come to room temperature and proof again (as in Step 5) for about 30-60 minutes before applying egg wash and baking as usual.
Freeze Baked Buns: If you’ve baked a large batch or simply want to have pre-made buns on hand, freezing baked buns is a great option. Once the buns have cooled completely on a wire rack, store them in a freezer-safe ziplock bag or double-wrap them tightly with plastic wrap and then foil to prevent freezer burn. They can be frozen for a month or even longer if properly sealed. To serve, let them thaw at room temperature for a few hours, or for a warm, “just baked” experience, gently reheat them in a 350°F (175°C) oven, covered with foil, for about 15-20 minutes until warmed through.
Homemade Burger Buns Recipe FAQs
Here are answers to some common questions you might have about making these delicious burger buns:
Bread flour is highly recommended for this recipe because it has a higher protein content compared to all-purpose flour. This higher protein content leads to greater gluten development, which is essential for creating the ideal chewy texture and robust structure needed for sturdy burger buns. More gluten means a better rise and a more satisfying, airy texture. While you can certainly use all-purpose flour if it’s all you have on hand, expect a slightly softer, less chewy bun. For the best results and that classic bakery-style bun, stick with bread flour when specified in yeast-risen recipes.
Both active-dry yeast and instant yeast (also commonly known as quick-rise or rapid-rise yeast) will work effectively for this recipe. If you opt for instant yeast, you might notice that the dough rises a bit faster, potentially cutting down on the rising time by about half. However, the final baked results in terms of flavor and texture will be largely the same with either type. This recipe has not been specifically tested with fresh yeast.
While “proofing” yeast in warm water is a traditional step many bakers use, it’s not strictly necessary for this recipe, especially if you’re confident your yeast is fresh and active. I adopted the “dry-blend method” for this recipe, a technique often recommended by experts like Red Star Yeast. This method saves a bit of time! Soaking yeast does hydrate it and gives it a head start, but if you combine all dry ingredients with liquids heated to the correct temperature range of 120-130°F (which is warmer than just “warm water”), it achieves the same activation and hydration without the extra step. Just ensure your liquids are within this specified temperature range.
Kneading bread by hand is a wonderfully tactile experience and perfectly achievable without a stand mixer, though it requires a bit more elbow grease. It’s essentially a process of stretching, folding, and pushing the dough to develop its gluten. While more hands-on, it’s not difficult to learn. I highly recommend watching this tutorial on how to knead bread by hand for clear visual instructions. The key is to work the dough until it’s smooth, elastic, and passes the “windowpane test” (where you can stretch a small piece thin enough to see light through it without tearing).
Several factors can prevent your dough from rising properly, leading to dense buns:
- Expired or Inactive Yeast: This is the most common culprit. Always check the expiration date on your yeast package. If unsure, you can test it: combine 1 packet (2 ¼ teaspoons) of yeast with ½ cup warm water (105-115°F) and 1 teaspoon of sugar. Let it sit for 10 minutes. If the mixture foams up and visibly increases in volume, your yeast is still good. If not, it has expired and needs to be replaced.
- Incorrect Liquid Temperature: Yeast is sensitive to temperature. If your melted butter and milk mixture was too hot (over 140°F), it would kill the yeast, rendering it inactive. Conversely, if the liquid was too cold, the yeast wouldn’t activate effectively. It’s incredibly helpful to use a kitchen thermometer to ensure your liquids are consistently between 120-130°F.
- Too Cold a Rising Environment: Dough needs warmth to rise. If your kitchen is too cold, the yeast will be sluggish. Find a warm, draft-free spot, or consider creating a makeshift proofing box.
If your buns turned out dense or failed to rise sufficiently, consider these points:
- Yeast Issues: Refer to the solutions above regarding expired or improperly activated yeast. An inactive yeast means no rise.
- Too Much Flour: This is a very common mistake. Adding too much flour results in a stiff, dry dough that struggles to rise and yields dense, heavy buns. The brioche dough should be firm but still quite tacky to the touch – it should clear most of the sides of the bowl during kneading, but a little stickiness to your fingers is perfectly normal and desired. Resist the urge to keep adding flour beyond what’s specified, and rely on the dough’s texture rather than just a measurement.
- Insufficient Rising Time: Dough needs adequate time to rise in a warm environment. It should almost double in size during both the first and second proofing stages. If your kitchen is cool, it will take longer. Patience is a virtue in bread making!
- Deflating the Dough: During shaping or the gentle flattening step, if you’re too rough and push out all the accumulated air, the buns won’t have the structure to rise again in the oven, leading to a dense texture. Be gentle!
For optimal freshness, homemade burger buns are best enjoyed on the day they are baked. However, you can store leftovers at room temperature in an airtight container or a sealed plastic bag for 2-3 days. For longer storage, see the “Ways to Make Burger Buns in Advance” section above, which details freezing options for both unbaked and baked buns. Reheating briefly in a warm oven can help refresh slightly stale buns.
Get the Recipe
Ready to bake these incredible burger buns? Here’s the full, printable recipe to guide you through every step!

Burger Buns
Pin Recipe
Leave a Review
Ingredients
- 3 tablespoons (42 grams) unsalted butter
- ¼ cup (56 grams) milk
- ¾ cup (170 grams) water
- 3-3 ½ cups (390-455 grams) bread flour
- 2 ¼ teaspoons (7 grams) active dry yeast (1 envelope)
- 2 tablespoons (37 grams) granulated sugar
- 1 ½ teaspoon salt
- 2 large eggs , beaten slightly to break up the yolks
- 1 large egg + 1 tablespoon water , whisked together for egg wash
- Sesame seeds , optional
Equipment
Instructions
-
In a small saucepan, melt the butter. Add the milk and water, and warm over medium low heat until temperature is 120-130°F (use a thermometer for best results. If you don’t have a thermometer, you can remove from heat as soon as mixture is steaming.)
-
In the bowl of a stand mixer fitted with a dough hook (or in a large bowl if planning to mix by hand), combine 2 ½ cups of the bread flour, the yeast, sugar and salt. Add the warm water mixture and the whisked eggs, mixing on low speed until incorporated.
-
Add the remaining bread flour 2 tablespoons at a time while mixing on medium low speed until dough almost clears the bowl and is only a slightly sticky to the touch (It’s okay if some dough sticks to your fingers). You may not need all 3½ cups of flour. Knead for another few minutes until dough is very smooth and elastic.
-
Gather dough into a ball and cover bowl with plastic wrap. Put in a warm place and allow to rise until doubled, 1 hour or more.
-
Punch down dough gently and let rest for a few minutes. Divide the dough into eight equal pieces and shape into balls. Place on a sheet pan lined with parchment paper. Spray some plastic wrap with non-stick cooking spray and loosely place over the shaped buns.
-
Return to a warm place and continue to rise for an additional 30 minutes to 1 hour. While buns are rising, very gently pat the tops with your hands 2-3 times to encourage the dough to expand outward instead of upward. (Be careful not to push the air out of the dough though, or you’ll lose the rise and buns will be flat.)
-
When ready to bake, preheat oven to 400°F. Brush buns with egg wash and sprinkle with sesame seeds, if desired.
-
Bake until golden brown, about 10 minutes. Cool completely on a wire rack.
Notes
- Use a kitchen scale to first weigh the bulk dough, then divide that number by 8. Use the scale to make sure each bun is the same weight and size. This way buns will be uniform and bake evenly!
- Be sure the warm liquid mixture (butter, milk, water) does not exceed 140°F! Temperatures higher than that will kill the yeast and prevent it from creating rise in the dough and buns. A thermometer is your best friend here.
- I like to give a range for the flour required in recipes like this because there are many factors that affect how much you’ll actually need (e.g., humidity, how you measure flour, egg size). This way, you know to look for how the dough should look and feel – soft and slightly tacky, but not overly sticky – instead of relying strictly on a numerical measurement.
This post was originally published in July 2010. Pictures have been updated and slight improvements have been made to the recipe for even better results.
