The Ultimate Kitchen Sink Cookies: Sweet, Salty & Irresistibly Chewy (Milk Bar Copycat!)
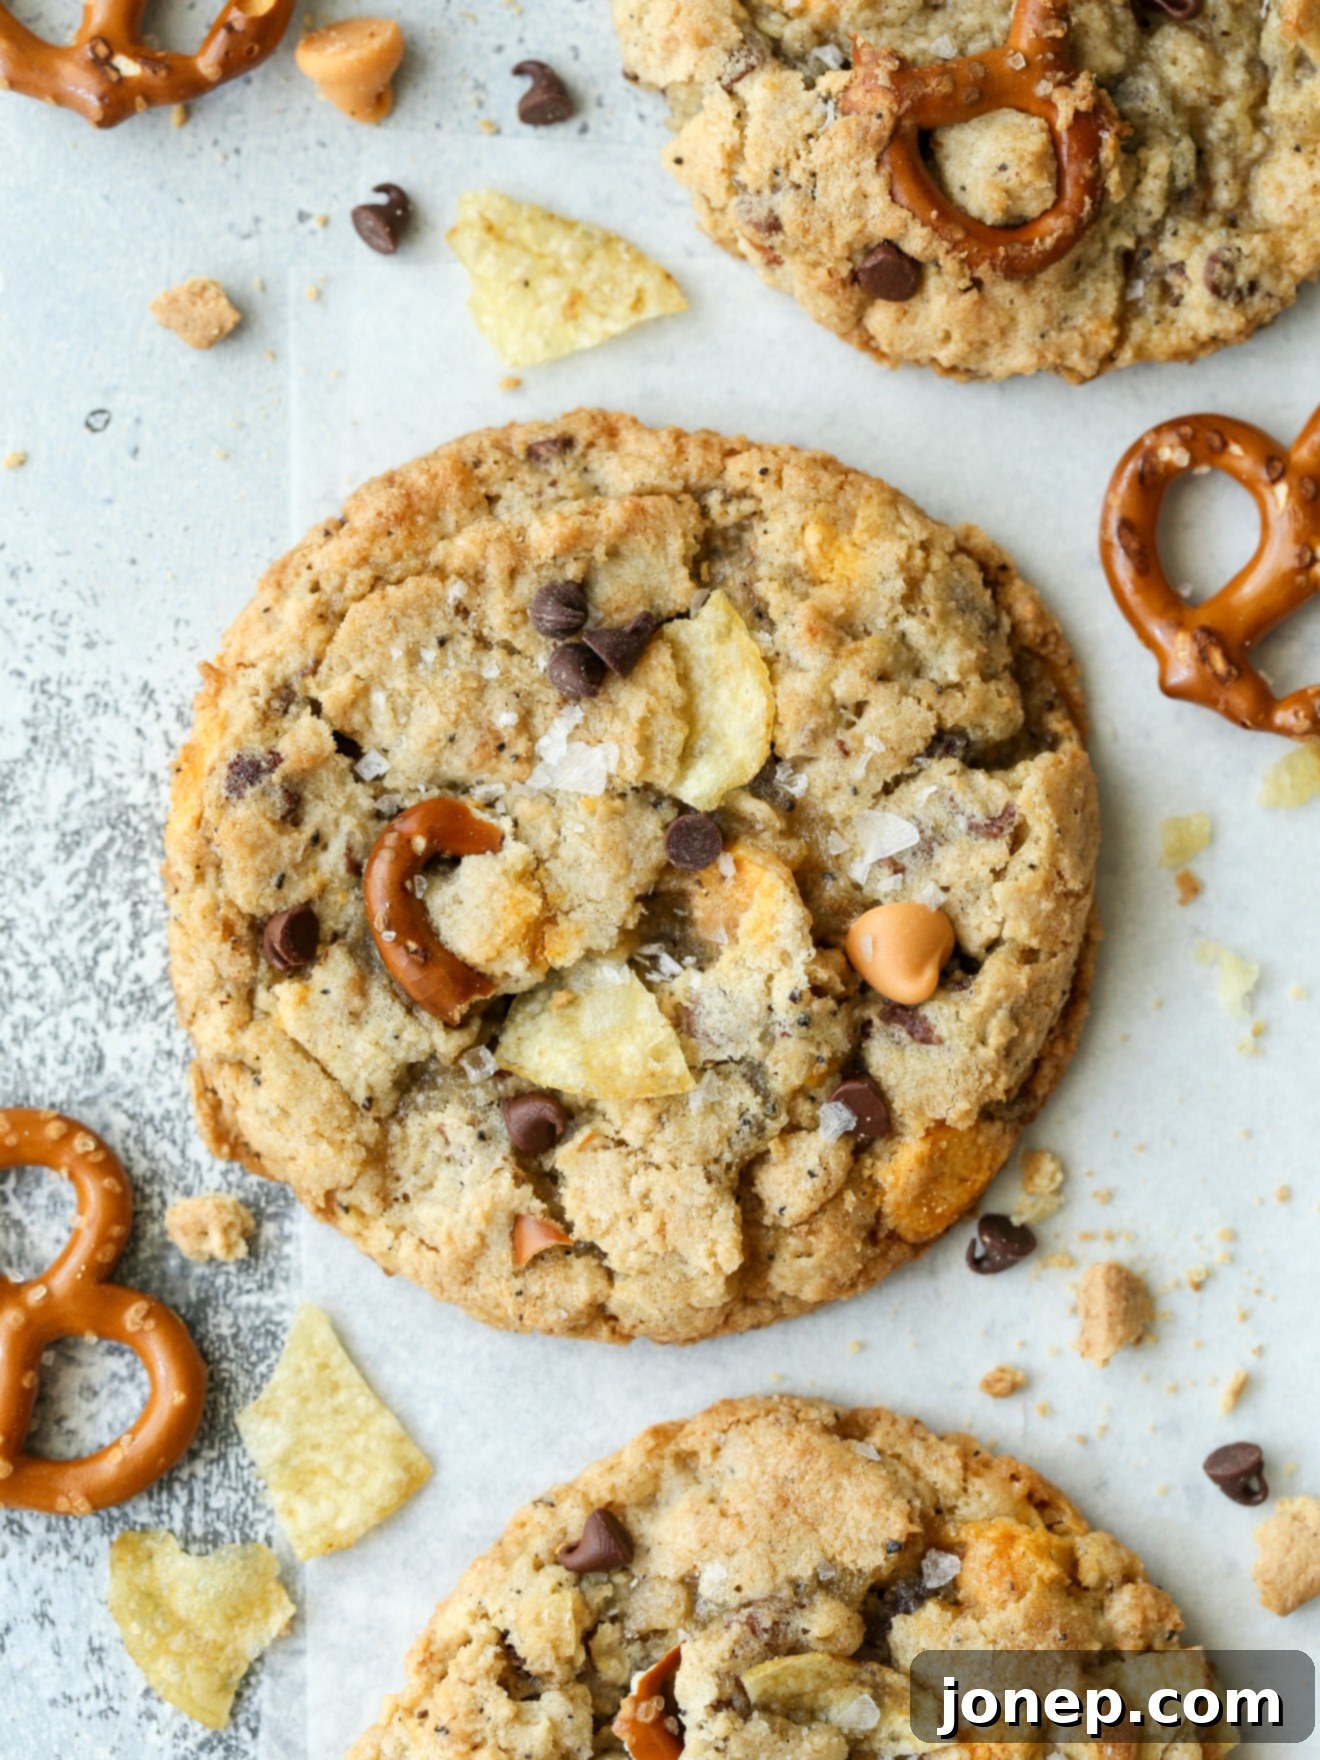
Prepare to fall in love with these Kitchen Sink Cookies, a delightful medley of flavors and textures that truly has “everything but the kitchen sink”! Each bite is an adventure, crammed full of crunchy pretzels, crispy potato chips, hearty oats, sweet graham crackers, rich chocolate, creamy butterscotch, and a unique hint of ground coffee. The result? Cookies that are wonderfully unique and undeniably delicious, boasting perfectly chewy centers contrasted by delightfully crisp edges.

This recipe is a labor of love, crafted to be a very close copycat of Christina Tosi’s famously indulgent Milk Bar Compost Cookies. I’ve had the pleasure of baking her original cookies many times, and they are, without a doubt, amazing! However, Christina’s recipe often calls for a few specialized ingredients that can be tricky to source for the home baker, and it involves several extra steps that, while rewarding, aren’t always practical for a busy day.
And so, inspired by her brilliant concept, I’ve lovingly developed my own version! These Kitchen Sink Cookies capture the essence of the original, offering a remarkably similar flavor and texture profile that I daresay is just as delicious and satisfying. You get all the complexity and fun without the fuss, making it accessible for any home baker craving that iconic sweet-and-salty treat.
What Makes These “Everything But The Kitchen Sink” Cookies So Special?
These aren’t just any cookies; they’re an experience. What truly sets these Kitchen Sink Cookies apart is a combination of meticulous mixing and an extraordinary blend of mix-ins. The texture, which is slightly crisp on the outside and wonderfully soft and chewy on the inside, is largely thanks to a specific mixing method. We beat the butter, sugars, and eggs together for a longer duration than typical cookie recipes. This extended creaming incorporates a significant amount of air bubbles into the mixture, which is the secret to achieving that desirable light and crispy exterior after baking, while maintaining a wonderfully tender interior.
But beyond the perfect texture, the biggest difference in flavor and sheer enjoyment comes from the sheer variety of mix-ins! While semi-sweet chocolate chips, pretzels, oats, and potato chips are common, even expected, ingredients for any “kitchen sink” style cookie, we take it a step further. The inclusion of crushed graham crackers, finely ground coffee, and sweet butterscotch chips adds layers of unexpected delight and complexity. The graham crackers contribute a subtle honeyed sweetness and a unique crumbly texture, the ground coffee offers an intriguing depth and a slight, pleasant bitterness that enhances the chocolate without tasting overtly like coffee, and the butterscotch chips bring a rich, caramel-like sweetness that ties all the other elements together beautifully.
These cookies truly live up to their name – they are bursting with “everything but the kitchen sink!” It’s this audacious combination of sweet, salty, crunchy, and chewy elements that creates a harmonious flavor profile, making each bite an exciting discovery. The contrast between the crunchy pretzels and potato chips, the chewiness of the oats, the melt of chocolate, and the surprising hint of coffee creates a symphony for your taste buds.
Essential Ingredients You’ll Need for Your Kitchen Sink Cookies
Ready to embark on this delicious baking adventure? Here’s a glimpse of the fantastic ingredients you’ll need to create these incredible Kitchen Sink Cookies. You’ll find the full, detailed recipe with exact measurements and instructions at the bottom of this article. This recipe is designed to be versatile, so while we highly recommend trying it as written to experience the full magic, you also have the freedom to swap in some of your favorite mix-ins! We’ll dive into some exciting ingredient substitution ideas further down.
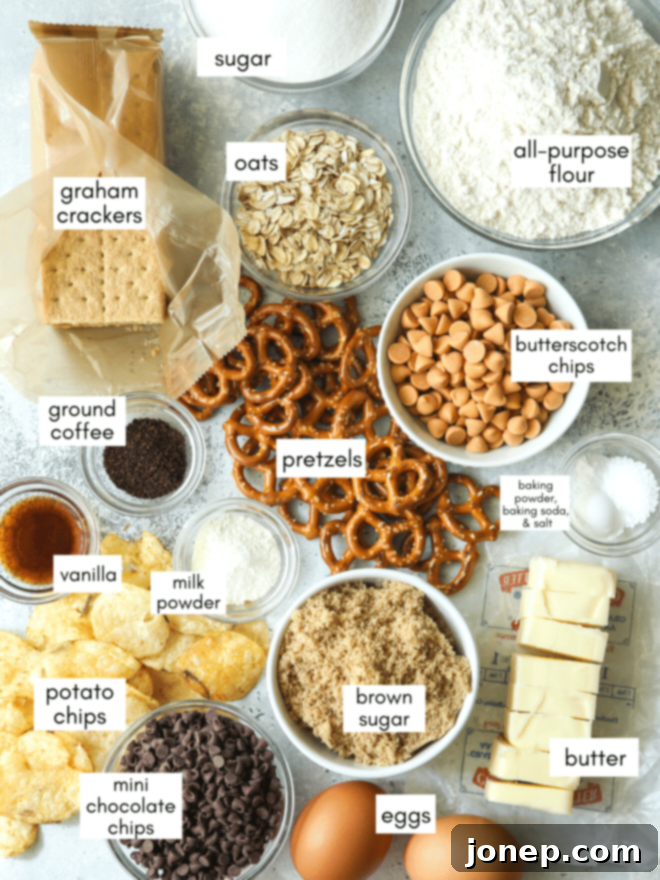
Despite the long list of components, making these cookies is fairly straightforward and far from difficult. At its heart, it’s your typical drop cookie recipe, just elevated with a little something extra – or rather, a lot of “somethings extra”! To ensure a smooth and enjoyable baking process, I can’t stress enough the importance of reading through the entire recipe from start to finish before you begin. Given the number of ingredients, it’s also incredibly beneficial to practice a little “mise-en-place” if possible. This French culinary term simply means “everything in its place” – having all your ingredients gathered, measured, and ready to go before you even turn on your mixer. This preparation will not only make the baking process easier but also more efficient and enjoyable, preventing any mid-recipe scrambles for forgotten items.
Step-by-Step: How to Craft Your Perfect Kitchen Sink Cookies
Creating these sensational cookies is a rewarding process, and following these steps closely will ensure you achieve that coveted balance of crisp edges and chewy centers. Pay close attention to the mixing times, as they are key to the unique texture of these treats.
- Cream Butter and Sugars: Begin by placing your softened butter, light or dark brown sugar, and granulated sugar into the bowl of an electric mixer or stand mixer. Using the paddle attachment (if you have one), beat these ingredients on medium-high speed for a good 2-3 minutes. You’re looking for the mixture to become noticeably pale in color and wonderfully fluffy in texture. This step is crucial for incorporating air, which contributes to the cookie’s final texture.
- Add Eggs, Vanilla, and Beat Extensively: Incorporate the large eggs one at a time, mixing briefly after each addition to just combine. Once the eggs are in, add the vanilla extract. Now, increase the mixer speed to medium-high and beat the mixture for an additional 6-7 minutes. This extended beating time is a secret weapon; it aerates the batter significantly, resulting in a light and frothy consistency that guarantees those perfect crispy edges. Remember to pause once or twice to scrape down the sides and bottom of the bowl with a spatula, ensuring everything is thoroughly mixed.
- Mix in Dry Ingredients: In a separate bowl, whisk together the all-purpose flour, milk powder, baking powder, baking soda, and salt. This ensures that the leavening agents and salt are evenly distributed. Add this dry mixture to the wet ingredients in the mixer all at once. Mix on low speed until the flour is just incorporated. Be careful not to overmix at this stage, as over-developing the gluten can lead to tough cookies.
- Add Small Mix-ins: In another bowl, combine your crushed graham cracker crumbs, old-fashioned rolled oats, ground coffee, mini semi-sweet chocolate chips, and butterscotch chips. Add this entire blend to the cookie dough and mix on low speed until they are just evenly incorporated throughout the dough.
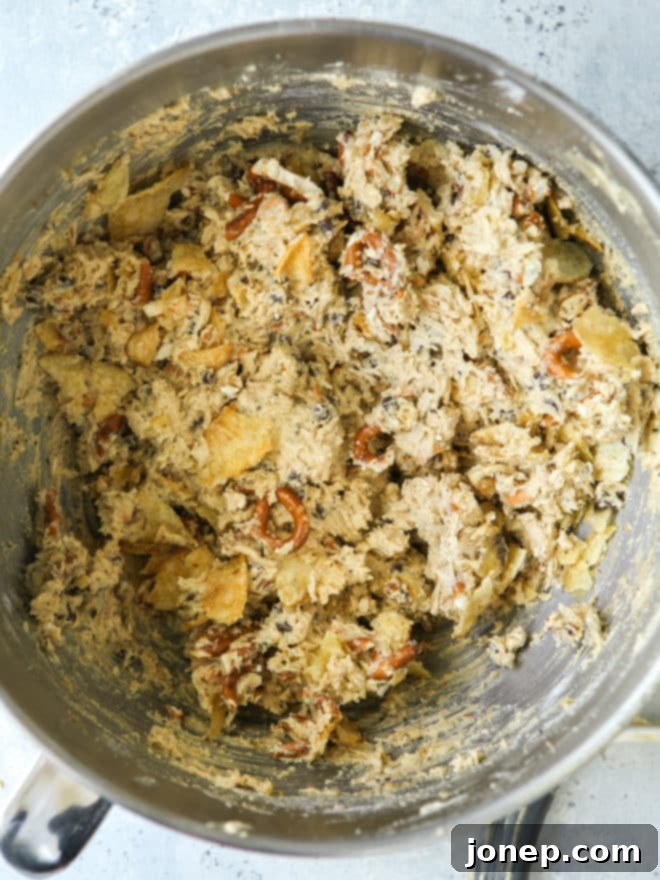
- Gently Mix in Potato Chips and Pretzels: Finally, add the larger, more delicate mix-ins: the broken-up mini pretzels and the potato chips. Mix for just a few seconds on low speed, or even gently fold them in by hand with a spatula. The goal is to distribute them without excessively breaking up the potato chips or pretzels, preserving their textural integrity.
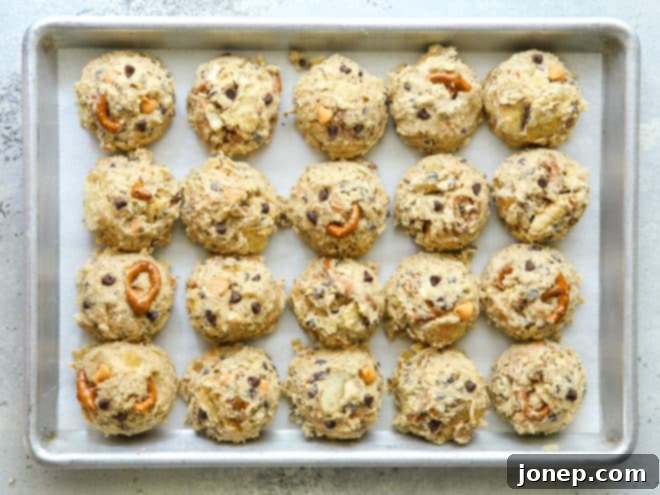
- Chill the Dough (Crucial Step!): This step is non-negotiable for the best results. Portion the cookie dough using a large cookie scoop (a 3-tablespoon size #20 is ideal) onto a sheet pan lined with parchment paper. If you’re feeling extra fancy, you can press a few more mix-ins onto the top of each dough round for a visually appealing finish. Cover the sheet pan with plastic wrap and chill the dough in the fridge for a minimum of 1 hour, or up to several days. Chilling allows the flavors to meld and prevents excessive spreading during baking.
- Bake to Golden Perfection: Preheat your oven to 375°F (190°C). Arrange the chilled cookie dough balls about 4 inches apart on a sheet pan lined with parchment paper. This spacing is important to prevent them from merging as they bake. Bake for approximately 10-12 minutes, or until the edges are golden brown and crisp, but the centers still look slightly soft.
- Cool and Enjoy: Once baked, remove the cookies from the oven. Let them cool on the sheet pan for at least 5 minutes. This crucial resting period allows them to finish setting up and firm up properly, making them easier to transfer. If some cookies baked up a bit misshapen due to the many mix-ins (which is common!), gently push their edges back into a round shape with a spatula immediately after they come out of the oven, while they are still hot and pliable. If desired, sprinkle with a pinch of coarse or flaky salt for an extra flavor boost. Then, enjoy them warm, or transfer them to a wire rack to cool completely.
Frequently Asked Questions About Kitchen Sink Cookies
I completely understand, there’s a lot going on in these cookies! Some of the mix-ins like the chocolate chips, butterscotch chips, pretzels, and potato chips can certainly be substituted to tailor them to your preference. However, for the core dry ingredients and the wet batter, I don’t recommend making other substitutions or omissions, as the unique texture and overall flavor profile might not be the same. The balance is key!
If you want to play around with the larger mix-ins to create your own “kitchen sink” masterpiece, here are a few delicious ingredient substitution ideas:
- Crunchy additions: Toffee bits, chopped nuts like walnuts, pecans, or almonds, crushed cornflakes, or even more types of pretzels!
- Sweet additions: White chocolate chips, dark chocolate chunks, peanut butter chips, chopped candy bars (like Snickers or Butterfinger), mini marshmallows.
- Fruity additions: Dried fruit such as cherries, cranberries, or chopped apricots for a touch of tartness.
- Other fun options: Shredded coconut, sprinkles for a festive look.
Note: To maintain the proper dough consistency and ensure even baking, try not to add more than 3 cups of total mix-ins. Too many additions can make the dough difficult to handle and may prevent the cookies from baking through properly.
Yes, you absolutely do! I know it sounds a little strange at first, but trust me, it’s a game-changer. These cookies won’t taste strongly of coffee at all. Instead, the ground coffee adds a delightful, unusual, and pleasing crunch to the cookies, along with a subtle, earthy depth of flavor that perfectly complements the chocolate and butterscotch. It’s a secret ingredient that elevates the whole experience!
You can use any unused regular coffee grounds you like – just avoid instant coffee. If, however, you’re truly hesitant or simply prefer not to include it, you can omit the coffee grounds completely without severely impacting the overall cookie.
Milk powder (also often labeled as instant milk, they are essentially the same product) is a fantastic secret ingredient in many baked goods, and especially in these cookies! It serves two primary purposes: it adds a wonderful depth of flavor, enhancing the overall richness of the cookie, and it significantly improves the texture. The milk solids in the powder contribute to the Maillard reaction during baking, which creates a more golden crust and a truly soft, chewy texture. Look for it in the baking aisle of most well-stocked grocery stores.
Note: While it is technically possible to omit it, I have not tested this specific recipe without milk powder. Its inclusion is integral to achieving the desired Milk Bar copycat texture and flavor, so I highly recommend using it.
This cookie dough absolutely, positively must be chilled for at least 1 hour before baking. This step is non-negotiable for a few critical reasons. First, chilling solidifies the butter in the dough, which prevents the cookies from spreading too much and melting all over your sheet pan in the oven. Second, it allows the flour to fully hydrate and the flavors of all those wonderful mix-ins to meld and deepen, resulting in a more flavorful and perfectly textured cookie. Don’t skip this step!
The unique crisp and chewy texture of these cookies, with all their diverse mix-ins, tends to dry out a bit faster than simpler cookies like basic chocolate chip cookies. For the absolute best experience, I highly recommend enjoying them within 1-2 days of baking. To keep them fresh and delicious, store them at room temperature in an airtight container. If they start to feel a little stale, a quick 10-15 second zap in the microwave can often revive their chewy goodness!
Yes, absolutely! This cookie dough stores exceptionally well, both in the fridge and the freezer, making it perfect for baking ahead or having fresh cookies on demand. You can store the raw dough balls in an airtight container in the fridge for up to a week. For longer storage, freeze the portioned dough balls on a sheet pan for about 30 minutes until firm, then transfer them to a plastic freezer bag. They’ll keep well in the freezer for a month or even longer. When you’re ready to bake, simply let the frozen dough balls thaw on the counter while your oven preheats, then bake as directed.
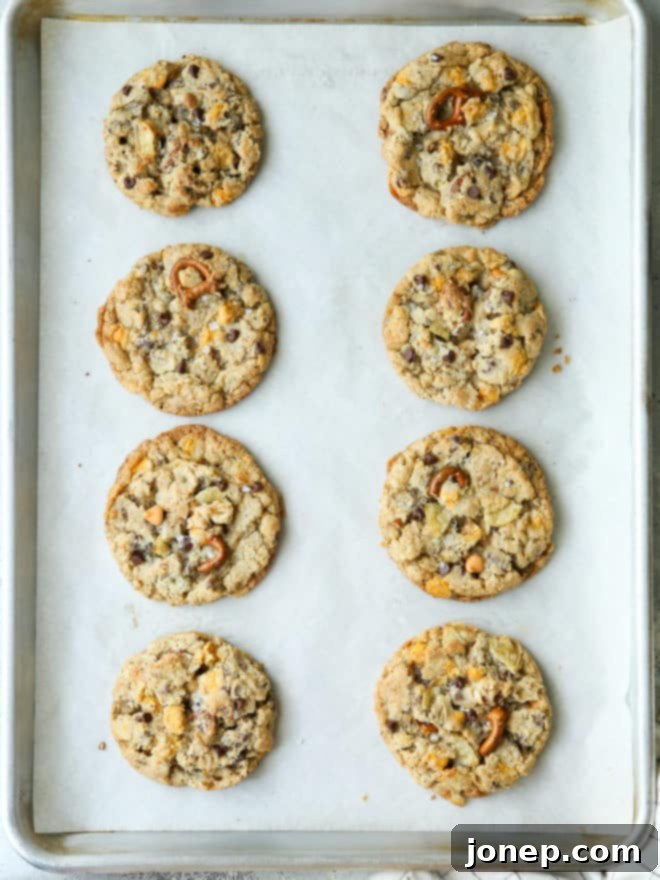
Because these cookies are so generously packed with an abundance of delicious mix-ins, some dough balls might naturally be denser or have more unevenly distributed chunks than others. This can sometimes cause them to not spread out perfectly evenly as they bake, leading to a somewhat lumpy or wonky shape. It’s a common occurrence with “kitchen sink” style cookies! (As shown in some of my photos, about half of my cookies bake up perfectly round, while others need a little help.)
The good news is, it’s an easy fix! To reshape lumpy cookies, simply use a spatula or the back of a spoon to gently push the edges back into a round shape. This has to be done immediately after the cookies come out of the oven, while they are still hot and pliable, before they get a chance to set and cool.
Excessive spreading is a common cookie woe, and it’s usually due to a few factors. The most likely culprit is butter that was too warm. For perfect cookies, start with butter that is slightly soft at room temperature, but not at all melted or greasy. When you press your finger into it, it should leave a small indent, but your finger shouldn’t easily push all the way through. Overly soft or melted butter will cause your cookies to spread excessively.
Additionally, always make sure to place your chilled cookie dough balls onto a cool baking sheet. A pan that’s still warm from a previous batch will cause the butter in the dough to melt too quickly before the cookie has a chance to set, leading to more spreading.
If your cookies didn’t spread and ended up dry and crumbly, the most common reason is an incorrect measurement of flour. It’s incredibly important to measure flour correctly! All of my recipes are tested using the “spoon and level” method, which involves spooning flour into your measuring cup and then leveling it off with a straight edge (like the back of a knife) without packing it down. For ultimate accuracy, using a kitchen scale to measure flour by grams is always the most reliable method.
If you measure flour by scooping directly from the bag with your measuring cup, you can easily add much more flour than intended. This excess flour drastically changes the ratio of ingredients in the dough, leading to a stiff dough that won’t spread and a dry, unpleasant cookie.

More Irresistible Cookie Recipes to Try
If you loved these unique Kitchen Sink Cookies, you’re in for a treat! Explore more exciting and delicious cookie recipes from our collection:
- Rice Krispie Treat Chocolate Chip Cookies
- Chocolate Marshmallow Cookies
- Monster Cookies
- Caramel Stuffed Chocolate Chip Cookies
Shop Essential Tools for This Recipe
To make your baking experience even smoother, here are some recommended tools that will help you achieve perfect Kitchen Sink Cookies every time:

Kitchen Sink Cookies
Pin Recipe
Leave a Review
Ingredients
- 10 tablespoons butter , softened to room temperature (140 grams)
- ½ cup light or dark brown sugar (107 grams)
- 1 cup granulated sugar (200 grams)
- 2 large eggs
- 1 teaspoon vanilla extract
- 1 ½ cup all-purpose flour (195 grams)
- 1 tablespoon milk powder/instant milk
- ½ teaspoon baking powder
- ¼ teaspoon baking soda
- 1 teaspoon salt
- ⅓ cup crushed graham crackers (50 grams, about 5 graham cracker squares)
- ⅓ cup old-fashioned rolled oats (30 grams)
- 2 teaspoons coffee grounds (see Note)
- ½ cup mini semi-sweet chocolate chips (90 grams)
- ½ cup butterscotch chips (85 grams)
- 1 cup mini pretzels , broken up (40 grams)
- 2 cups potato chips (70 grams)
- Coarse or flaky salt , for sprinkling (optional)
Instructions
-
Beat butter, sugar and brown sugar with an electric mixer or stand mixer on medium high (with paddle attachment if you have it) for 2-3 minutes until pale and fluffy.
-
Mix eggs and vanilla in one at a time, mixing briefly between each addition. Then beat on medium high for 6-7 minutes until batter is light and frothy, pausing once to scrape down the bowl.
-
In a separate bowl stir together all-purpose flour, milk powder, baking powder, baking soda, and salt and add to the mixer all at once. Mix until just incorporated.
-
In a separate bowl combine graham cracker crumbs, oats, coffee grounds, mini chocolate chips and butterscotch chips in a bowl, then add all at once and mix until incorporated.
-
Add the pretzels and potato chips and mix for just a few seconds to incorporate them through the dough without breaking up the potato chips as much as possible.
-
Portion cookie dough with a large cookie scoop (3 tablespoon size #20) onto a sheet pan lined with parchment paper (and if desired, add a few more mix-ins to the top of each round), cover with plastic wrap, and chill in the fridge for 1 hour and up to several days.
-
Place chilled cookie dough about 4 inches apart on a sheet pan lined with parchment paper. Bake at 375°F for about 10-12 minutes.
-
If cookies bake up misshapen (because there are so many mix-ins this is common), use a spatula to gently push hot cookies back into a round right after they come out of the oven. If desired, sprinkle with coarse salt.
-
Let the cookies cool on the sheet pan for at least 5 minutes to finish setting up. Then enjoy warm, or transfer to a wire rack to cool completely.
Notes
Notes
- You can use salted or unsalted butter, per your preference.
- To make graham cracker crumbs, seal in a ziplock bag and crush with something heavy. It’s okay if some crumbs are bigger than others.
- You can use any coffee grounds you like except instant coffee, and make sure they are unused coffee grounds. If preferred, they can be omitted entirely.
- Thicker, kettle-style potato chips are preferred for this recipe. Do not break up before adding to cookie dough.
- If you don’t have a #20 large cookie scoop, you can use a ¼ cup measuring scoop. Cookies need to be on the larger size because of all the bulky mix-ins.
- Cookies will be best the day they are baked, but will keep at room temperature in an airtight container for several days.
- Chilled cookie dough can be stored in the fridge for up to 1 week and baked as desired.
- To freeze cookie dough, freeze for 30 minutes on a sheet pan, then transfer to an airtight freezer bag and store for a month or more. Let cookie dough rounds thaw while oven preheats.
Recipe adapted from Momofuku Milk Bar: a Cookbook by Christina Tosi.
