Decadent Chocolate Mint Thumbprint Cookies with Peppermint White Chocolate Ganache
Prepare to be enchanted by these truly special Dark Chocolate Mint Thumbprint Cookies, a delightful fusion of rich, deep chocolate and refreshing peppermint. Each cookie features a tender, intensely chocolatey base, made even more luxurious with both melted dark chocolate and premium cocoa powder. The crowning glory is a luscious, creamy peppermint white chocolate ganache, nestled perfectly in the center. These cookies aren’t just a treat; they’re a celebration of flavor and texture, making them absolutely perfect for holiday gatherings, festive cookie swaps, or simply as an indulgent anytime dessert. Their festive appearance and irresistible taste are guaranteed to make them a standout on any dessert platter.

If you’re seeking a unique yet undeniably festive cookie to elevate your Christmas cookie exchange or impress guests at your next holiday party, look no further. These Chocolate Mint Thumbprint Cookies offer a sophisticated twist on a beloved classic. The deeply flavorful dark chocolate cookie provides a robust canvas for the bright, cool notes of peppermint, encased in a silky white chocolate ganache. This exquisite combination delivers a burst of seasonal cheer, blending the comforting familiarity of chocolate with the invigorating zest of mint. We promise these thumbprints will become a cherished recipe in your baking repertoire, loved by everyone who tries them!
Table of Contents
- Why You’ll Love These Chocolate Mint Cookies
- Key Ingredients for Irresistible Thumbprint Cookies
- How to Bake Perfect Chocolate Mint Thumbprint Cookies
- Expert Baking Tips for Thumbprint Perfection
- Creative Variations and Storage Suggestions
- More Peppermint Cookie Recipes to Explore
- Get the Full Chocolate Mint Thumbprint Recipe
Why You’ll Love These Chocolate Mint Cookies
These Chocolate Mint Thumbprint Cookies are more than just a dessert; they’re an experience. The moment you bite into one, you’re greeted by a symphony of textures and flavors. The cookie itself is wonderfully soft and chewy, with a rich, intense dark chocolate flavor that’s both comforting and sophisticated. This is perfectly complemented by the creamy, smooth peppermint white chocolate ganache filling, which melts in your mouth and leaves a delightful cooling sensation. The balance of sweet and minty, soft and slightly crisp (from the sugar coating) is simply divine. They also boast a beautiful, inviting appearance that makes them ideal for showcasing at any festive gathering or as a thoughtful homemade gift. They truly capture the essence of holiday baking with a touch of elegance.
Key Ingredients for Irresistible Thumbprint Cookies
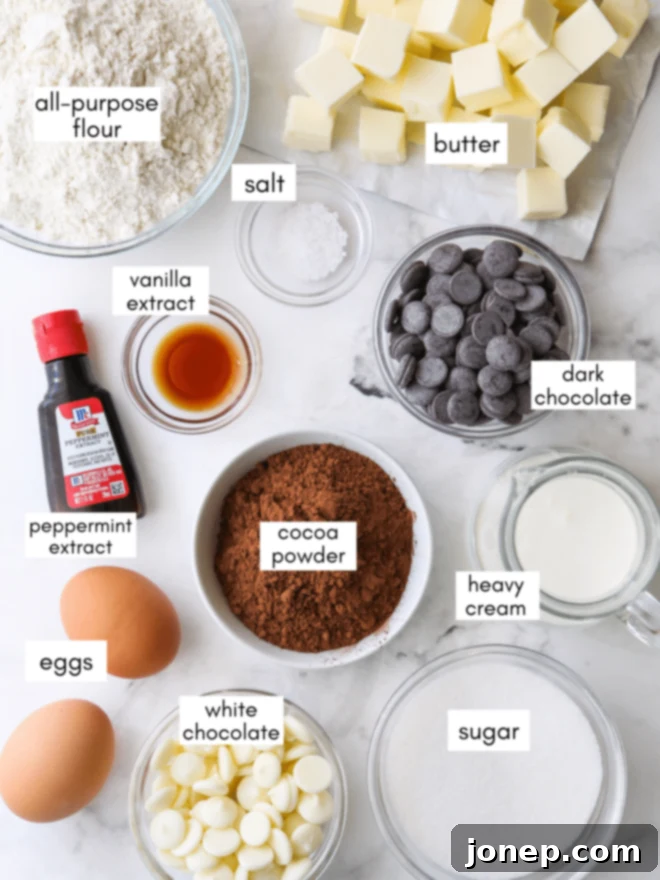
Creating these sensational Chocolate Mint Thumbprint Cookies starts with a careful selection of high-quality ingredients. For the intensely chocolatey cookie base, you’ll need both rich dark chocolate and unsweetened cocoa powder, ensuring a deep and complex flavor profile. All-purpose flour provides the perfect structure, while unsalted butter and a blend of granulated and brown sugars contribute to a tender, moist crumb. Egg yolks add richness and bind the dough, and a touch of vanilla and peppermint extracts infuses the cookies with their signature aroma and taste. For the star filling, premium white chocolate and heavy cream are essential for a silky-smooth ganache, along with additional peppermint extract to enhance that refreshing minty kick. Coarse sugar for rolling adds a beautiful sparkle and a delicate crunch.
How to Bake Perfect Chocolate Mint Thumbprint Cookies
Crafting these delicious Chocolate Mint Thumbprint Cookies is a rewarding process, and following these detailed steps will ensure perfect results every time. Take your time with each stage, and you’ll be enjoying these festive treats in no time.
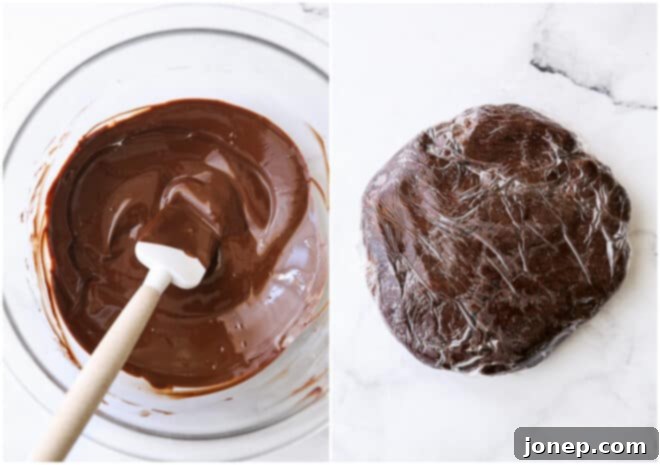
- Melt the Dark Chocolate. Begin by gently melting your chopped dark chocolate. You can achieve this using a double boiler, which provides even heat and prevents scorching, or a microwave. If using a microwave, heat in short 20-30 second bursts, stirring well after each interval, until only a few small lumps remain. Continue stirring off the heat until the chocolate is completely smooth and glossy. Set it aside to cool slightly, as you don’t want to add hot chocolate to your butter mixture.
- Prepare the Rich Cookie Dough. This recipe utilizes the classic creaming method, which is incredibly straightforward with a stand mixer or a hand-held electric mixer. Start by creaming together the softened unsalted butter with both granulated and brown sugars until the mixture is light, fluffy, and pale in color. This process incorporates air, contributing to the cookie’s tender texture. Next, beat in the large egg yolks one at a time, ensuring each is fully incorporated before adding the next. Finally, stir in the vanilla extract and peppermint extract, which are crucial for the flavor profile.
- Incorporate Dry Ingredients and Chill the Dough. In a separate bowl, whisk together your all-purpose flour, cocoa powder, and salt. Gradually add this dry mixture to the wet ingredients, mixing on low speed until just combined. Be careful not to overmix, as this can lead to tough cookies. Once the dough comes together, form it into a flattened disk, wrap it tightly in plastic wrap, and chill it in the refrigerator for at least 30 to 60 minutes. Chilling is essential as it firms up the dough, making it much easier to handle and preventing the cookies from spreading too much during baking, ensuring they hold their perfect thumbprint shape.
- Roll Dough Balls, Coat in Sugar, and Create a Thumbprint. Once chilled, scoop the dough into rounded tablespoon-sized portions. Roll each portion between your palms to form a smooth ball. Next, roll each cookie dough ball generously in coarse or sanding sugar. This adds a beautiful sparkle, a delightful textural contrast, and a hint of extra sweetness. Place the coated dough balls onto a parchment-lined baking sheet, spaced a few inches apart. Using the back of a rounded tablespoon, a wooden spoon handle, or even your thumb, gently press an indent into the center of each cookie. Aim for about halfway down, creating a distinct well without cracking the sides too much.
- Bake to Perfection. Preheat your oven to 350°F (175°C). Bake the cookies for approximately 12-14 minutes total. About halfway through the baking time (around 6-7 minutes), gently remove the baking sheet from the oven and use your chosen tool (spoon or thumb) to press down the center of the thumbprints again. This helps to re-establish the well if the dough has puffed up. Repeat this step immediately after removing the cookies from the oven as well, to ensure deep, perfectly shaped wells for your ganache filling. Allow the cookies to cool completely on a wire rack before filling.
- Prepare the Smooth Peppermint White Chocolate Ganache. While the cookies are cooling, prepare the indulgent ganache. In a small saucepan or microwave-safe bowl, heat the heavy cream until it’s steaming and just barely simmering, but not boiling vigorously. Pour the hot cream over your finely chopped white chocolate in a heatproof bowl. Let it sit undisturbed for 2-3 minutes to allow the heat to melt the chocolate. Then, gently stir with a whisk or spoon until the mixture is completely smooth, glossy, and emulsified. Stir in the peppermint extract.
- Fill and Serve the Delicious Thumbprints. Allow the ganache to cool slightly at room temperature for about 15-20 minutes, stirring occasionally. This will allow it to thicken to a spoonable consistency. Once the cookies are completely cool and the ganache is thickened, spoon a generous amount of the peppermint white chocolate ganache into the center of each dark chocolate thumbprint cookie. For the best presentation and set, let the ganache filling rest for at least 15-30 minutes, or even chill briefly in the refrigerator, before serving these magnificent treats. This allows the ganache to set properly, ensuring a clean bite.



baking tip: Mastering Your Thumbprint Cookies
To achieve that ideal “thumbprint” every time, make an initial well in the center of the cookie dough ball *before* placing them in the oven. Then, about 10 minutes into the baking process, gently remove the tray and press down on any parts of the cookie that may have puffed up, reinforcing the indent. Finally, immediately after removing the cookies from the oven, give one last gentle press to secure the shape. This three-stage approach guarantees a beautiful, deep cavity ready to hold your luscious ganache filling.

Expert Baking Tips for Thumbprint Perfection
To ensure your Chocolate Mint Thumbprint Cookies turn out absolutely perfect, keep these additional tips in mind:
- Invest in Quality Chocolate: The flavor of these cookies heavily relies on the quality of your chocolate. For both the dark chocolate in the dough and the white chocolate in the ganache, opt for high-quality chocolate chips or finely chopped bar chocolate. When selecting white chocolate, always check the ingredients list to ensure “cocoa butter” is present, rather than cheaper substitutes like “palm oil,” which can affect texture and flavor.
- Mastering the Initial Indent: When creating the first indent in the cookie dough balls, press down only about halfway. The goal is to form a defined well without causing the cookie ball to crack excessively. A few small, hairline cracks are perfectly normal and will blend beautifully as the cookie bakes.
- Understanding Ganache Consistency: Don’t be alarmed if your white chocolate ganache appears slightly yellowish when first melted. As it cools and thickens, it will become more opaque and turn to its characteristic beautiful white hue. For a truly thick and luxurious ganache, allow it to cool for approximately 15-20 minutes at room temperature, stirring frequently, before spooning it into the cooled cookies. This patience ensures a perfectly set and creamy filling.
- Delicious Dark Chocolate Ganache Variation: While the peppermint white chocolate ganache is exquisite, these dark chocolate cookies are also incredibly versatile. For a deep, rich, and intensely chocolatey experience, consider filling them with a classic dark chocolate ganache instead. Simply follow the ganache recipe, substituting the white chocolate with an equal amount of high-quality chopped dark chocolate.
- Add a Festive Garnish: To elevate the holiday spirit and add an extra layer of texture and flavor, consider topping the freshly filled ganache with some finely crushed candy cane pieces. The vibrant red and white against the dark cookie and white ganache creates a stunning visual, and the extra crunch and burst of peppermint are delightful.
- Freezing for Future Enjoyment: These chocolate cookies are excellent candidates for freezing. Once baked and completely cooled (before adding the ganache filling), store them in an airtight freezer bag or container for up to one month. When you’re ready to serve, simply thaw them at room temperature and then prepare and add the fresh peppermint white chocolate ganache. This makes holiday baking much easier to plan ahead!
- Optimal Storage for Freshness: Once filled, these Chocolate Mint Thumbprint Cookies are best stored at room temperature in an airtight container for up to 3-4 days. For extended freshness, especially in warmer climates, you may store them in the refrigerator, but allow them to come to room temperature for about 15-20 minutes before serving for the best texture and flavor experience.

More Peppermint Cookie Recipes to Explore
If the delightful combination of chocolate and peppermint has captured your heart, then you’re in for a treat! We’ve got more irresistible cookie recipes that perfectly blend these classic flavors, ensuring you can enjoy that refreshing festive taste all year round.
- Peppermint White Chocolate Chip Cookies
- Chocolate Candy Cane Sandwich Cookies
- Chocolate Mint Chip Cookies
Get the Full Chocolate Mint Thumbprint Recipe
Ready to bake a batch of these exquisite Chocolate Mint Thumbprint Cookies? Below, you’ll find the complete recipe, including precise measurements and step-by-step instructions. This detailed guide ensures you have all the information needed to create these stunning and delicious cookies. Happy baking!

Chocolate Mint Thumbprint Cookies
Pin Recipe
Leave a Review
Ingredients
For the chocolate cookies:
- 4 ounces dark chocolate , chopped (110 grams)
- 1 ½ cup all-purpose flour (190 grams)
- ½ cup cocoa powder (40 grams)
- ¾ teaspoon salt
- 1 cup unsalted butter , at room temperature (226 grams)
- ⅓ cup granulated sugar (65 grams)
- 2 tablespoons packed light or dark brown sugar
- 2 large egg yolks
- 1 teaspoon vanilla extract
- ½ teaspoon peppermint extract
- Coarse sugar , for rolling
For the filling:
- 3 ounces white chocolate , chopped (85 grams)
- 3 tablespoons heavy cream
- ½ teaspoon peppermint extract
Instructions
To make the cookies:
-
In a double boiler or heat proof bowl set over a pan of simmering water, melt the chocolate. Stir until smooth, then remove from heat to cool slightly.
-
In a bowl, sift together the flour, cocoa powder, and salt. In the bowl of a stand mixer fitted with a paddle attachment, beat the butter and sugar and brown sugar together on medium high speed until light and fluffy. Add the egg yolks one at a time, mixing after each, followed by the vanilla and peppermint extracts.
-
Add the melted chocolate and mix until combined. Add the flour mixture all at once and mix until just combined. Form the dough into a disk and wrap in plastic wrap. Chill in the fridge for at least 30 minutes.
-
Preheat oven to 350°F. Line a sheet pan with parchment paper.
-
Roll the dough into rounded tablespoons and roll in the course sugar. Place on the prepared sheet pan and use your thumb or a dowel to create a well in the center of each cookie.
-
Bake for 10 minutes, then remove from the oven and reinforce indents with your thumb or dowel. Return to oven and bake for an additional 4-5 minutes, just until cracks begin to form in the cookies. Remove from oven and reinforce the indents again. Let cool completely on a cooling rack.
To make the filling:
-
In the microwave, heat the cream for about 30 seconds until boiling. Pour over the chocolate, let sit for 2 minutes, then stir until smooth. Stir in the peppermint extract.
-
Pour the filling into the cooled cookies. Let cookies firm up in the fridge for 15 minutes. Store cookies at room temperature in an airtight container for up to several days.
Notes
Adapted from Baked Explorations.
This recipe was originally published December 2013.
