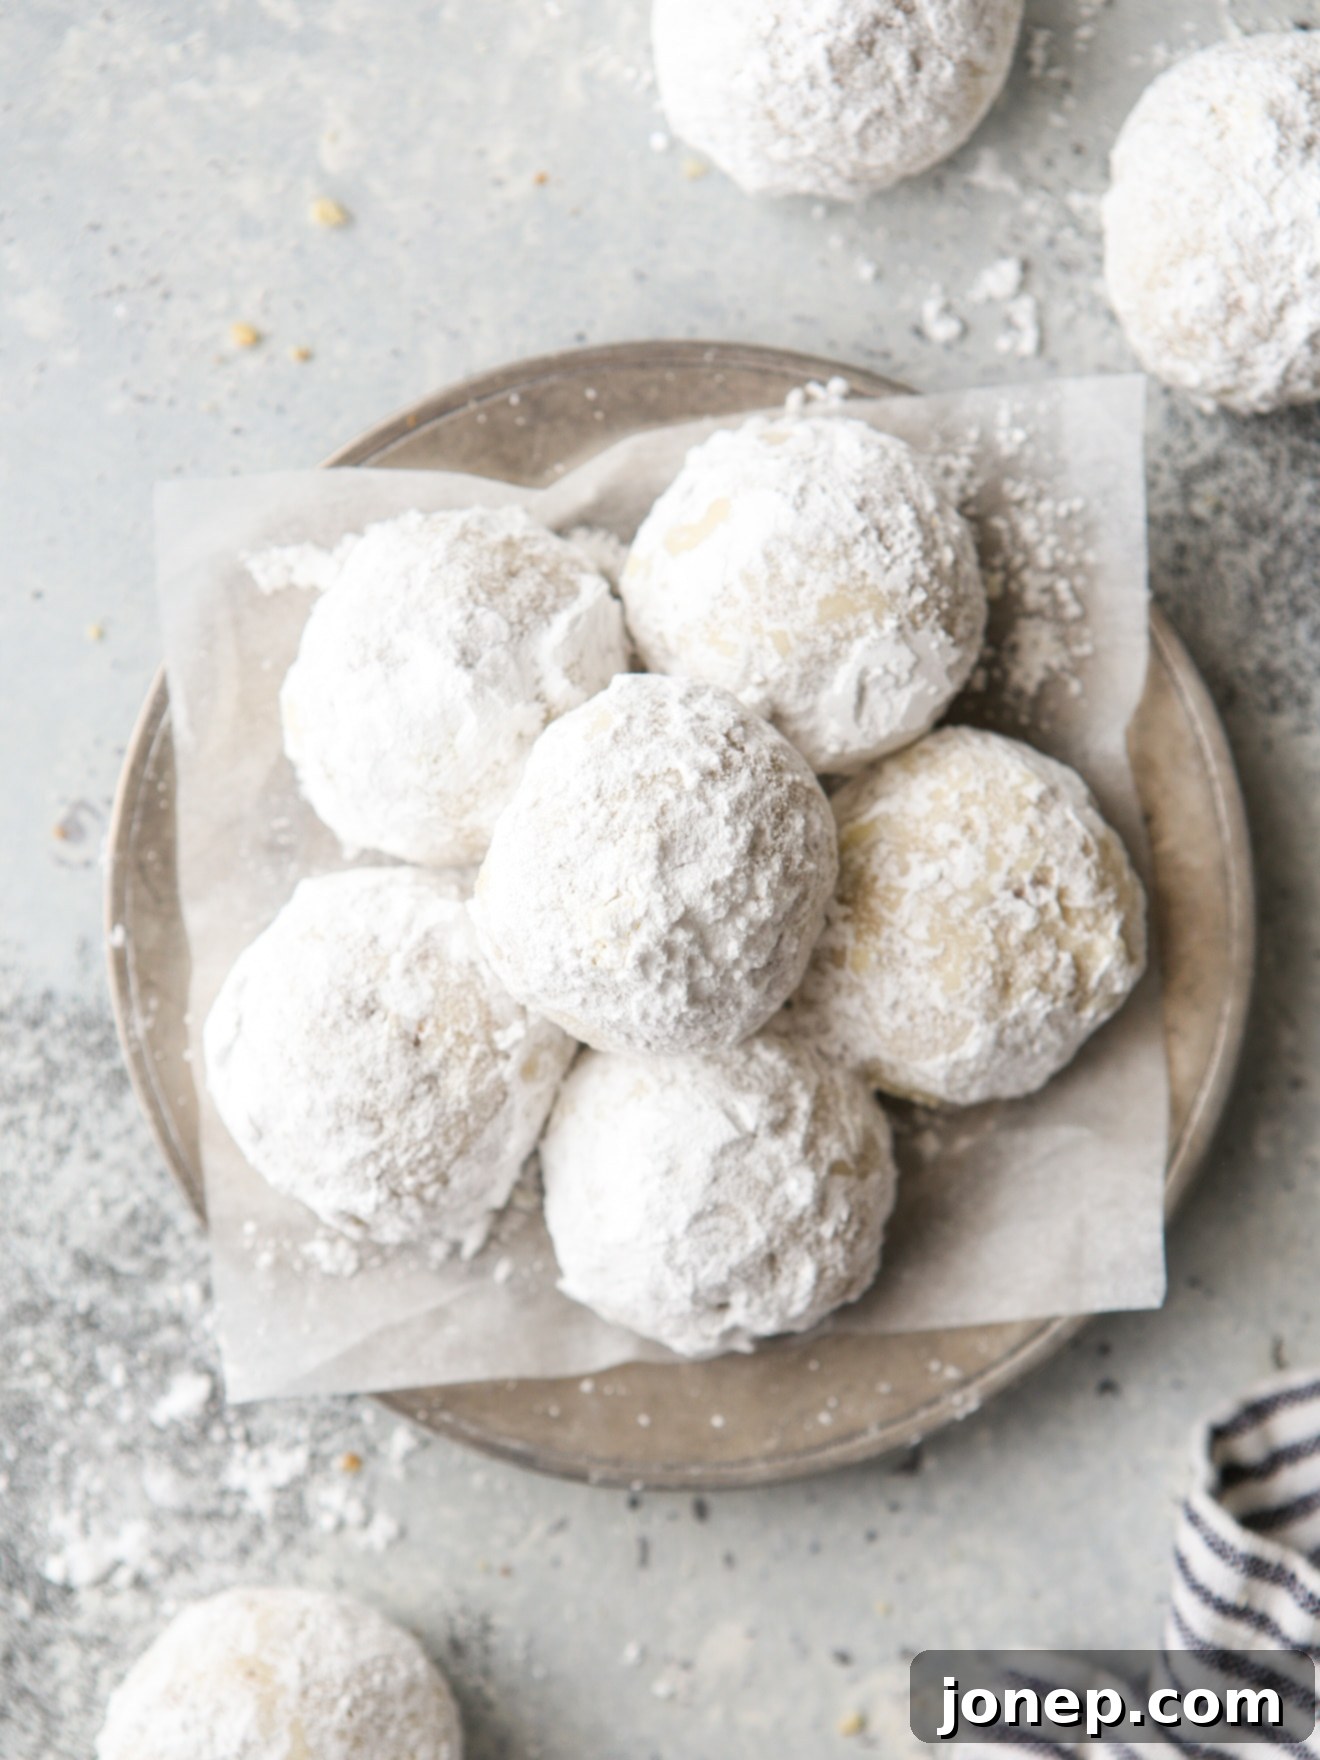
The Ultimate Guide to Making Perfect Snowball Cookies: Your Essential Holiday Treat
Whether you know them as classic snowball cookies, elegant Mexican wedding cookies, festive Russian tea cakes, or simply melt-in-your-mouth meltaway cookies, these delicate, buttery, and nutty confections are an undeniable crowd favorite. Their universal appeal spans cultures and generations, making them a staple in holiday baking and a delightful treat any time of year.
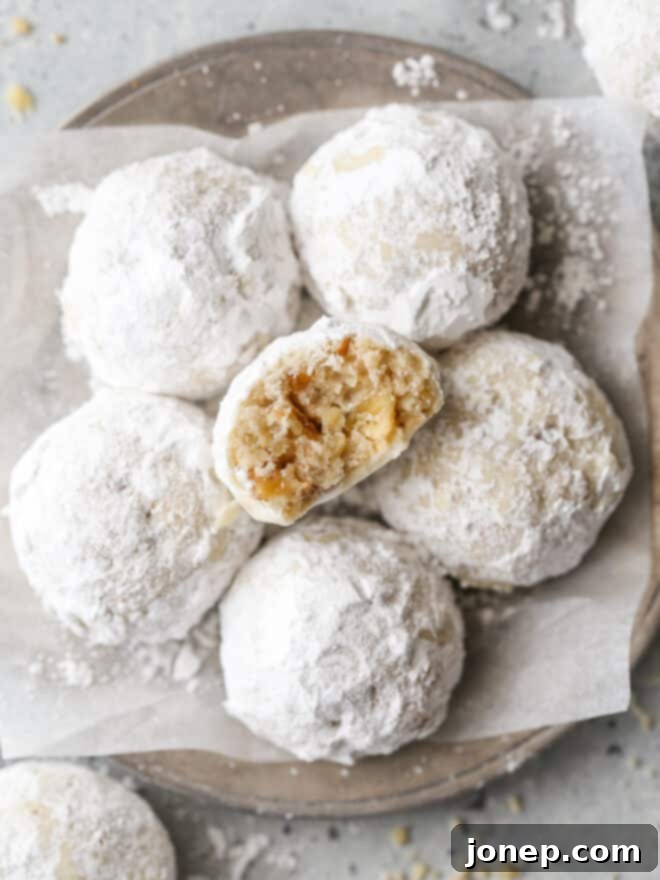
These exquisite cookies are instantly recognizable by their generous dusting of powdered sugar, giving them their characteristic “snowball” appearance. Beneath this sweet, frosty exterior lies a rich, buttery, and often nut-filled center that practically dissolves on your tongue. They boast a uniquely tender and crumbly texture that truly lives up to the “meltaway” moniker. For many, including myself, the holiday season simply isn’t complete without a fresh batch of these wonderfully flavorful and impossibly delicate cookies.
While walnuts are traditionally the most common nut found in snowball cookies, their versatility is one of their many charms. You can easily experiment with a variety of finely chopped nuts such as pecans, pistachios, almonds, or hazelnuts. Each choice imparts a slightly different flavor profile, allowing you to customize this classic to your liking. I’ve even explored unique twists, like a cherry and almond variation, which offers a delightful tartness and a beautifully distinct taste, proving just how adaptable these cookies can be.
The Simple Yet Essential Ingredients for Perfect Snowball Cookies
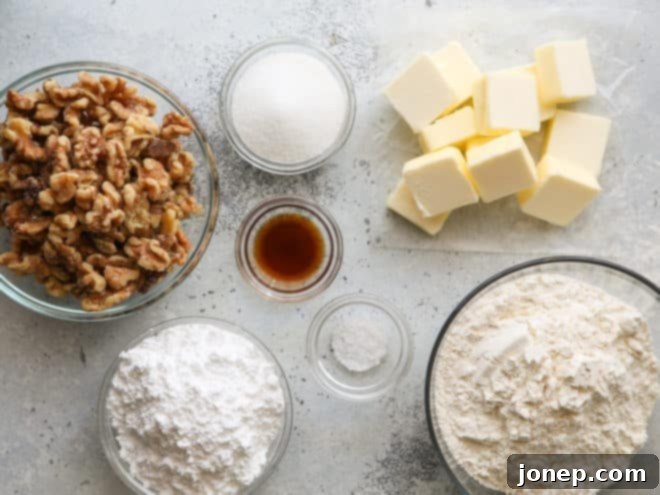
One of the many reasons these cookies are a beloved classic is their incredible simplicity. With just a handful of pantry staples, you can create a batch of these exquisite treats. The magic lies in the quality of your ingredients and how they come together. Here’s a closer look at everything you’ll need to whip up a batch of delicious snowball cookies (you’ll find the full, detailed recipe further down on this page):
- Unsalted Butter: The foundation of these buttery cookies. Using unsalted butter allows you to control the total salt content in your recipe. Ensure it’s at the perfect room temperature for optimal creaming.
- Granulated Sugar: This provides a touch of sweetness and helps create that light, fluffy texture when creamed with the butter.
- Vanilla Extract: A crucial flavor enhancer that elevates the overall taste. Opt for a good quality pure vanilla extract for the best results.
- All-Purpose Flour: The structural component of our cookies. Proper measurement is key to achieving the desired crumbly-yet-tender texture.
- Salt: Just a pinch of salt balances the sweetness and brings out the nutty, buttery flavors.
- Finely Chopped Nuts: This is where much of the cookie’s character comes from. While walnuts are traditional, feel free to use your favorite! Pecans, pistachios, almonds, or hazelnuts are all excellent choices. The key is to chop them very finely so they integrate seamlessly into the dough and contribute to that melt-in-your-mouth feel.
- Powdered Sugar: The star of the show for the iconic snowy coating. You’ll need a generous amount for the double-rolling process.
How to Make Snowball Cookies: A Step-by-Step Guide for Perfection
Crafting these delightful snowball cookies is a straightforward process that yields incredibly rewarding results. Follow these simple steps to achieve that perfect crumbly, buttery, and snow-dusted treat:
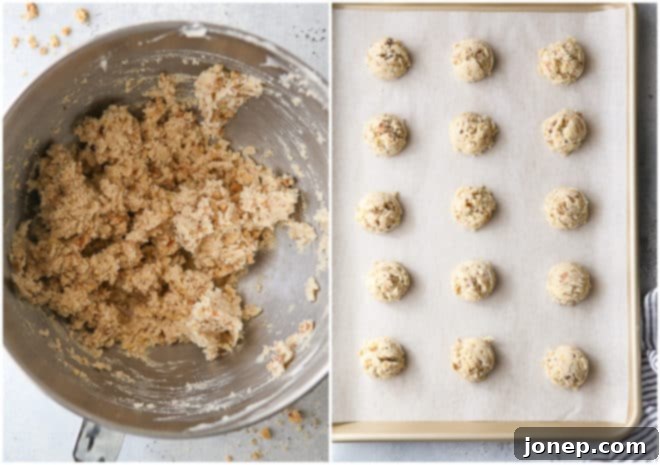
- Prepare the Dough Using the Creaming Method: This is a foundational baking technique that makes these cookies so tender. You’ll start by beating the softened unsalted butter and granulated sugar together until the mixture is incredibly creamy, light, and fluffy. This process incorporates air, which contributes to the cookies’ delicate texture. After achieving this airy consistency, the vanilla extract is added for flavor. Finally, the dry ingredients—flour, finely chopped nuts, and salt—are gently mixed in. The dough will initially appear quite dry and crumbly, almost like wet sand, but don’t be alarmed. Continue mixing until it just comes together, forming a cohesive dough that holds its shape when pressed. Overmixing at this stage can lead to tough cookies, so mix only until combined.
- Portion and Shape the Dough Balls: Once your dough is ready, it’s time to shape it. Using a medium #40 spring-loaded scoop (which holds approximately 1.5 tablespoons) is ideal for creating uniformly sized cookies, ensuring even baking. Scoop out rounded portions of dough and then gently roll them between your palms to form smooth, compact balls. Place these dough balls onto a parchment-lined baking sheet, leaving about 2 inches of space between each to allow for slight spreading during baking.
- Bake to Golden Perfection: Preheat your oven to 350°F (175°C). Bake the cookies for approximately 15 minutes. You’ll know they’re ready when the bottoms are lightly golden brown, and the edges are just set, though the tops may still appear pale. It’s crucial not to overbake these cookies, as they are meant to be tender and slightly crumbly. They will continue to firm up as they cool.
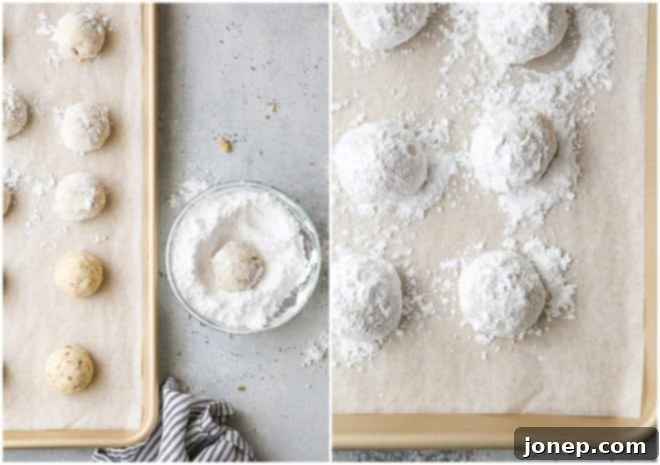
- The Double Roll in Powdered Sugar: This is the signature step that gives snowball cookies their iconic snowy appearance and adds an extra layer of sweetness.
- First Roll (While Warm): As soon as the cookies come out of the oven, let them sit on the baking sheet for about 5-10 minutes. They should be cool enough to handle comfortably but still warm. While warm, gently roll each cookie in a bowl of powdered sugar. The warmth of the cookie helps the sugar adhere beautifully, creating a thick, sweet coating.
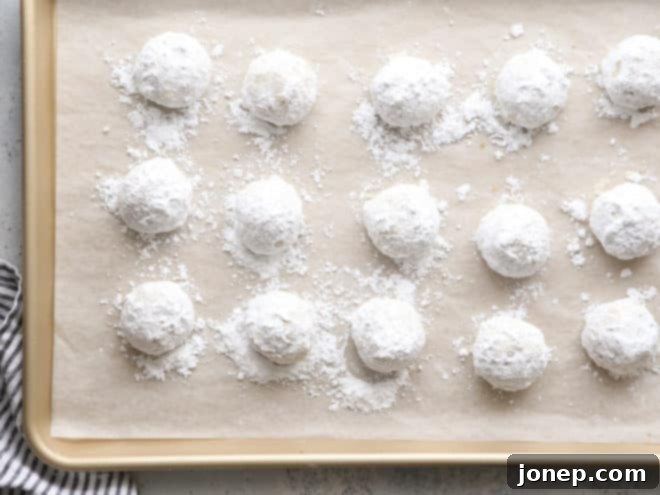
- Second Roll (Once Cooled Completely): Transfer the sugared cookies to a wire rack to cool completely. Once they’ve reached room temperature, roll them in powdered sugar a second time. This double-dusting technique ensures a thick, opaque white coating that truly resembles a fresh snowfall. Don’t worry if this step gets a little messy—it’s part of the charm and well worth the effort for the perfect finish!
- Enjoy Your Delicious Creation: And finally, it’s time to savor your homemade snowball cookies! Their delicate texture and rich flavor make them truly irresistible. I have no doubt you’ll love every crumbly, sweet bite.
My Best Cookie Tips for Snowball Cookie Success
Achieving perfectly uniform, melt-in-your-mouth snowball cookies is incredibly satisfying. Here are my tried-and-true tips to ensure your baking experience is smooth and your cookies turn out exceptionally delicious every time:
- Mastering Butter Temperature: This is perhaps the most critical factor for perfect cookies. Your unsalted butter should be soft enough that when you gently press a finger into it, it leaves an indent without your finger sinking all the way through. If the butter looks shiny, greasy, or feels melty, it’s too warm. Butter that is too soft will cause your cookie dough to be too loose, leading to cookies that spread excessively in the oven and lose their shape. If it’s too cold and hard, it won’t cream properly with the sugar, resulting in a dense dough.
- Measure Flour with Precision: Incorrect flour measurement is a common baking pitfall. Always measure flour correctly! All of my recipes, including this one, are meticulously tested using the “spoon and level” method. This means you lightly spoon flour into your measuring cup until it overflows, then level off the excess with a straight edge (like the back of a knife). Scooping directly from the bag can compact the flour, adding too much to your recipe. Too much flour will result in a very dry, crumbly dough that won’t hold together well, and your baked cookies will be tough and prone to falling apart.
- Embrace Nut Versatility and Proper Preparation: While walnuts are traditional, don’t hesitate to experiment with different nuts! I’ve had fantastic results with pecans, pistachios, almonds, and hazelnuts. Each nut offers its own unique flavor profile, allowing you to customize your snowball cookies. The crucial element, regardless of your nut choice, is to ensure they are *very finely chopped*. This allows them to integrate seamlessly into the dough, contributing to the melt-in-your-mouth texture without creating large, chunky bites. A food processor can make quick work of this, but be careful not to over-process them into a butter.
- The Magic of Parchment Sheets: For effortless cookie baking and easy cleanup, I highly recommend using pre-cut parchment sheets. They prevent sticking, promote even baking, and make transferring cookies a breeze. If you don’t have pre-cut sheets, regular parchment paper or silicone baking mats work just as well.
- Freeze Dough for Fresh Cookies On Demand: Snowball cookie dough freezes beautifully! This is a fantastic tip for meal prepping or simply having fresh-baked cookies whenever a craving strikes. Simply scoop and roll the dough balls, then arrange them on a baking sheet and freeze until solid. Once frozen, transfer the dough balls to an airtight freezer bag or container. When you’re ready to bake, you can bake them directly from frozen, adding a few extra minutes to the baking time, or let them thaw slightly. For detailed instructions, see my guide on how to freeze cookie dough.
- Optimal Storage for Freshness: These cookies are best enjoyed within a few days of baking, but they will keep well at room temperature for about a week. Store them in an airtight container to prevent them from drying out and to maintain their delicate texture and powdered sugar coating.
- Gifting with Care: Snowball cookies make a wonderful edible gift, especially during the holidays. If you plan on sharing these festive treats, consider how to package them thoughtfully to prevent the powdered sugar from rubbing off too much and to protect their delicate structure. Refer to my tips for how to package up cookies for gifts and shipping for best practices.
- Sifting Powdered Sugar: For the smoothest, most even powdered sugar coating, sift your powdered sugar before rolling the cookies. This removes any lumps and ensures a beautiful, velvety finish.
- Cooling Rack Essentials: While the first roll in powdered sugar happens when cookies are warm, it’s vital to transfer them to a wire cooling rack to cool completely before the second roll. This allows air to circulate around the cookies, preventing them from becoming soggy and ensuring that delightful crumbly texture.
More Irresistible Cookie Recipes You’ll Love
If you’ve enjoyed baking these snowball cookies, you’re in for a treat! Our collection of cookie recipes offers something for every palate and occasion. Explore some of our other cherished favorites:
- Brown Butter Pecan Cookies: A deeply flavorful cookie with a hint of toasted nutty goodness.
- 4-in-1 Shortbread Cookies: Versatile and classic, these buttery shortbreads are perfect for any occasion.
- Chocolate Crinkle Cookies: Rich, fudgy, and beautiful with their powdered sugar cracks.
- Caramel Stuffed Chocolate Chip Cookies: An indulgent twist on a beloved classic.
Shop Essential Tools for Your Baking Adventure
Having the right tools can make all the difference in your baking. Here are some of my go-to items that will help you achieve perfect snowball cookies and beyond:

Snowball Cookies
Pin Recipe
Leave a Review
Ingredients
- ¼ cup (50 grams) granulated sugar
- ¾ cup (170 grams) unsalted butter , at room temperature
- 1 teaspoon vanilla extract
- 1 ½ cup (180 grams) all-purpose flour
- 1 ½ cup (180 grams) walnuts , very finely chopped (See Notes)
- Pinch of salt
- About 1 cup (113 grams) powdered sugar
Instructions
-
Preheat oven to 350°F. Line a sheet pan with parchment paper or a silicone baking mat.
-
In the bowl of a stand mixer fitted with a paddle attachment, or in a bowl with a hand mixer, beat the butter and sugar together on medium high speed until creamy and pale in color, about 3-4 minutes. Add the vanilla extract. Add the flour, nuts and salt, and mix until just combined.
-
Shape the dough into rounded tablespoons and place on the prepared baking sheet, about 2 inches apart. Bake until cookies just begin to turn golden brown, about 15 minutes.
-
Let sit on the pan until cool enough to touch but still warm, then roll in powdered sugar. Let cool completely and then roll in powdered sugar again.
