How to Bake Perfectly Flat Cake Layers Every Time: No Trimming, No Special Tools Required
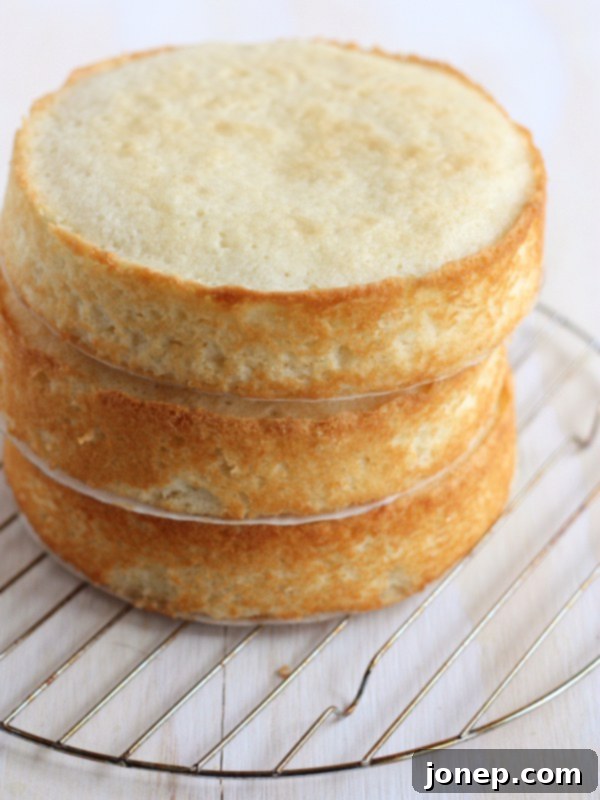
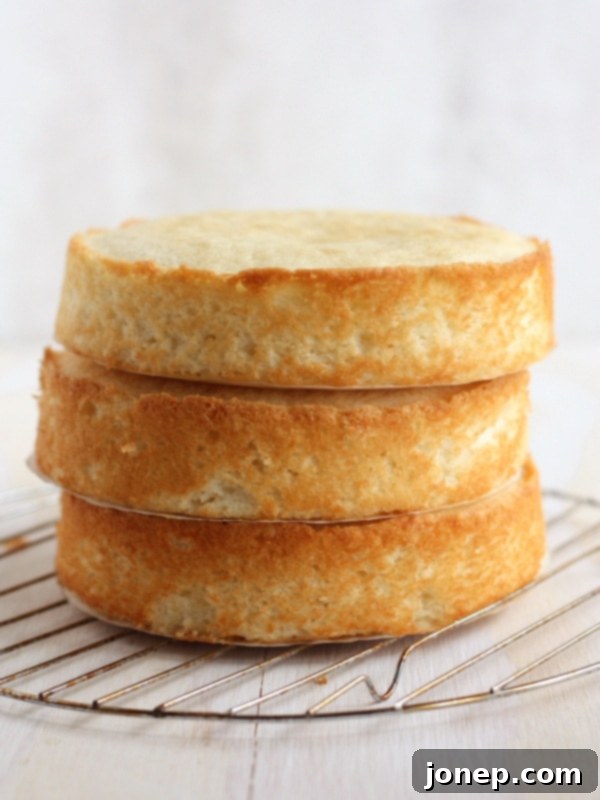
Imagine pulling perfectly flat, even cake layers from your oven every single time, without the need for frustrating trimming or special, single-use gadgets. This guide will reveal a simple yet incredibly effective method to achieve bakery-quality, level cakes that are a dream to stack and decorate. Say goodbye to wasted cake scraps from leveling off domed tops, and hello to taller, more impressive cakes with a professional finish. Get ready to discover the secrets to consistently flat cake layers, using just a few tweaks to your standard baking routine.
We’ve all been there: eagerly pulling a freshly baked cake from the oven, only to find a perfectly risen, golden-brown dome staring back at us. While delicious, that dome presents a challenge. Leveling cakes can be incredibly frustrating. Achieving a perfectly even surface without a dedicated cake leveler tool is tricky, often resulting in uneven layers or accidental gouges. Even with a leveler, you inevitably end up with a pile of cake trimmings. While those scraps are undeniably tasty for a quick snack, they represent precious cake that could have contributed to a fuller, taller, and more structurally sound final dessert. If you’re tired of uneven layers, lopsided stacked cakes, and the constant need to trim away precious cake, then you’re in the right place. We’re about to share a game-changing technique that will deliver flat cake layers, ready for frosting and assembly, straight out of the pan!
Table of Contents
- No special equipment needed!
- How to bake flat, even cake layers
- Divide batter evenly between cake pans
- Reduce the baking temperature
- Bake in the middle rack only
- FAQs
- A few favorite cake recipes
- More cake tips
No Special Equipment Needed: Ditch the Gadgets!
Many baking guides suggest using specialized equipment like cake strips to achieve flat cakes with perfectly level tops and no unsightly domes. These insulated strips wrap around your cake pans, slowing down the baking process around the edges, which in turn helps the cake bake more evenly from the center outwards. While they can certainly be effective, I’ve personally never found them to be a necessary part of my baking routine. If you’ve had success with cake strips and enjoy using them, by all means, continue! They are a legitimate tool for many bakers.
However, for those who prefer a minimalist kitchen, or simply want to avoid purchasing yet another single-use gadget, I’m thrilled to show you how to achieve the exact same impressive results without any extra tools. My method relies on simple adjustments to your baking process, using equipment you already own. We’ll focus on understanding the “why” behind cake domes and how to prevent them with intelligent baking techniques, rather than relying on an additional product. It’s all about working smarter, not harder, to get those beautiful, level cake layers.
How to Bake Perfectly Flat and Even Cake Layers
Achieving consistently flat cake layers is simpler than you might think, boiling down to just three fundamental adjustments to your baking process. These steps work in harmony to ensure your cakes rise evenly and bake through without forming a prominent dome. Let’s explore each technique in detail to transform your cake baking:
- Divide Cake Batter Evenly Between Your Pans: Precision here lays the foundation for even baking.
- Reduce the Baking Temperature: A subtle temperature change can make a significant difference in how your cake rises.
- Bake in the Middle Rack Only: Strategic oven placement is key to uniform heat distribution.
Master these three simple principles, and you’ll be well on your way to baking beautiful, level cake layers every single time, making stacking and decorating an absolute breeze.
Step 1: Divide Batter Evenly Between Cake Pans for Uniform Layers
The very first and arguably most critical step towards achieving flat, even cake layers is ensuring that each cake pan contains precisely the same amount of batter. Any discrepancy in batter volume will inevitably lead to variations in baking time and height, making truly level layers impossible without extensive trimming.
Why Even Division Matters
When one pan has more batter than another, it will naturally take longer to bake and will likely result in a taller, potentially more domed cake. This creates an uneven foundation for your finished dessert. Starting with perfectly equal portions ensures that all your cake layers bake consistently, reach doneness at roughly the same time, and emerge from the oven with uniform heights and surfaces.
The Gold Standard: Using a Digital Kitchen Scale
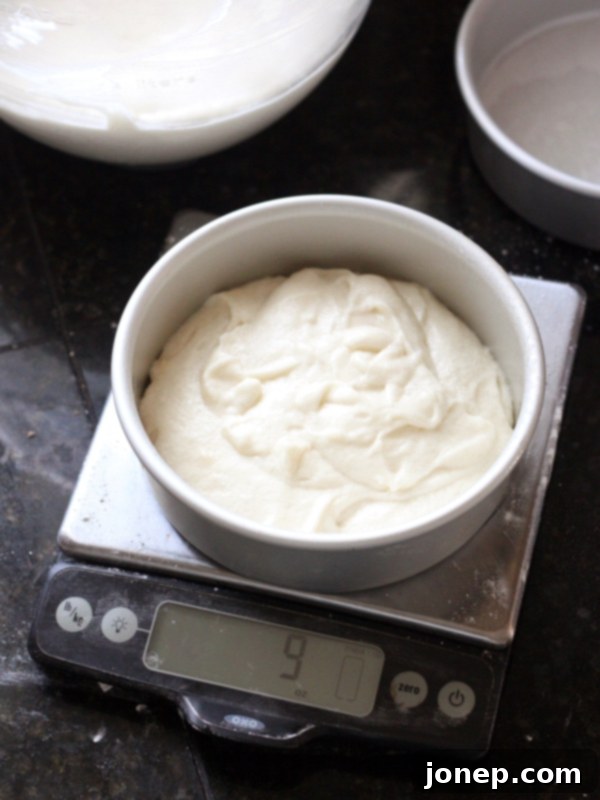
Without a doubt, the most accurate and efficient way to divide your cake batter is by using a digital kitchen scale. This tool removes all guesswork and ensures scientific precision. Here’s how to do it:
- Place an empty cake pan on your digital scale and zero it out (tare).
- Pour a portion of your prepared cake batter into the pan until you reach your desired weight. For example, if your recipe yields 1000g of batter and you’re using two pans, aim for 500g in each.
- Remove the pan, place the next empty pan on the scale, zero it, and repeat the process.
This method guarantees that each pan holds the exact same weight of batter, leading to beautifully consistent layers.
Alternative Method: Measuring by Volume (If No Scale Is Available)
If you don’t yet own a kitchen scale, don’t despair! You can still achieve good results by dividing your batter by volume. While less precise than weighing, it’s a viable alternative:
- Carefully pour all your cake batter into a large, clear liquid measuring cup or a bowl with volume markings. Note the total volume.
- Divide the total volume by the number of cake pans you’re using. For example, if you have 6 cups of batter and are using two pans, you’ll need 3 cups per pan.
- Use a measuring cup to carefully scoop and pour the calculated amount into each cake pan.
Pro Tip: When measuring by volume, aim for visual consistency. After pouring, gently tap the pans on the counter a few times to help the batter settle and visually assess if the levels are identical. This method, while functional, can be less accurate and typically results in more dirty dishes, but it’s a good temporary solution until you invest in a scale.
Investing in a digital scale is highly recommended for any baker serious about consistent results. It’s a game-changer for everything from measuring ingredients to dividing batter.

Step 2: Reduce the Baking Temperature for Gentle, Even Rising
The second crucial step in achieving flat cake layers is to subtly adjust your oven temperature. While many cake recipes call for a standard baking temperature of 350°F (175°C), this higher heat can often contribute to the formation of a dome.
The Science Behind the Dome
When a cake batter is exposed to high heat quickly, the edges and top set and bake much faster than the center. The leavening agents (like baking powder and baking soda) in the center continue to react, producing gas and causing the still-liquid batter to rise rapidly. Because the outer edges are already firm, the rising batter has nowhere to go but up, creating that characteristic dome in the middle.
The Simple Solution: Lower the Temperature
To counteract this, simply reduce your oven temperature by 25 degrees Fahrenheit. So, if your recipe calls for 350°F, set your oven to 325°F (160°C). This lower temperature slows down the baking process significantly, allowing the cake to bake more evenly from the edges to the center. The leavening agents have a gentler, more gradual rise, which prevents the rapid expansion in the middle that causes doming. The entire cake sets at a more uniform rate, resulting in a beautifully flat top.
Adjusting Baking Time: Patience is a Virtue
As you’ve lowered the oven temperature, it’s essential to understand that your cake will naturally require a longer baking time. This is a critical trade-off for perfectly flat layers, and the extra patience is absolutely worth it. A good general rule of thumb is to increase the baking time by approximately 50% of the original time when reducing the temperature by 25°F. However, this is an approximation, and actual times can vary based on your oven and recipe.
Example Adjustment:
- Original Recipe: Bake at 350°F for 30 minutes.
- Adjusted Method: Bake at 325°F for 30 minutes (original time) + 15 minutes (50% of original time) = 45 minutes total.
Always start checking at the original baking time. Then, continue baking and checking in 5-minute increments until the cake is done. Trust your instincts and the doneness tests.
How to Tell When Your Cake is Done
Determining doneness without overbaking is key. Here are the reliable indicators:
- Visual Check: The cake should be golden brown, and the edges should start to pull slightly away from the sides of the pan. The center should appear set and no longer wet or jiggly.
- Gentle Touch Test: Lightly press the center of the cake with your fingertip. If it springs back immediately, the cake is likely done. If your finger leaves an indentation, it needs more time.
- Toothpick Test: Insert a wooden skewer or toothpick into the very center of the cake. If it comes out clean or with just a few moist crumbs attached (no wet batter), your cake is ready. A completely clean toothpick indicates it might be slightly overbaked, but for flat layers, this is often acceptable.
Important Note: Cakes are delicate while baking. Minimize how often you open the oven door, as fluctuating temperatures can cause the cake to sink or bake unevenly. Use your oven light and window to check progress as much as possible.
By baking at a slightly lower temperature and extending the time, you create an environment where your cake can rise beautifully and evenly, preventing the formation of that unwanted dome.
Step 3: Bake in the Middle Rack Only for Uniform Heat Distribution
The final, yet equally important, step in securing perfectly flat and evenly baked cake layers is meticulous oven placement. It might seem like a small detail, but where you position your cake pans within the oven can drastically affect the outcome.
Understanding Oven Heat Distribution
Ovens, even modern ones, typically have hot spots and cooler areas. Heat circulates, and elements at the top and bottom of the oven generate heat at different intensities. The middle rack is universally considered the “sweet spot” because it provides the most consistent and even heat distribution. Here, your cake is equidistant from the top and bottom heating elements, minimizing the risk of uneven browning or baking.
The Pitfalls of Multiple Racks
While it might be tempting to bake all your cake layers at once by utilizing multiple oven racks, this practice is a common culprit for uneven and lopsided cakes. When you place pans on both the top and bottom racks, you encounter several problems:
- Uneven Browning: Cakes on the top rack are often exposed to more direct heat from the upper element, leading to overly browned or even burnt tops. Conversely, cakes on the bottom rack might have overly dark bottoms.
- Uneven Baking: The temperature variations between racks can cause cakes to bake at different rates, resulting in some layers being underbaked while others are perfectly done or even overbaked.
- Lopsided Cakes: Restricted airflow and inconsistent heat can cause cakes to rise unevenly, leading to layers that are higher on one side than the other, making stacking a nightmare.
Baking in Batches for Multiple Layers
For the best and most consistent results, always bake your cake layers in a single layer on an oven rack placed squarely in the middle of the oven. If your recipe calls for more than two cake layers and your oven can only accommodate two pans comfortably on one rack without touching each other or the oven walls, then bake in batches.
For example, if you’re making a four-layer cake, bake the first two layers together on the middle rack. Once they are out of the oven, cooled slightly, and removed from their pans, you can then bake the subsequent layers. Yes, this means a bit more time spent in the kitchen, but the consistency and quality of your final cake will be immeasurably better. Resist the urge to overcrowd your oven, as it hinders proper heat circulation and can compromise the texture and rise of your cakes.
By diligently adhering to this simple rule of baking on the middle rack only, you ensure that each cake layer receives optimal, uniform heat, contributing significantly to that coveted flat and even finish.
FAQs: Your Common Questions Answered
While a digital kitchen scale offers the most precise way to divide batter and is highly recommended for consistent baking, it’s not strictly necessary. You can accurately measure the total volume of your batter using a large liquid measuring cup. Once you have the total volume, divide it by the number of cake pans you’re using. For instance, if you have 6 cups of batter for two pans, aim for 3 cups in each. Use a standard measuring cup to pour equal portions into each pan. Be as careful and precise as possible, and you can still achieve very good results.
Reducing the oven temperature from 350°F to 325°F deliberately slows down the baking process. This extended baking time is precisely what allows the cake batter to heat and set more gradually and evenly from the edges to the center, preventing the rapid rise in the middle that causes domes. While it requires a bit more patience, this controlled baking environment is the key to achieving perfectly flat layers. Once you’ve practiced this method a few times, you’ll become more accustomed to the adjusted baking times and more confident in knowing when your cakes are perfectly done.
Determining doneness is crucial for any cake. When baking at a lower temperature, the visual cues might be slightly different than what you’re used to, but the principles remain the same. Begin by observing through the oven door: the cake should appear set, golden-brown around the edges, and the center should no longer look wet or jiggly. Once you believe it’s close, quickly and carefully open the oven door. Gently press the center of the cake with your fingertip; if it springs back resiliently, it’s done. If it leaves an indentation, close the door and bake for a few more minutes. Another reliable method is the toothpick test: insert a wooden skewer into the center; if it comes out with just a few moist crumbs (not wet batter), your cake is ready. Avoid testing too early, as a premature poke can cause a fragile cake to collapse.
Absolutely, you can still bake your cakes at 350°F or at the temperature specified in your recipe. The cake will certainly be delicious! However, using the higher temperature will likely result in a domed top due to the faster setting of the edges compared to the center. While this doesn’t affect the taste, it does mean you’ll need to trim off the domed top with a serrated knife once the cake has completely cooled to achieve flat layers for stacking. Our method is designed to eliminate this extra trimming step and the associated cake waste.
While the techniques discussed here are effective regardless of your pan material, choosing the right cake pan can certainly enhance your results. Light-colored, anodized aluminum pans are generally recommended for even baking. Darker pans and glass pans absorb more heat, which can sometimes lead to darker, crispier crusts and may require a slight further reduction in oven temperature or baking time. Always ensure your pans are of good quality and the correct size specified in your recipe for optimal results. Greasing and flouring your pans properly (or using parchment paper) is also crucial to prevent sticking and ensure a clean release.
While the core principles of even heat distribution and controlled rising apply, adapting this method directly for cupcakes isn’t usually necessary, nor is it always ideal. Cupcakes often benefit from a slight dome for a pleasing aesthetic and to hold frosting effectively. Reducing the temperature significantly for cupcakes might lead to them not rising enough or having a less desirable texture. For flat-topped cupcakes (if desired), ensuring even batter distribution and not overfilling the liners are the most important steps. Generally, baking cupcakes at the recipe’s recommended temperature works best for their intended form and texture.

A Few Favorite Cake Recipes to Try
With these three straightforward adjustments – precise batter division, a slightly reduced baking temperature, and strategic oven placement – you are now equipped to bake flawless, perfectly flat cake layers every single time. No more uneven towers, no more wasted cake scraps, and no more wrestling with a cake leveler. Embrace the simplicity and effectiveness of these techniques, and watch your homemade cakes transform into professional-looking masterpieces that are a joy to decorate and even more delightful to share.
Ready to put your new skills to the test? Explore some of my favorite cake recipes below and embark on your journey to baking perfection!
More Essential Cake Baking Tips
- How to Keep Cake from Sticking to the Pan
- How to Store and Freeze Cake Layers
- How to Frost a Layer Cake
