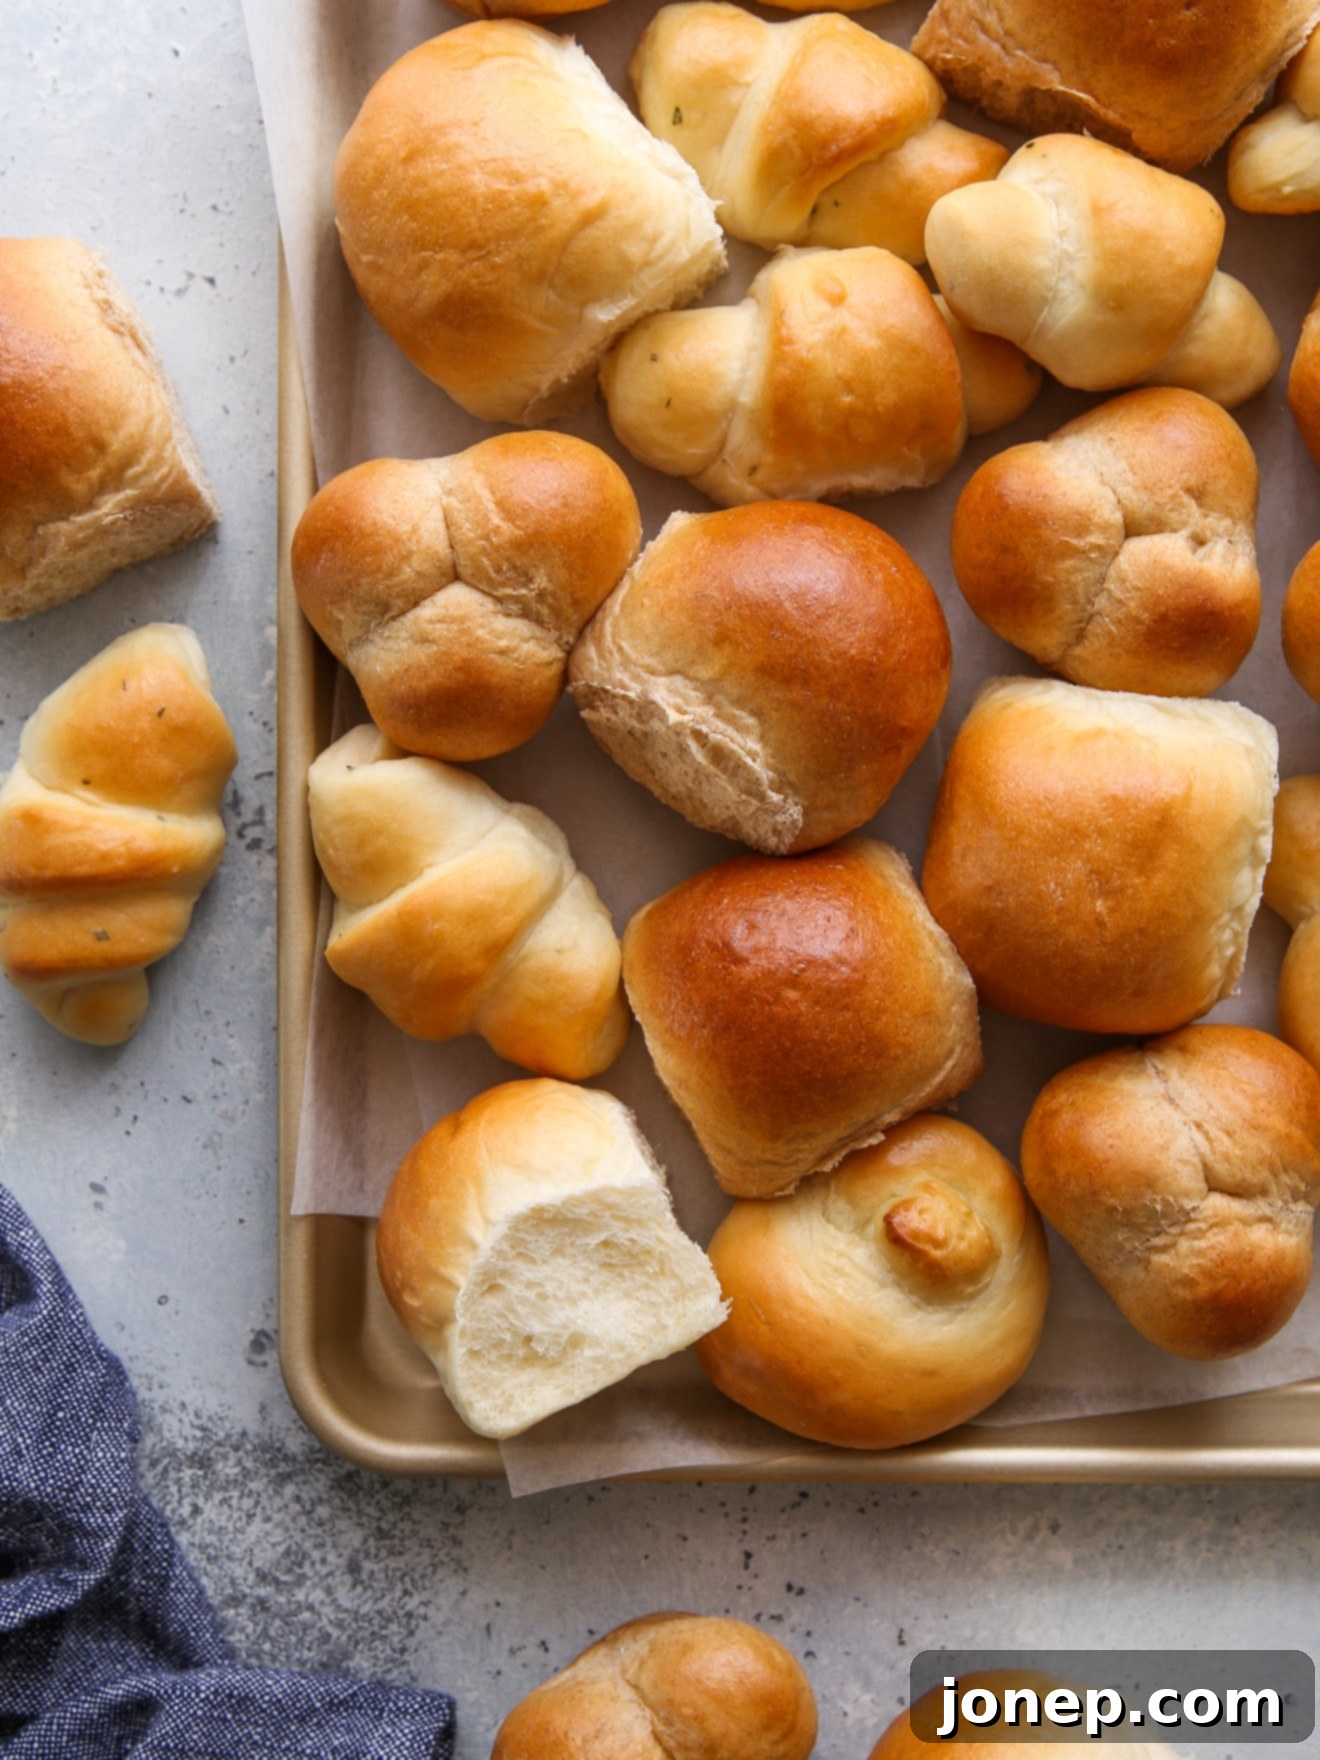
Master the Art of Shaping Dinner Rolls: A Comprehensive Guide to Perfect Homemade Bread
There’s an undeniable joy that comes with baking homemade bread, and dinner rolls are often at the heart of that culinary satisfaction. While a classic round dinner roll is always a welcome sight, imagine elevating your bread basket with a variety of beautifully shaped rolls! This guide will empower you to transform simple dough into professional-looking creations. You’ll learn the techniques for crafting traditional round rolls, elegant cloverleaf rolls, classic crescent rolls, and charming knotted rolls.
Whether you’re using your tried-and-true family recipe or exploring a new one, these shaping methods are universally applicable. If you’re looking for a starting point, feel free to use my go-to traditional soft buttery roll recipe, which provides the perfect canvas for these delightful shapes.
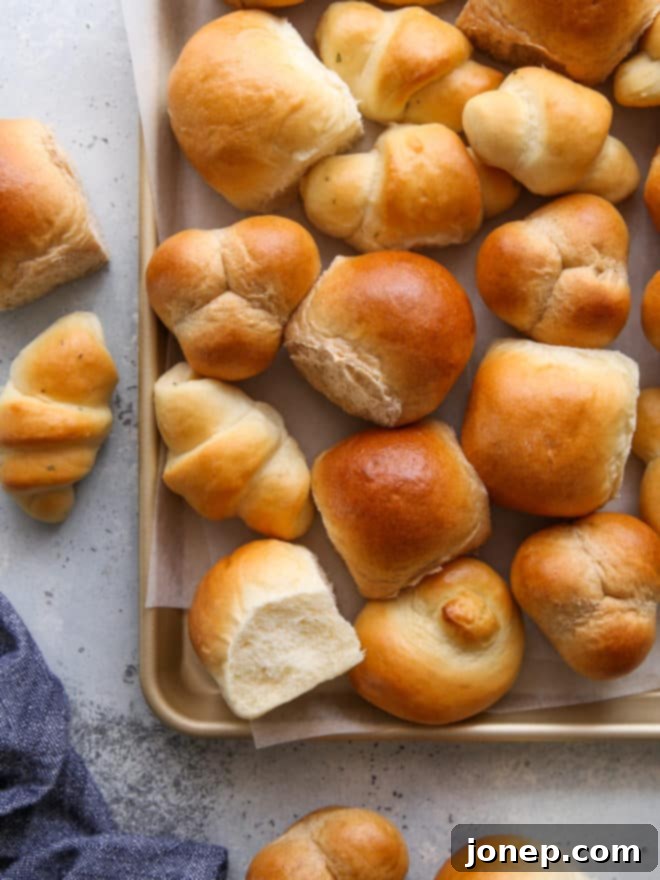
While classic round dinner rolls are undeniably comforting and always a hit, sometimes it’s fun and incredibly rewarding to add a touch of flair. If you’re ready to elevate your dinner roll game from simple to spectacular, you’ve come to the right place. I’ll walk you through how to shape not just the familiar traditional rolls, but also captivating crescents, delightful knots, and charming cloverleaf rolls, turning your baking into a true art form.
Table of Contents
- Start with a great roll recipe
- Portion dough evenly so your rolls are the same size
- Traditional round rolls
- Cloverleaf rolls
- Crescent rolls
- Knotted rolls
- Additional tips for success
- More roll recipes
Start with a Great Roll Recipe: The Foundation for Perfectly Shaped Rolls
The secret to beautifully shaped rolls begins long before your hands touch the dough for shaping. It starts with an excellent recipe that yields a pliable, elastic, and well-developed dough. This article was written in combination with my Ultimate Dinner Roll Guide, which provides the quintessential base. It includes my favorite roll recipe, crafted to make the best soft, tender, and impossibly buttery rolls. Within that guide, you’ll also discover various possible flavor variations, crucial baking tips, and more insights to perfect your roll-making journey.
A good dough consistency is paramount for successful shaping. It needs to be firm enough to hold its structure, yet soft and elastic enough to stretch without tearing. However, don’t feel limited! If you already have a classic roll recipe that consistently produces a good, workable dough, you can absolutely apply these diverse shaping techniques to it without any problem. Once you’ve selected your recipe, the critical first steps are to make the dough and allow it to complete its initial proofing until it’s light, airy, and ready to be handled.
Portion Dough Evenly: The Secret to Uniformly Sized and Baked Rolls
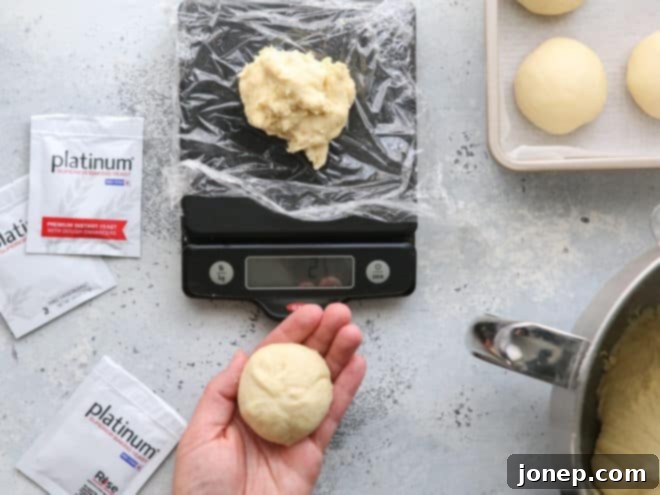
Regardless of the intricate shape you plan for your dinner rolls, the very first step to achieving a professional, uniform look and ensuring even baking is to portion your dough precisely. Rolls that are the same size not only look more appealing on the plate but, more importantly, they bake consistently, preventing some from being overdone while others are still doughy.
- First, for the utmost accuracy, I highly recommend weighing all of your risen dough using a digital kitchen scale. This provides a total weight to work with.
- Next, divide that total dough weight by the desired number of rolls. For my standard dinner roll recipe, this usually means dividing by 12, aiming for approximately 2 ounces (or about 56-60 grams) for each individual roll. This calculation ensures every roll starts with the exact same amount of dough.
- Carefully divide the dough into the calculated number of pieces using a bench scraper. Use your digital scale to weigh each individual portion, making small adjustments by adding or removing tiny bits of dough until each piece meets your target weight. This step is crucial for achieving consistent results.
With your dough expertly portioned, you’re now perfectly ready to shape your rolls! Let’s begin with the timeless and beloved traditional round rolls.
Traditional Round Rolls: The Classic Foundation
The traditional round roll is a staple for a reason – its simple, satisfying shape is universally loved. Mastering this basic technique is fundamental, as it forms the basis for many other roll shapes.
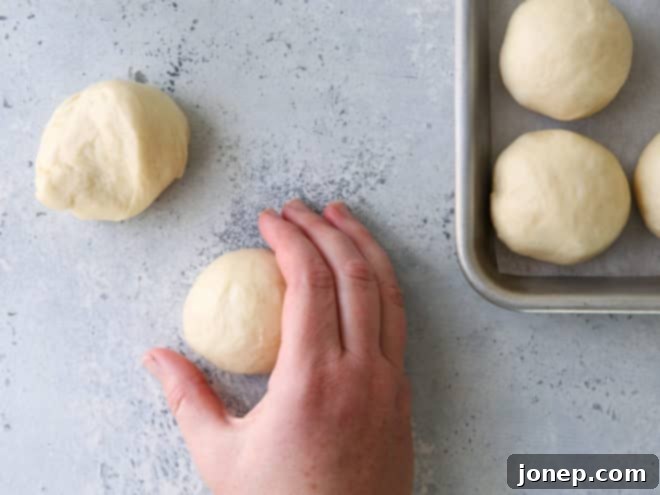
- Take one portioned piece of dough in one hand. Using the fingers of your other hand, gently pull and stretch the dough over itself, tucking the edges underneath. This action creates a smooth, taut surface on top and seals the seam at the bottom. Think of it like gathering the edges of a small cloth pouch and pulling them tight. Pinch the gathered dough firmly at the very bottom to secure the seam.
- Place the newly formed ball, pinched side-down, onto an unfloured work surface. Cup your hand around the dough, ensuring the edge of your palm or pinky finger maintains firm contact with the counter. Sweep your hand in a gentle, circular motion, applying very light pressure. This continuous, circular movement helps to further tighten the surface tension of the dough, smoothing it into a perfectly round, seamless ball. This technique should take only a few swift seconds per roll once you get the hang of it.
- Carefully transfer the shaped round roll to a 9×13-inch pan or a quarter sheet pan that has been lined with parchment paper. Leave adequate space between the rolls, as they will expand significantly during the final proofing and baking.
Cloverleaf Rolls: An Elegant Trio
Cloverleaf rolls are a charming and classic choice, particularly popular for holiday meals. Their distinctive three-lobed appearance is surprisingly simple to achieve and adds a touch of elegance to any table.
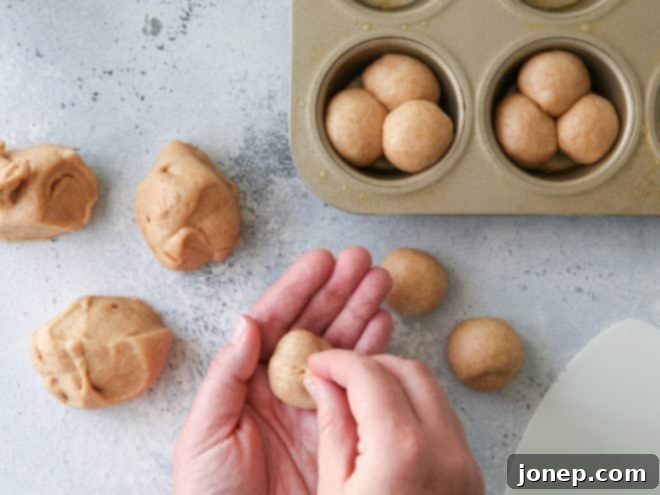
- Begin by taking one of your evenly portioned pieces of dough. Divide this single portion into three smaller, roughly equal portions. Precision here helps ensure each “leaf” is of similar size.
- Shape each of these three smaller portions using the same technique as you would for traditional round dinner rolls. That is, use your fingers to pull the dough over itself, smoothing out the tops and pinching the bottoms to create a taut surface. Finish by gently rolling each small ball on the counter under a cupped hand to ensure a perfectly smooth, round shape.
- Take a muffin pan and lightly grease each cup. Place three of these small, smooth rounds into each cup of the greased muffin pan. Arrange them so they touch, forming a neat trio that will fuse into the characteristic cloverleaf shape as they rise and bake. The muffin tin acts as a mold, guiding the dough into its beautiful final form.
Crescent Rolls: Iconic and Versatile
Crescent rolls, with their distinctive curved shape and often flaky texture, are a beloved classic. They are incredibly versatile, equally at home as a side with dinner or as a base for sweet or savory fillings.
- Instead of dividing your entire batch of dough into individual portions, first divide the dough in half. Take one half and roll it out on a lightly floured surface into a large circle, aiming for about ½ inch thick. This thickness is ideal for creating the right amount of dough to roll up into layers.
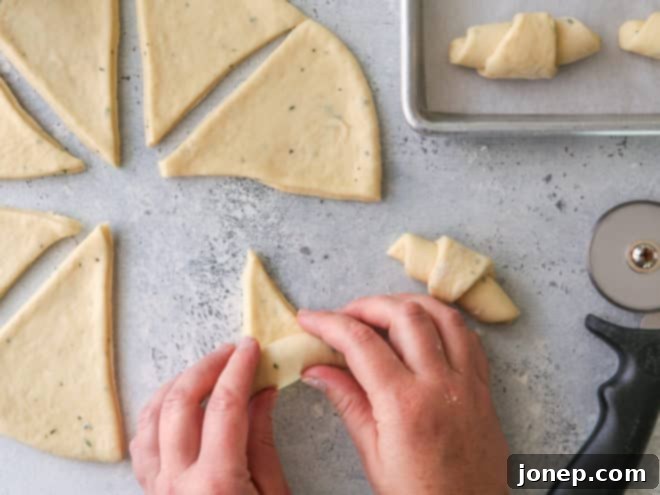
- Using a pizza cutter or a sharp knife, cut the large circle into 6 equal triangular pieces. Start by cutting it in half, then quarter it, and then cut each quarter in half again. Each triangle should have a wide base and a pointed tip.
- Beginning at the wide end of each triangular piece of dough, gently but firmly roll the dough up towards the pointed end. Roll it fairly tightly to create those wonderful layers, ensuring the pointed tip is tucked neatly underneath the roll to prevent it from unfurling during proofing and baking.
- Place the rolled crescent on a regular sheet pan lined with parchment paper. If desired, gently curve the ends inward to accentuate the classic crescent moon shape. Ensure ample space between each roll to allow for expansion during the final proof and baking. Repeat with the other half of the dough.
Knotted Rolls: Simple Elegance
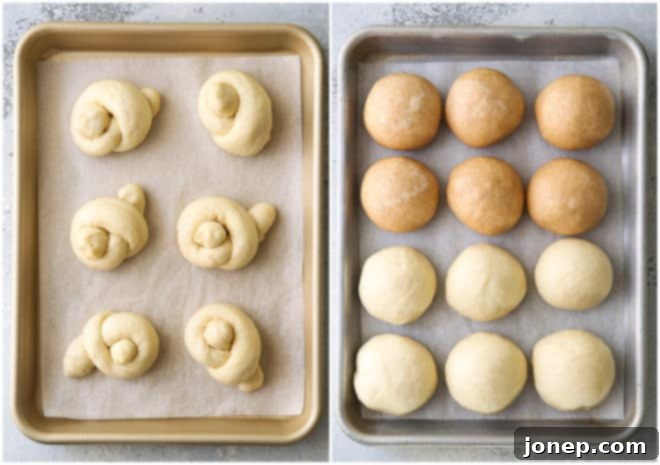
Knotted rolls are a beautiful way to add an impressive, artisanal touch to your dinner table. Despite their intricate appearance, they are surprisingly easy to form and are always a conversation starter.
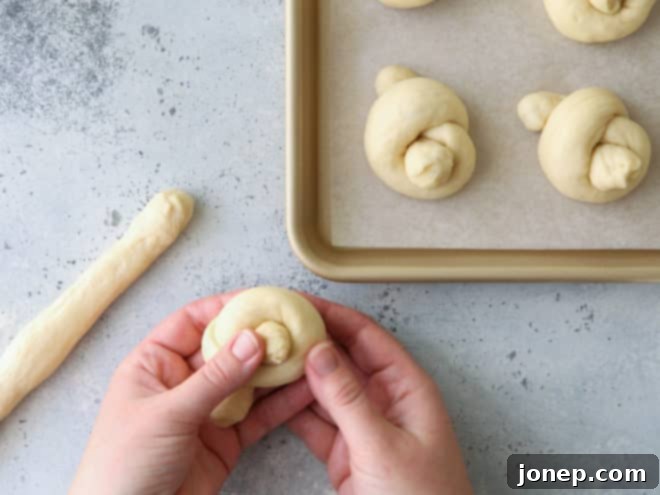
- Take each portioned piece of dough and gently roll and stretch it into a long, even rope, about 6-8 inches long. The key is to achieve a consistent thickness throughout the rope. If the dough resists stretching and springs back too much (this means the gluten is too tight), cover it loosely with plastic wrap and let it rest for 5-10 minutes. This allows the gluten to relax, making it much easier to stretch without tearing.
- Once you have a pliable rope, use both hands to form a simple knot. A common method is to make a loose loop, then bring one end up through the center of the loop, pulling gently to form a snug, but not overly tight, knot. You can experiment with different knot styles, but a basic single knot is perfectly charming.
- Place the knotted dough onto a regular sheet pan lined with parchment paper. As with all rolls, ensure there is sufficient space between each knotted roll to allow for their final rise and expansion in the oven. The unique shape will hold beautifully.
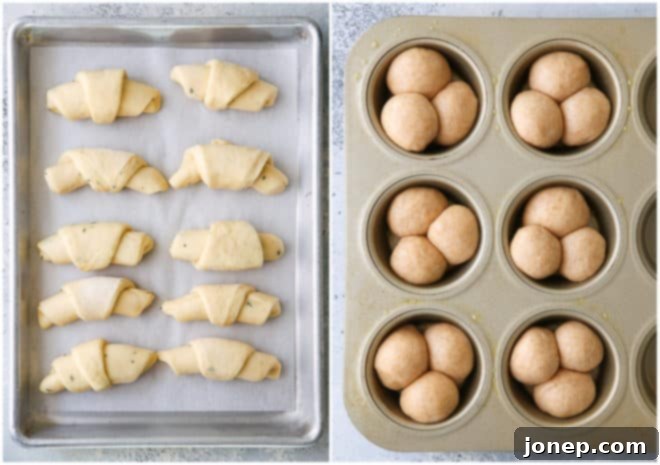
Now that your rolls are expertly shaped into their desired forms, the hard part is done! All that’s left is to allow them to complete one final rise (often called the “proof”) in a warm, draft-free place, and then bake them to golden perfection. This final proof is crucial for achieving light and airy rolls. For my full, detailed dinner roll recipe, including optimal proofing conditions, exact baking times, temperatures, and many more tips for baking the best, softest rolls possible, be sure to see my comprehensive Ultimate Dinner Roll Guide.
Additional Tips for Shaping and Baking Perfect Rolls
Beyond the specific shaping techniques, a few general best practices will ensure your rolls turn out beautifully every time. These tips are invaluable for both novice and experienced bakers alike.
- Keep Dough Covered: Always cover your portioned or partially shaped dough with a clean kitchen towel or a sheet of plastic wrap while you are working on the other rolls. This is essential to prevent the dough from drying out and forming a crust, which can hinder the final rise and lead to tough rolls.
- Invest in a Kitchen Scale: While not strictly mandatory, using a digital kitchen scale for portioning your dough is one of the best investments you can make. It guarantees each roll is precisely the same size, which is the key to uniform appearance and, more importantly, even baking.
- Mind the Flour: Flour your hands and work surface lightly with flour only as needed if the dough is particularly sticky. Too much flour can make the dough dry and stiff, altering its texture. Interestingly, I find that having just a bit of natural grip from an unfloured or very lightly floured surface actually helps significantly, especially when creating that perfect, taut surface tension for round rolls.
- Gentle Touch is Key: Always handle the dough with a gentle touch. Aggressive handling can deflate the air pockets that have formed during proofing, resulting in dense rolls. You want to maintain the dough’s lightness and airy structure as much as possible.
- Practice Makes Perfect: Don’t be discouraged if your first few attempts at shaping aren’t picture-perfect. Dough handling is a skill that develops with practice. The more rolls you make, the more intuitive the process will become, and the more confident you will feel. Embrace the learning curve!
- Create a Warm Proofing Environment: For the final rise, place your shaped rolls in a warm, draft-free spot. A slightly warm oven (turned off, with just the light on), or a microwave with a cup of hot water can create an ideal environment for dough to rise beautifully.
- Preheat Your Oven Thoroughly: Ensure your oven is fully preheated to the correct temperature before introducing your rolls. A consistent and hot initial temperature is vital for a good oven spring, which contributes to soft, fluffy rolls.
- Consider a Wash: For a beautiful golden-brown crust and extra shine, you can brush your rolls with an egg wash (egg yolk mixed with a little water or milk) or melted butter just before baking.
- Cool Properly: Once baked, transfer your rolls to a wire rack to cool slightly. This prevents the bottoms from becoming soggy and helps maintain their tender texture.
More Delicious Roll Recipes to Explore
If you’ve enjoyed mastering these shaping techniques, you might be eager to try them with other fantastic roll recipes or simply explore new flavors. Here are a few more recipes to inspire your baking adventures:
Disclosure: This post was first published in November 2021 in partnership with Red Star Yeast. All opinions are my own, as always. Thank you for supporting partnerships with brands I believe in. Be sure to visit Red Star Yeast on their website, and follow them on Twitter, Facebook, Pinterest and YouTube.
