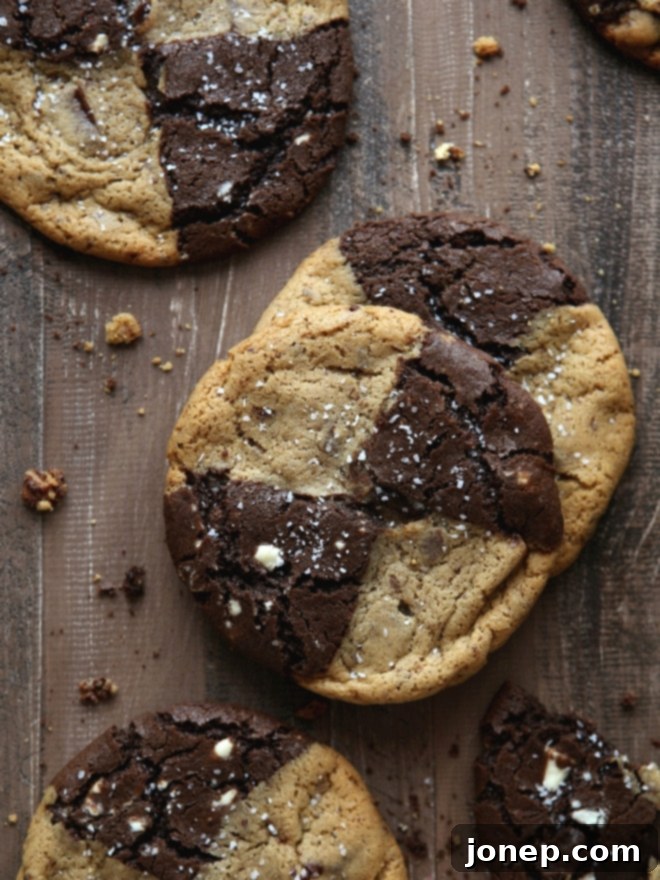
Indulge in Ultimate Swirled Malted Chocolate Chip and Reverse Chip Cookies
Prepare to elevate your cookie game with these truly exceptional swirled cookies! Imagine the best of two worlds colliding: a rich, deeply flavored malted chocolate chip dough swirled with a decadent chocolate dough studded with white chocolate chunks. This isn’t just a cookie; it’s an experience, a symphony of textures and flavors that will redefine your expectations for homemade treats. Each bite offers a delightful contrast – the robust, malty notes perfectly balanced by the sweet, creamy white chocolate and intense cocoa.
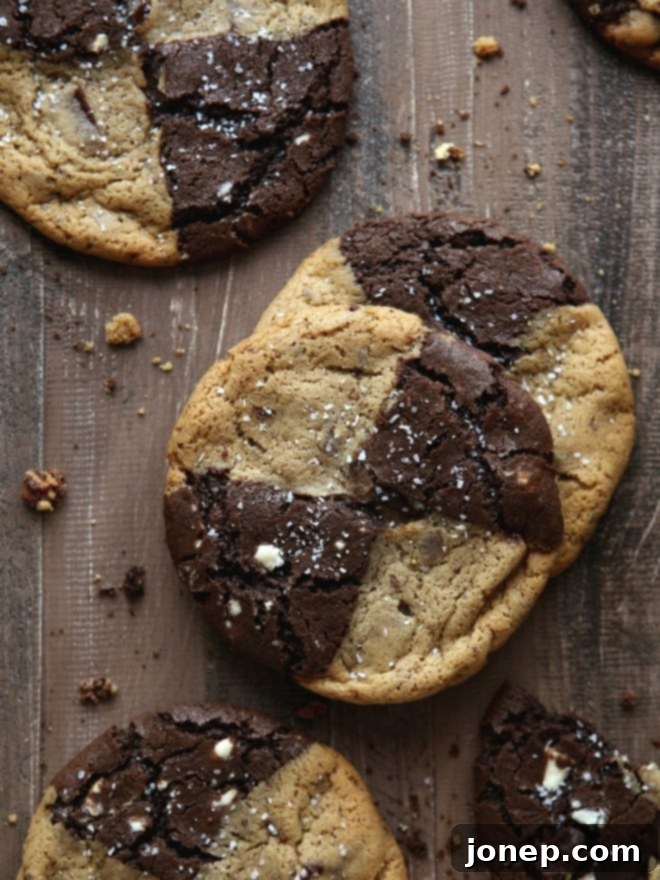
While a classic chocolate chip cookie holds a special place in everyone’s heart, these gourmet swirled cookies just might steal the spotlight. They take everything you love about cookies and multiply it by two, presenting two distinct yet perfectly harmonious flavors in one gigantic, unbelievably scrumptious package. Truly, it’s like discovering cookie heaven – a place where every morsel is a moment of pure bliss. Forget your standard cookie jar staples; these are the showstoppers, the conversation starters, and the treats you’ll be dreaming about long after they’re gone.
As December rolls around, my kitchen inevitably transforms into a bustling holiday bakery, overflowing with an abundance of festive treats. Some batches are destined for work events, others for sharing with loved ones, and a select few are simply for the pure joy of baking. Usually, I’ll savor one or two cookies from each batch and then happily send the rest off with friends. But with these extraordinary malted chocolate chip and reverse chip cookies? Nope! These were different. Their irresistible charm meant I pretty much savored every single one myself. Their unique combination of flavors and striking appearance made them impossible to resist, a testament to just how incredible they truly are.
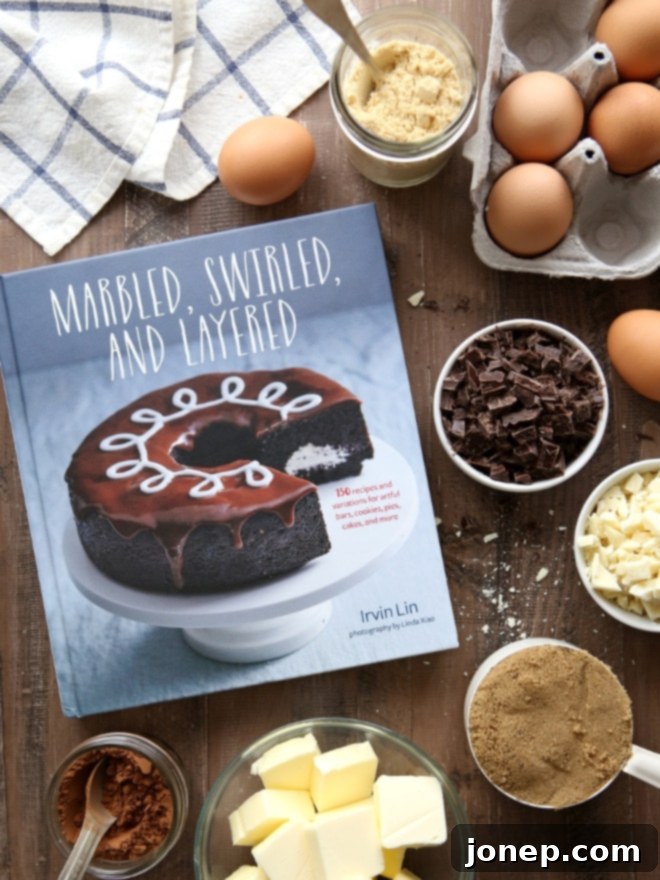
The Inspiration: A Culinary Journey with Irvin Lin
This incredible recipe for our ultimate swirled cookies comes from the groundbreaking cookbook Marbled, Swirled, and Layeredby the exceptionally talented Irvin Lin. I first had the pleasure of meeting Irvin seven years ago at a blogging conference, and ever since, his blog, Eat the Love, has been a constant source of inspiration. His work is characterized by stunning photography that makes your mouth water and incredibly reliable baking recipes that consistently deliver perfect results. The man truly possesses an innate understanding of the art of baking, transforming complex ideas into accessible and delicious creations.
Irvin’s new book is no exception to his high standards. It’s a treasure trove, packed with 150 innovative recipes designed to create fun, unique, and utterly eye-catching desserts and baked goods. As I flipped through its pages, I earmarked no fewer than twenty recipes that immediately caught my attention, each one promising a delightful adventure in the kitchen. However, these particular checkered, or rather, swirled cookies, shot straight to the very top of my must-bake list. The concept of combining two complementary cookie doughs into one visually stunning and intensely flavorful treat was simply too enticing to ignore. Obviously, they demanded immediate attention!
The Art of the Swirl: Worth Every Effort
Now, it’s true that crafting these magnificent swirled cookies does require a little more attention and effort than your average quick-and-easy chocolate chip cookie recipe. Unlike many single-dough variations, these necessitate preparing two separate, distinct cookie doughs. There’s also a crucial resting period in the refrigerator, which allows the flavors to meld and the dough to firm up, contributing significantly to the final texture and depth of taste. Furthermore, mastering the swirling technique to achieve that beautiful, alternating pattern takes a bit of practice and patience. But let me assure you, every moment of that extra effort is incredibly worth it!
The process, while initially seeming intricate, quickly becomes a joy once you get the hang of it. There’s a satisfying rhythm to assembling the cookies, pressing the two different doughs together, and creating the unique four-quadrant swirl. It transforms baking from a simple task into a delightful culinary art project. The anticipation builds as you carefully craft each cookie, knowing the incredible treat that awaits. This isn’t just baking; it’s creating edible masterpieces that are as beautiful to behold as they are delicious to devour.
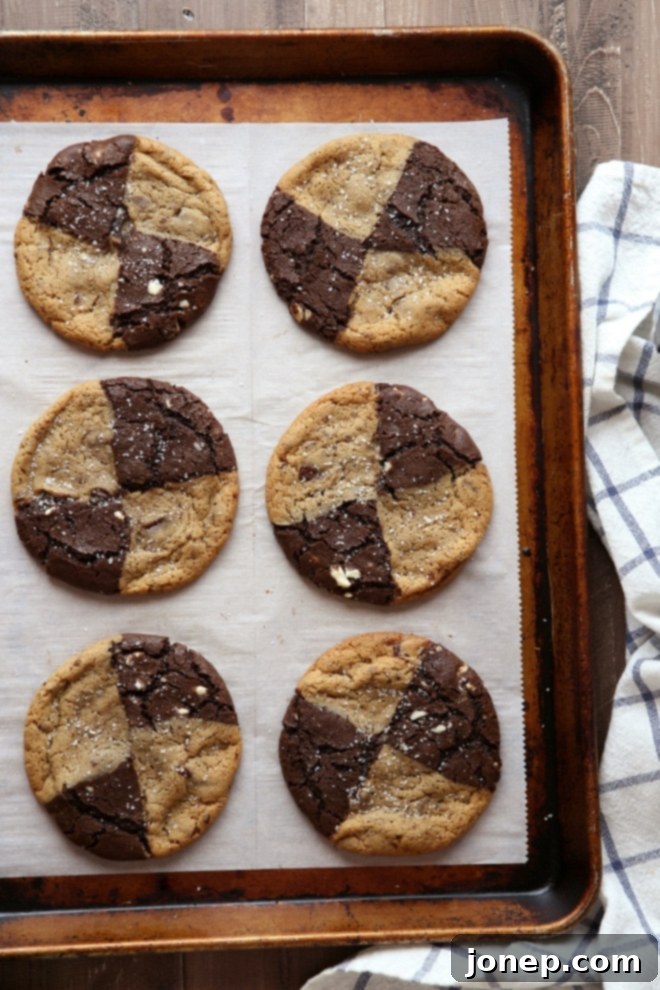
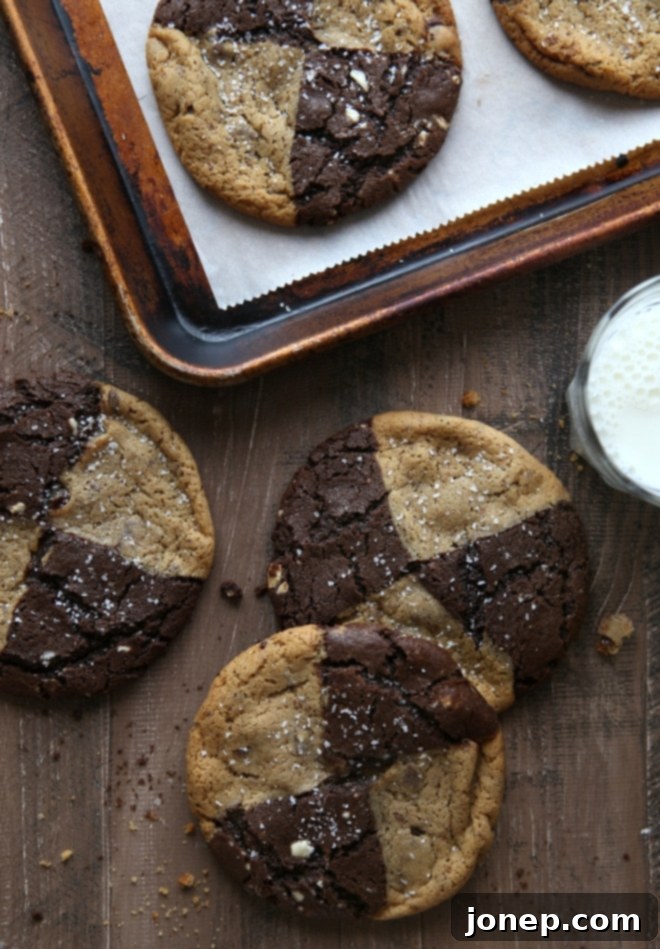
When you finally pull that first sheet of perfectly alternating malted chocolate chip and chocolate white chip cookies from the oven, a little triumphant dance is almost guaranteed (I certainly did!). The aroma alone is intoxicating – a rich blend of cocoa, malt, and vanilla that promises something truly special. And then, that first bite… Oh, that first bite! Each mouthful offers a slightly different experience, a delightful variation in flavor and texture as the distinct doughs and chocolate chunks come together. You’ll be so incredibly grateful that you didn’t settle for just another batch of the same old chocolate chip cookies. These swirled beauties offer a dynamic, engaging flavor profile that keeps you coming back for more, making them an unforgettable addition to your baking repertoire.
baking tip:Mastering Perfect Cookies Every Time
Achieving cookie perfection is a blend of art and science. Here are some essential tips to ensure your swirled malted chocolate chip and reverse chip cookies, and indeed all your cookie endeavors, turn out perfectly golden, chewy, and utterly delicious every single time:
- **Room Temperature Butter, Not Too Soft:** This is crucial for proper creaming. Your butter should be soft enough that your finger makes an indentation when gently pressed, but it shouldn’t squish through easily or appear greasy. Butter that’s too cold won’t cream properly, resulting in a dense dough, while butter that’s too warm can lead to flat, greasy cookies. Aim for around 67°F (19°C).
- **Keep Your Eggs Cold:** Counter-intuitive for some recipes, but for cookies, cold eggs help maintain the butter’s temperature in the dough. This prevents the butter from getting too warm during mixing, which can lead to excessive spreading during baking.
- **Measure Flour Correctly:** This is arguably the most common baking mistake! Always measure flour using the spoon and level method. Fluff the flour in its container, then gently spoon it into your measuring cup until overflowing, and finally, level off the top with a straight edge (like the back of a knife). If you simply scoop your measuring cup directly into the flour bag, you’ll compact it and end up with significantly too much flour, leading to dry, cakey, or crumbly cookies.
- **The Magic of Chilling Dough:** Don’t skip this step, especially for our swirled cookies! Letting the dough rest overnight (at least 12 hours and up to 72 hours) before baking makes a profound difference in both flavor and texture. Chilling allows the flour to fully hydrate, preventing a gritty texture, and gives the flavors (especially the malt and chocolate) a chance to deepen and meld. It also firms up the butter, which helps prevent the cookies from spreading too much in the oven, resulting in a thicker, chewier cookie. Yes, it really does make a significant difference!
- **Uniformity with a Cookie Scoop:** For consistently sized cookies that bake evenly, a cookie scoop is your best friend. It ensures each cookie is the same size, promoting uniform baking and making portioning incredibly easy. For these large swirled cookies, a medium (number 40) scoop is ideal for each dough portion.
- **The Perfect Bake:** Remove cookies from the oven when their edges are visibly browned, but the centers still appear slightly soft and not quite set. The residual heat of the baking sheet will continue to cook them after removal. Leave the cookies on the hot baking sheet for 5 minutes to finish setting, then transfer them to a wire rack to cool completely. This technique consistently yields cookies with wonderfully crisp edges and perfectly chewy centers.
- **Reshaping Hot Cookies:** If, despite your best efforts, a cookie comes out of the oven a little lopsided or oblong, don’t despair! Immediately after removing the baking sheet, use the side of a spatula to gently press the hot cookie back into a perfect circle. This works wonders while the cookie is still warm and pliable.

Malted Chocolate Chip and Reverse Chip Cookies
Pin Recipe
Leave a Review
Ingredients
Cookie dough base:
- 2 ¾ cup all-purpose flour (330 grams)
- 1 ½ teaspoon baking powder
- 1 ¼ teaspoon baking soda
- ½ teaspoon coarse salt
- 1 ¼ cup unsalted butter , at room temperature (283 grams)
- 1 ¼ cup packed light or dark brown sugar (265 grams)
- 1 cup granulated sugar (200 grams)
- 2 large eggs
- 1 large egg yolk
- 1 tablespoon vanilla extract
Malted chocolate chip cookie dough:
- ½ cup malted milk powder (70 grams)
- ½ cup all-purpose flour (60 grams)
- 1 ½ cups chopped dark chocolate , see Note (255 grams)
Reverse chip cookie dough:
- ½ cup unsweetened cocoa powder (42 grams)
- ½ cup chopped white chocolate (170 grams)
Topping:
- 1-2 tablespoons coarse or flaky sea salt
Instructions
To make the cookie dough base:
-
In a medium bowl, whisk together the flour, baking powder, baking soda, and salt until well combined. Set this dry mixture aside.
-
In the bowl of a stand mixer fitted with a paddle attachment (or using a large bowl and a hand-held mixer), cream together the room-temperature butter and both sugars on high speed. Beat for about 2-3 minutes, until the mixture is visibly pale and wonderfully creamy.
-
Pause to scrape down the sides and bottom of the bowl thoroughly. Add the cold large eggs and the egg yolk one at a time, beating well after each addition until fully incorporated. Finally, mix in the vanilla extract until just combined.
-
Gradually add the reserved dry ingredients to the wet mixture. Mix on low speed until the flour is just incorporated and no dry streaks remain. Be careful not to overmix at this stage.
To make the malted chocolate chip dough:
-
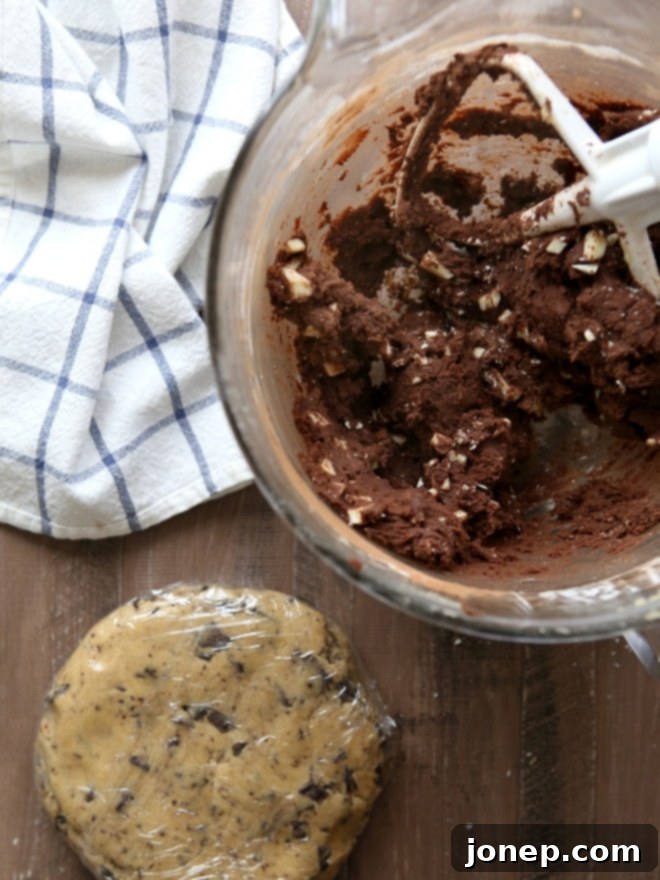
Carefully transfer exactly half of the prepared cookie dough base to a separate large bowl and set it aside. To the dough remaining in the mixer bowl, add the malted milk powder and the additional all-purpose flour. Mix on low speed until these ingredients are fully incorporated into the dough. Then, add the chopped dark chocolate and mix briefly until the chocolate is evenly distributed.
-
Gently shape this malted chocolate chip cookie dough into a flat disk. Wrap it tightly with plastic wrap and chill it in the refrigerator for a minimum of 12 hours, and ideally up to 72 hours, to develop richer flavor and better texture.
To make the reverse chip cookie dough:
-
Return the remaining half of the cookie dough base (the portion you set aside earlier) to the mixer bowl. There’s no need to clean the bowl after the malted dough. Add the unsweetened cocoa powder and mix on low speed until it is completely incorporated and the dough is uniformly dark. Finally, add the chopped white chocolate and mix just until combined.
-
Shape this reverse chip cookie dough into a disk, similar to the first dough. Wrap it tightly with plastic wrap and chill it alongside the malted chip cookie dough for the same duration (12-72 hours). This chilling step is essential for both doughs.
To make the cookies:
-
Once the doughs are thoroughly chilled, preheat your oven to 350°F (175°C). Line several large cookie sheets with parchment paper for non-stick baking.
-
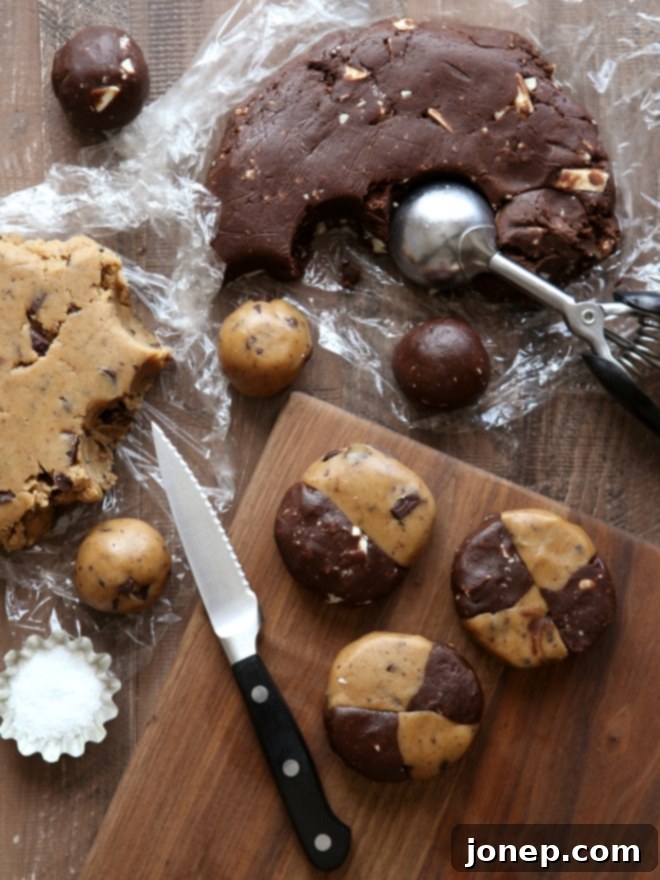
Using a medium (number 40) cookie scoop, portion out individual balls of both the malted chocolate chip dough and the reverse chip cookie dough. Gently roll each portion in your hands until it forms a smooth ball. You will need one ball of each dough per cookie.
-
Take one ball of the malted chocolate chip cookie dough and one ball of the reverse chip cookie dough. Press them together firmly but gently, then roll them lightly in your hands to form one larger, combined ball. The goal is to adhere them without completely mixing the colors.
-
Place the combined dough ball onto a clean cutting board. Press it down to form a disk approximately ½-inch thick. At this point, one half of the disk should clearly be the malted chocolate chip dough and the other half the reverse chip dough. Next, using a sharp knife or bench scraper, cut the cookie dough disk in half, perpendicular to the dividing line between the two doughs. Flip one of the halves over (rotating it 180 degrees) and press the two halves back together firmly. You should now have a single disk composed of four distinct quarters of alternating dough colors, creating that beautiful “checkered” or swirled effect.
-
Continue this process with the remaining dough. Arrange the prepared dough disks onto your parchment-lined cookie sheets, ensuring there’s ample space between them – about 5 inches apart – as they will spread significantly during baking. Place no more than 6 cookies per standard sheet.
-
Bake in the preheated oven for 14-16 minutes, or just until the edges of the malted chocolate chip dough (the lighter part) turn a beautiful golden brown, and the centers still look slightly soft. Once removed from the oven, if any cookies have spread awkwardly, immediately use a spatula to gently press their hot edges back into a perfect circular shape. This works best right after they come out of the oven while still very warm. If desired, sprinkle the hot cookies with a pinch of coarse or flaky sea salt for an added touch of flavor and crunch.
-
Allow the cookies to cool on the baking sheet for about 5 minutes. This crucial step helps them finish cooking through and firm up. Then, carefully transfer them to a wire rack to cool completely, ensuring they achieve that ideal crisp-edge, chewy-center texture.
Notes
NOTES
- For a superior texture and melt-in-your-mouth chocolate pockets, I highly recommend using **chopped dark chocolate** instead of standard chocolate chips. Chopped chocolate melts more fluidly and integrates better into the cookie dough as it bakes, creating a richer, gooier experience. However, if chocolate chips are all you have on hand, they will certainly work.
Recipe adapted from Marbled, Swirled, and Layered by Irvin Lin.
Carbohydrates: 43g,
Protein: 4g,
Fat: 17g,
Saturated Fat: 10g,
Cholesterol: 49mg,
Sodium: 133mg,
Potassium: 202mg,
Fiber: 2g,
Sugar: 26g,
Vitamin A: 336IU,
Vitamin C: 1mg,
Calcium: 54mg,
Iron: 3mg
Top Tools for this Recipe
Disclosure: I received a free review copy of Marbled, Swirled, and Layered. All opinions are always 100% my own. This post may contain affiliate links, which means I may earn a small commission if you purchase through them, at no extra cost to you. Thank you for supporting the brands that support this blog!
