Preserve Summer’s Sweetness: The Ultimate Homemade Raspberry Plum Jam Recipe (No Pectin Needed!)
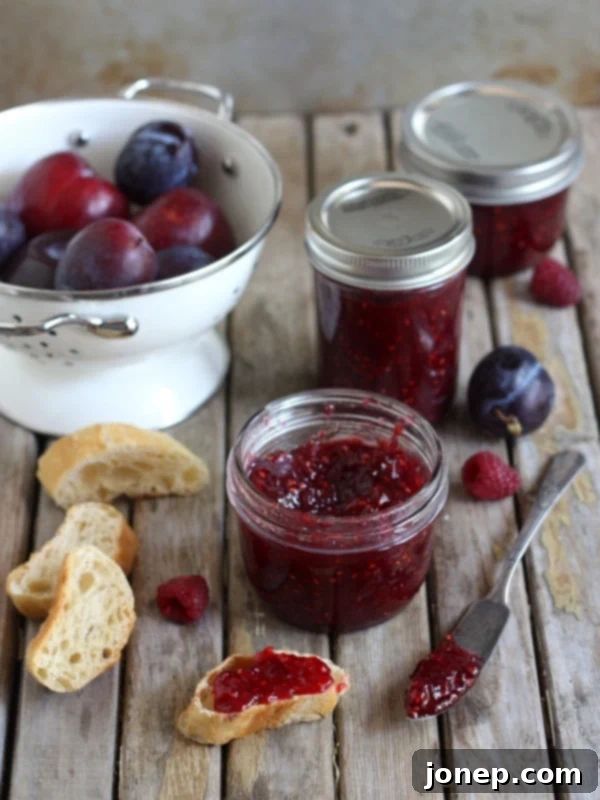
There’s an undeniable magic in a jar of homemade jam. It’s a tangible piece of summer, a burst of sunshine saved for a rainy day, or a cozy winter morning. This easy raspberry plum jam isn’t just a spread; it’s a vibrant symphony of flavors that tastes like the peak of summer, ready to be savored year-round. Imagine the sweet tang of ripe raspberries mingling with the rich, juicy depth of plums – truly a delightful combination.
The summer of 2013 holds a special place in my memory as “That Time I Went Crazy with Jam.” It was a season of discovery, where I finally started feeling truly comfortable with the general process of water bath canning and ventured into exploring countless new recipes. Among all the delightful concoctions, homemade fruit jams have always held a unique charm for me. They are straightforward, incredibly rewarding, and offer an endless array of exciting flavor combinations. This particular plum and raspberry jam emerged as the latest creation in a long string of summer preserves, and honestly, it quickly became a personal favorite.
The decision to combine plums with raspberries in this homemade jam recipe was nothing short of genius for several compelling reasons. First and foremost, it creates an exquisite and unique flavor profile that you’re unlikely to find readily available in your local grocery store. This distinct taste immediately signals “homemade with love” – a touch of artisanal craftsmanship in every spoonful. The tartness of the plums perfectly complements the sweet and slightly floral notes of the raspberries, resulting in a balanced and incredibly palatable preserve. Furthermore, raspberries can often be quite expensive, especially when buying them in the quantities needed for jam. By adding plums, which are typically more affordable, you effectively stretch the vibrant raspberry flavor without significantly increasing your overall costs. This clever combination not only enhances the taste but also makes this delicious fruit jam more budget-friendly, allowing you to enjoy more of summer’s bounty.
Beyond its incredible taste, one of the aspects I cherish most about making homemade jam is its versatility as a thoughtful and personal gift. As the seasons change and the holidays approach, I always find myself with a growing stockpile of beautifully sealed jars in my pantry, eagerly awaiting their moment to be shared. There’s another special stash, of course, reserved exclusively for my own enjoyment! Sharing these handcrafted preserves with friends and family is a true pleasure, allowing us all to extend the delightful flavors of summer well into the colder months. Imagine gifting a jar of this vibrant raspberry plum jam – it’s more than just food; it’s a gesture of care, a taste of sunshine, and a memory of warm days.
Making Jam Without Pectin: The Natural Way to Gel
Many traditional jam recipes frequently call for the addition of commercial pectin, a gelling agent designed to help the fruit mixture thicken and set. While convenient, it’s important to remember that pectin is a naturally occurring soluble fiber found in the cell walls of most fruits, particularly in their skins, seeds, and flesh. Therefore, in many cases, additional pectin is simply not necessary. The process of naturally drawing out this inherent pectin and allowing the jam to gel on its own is a method that often takes a bit longer on the stovetop, but the resulting depth of flavor and superior texture are, in my opinion, well worth the extra patience. This natural approach allows the true essence of the fruit to shine through, unmasked by the sometimes-gummy texture that commercial pectin can impart.
However, not all fruits are created equal in their natural pectin content. Some fruits, such as apricots, cherries, peaches, pears, rhubarb, and most berries (like raspberries used here), are naturally lower in pectin. This means it can be a bit trickier to achieve that perfect gel without assistance. When working with these low-pectin fruits, you have a couple of options. You can certainly choose to use commercial pectin if you prefer a quicker set or a very firm jam. Alternatively, and often my preferred method, you can strategically combine them with fruits that are naturally high in pectin. Excellent high-pectin choices include apples (especially tart ones like Granny Smith), cranberries, lemons (their juice and zest are potent), and, conveniently for this recipe, plums! The combination of plums and raspberries leverages the plums’ natural gelling power to create a beautifully set jam.
For those daring to make jam without commercial pectin, the key to success lies in understanding and testing the jelling point. This critical stage indicates when your jam has cooked down sufficiently to set properly upon cooling. There are several reliable methods to test for the jelling point, ensuring your efforts result in perfectly set preserves every time. A commonly used technique is the frozen plate test: simply place a small plate in the freezer before you start cooking. When you suspect the jam is ready, spoon a small amount onto the cold plate, wait for 30 seconds, then push the jam with your finger. If it wrinkles and forms a skin, it’s ready! Another method involves using a candy thermometer; most jams set around 220°F (104°C) at sea level. However, this temperature can vary with elevation, so the wrinkle test is often more foolproof. Understanding these methods will give you the confidence to achieve a perfect gel without relying on store-bought thickeners. Here’s a great cheat sheet on the 3 ways to test the jelling point, offering further guidance for aspiring jam makers.
Ready to capture the luscious flavors of summer in your kitchen? This homemade raspberry plum jam recipe is not only incredibly delicious but also surprisingly simple to prepare, even for those new to canning. It’s a wonderful way to enjoy fresh, seasonal fruit long after the harvest season has passed. Let’s gather our ingredients and embark on this sweet journey!

Raspberry Plum Jam
Pin Recipe
Leave a Review
Ingredients
- 1 lb raspberries (454 grams)
- 3 lbs plums , sliced and pits removed (leave skins on) (1360 grams)
- 5 cups granulated sugar (1000 grams)
- ½ cup bottled lemon juice (120 ml)
- Zest of 1 orange
Instructions
-
Combine the raspberries, sliced plums, granulated sugar, bottled lemon juice, and orange zest in a large, heavy-bottomed pot. Place the pot over medium-high heat and stir frequently to ensure the sugar dissolves completely and the fruit begins to release its natural juices. This initial stirring prevents scorching and helps the sugar incorporate evenly.
-
Continue to cook the mixture, stirring frequently to prevent sticking and promote even cooking, as the jam gently simmers and gradually thickens. As the jam cooks, a foamy layer may form on the surface; skim this off with a clean spoon to ensure a clear, beautiful final product. Continue cooking until the jam reaches its jelling point (refer to the tips in the article above for testing).
-
(Optional) While the jam is simmering, you may choose to remove the plum skins. They will often separate from the flesh and can be easily scooped out with a spoon or tongs. This step is slightly tedious but results in a smoother, more refined jam texture, which many prefer.
-
(Optional) If you prefer a jam with fewer raspberry seeds, an excellent technique is to place a fine-mesh strainer over the pot. Ladle approximately one-third to one-half of the cooked fruit mixture into the strainer and carefully push it through with a spatula back into the pot. Discard the raspberry seeds caught in the strainer. Repeat if necessary until your desired seed consistency is achieved.
-
Once the jam has reached its desired consistency and jelling point (as tested, see the tip above), remove it from the heat. Carefully ladle the hot jam into sterilized half-pint jars, leaving about ¼ inch of headspace. Wipe the rims of the jars clean, then top with a new, properly fitting lid and secure with a screw-on ring.
-
Process the filled jars in a boiling water bath canner for 10 minutes. If you are at an elevation of 5,000 feet or higher, increase the processing time to 15 minutes. Once the processing time is complete, carefully remove the jars from the water bath and let them cool undisturbed on a wire rack for 12-24 hours. After cooling, check that the lids have properly sealed by pressing down on the center of each one; it should not move or flex.
-
Store your beautifully preserved homemade raspberry plum jam in a cool, dry, dark place, such as a pantry or cellar. Properly sealed jars can be stored for up to 1 year. Once opened, refrigerate the jam and consume within a few weeks. Enjoy the taste of summer whenever you desire!
Notes
Making homemade jam is a truly rewarding experience, transforming simple, fresh fruits into a treasure that brings joy throughout the year. This raspberry plum jam, with its vibrant color and exquisite flavor, stands as a testament to the beauty of natural ingredients and the satisfaction of preserving summer’s bounty. Whether spread on toast, swirled into yogurt, or gifted to loved ones, each jar holds a piece of culinary artistry. Embrace the process, savor the aroma, and delight in the taste of your very own perfectly crafted fruit jam. Happy canning!
