The Ultimate Chewy Chocolate Chip Cookie Recipe: Your Search Ends Here!
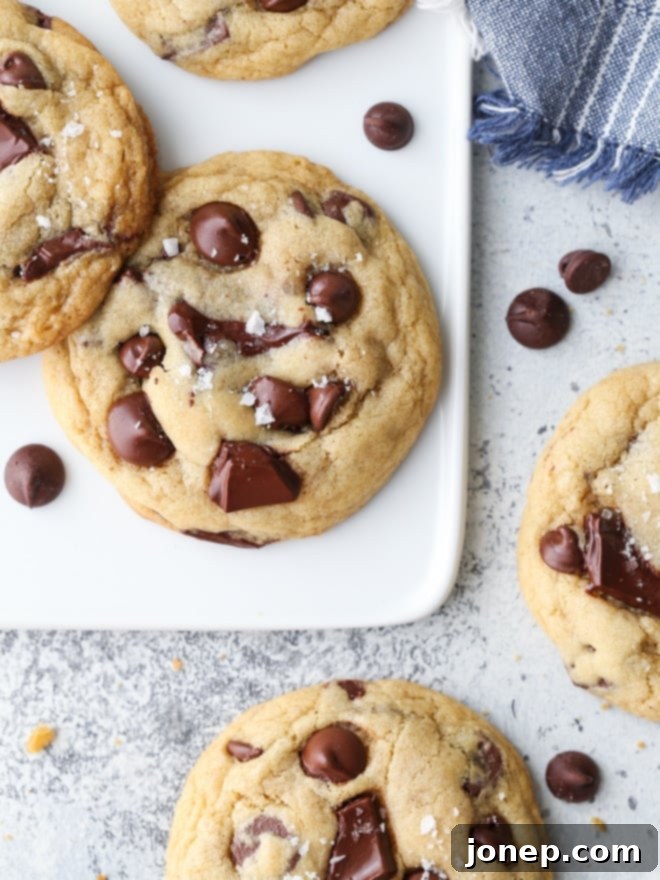
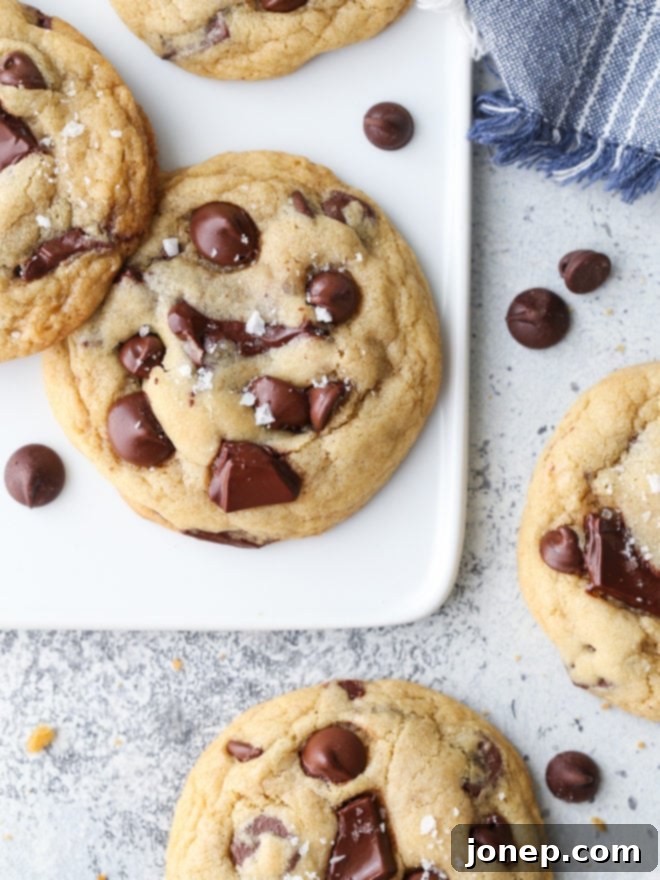
Classic chocolate chip cookies reach new heights with this exceptional recipe! Prepare for an unforgettable baking experience that delivers everything you crave: irresistibly crisp, golden edges, giving way to gloriously soft and delightfully chewy centers. Each bite is a symphony of rich, buttery flavor, generously studded with melted pockets of your favorite chocolate. This isn’t just a cookie; it’s a revelation, and it’s destined to become your go-to recipe for years to come.
If you’ve been on a quest for the perfect chocolate chip cookie recipe, your journey triumphantly concludes here! This is it—the definitive guide to baking cookies that consistently impress, delight, and satisfy every single time. Forget endless trials and disappointing batches; this recipe is meticulously crafted to guarantee success.
This beloved cookie recipe is the culmination of over 15 years of dedicated baking and experimentation, stretching back to the very beginnings of this blog. Over countless batches, through hundreds of cookies baked and shared, I’ve refined and perfected every detail, ultimately arriving at what I proudly present as the best chocolate chip cookie recipe ever created. I am absolutely thrilled to finally share this treasured recipe and all my accumulated wisdom with you!
Table of Contents
- Why These Are The Best Chocolate Chip Cookies
- Essential Ingredients for Perfect Cookies
- Step-by-Step: How to Make Chocolate Chip Cookies
- Expert Tips for Chocolate Chip Cookie Perfection
- Recommended Baking Tools
- Full Recipe Card
- Exciting Chocolate Chip Cookie Variations
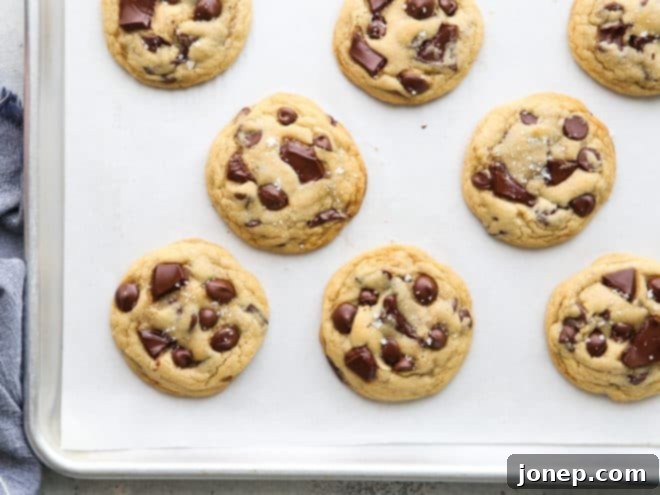
Why These Are The Best Chocolate Chip Cookies
If you need convincing (though we suspect the photos speak for themselves!), here’s an in-depth look at why this recipe stands head and shoulders above the rest. Get ready to bake, because you won’t want to wait!
- Crisp Chewy Edges with Soft Centers: This is the hallmark of a truly great chocolate chip cookie. Our careful balance of ingredients and precise baking instructions ensure a delightful contrast in texture. The edges caramelize beautifully, offering a satisfying snap, while the interior remains wonderfully soft, moist, and chewy. It’s the perfect textural interplay that defines cookie perfection.
- Thick Cookies That Hold Their Shape: Say goodbye to flat, greasy cookies! This recipe is designed for thick, substantial cookies that maintain their shape during baking. They spread just enough to create those lovely crinkled edges but retain their comforting height, giving you more delicious cookie to enjoy in every bite.
- Rich, Buttery Flavor: The foundation of any incredible cookie is its flavor, and these deliver intensely on that front. Using quality butter and a thoughtful blend of sugars creates a deep, caramelized, and undeniably buttery base that perfectly complements the chocolate. Every ingredient contributes to a complex, satisfying taste profile.
- Abundant Melty Chocolate Throughout: We don’t skimp on the chocolate here! Expect generous puddles of melty, semi-sweet or dark chocolate in every single cookie. The choice of chocolate chips, chunks, or a combination allows for different melt textures and appearances, ensuring a chocolatey explosion with each mouthful.
- No Chilling Required for Instant Gratification: One of the biggest advantages of this recipe is that it’s ready to enjoy in 30 minutes or less! That’s right, no waiting for hours for the dough to chill. This means you can satisfy those sudden cookie cravings almost instantly, making homemade chocolate chip cookies an easy and accessible treat any time.
There’s no time like the present to experience this magic. So, let’s get baking already!
Craving a smaller batch? Try my small batch chocolate chip cookies for all of the incredible flavor, but a scaled-down recipe that yields just a dozen cookies!
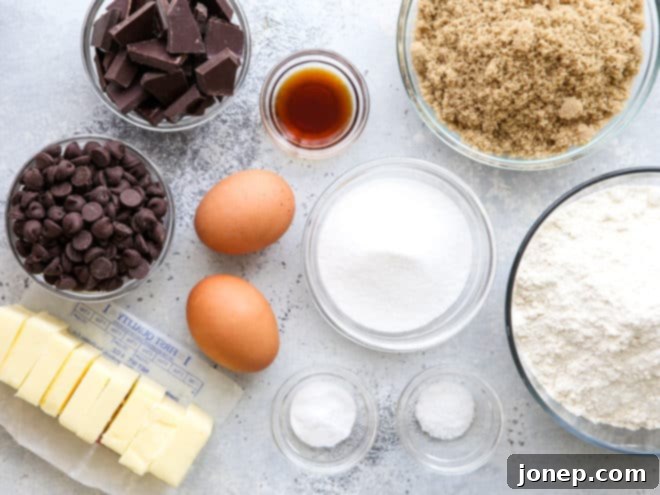
Essential Ingredients for Perfect Cookies
One of the beauties of classic chocolate chip cookies is that they rely on common pantry staples. You likely already have most, if not all, of these ingredients in your kitchen right now. Lucky you! Let’s dive into what you’ll need and a few tips for each:
- Salted Butter: For the absolute best overall flavor, I highly recommend using salted butter. The hint of salt truly enhances the sweetness and richness of the cookie. However, if you only have unsalted butter, that works too! Just be sure to increase the amount of added salt in the recipe by about ¼ to ½ teaspoon to compensate. Ensure your butter is softened to room temperature, but not melted, for optimal creaming.
- Light or Dark Brown Sugar: Both light and dark brown sugar yield fantastic results in this recipe. Brown sugar contributes to the cookies’ signature chewiness and adds a lovely depth of molasses flavor. Use whatever you have on hand in your pantry!
- Granulated Sugar: This provides sweetness and helps with the crispness of the cookie edges, balancing the chewiness from the brown sugar.
- Vanilla Extract: A good quality vanilla extract is non-negotiable for superior flavor. It enhances all the other ingredients and adds a warm, inviting aroma. Don’t skimp on this!
- Eggs: Large eggs bind the ingredients together, add moisture, and contribute to the cookie’s structure. Make sure they are at room temperature, as this helps them emulsify better with the butter and sugar mixture.
- All-Purpose Flour: The backbone of our cookies. Proper measurement is crucial for texture. I always recommend the “spoon and level” method to avoid adding too much flour, which can lead to dry, cakey cookies instead of soft and chewy ones.
- Baking Soda: This leavening agent helps the cookies spread and rise, creating that desirable texture.
- Salt: Essential for balancing sweetness, enhancing flavor, and providing a subtle contrast. If using unsalted butter, you might add a touch more.
- Semisweet Chocolate Chips, Chunks, or Chopped Chocolate: This is where you can truly customize! I love using a mixture of different chips and chunks – some smaller pieces melt into the dough, while larger ones create those irresistible melty puddles. You can also opt for bittersweet or dark chocolate if you prefer a less sweet, more intense chocolate flavor. My personal favorite brand for consistent quality and melt is Guittard chocolate chips!
Step-by-Step: How to Make Chocolate Chip Cookies
This is a wonderfully straightforward “drop cookie” recipe, meaning no complicated rolling or cutting! If you’ve baked cookies before, you’ll find the process familiar and satisfying. Here’s a detailed guide to making these sensational chocolate chip cookies:
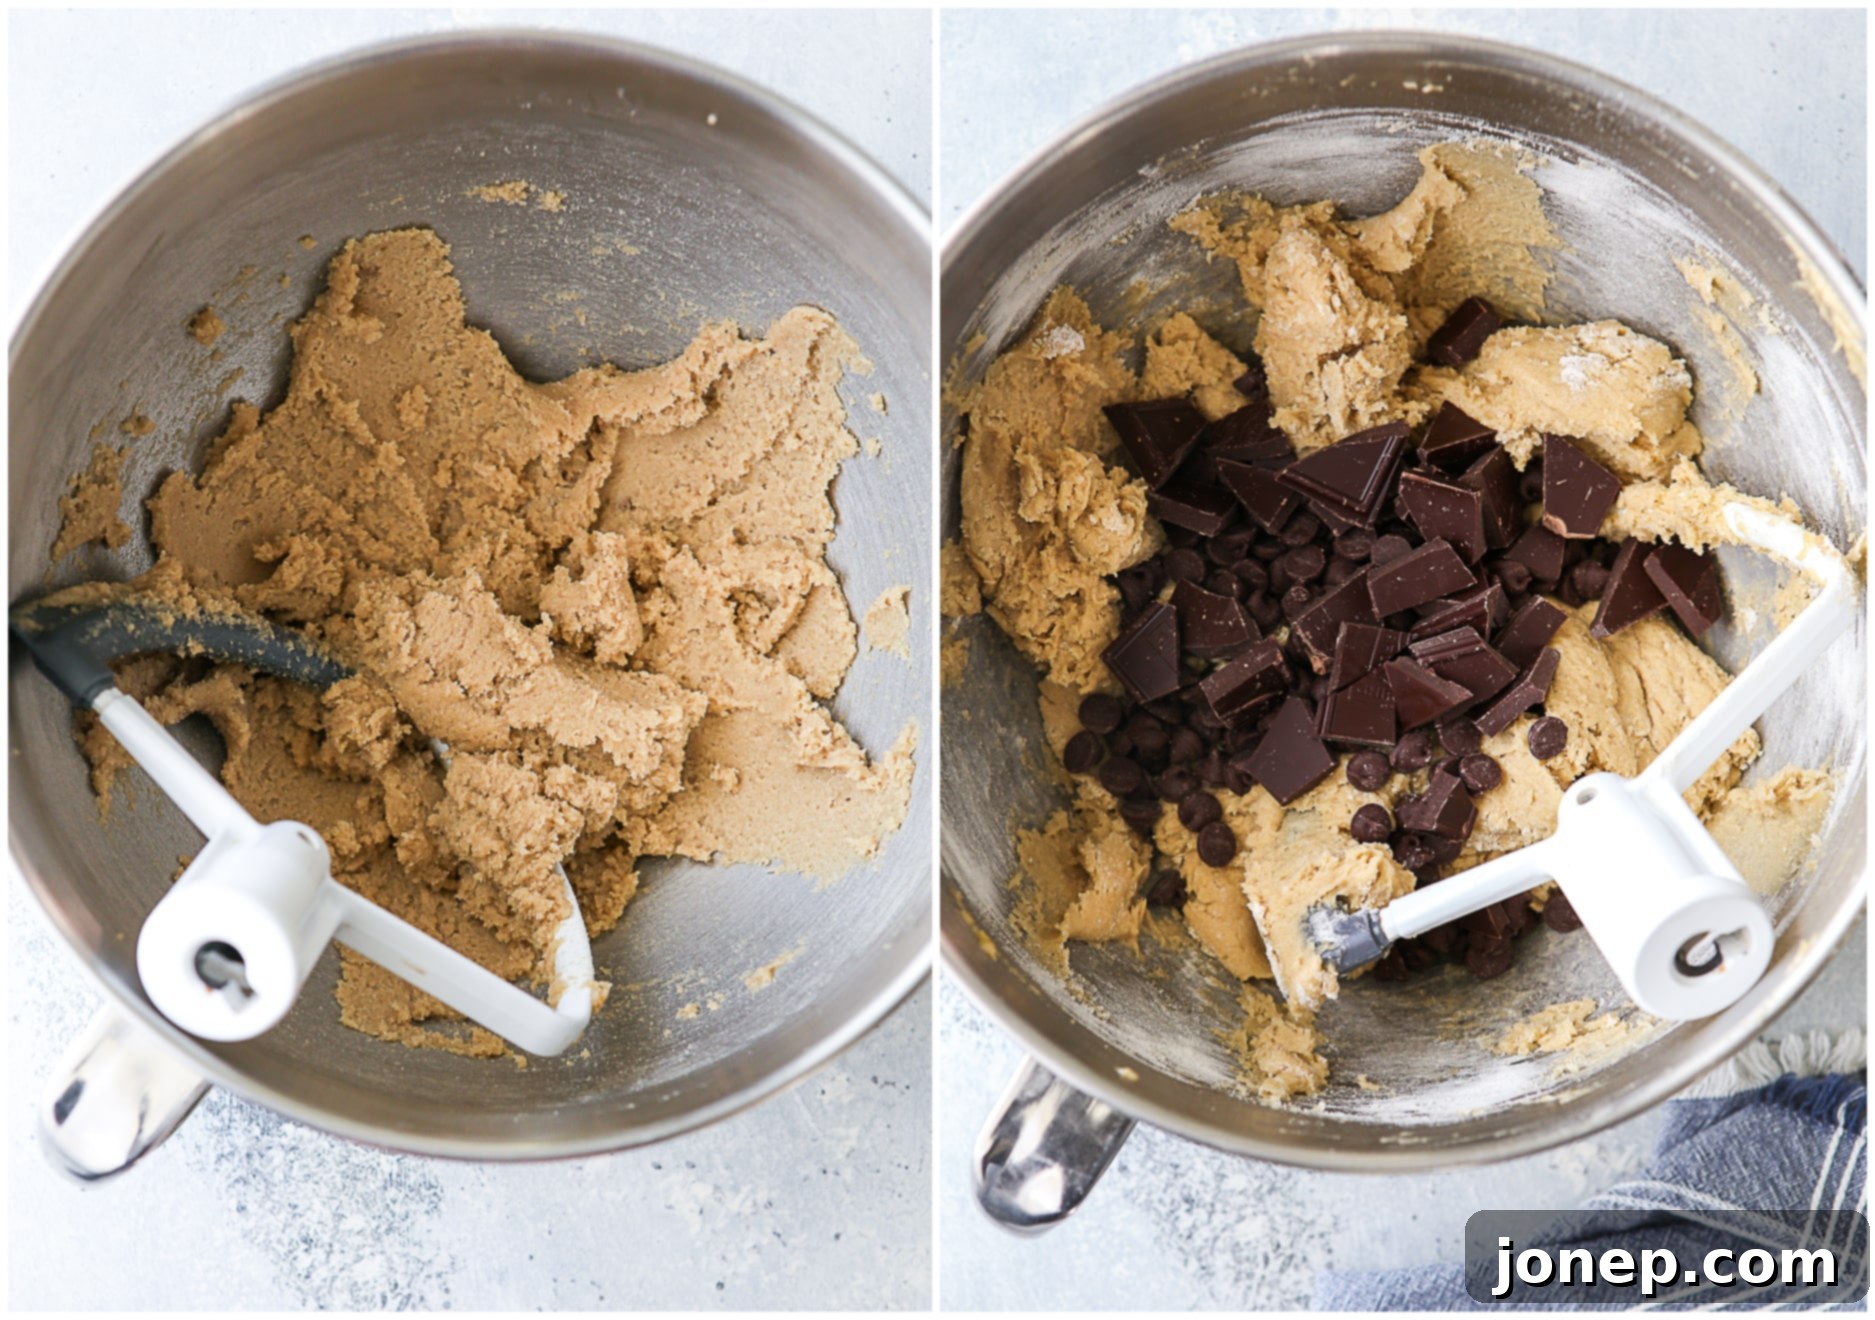
- Cream Butter with Sugars: Begin by combining the softened salted butter with both granulated and brown sugars in the bowl of an electric mixer fitted with a paddle attachment. Beat on medium-high speed for a crucial 3-5 minutes. This step is vital: you’re not just mixing, you’re aerating the butter and sugar, which creates tiny air pockets that contribute to the cookies’ light, chewy texture. The mixture should become noticeably lighter in both color and texture, resembling fluffy frosting, and start to stick slightly to the sides of the bowl. For more in-depth information on this foundational baking technique, refer to my comprehensive guide on the creaming method.

- Add Eggs and Vanilla: Reduce the mixer speed to medium. Add the eggs one at a time, beating well after each addition until just combined. Be sure to scrape down the sides and bottom of the bowl at least once during this step to ensure all ingredients are thoroughly incorporated. Finally, add the vanilla extract and mix until fragrant.
- Combine Dry Ingredients: In a separate bowl, whisk together the all-purpose flour, baking soda, and salt. Gradually add these dry ingredients to the wet mixture in the mixer. Mix on low speed just until the dry ingredients are mostly combined, and some loose streaks of flour still remain. Be careful not to overmix at this stage; overmixing develops gluten, which can lead to tough cookies.
- Stir in Chocolate Chips/Chunks: Remove the bowl from the mixer or reduce speed to very low. Add your chosen chocolate chips and/or chunks to the dough. Mix briefly, either by hand with a spatula or on the lowest mixer speed, until the chocolate is just incorporated throughout the dough. You want the chocolate evenly distributed without overworking the dough.
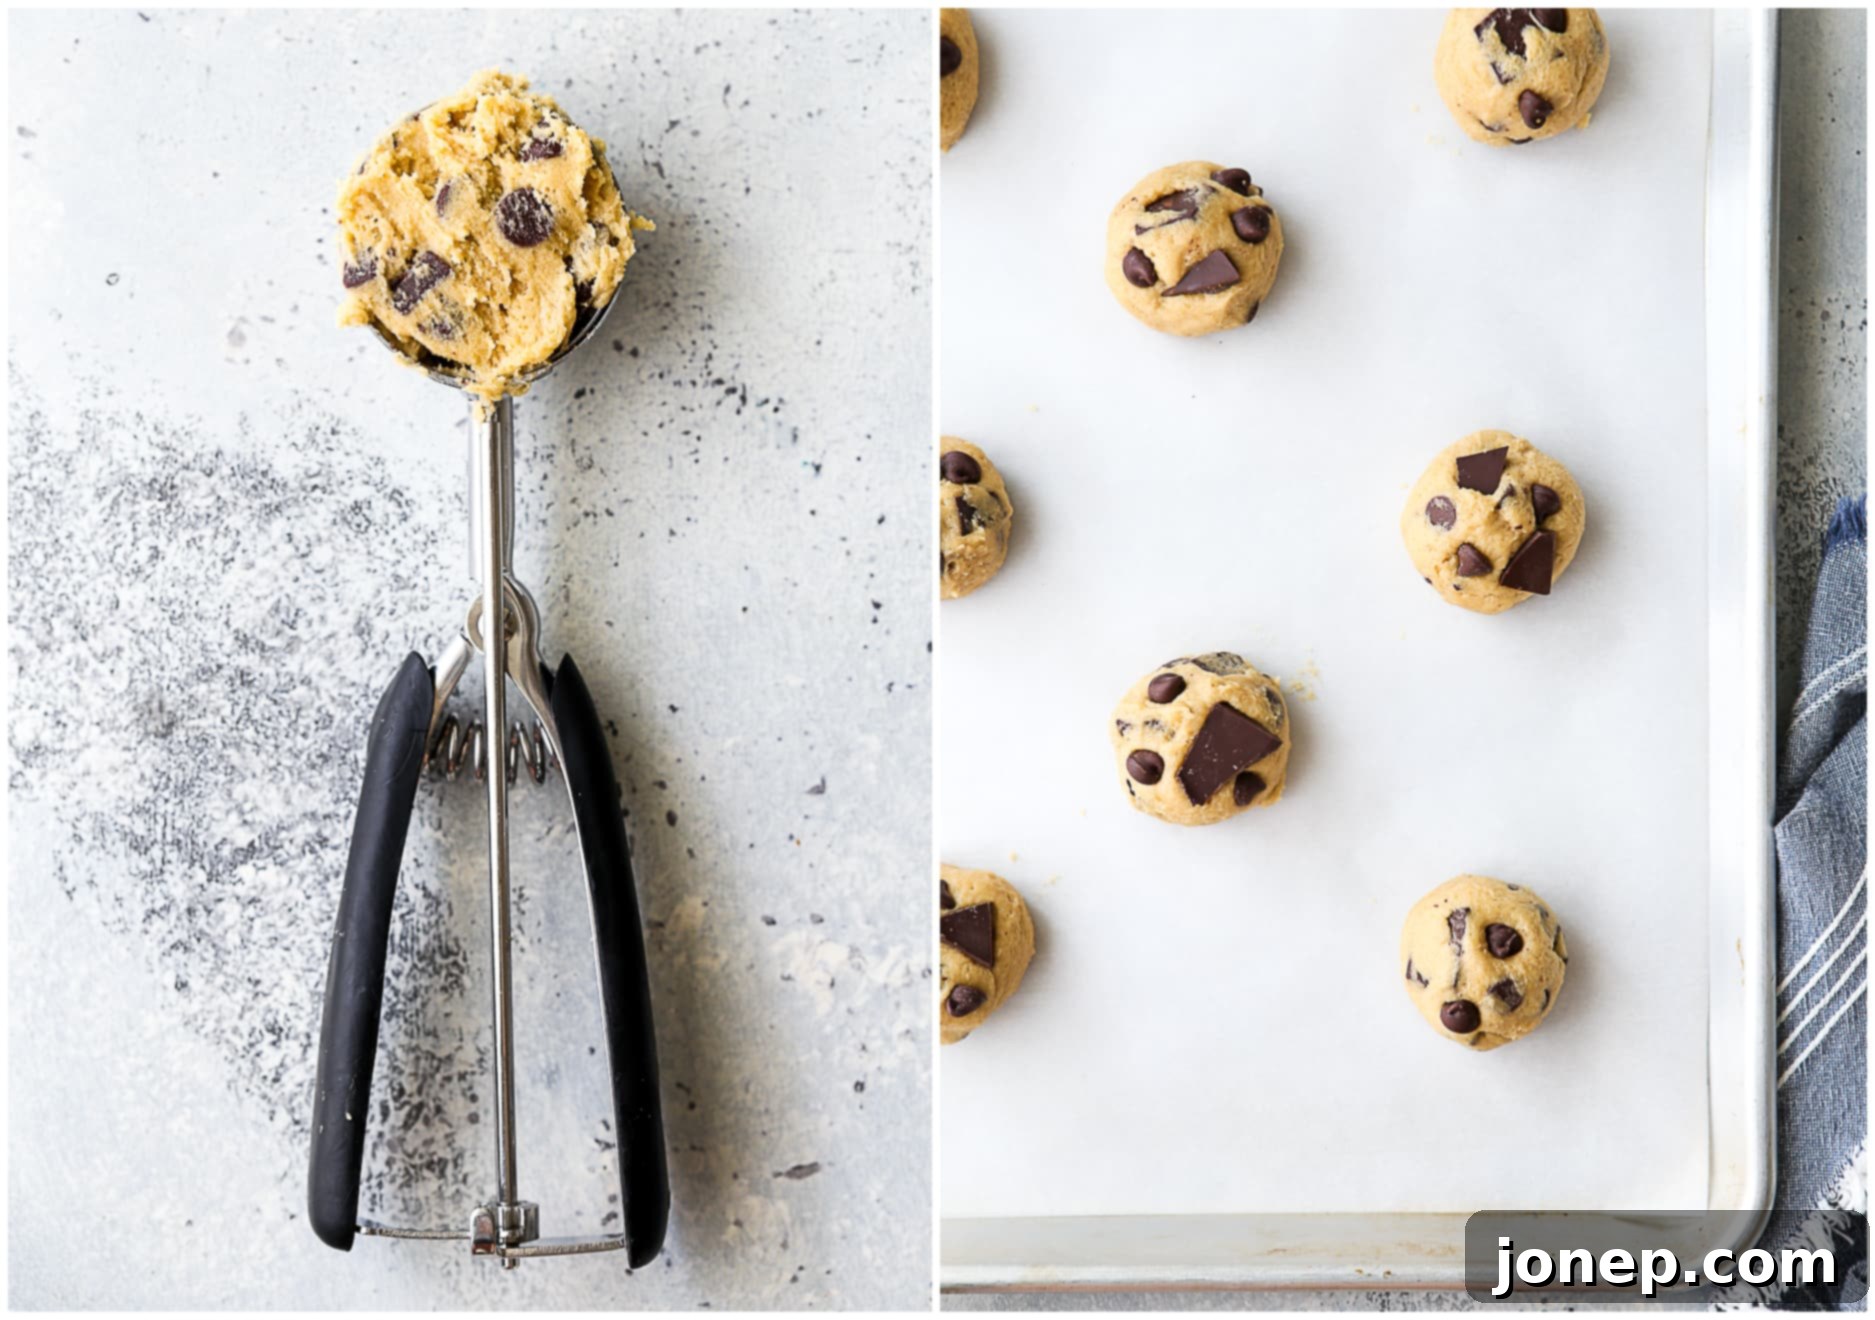
- Portion the Dough: Use a cookie scoop or a spoon to portion out uniform balls of cookie dough. Rolling them gently into rounds can help create a neater shape. Place the cookie dough balls onto a baking sheet pan that has been lined with parchment paper. Ensure they are spaced a few inches apart to allow for even spreading and prevent them from merging during baking.

- Bake to Golden Perfection: Preheat your oven to 375°F (190°C). Bake the cookies for 9-11 minutes for standard-sized cookies (or 7-9 minutes for smaller cookies). Cookies are perfectly done when their edges are beautifully golden brown, the centers appear set, and they are just barely beginning to take on a light golden hue. The very center might still look slightly underbaked; this is exactly what you want for a soft, chewy texture after cooling.
Once baked, you’re just moments away from pure bliss! Let them cool slightly, and then enjoy! I truly believe you will. These chocolate chip cookies are, without a doubt, my most cherished and favorite!
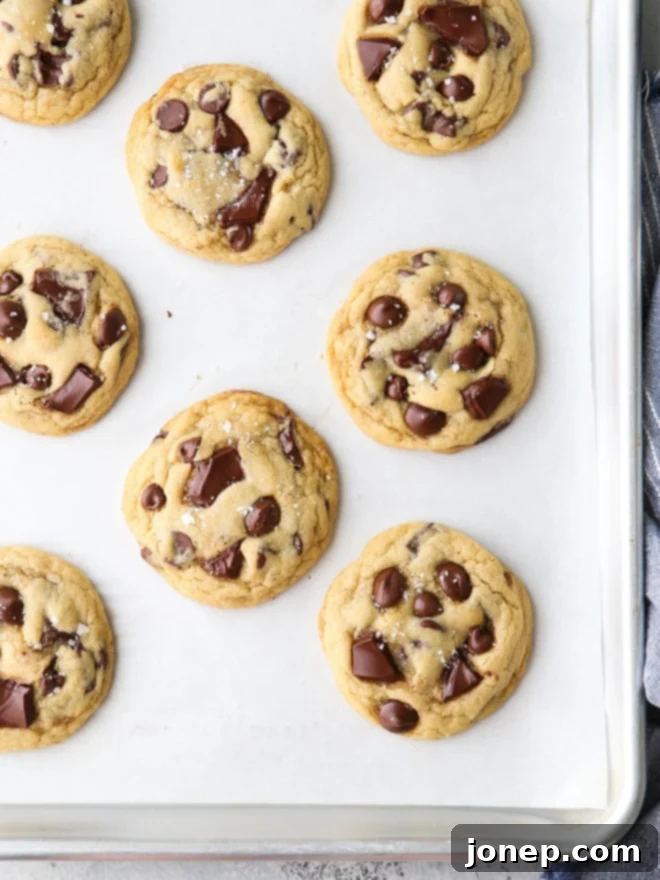
baking tip:How to know when cookies are done
Expert Tips for Chocolate Chip Cookie Perfection
Drawing from my 15 years of extensive baking experience, these are my absolute favorite and most valuable tips to help ensure your next batch of cookies is nothing short of extraordinary. Don’t skip this section – it’s packed with insights that will elevate your baking game!
- Butter Temperature is Key: Always start with butter that is slightly soft at room temperature, but never melted or greasy. When you gently press your finger into it, it should leave a small indent, but your finger should not easily push all the way through. If your butter is too warm, the emulsion with the sugar won’t hold properly, leading to cookies that spread excessively thin in the oven.
- Master Flour Measurement: Precision in measuring flour makes a world of difference! All of my recipes, including this one, are rigorously tested using the “spoon and level” method. This involves lightly spooning flour into your measuring cup until it overflows, then leveling it off with the back of a knife. If you simply scoop your measuring cup directly into the flour bag, you’re likely compacting too much flour, which will result in a dry, dense, and cakey cookie instead of a soft, chewy one. Learn how to properly measure flour here for consistently perfect results.
- Embrace Chocolate Variety: For the most dynamic chocolate experience, I highly recommend using a combination of both chocolate chips and chopped chocolate (or chocolate chunks). Chips hold their shape better, while chopped chocolate melts into luscious, irregular “puddles” throughout the cookie. Using different sizes ensures you get both delicate specks of chocolate that almost disappear into the dough and large, gooey pockets of melted goodness.
- The Power of a Cookie Scoop: For perfectly uniform cookies that bake evenly every time, a cookie scoop is an invaluable tool. My go-to is a large #20 scoop (approximately 3 Tbsp). This size creates cookies with those desired crisp edges and wonderfully soft middles. For smaller, more delicate cookies, a medium #40 scoop (1.5 Tbsp) works beautifully, just remember to adjust your baking time accordingly.
- Optimal Oven Placement: For the best results and most consistent baking, I always bake my cookies in a single layer on the center rack of the oven. This ensures that neither the tops nor the bottoms of the cookies cook too quickly or unevenly. If you’re short on time and need to bake multiple sheets, you can use two racks, but make sure to rotate them halfway through the baking process to ensure even cooking.
- Do Not Overbake! This is arguably the most critical tip for achieving that perfect soft and chewy texture. Pull the cookies from the oven when their edges are golden brown, the centers are set, and they are just barely beginning to take on any color – they should still be mostly pale in the middle. Remember, they will continue to firm up and finish setting on the hot baking sheet once removed from the oven, so trust the process!
- Reshape for Perfection: If, by chance, some of your cookies come out of the oven slightly misshapen or imperfectly round, don’t fret! Immediately after removing them from the oven, use a spatula or the back of a spoon to gently push and reshape them back into a perfect circle. This small trick works wonders for creating picture-perfect cookies. See more of my tips for how to bake pretty cookies.
- Garnish with Flaky Sea Salt: For an extra touch of gourmet sophistication and to enhance that irresistible sweet and salty combination, sprinkle a pinch of flaky sea salt (like Maldon) over the warm cookies immediately after they come out of the oven. It adds a wonderful textural contrast and a burst of flavor.
- Dough Storage for Freshness: While these cookies are undoubtedly best enjoyed the day they are baked, the cookie dough itself is incredibly versatile and keeps exceptionally well! Store the prepared cookie dough in an airtight container in the refrigerator for at least a week, allowing you to bake off fresh cookies whenever a craving strikes. Even better, cookie dough freezes beautifully for longer storage. This means you can have warm, fresh-baked cookies in minutes, any time you desire!
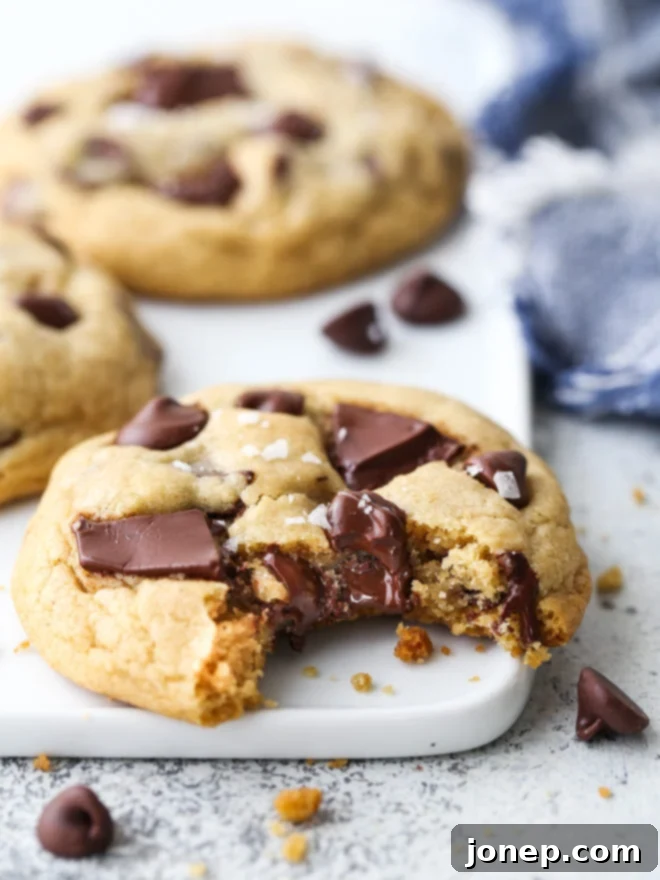
Recommended Baking Tools
Having the right tools can truly elevate your cookie baking experience from good to exceptional. These are the essential items I use and highly recommend for achieving perfect results every time. (Note: these are affiliate links, which means I may earn a small commission if you make a purchase, at no extra cost to you.)
- Paddle attachment for your stand mixer (essential for proper creaming!)
- Durable baking sheet pans
- Pre-cut parchment paper sheets or a reusable baking silicone mat (for easy cleanup and non-stick baking)
- A high-quality medium or large spring-loaded cookie scoop (for perfectly portioned cookies)
- Sturdy cooling racks
Full Recipe Card

The Best Chewy Chocolate Chip Cookies
Pin Recipe
Leave a Review
Ingredients
- ¾ cup (170 grams) salted butter , softened to room temperature
- ½ cup (100 grams) granulated sugar
- 1 cup (213 grams) packed light or dark brown sugar
- 2 large eggs
- 1 tablespoon vanilla extract
- 2 ½ cup (330 grams) all-purpose flour
- 1 teaspoon baking soda
- 1 teaspoon salt
- 2 cups (340 grams) semi-sweet chocolate chips or chunks , see Notes
Equipment
Instructions
-
Preheat oven to 375°F (190°C). Line a sheet pan with parchment paper.
-
In the bowl of an electric mixer with the paddle attachment, beat the softened butter, granulated sugar, and brown sugar until light and creamy, about 3-5 minutes. Stop to scrape down the bowl once or twice to ensure even mixing.
-
Add the eggs, one at a time, beating on medium speed after each addition. Scrape down the bowl at least once. Stir in the vanilla extract.
-
In a separate bowl, whisk together the flour, baking soda, and salt. Gradually add these dry ingredients to the wet mixture and mix on low speed until almost combined, leaving a few streaks of flour. Add the chocolate chips/chunks and mix briefly until just incorporated. Do not overmix.
-
Portion the dough equally using a cookie scoop (I recommend a #20 3 Tbsp scoop) and roll into rounds. Place them a few inches apart on the prepared sheet pan.
-
Bake for 9-11 minutes, or until the edges are golden brown and the top is set but still looks mostly pale in the center. Avoid overbaking!
-
Allow the cookies to cool on the baking sheet for 5 minutes before carefully transferring them to a wire rack to cool completely. This step is crucial for achieving the perfect chewy texture.
Video
Notes
- All recipes are tested with the “spoon and level” method of measuring flour. Learn how to properly measure flour here to ensure your cookies have the perfect texture.
- For the best visual appeal and textural variety, I love to use a combination of standard chocolate chips and larger chopped chocolate or chocolate chunks (for example, 1 cup of each). You can also use bittersweet or dark chocolate if you prefer a richer flavor.
- If you opt to bake smaller cookies (using a rounded tablespoon of dough), remember to adjust the baking time to approximately 7-9 minutes. Keep a close eye on them to prevent overbaking.
- Unbaked cookie dough can be conveniently stored in an airtight container in the fridge for at least a week. This allows you to bake fresh cookies on demand whenever you’re ready for a warm treat!
- Cookie dough can also be frozen for longer storage. This is perfect for meal prepping your desserts!
Note: This recipe was originally published in May 2020 and has since been updated and refined for even better results.
Exciting Chocolate Chip Cookie Variations
While this classic recipe is truly unbeatable, sometimes it’s fun to put a creative twist on a beloved favorite. If you’re looking for something a little extra special for your next batch of chocolate chip cookies, these inventive variations take the classic to an exciting new level!
