Rustic Peach Apple Galette: The Perfect Easy Dessert for Late Summer and Fall
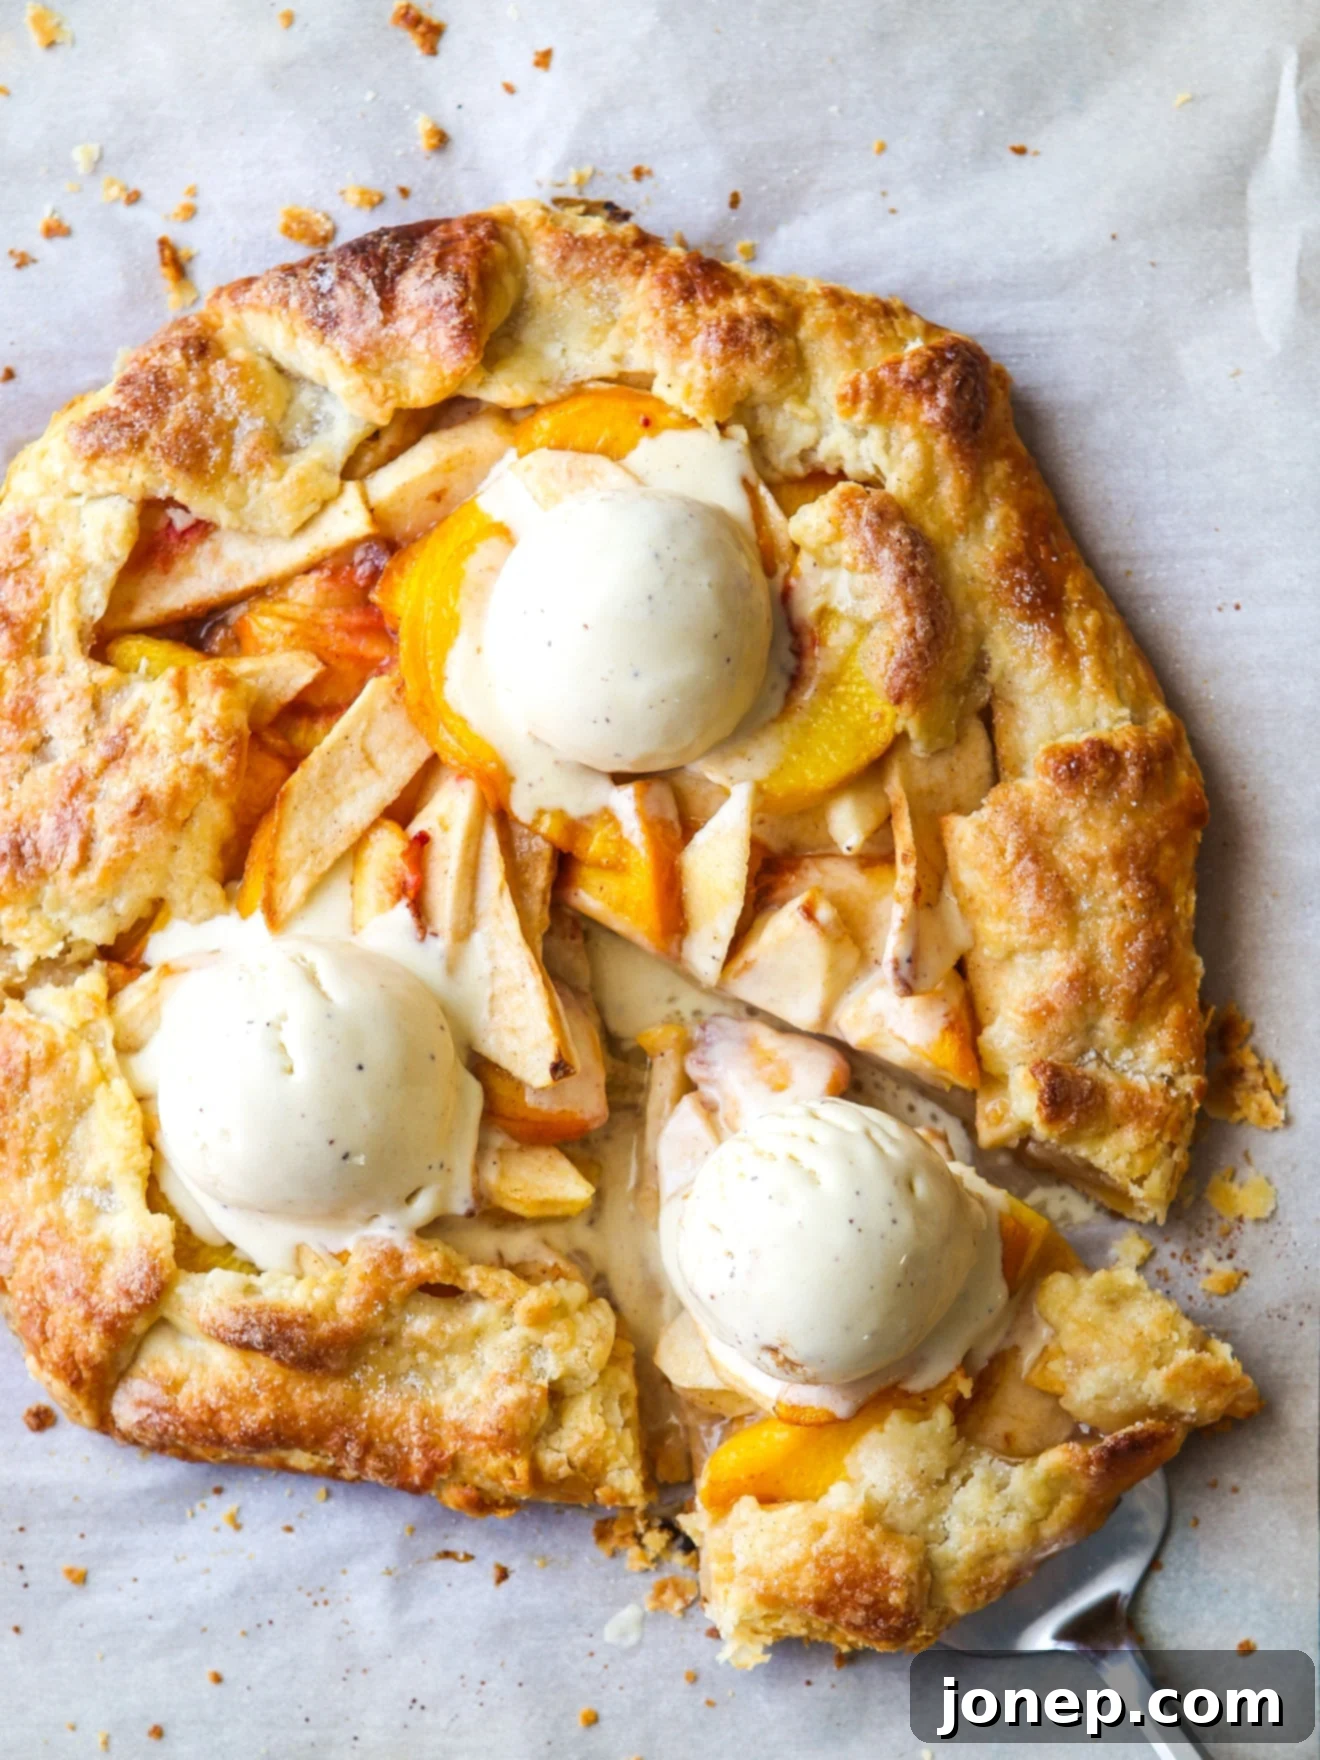
There’s nothing quite like the harmonious blend of summer’s last bounty and the first crisp flavors of autumn. This incredibly easy and utterly delicious peach apple galette recipe captures that seasonal magic, offering a delightful dessert that’s simple to make and always a crowd-pleaser. Imagine succulent, sweet peaches mingling with tart, crisp apples, all enveloped in a warm blanket of cinnamon and baked inside a beautifully flaky, all-butter pastry. It’s a dessert that speaks of comfort, celebration, and the changing seasons.

This peach apple galette has quickly become a cherished recipe in my kitchen, especially during August and September. It’s that sweet spot when the vibrant peach season gently draws to a close, and the exciting apple harvest is just beginning. The inherent beauty of this dessert lies in its simplicity and the remarkable flavor combination: the juicy sweetness of peaches, the gentle tang of apples, and the comforting warmth of cinnamon, all encased within a golden, buttery crust. And let’s be honest, serving it with a generous scoop of creamy vanilla ice cream isn’t just an option—it’s practically mandatory for the ultimate experience!
What makes a galette so appealing is its rustic charm and straightforward preparation. Unlike a traditional pie that requires careful crimping and a precise pan, a galette is an open-faced, free-form pastry that embraces imperfections, making it far less intimidating for bakers of all skill levels. This particular recipe calls for just a handful of essential ingredients, meaning you can whip it up in minutes. If you’re a seasoned baker who keeps a homemade pie crust or two stashed in the freezer, this dessert becomes an almost effortless endeavor, perfect for impromptu outdoor dinner parties with friends, a cozy family gathering, or simply a sweet treat to enjoy any night of the week. It’s consistently one of my favorite late-summer desserts to share with guests, and without fail, they absolutely rave about it!
Table of Contents
- Ingredients You’ll Need for a Perfect Galette
- To Peel or Not to Peel: Peaches and Apples
- Step-by-Step Guide: How to Make This Peach Apple Galette
- Expert Tips for Making Your Best Galette
- Get the Full Peach Apple Galette Recipe

baking tip:What is a Galette?
Ingredients You’ll Need for a Perfect Galette
Crafting this irresistible peach apple galette requires just a few basic ingredients, most of which you likely already have in your pantry. The quality of your fruit, however, will truly shine through, so pick the best you can find. Here’s a detailed look at everything you’ll need to bake this delightful dessert (the full recipe card with precise measurements is located at the bottom of the article):
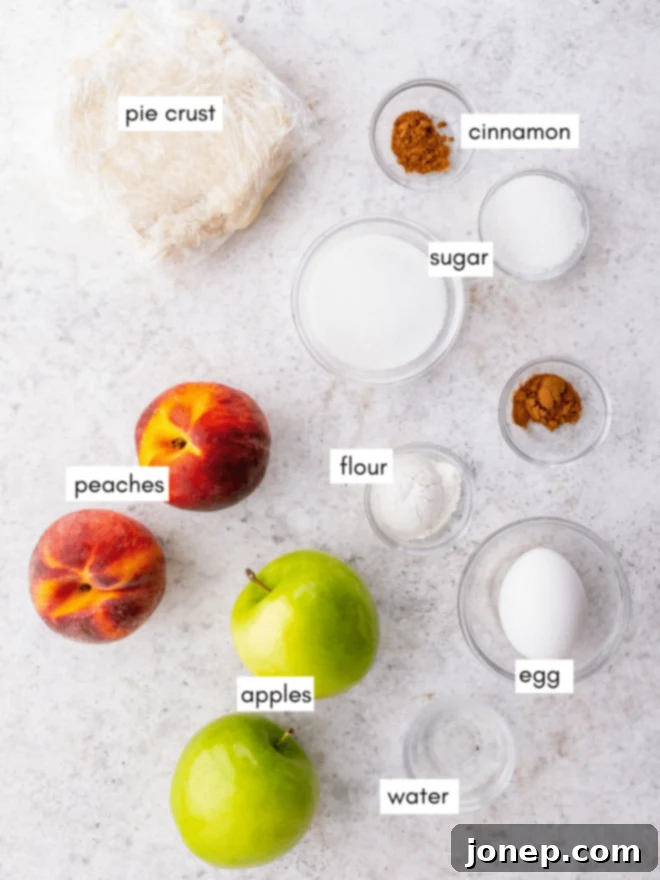
- Single Pie Crust: This is the foundation of your galette. You can use your favorite homemade all-butter pie crust for an unparalleled flaky texture and rich flavor, or opt for a high-quality store-bought crust for a fantastic time-saving shortcut. A good pie crust is essential for that perfect golden, crispy base.
- Fresh Peaches: Choose ripe, fragrant peaches that yield slightly to gentle pressure. While sweet, ensure they are still a little firm to prevent them from becoming too mushy during baking. Freestone peaches are generally easier to work with as their flesh easily separates from the pit.
- Fresh Apples: Select firm, slightly tart apples that hold their shape well when baked. Varieties like Granny Smith, Honeycrisp, Gala, or Fuji are excellent choices as they provide a lovely counterpoint to the sweetness of the peaches and prevent the filling from becoming overly soft.
- Granulated Sugar: This sweetens the fruit and helps to create a delicious, slightly syrupy filling. Adjust the amount based on the natural sweetness of your fruit and your personal preference.
- All-Purpose Flour: A small amount of flour is crucial to thicken the fruit juices released during baking. This prevents a watery filling and helps create that desirable gooey consistency. Cornstarch can also be used as an alternative.
- Ground Cinnamon: The quintessential spice for apple and peach desserts. Cinnamon adds a warm, aromatic depth that perfectly complements the fruit flavors. You can also experiment with a pinch of nutmeg or allspice for a more complex profile.
- Egg and Water, for Egg Wash: A simple egg wash (one beaten egg mixed with a tablespoon of water) brushed over the crust before baking gives it a beautiful golden-brown sheen and a slightly crisp texture.
To Peel or Not to Peel: Peaches and Apples
The decision of whether to peel your peaches and apples for this galette is entirely up to your personal preference! Both approaches yield delicious results, so it truly depends on what texture and appearance you prefer in your baked goods. Leaving the skins on is undoubtedly the easiest assembly method, saving you valuable prep time. The skins also add a bit of fiber and a lovely rustic texture to the finished galette, and sometimes a subtle color variation.
However, if you’re sensitive to texture or simply prefer a smoother, more uniform filling, you might choose to remove them. Sometimes, I find the peach skins can be a bit tough or slip off too easily after baking, and other times, they don’t bother me at all. It’s truly a matter of taste!
To peel the apples: This is generally straightforward. Simply use a standard vegetable peeler to efficiently remove the skins. Choose a sharp peeler for the best results and minimal waste.
To peel the peaches: This method is slightly more involved but yields beautifully peeled peaches without much fuss. First, use a small, sharp knife to score a shallow “x” in the bottom of each peach. Then, carefully dip the peaches into a pot of boiling water for just a few seconds – usually 10-30 seconds, depending on ripeness. Immediately transfer the peaches to a bowl of ice water to stop the cooking process. Once cooled enough to handle, use your fingers to easily peel off the skins, starting from the “x” you scored at the bottom. The skins should slip right off.
Step-by-Step Guide: How to Make This Peach Apple Galette
Creating this rustic peach apple galette is a straightforward and rewarding process. Follow these simple steps for a truly delightful dessert:
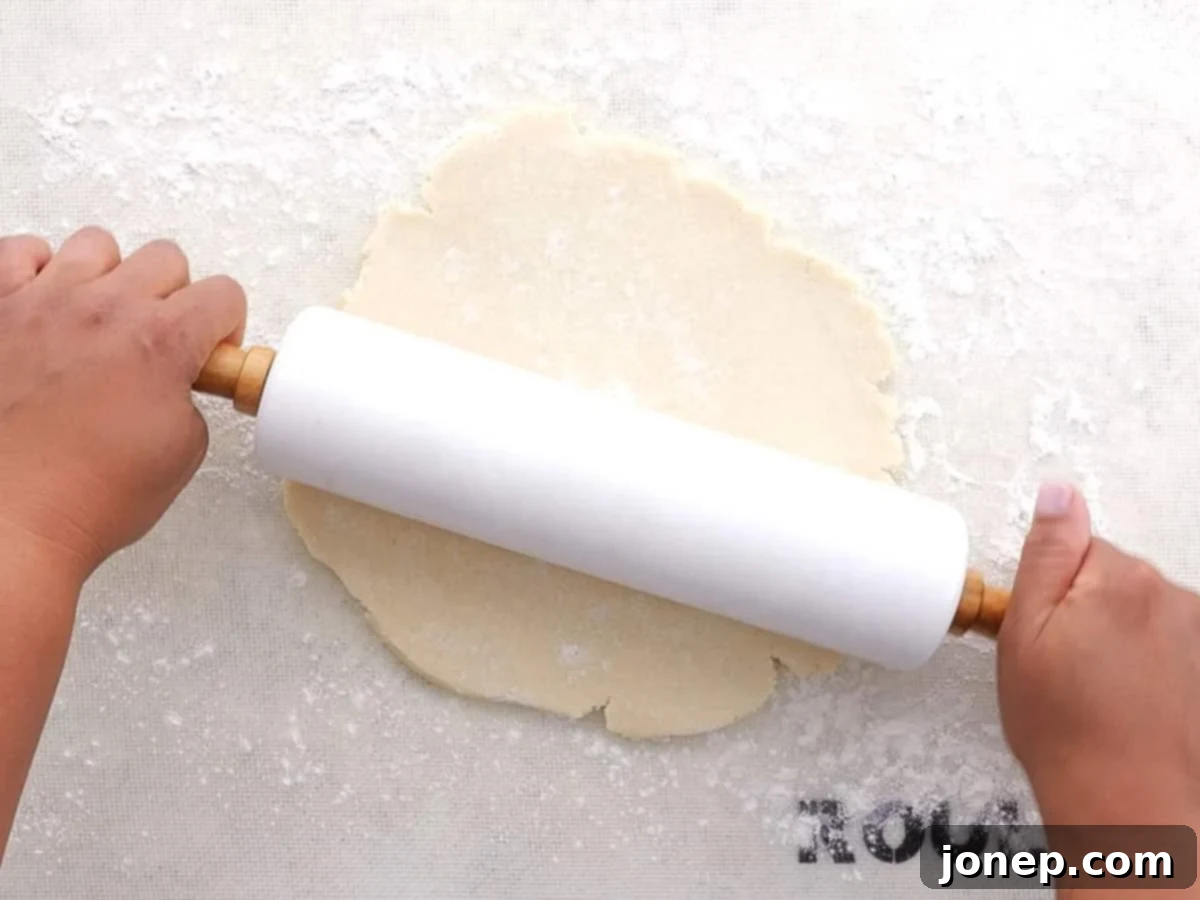
- Prepare Your Workspace and Roll Out Pie Crust. Before you begin, preheat your oven to 400°F (200°C) and line a large baking sheet with parchment paper. This prevents sticking and makes cleanup a breeze. On a lightly floured surface, unroll or roll out your chilled pie dough. Aim for a rough 12-inch circle. Don’t stress if it’s not perfectly round; the beauty of a galette is its rustic, free-form nature! Once rolled, carefully transfer the dough to your prepared baking sheet. Keeping it chilled helps with handling.

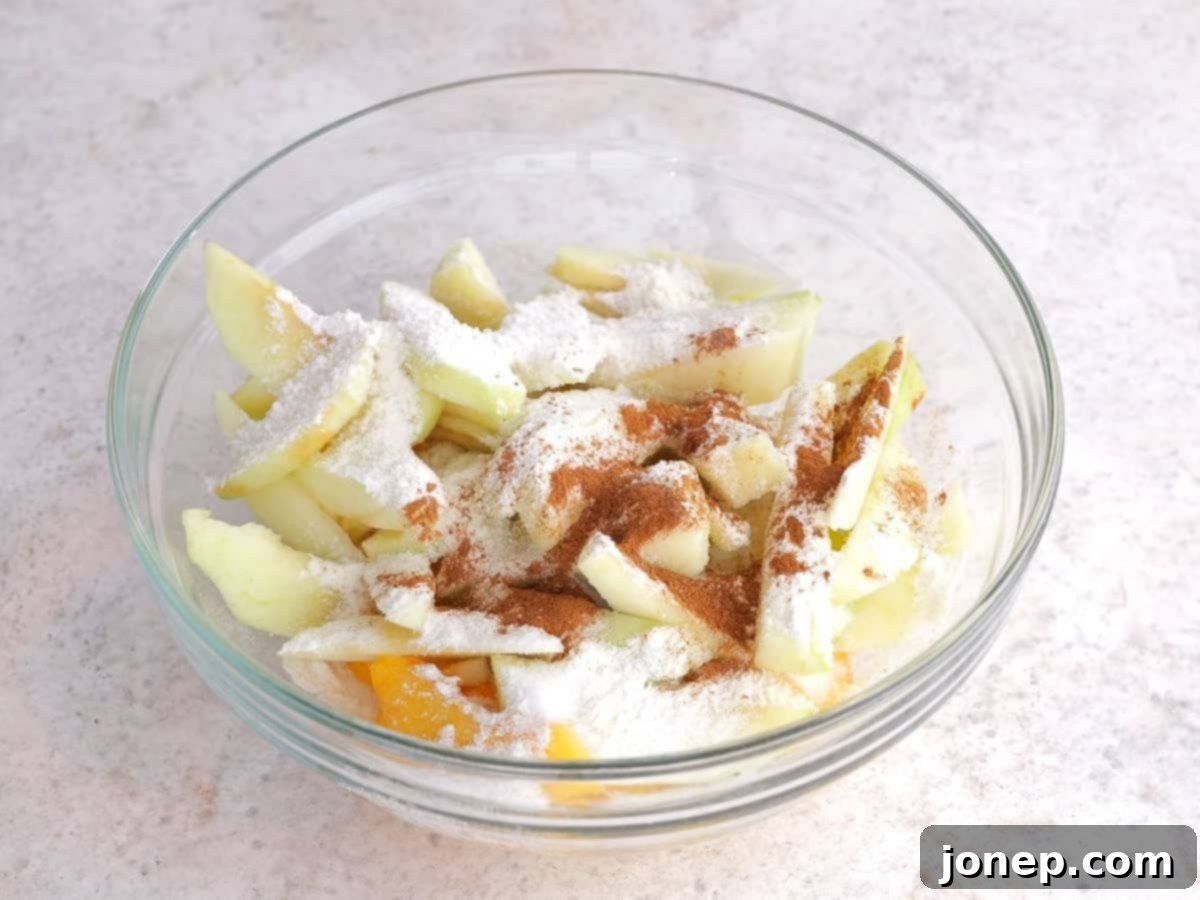
- Toss Peaches and Apples with Sugar, Flour, and Cinnamon. In a large bowl, gently combine your thinly sliced peaches and apples. Add the granulated sugar, all-purpose flour, and ground cinnamon. Using a spatula or your hands, toss everything together until the fruit is evenly coated. The flour is essential here as it will absorb the juices released by the fruit during baking, ensuring a perfectly thickened, not watery, filling. Crucially, do this step only right before you plan to assemble the galette. If the fruit sits too long after being tossed with sugar, it will release excess juices, which can lead to a soggy crust.

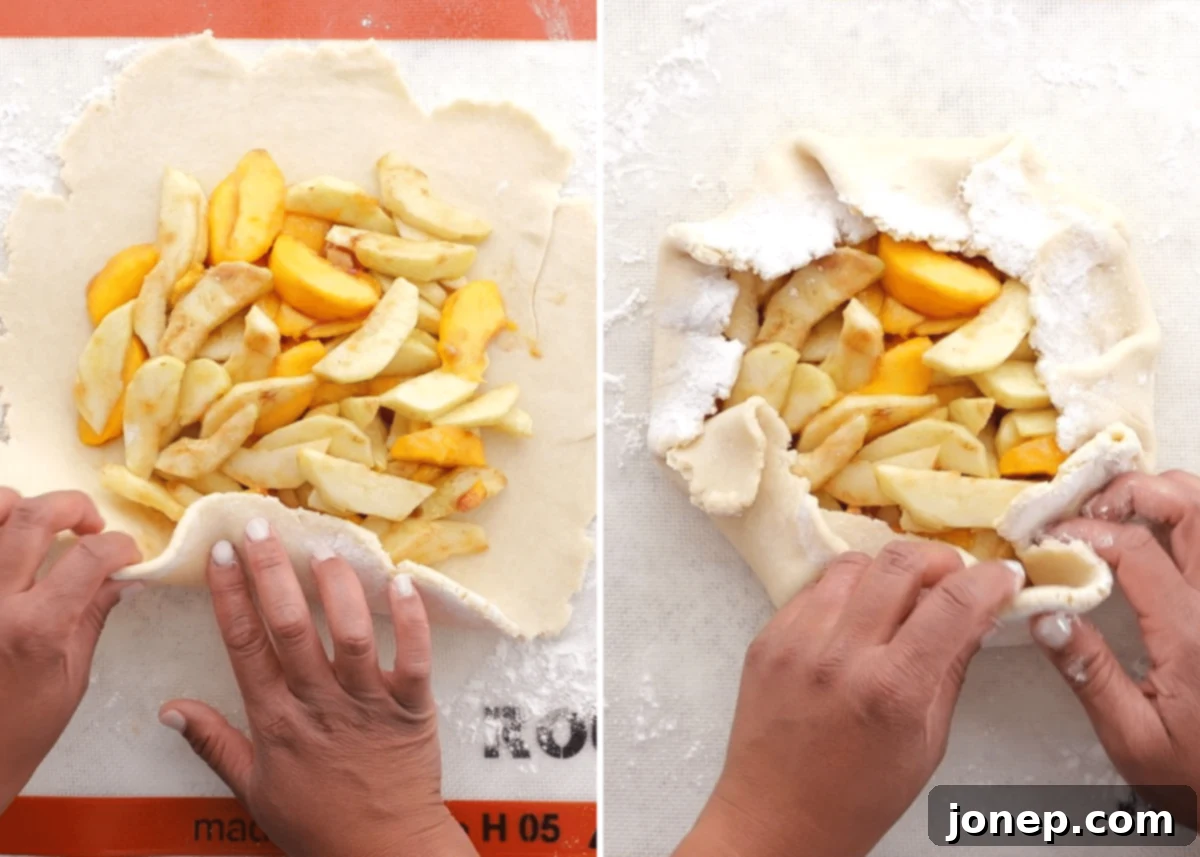
- Assemble the Galette. Carefully spoon the fruit mixture into the center of your rolled-out pie crust, leaving a clear 2-inch border around the edges. This border will form the crust of your galette. Now comes the fun, rustic part: gently fold the edges of the pie crust up and over the fruit filling in sections. Pinch the folds together slightly to create a loose, free-form border. Again, don’t worry about perfection; the charm of a galette is in its homemade, imperfect look.

- Bake to Golden Perfection. In a small bowl, whisk together one large egg with a tablespoon of water to create an egg wash. Lightly brush the folded edges of the pie crust with this egg wash. If you desire an extra touch of sweetness and sparkle, sprinkle the crust generously with a mixture of granulated sugar and a pinch of cinnamon (an optional topping often makes a big difference!). Transfer the baking sheet to your preheated 400°F (200°C) oven and bake for approximately 30-35 minutes. You’ll know it’s done when the crust is beautifully golden brown and the fruit filling is visibly bubbling in the center, indicating that the juices have thickened and the fruit is tender.
- Cool and Serve. Once baked, remove the galette from the oven and allow it to cool slightly on the baking sheet before transferring it to a wire rack. While delicious warm, letting it cool for at least 15-20 minutes allows the filling to set properly, making it easier to slice. For the ultimate indulgence, serve warm slices topped with a dollop of freshly whipped cream or a scoop of premium vanilla ice cream. The contrast of the warm fruit and cold cream is simply divine!
Expert Tips for Making Your Best Galette
Even though galettes are designed to be rustic and forgiving, a few expert tips can elevate your peach apple galette from good to absolutely phenomenal. Pay attention to these details for a consistently delicious result:
- Mastering the Pie Crust is Key: The crust is a star component of any galette. While store-bought crusts are a fantastic convenience, a homemade all-butter pie crust offers an unrivaled flakiness and rich flavor. I have developed several excellent resources to help you achieve pie crust perfection:
- For a reliable, consistent crust, try my foolproof method for making all-butter pie crust. It focuses on technique for maximum flakiness.
- If you’re looking for a slight flavor variation that adds a subtle tang and tender crumb, my favorite buttermilk pie crust recipe is a must-try.
- For those busy days when you need speed without sacrificing quality, I even have a detailed tutorial for making quick pie crust in a food processor, which is incredibly efficient and still yields a beautiful crust.
- Don’t underestimate the power of a good quality store-bought crust! It’s a lifesaver for last-minute desserts and still results in a delicious galette, especially when doctored up with an egg wash and sugar.
- Choosing the Best Apples for Baking: Not all apples are created equal when it comes to baking. For this galette, you want varieties that will hold their shape and offer a good balance of sweetness and tartness, preventing the filling from becoming mushy or overly sweet. Excellent choices include Granny Smith (classic tartness), Jonagold, Jonathan, Gala, Honeycrisp (sweet and crisp), and Pink Lady/Cripps Pink. These varieties are firm enough to withstand the baking process and contribute to the filling’s delightful texture and flavor complexity. Avoid overly soft or mealy apples like Red Delicious.
- Knowing When Your Galette is Perfectly Done: Over or under-baking can significantly impact the outcome. There are two primary indicators to look for to ensure your galette is perfectly baked:
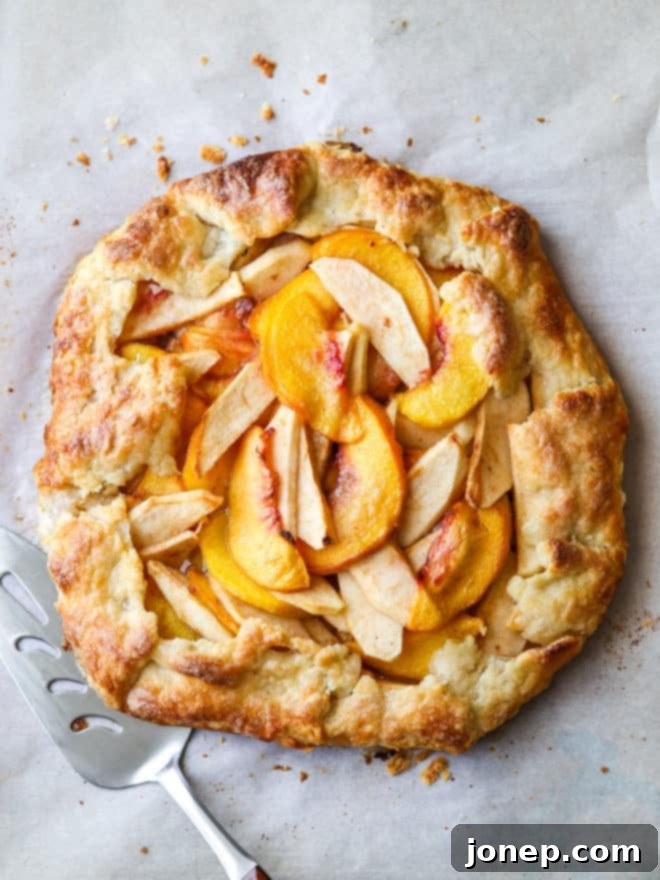
- Golden Brown Crust: The pastry edges should be deeply golden brown. This indicates that the butter in the crust has caramelized, leading to a crispy, flavorful texture. Pale crusts often mean an underbaked, doughy result.
- Bubbling Filling: The fruit filling in the center should be visibly bubbling vigorously. This isn’t just for show; it’s a critical sign that the internal temperature has reached a point where the flour has had enough time to properly thicken the fruit juices. If the filling isn’t bubbling, it likely hasn’t thickened sufficiently, and you might end up with a watery galette.
- Reheating for Optimal Enjoyment: If you have leftovers (a rare occurrence!), reheating them properly can bring them back to life. To reheat the galette before serving, cover it loosely with aluminum foil to prevent the crust from browning too much, and warm it in a 350°F (175°C) oven for 20-30 minutes. Remove the foil for the last few minutes of reheating to allow the crust to crisp up again, bringing back that freshly baked texture.
- Storing Your Galette: This galette tastes best on the day it’s baked. However, if you have any remaining slices, it will keep well in the refrigerator for several days. Ensure it’s covered tightly with plastic wrap or stored in an airtight container to maintain freshness and prevent it from drying out or absorbing other odors from the fridge. For longer storage, individual slices can be wrapped and frozen, then reheated as described above.
Get the Full Peach Apple Galette Recipe

Peach Apple Galette
Pin Recipe
Leave a Review
Ingredients
- One single-crust pie crust recipe (homemade or store-bought)
- 2 (255 grams) large peaches , ripe but firm, peeled and thinly sliced (optional peeling)
- 2 (170 grams) large apples , such as Granny Smith or Honeycrisp, peeled and thinly sliced (optional peeling)
- ¼ cup (50 grams) granulated sugar
- 1 tablespoon all-purpose flour
- ¼ teaspoon ground cinnamon
- 1 large egg + 1 tablespoon water , for egg wash
Optional topping:
- 1 tablespoon granulated sugar
- ½ teaspoon ground cinnamon
- Ice cream or whipped cream , for serving
Instructions
-
Preheat your oven to a robust 400°F (200°C). Line a standard baking sheet with parchment paper. This simple step is crucial for preventing sticking and ensuring easy cleanup after baking your delicious galette.
-
On a lightly floured surface, carefully roll out your chilled single pie crust. Aim for a circular shape that is roughly 12 inches (about 30 cm) in diameter. Remember, perfection isn’t the goal here; the rustic charm of a free-form pastry is part of its appeal. Once rolled, gently transfer the dough onto the prepared baking sheet.
-
In a large mixing bowl, combine the thinly sliced peaches and apples. Sprinkle the granulated sugar, all-purpose flour, and ground cinnamon over the fruit. Toss everything together thoroughly but gently, ensuring all fruit slices are evenly coated. This step is best done just before assembly to minimize the fruit releasing excessive juices, which can lead to a soggy crust. Place the coated fruit mixture into the center of the pie crust, making sure to leave a generous 2-inch (about 5 cm) border clear around the edges of the dough.
-
Now, carefully fold the edges of the pie crust up and over the fruit filling. Create an overlapping pattern, gently pinching the folds together to secure them. This creates the signature rustic border of the galette. In a small bowl, whisk together the large egg and 1 tablespoon of water to create an egg wash. Lightly brush this egg wash over the folded crust. If desired, sprinkle the brushed crust generously with the optional cinnamon sugar topping (1 tablespoon granulated sugar mixed with ½ teaspoon ground cinnamon) for an extra layer of sweetness and a beautiful glimmer.
-
Transfer the baking sheet with your assembled galette to the preheated oven. Bake for approximately 30-35 minutes, or until the crust is a rich golden brown and the fruit filling is bubbling vigorously in the center. The bubbling indicates that the filling has reached the proper temperature to thicken. Once baked, remove from the oven and allow it to cool slightly on the baking sheet for 10-15 minutes before serving. This allows the filling to set. Serve hot or at room temperature. For an truly indulgent experience, top each slice with a scoop of vanilla ice cream or a dollop of fresh whipped cream, if desired. Enjoy the harmonious blend of summer and fall flavors!
Video
Notes
- Feel free to use your favorite pie crust recipe, whether it’s a cherished family recipe or one of the detailed options provided earlier in this article. Store-bought pie crust is also a fantastic and convenient time-saving option, especially when you’re short on time but still crave homemade flavor!
- Since apples are generally firmer and take slightly longer to soften than peaches during baking, try to use peaches that are still a little firm rather than overly ripe and soft. This helps ensure a more even baking process and a consistent, delightful texture throughout the galette, where both fruits are tender but not mushy.
This recipe was originally published in September 2017 and has been updated to provide even more helpful tips, detailed instructions, and delicious insights into creating the perfect peach apple galette.
