Homemade Toasted Marshmallow Ice Cream: A Campfire Dream in Every Scoop
There’s nothing quite like the taste of a perfectly toasted marshmallow – that sweet, caramelized crust giving way to a warm, gooey center. It’s a flavor that instantly transports you to cool summer nights, crackling campfires, and shared laughter. What if you could capture that magical essence and swirl it into the creamiest, most luxurious ice cream imaginable? Well, get ready to make that dream a reality with this incredible Toasted Marshmallow Ice Cream recipe!
I recently returned from a blissful week at my family’s cabin in Idaho, a place where campfires are a nightly ritual and s’mores are practically a food group. While I’m excited to share more about that adventure soon, my mind – and my taste buds – are utterly captivated by this ice cream. It begins with the irresistible charm of marshmallows kissed by flame, transforming into a rich, creamy frozen treat that perfectly encapsulates those warm summer nights around the fire. Summer, for me, just isn’t complete without indulging in at least one s’more, isn’t that true for everyone?
However, as much as I adore the classic trinity of toasted marshmallow, crisp graham cracker, and melted chocolate, I often find myself craving just the marshmallow itself, still warm and slightly charred from the roasting stick. I don’t even mind if it catches fire and I have to blow it out, leaving a delightfully smoky, slightly blackened mess. Sometimes, that intense, caramelized flavor is even better that way. And now, the best part? I don’t need a roaring campfire to enjoy that exquisite taste. I can simply scoop it straight from my freezer, whenever the craving strikes.
The Secret to Perfectly Toasted Marshmallows for Your Ice Cream
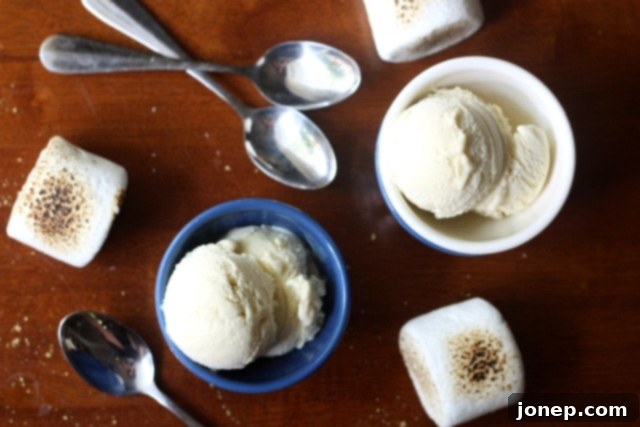
The magic of this ice cream truly lies in the toasted marshmallows. The key is to achieve that perfect balance of golden-brown caramelization without completely incinerating them. If you happen to own a small kitchen torch, this step becomes incredibly easy and fun. You get precise control over the toasting, creating beautiful, even browning. Simply lay your marshmallows on a parchment-lined baking sheet and torch them until they’re golden and slightly bubbly, rotating as needed.
But don’t fret if a kitchen torch isn’t part of your culinary arsenal! Your oven broiler is a fantastic alternative. Just be sure to place your oven rack on the highest setting and keep a vigilant eye on the marshmallows. They can go from perfectly toasted to burnt in a matter of seconds. Rotate the baking sheet frequently to ensure even toasting on all sides. The goal is to get them gooey and browned, developing that distinct, smoky-sweet flavor that will infuse your ice cream. Once toasted, they’re ready to be blended seamlessly into the rich custard base, creating a truly unique and irresistible flavor profile. Churn it up, and voila, you have toasted marshmallow ice cream!
Elevate Your Dessert: Serving Suggestions and Why It Shines on Its Own
This ice cream is a star in its own right, but it also lends itself beautifully to creative enhancements. If you’re feeling adventurous and want to recreate the full s’mores experience in a sundae, consider drizzling it with a rich chocolate sauce and sprinkling it with crunchy graham cracker crumbles. Imagine the textural contrast, the additional layers of sweetness – it’s a truly indulgent combination.
In fact, I initially had grand plans to do just that. I envisioned a towering s’mores sundae, complete with all the fixings. However, after my very first spoonful of this incredible ice cream, I changed my mind completely. It simply didn’t need any toppings or garnishes. The flavor of the toasted marshmallow is so profound, so perfectly balanced with the creamy base, that it’s absolutely incredible all on its own. The subtle smokiness, the intense sweetness, and the luxurious texture are more than enough to satisfy any dessert craving. You’ll understand exactly what I mean once you taste it!
Tips for the Best Homemade Toasted Marshmallow Ice Cream
- Don’t Skip the Chilling: Ensure your custard base is completely chilled before churning. This is crucial for achieving a smooth, creamy texture and preventing icy ice cream.
- Quality Ingredients: Use good quality whole milk and heavy cream for a truly rich and decadent base.
- Toasting Perfection: Whether using a torch or broiler, aim for a deep golden brown with some slight charring in spots. This is where the signature toasted flavor comes from.
- Blend Until Smooth: Ensure the toasted marshmallows are thoroughly pureed into the custard. Any small lumps might affect the texture of the final product.
- Patience is Key: While the churn time is relatively short, allowing the ice cream to harden in the freezer for a few hours post-churning will result in the perfect scoopable consistency.
- Storage: Store homemade ice cream in an airtight container in the coldest part of your freezer to prevent freezer burn and maintain optimal texture.
Frequently Asked Questions about Toasted Marshmallow Ice Cream
- Can I make this ice cream without an ice cream maker?
- While an ice cream maker is recommended for the creamiest results, you can try a no-churn method. After blending the custard with the marshmallows, freeze the mixture in a shallow dish, stirring every 30-45 minutes for the first 2-3 hours to break up ice crystals. It won’t be as perfectly smooth as churned ice cream, but it will still be delicious.
- What kind of marshmallows should I use?
- Regular, good-quality white marshmallows work best. Jumbo “campfire” marshmallows are excellent as they toast beautifully and yield a good amount of gooey goodness. Avoid mini marshmallows as they can toast too quickly and unevenly.
- Can I add other mix-ins to this ice cream?
- Absolutely! While it’s fantastic on its own, feel free to get creative. Swirl in chocolate fudge, add chocolate chips, mix in crushed graham crackers, or even a hint of smoked sea salt for an extra layer of complexity.
- How long does homemade ice cream last in the freezer?
- For the best quality and texture, homemade ice cream should be consumed within 1-2 weeks. After that, ice crystals can start to form, and the flavor might diminish.
Indulge in the Ultimate Summer Dessert
This Toasted Marshmallow Ice Cream isn’t just a dessert; it’s an experience. It’s the taste of summer captured in a scoop, offering warmth, comfort, and pure delight. Whether you’re a seasoned ice cream maker or trying it for the first time, the process is straightforward, and the rewards are immense. Get ready to impress your friends and family, or simply treat yourself to a moment of pure, nostalgic bliss. You truly deserve this creamy, dreamy, campfire-inspired delight!

Toasted Marshmallow Ice Cream
Pin Recipe
Leave a Review
Ingredients
- 5 large egg yolks
- 2 cups whole milk (470 ml)
- 1 cup heavy cream (235 ml)
- 1 teaspoon vanilla extract
- ⅓ cup granulated sugar (66 grams)
- Pinch of salt
- 7 ounces marshmallows (200 grams) (I used 9 jumbo “campfire” marshmallows)
Instructions
-
To make the custard base, combine the whole milk and sugar in a saucepan over medium high heat. Heat the mixture until steaming and bubbles appear at the edges, do not boil. Meanwhile, whisk together the egg yolks in a large bowl. Slowly add the heated milk mixture to the egg yolks while whisking constantly. Pour the mixture back into the saucepan and cook over medium heat until thickened and coats the back of a spoon, stirring frequently. Pour mixture through a mesh strainer into a large bowl. Add the heavy cream, vanilla extract, and salt. Set aside.
-
Spread the marshmallows out on a sheet pan lined with parchment paper or a silpat. Toast the marshmallows with a kitchen torch or an oven broiler. If you use a broiler, place the oven rack as high as possible and watch the marshmallows very closely to ensure they don’t burn. Rotate the marshmallows so that they are evenly toasted on each side.
-
In a blender, add the custard mixture and the toasted marshmallows and puree until smooth. Chill completely in the fridge. Freeze in an ice cream machine according to the manufacturer’s instructions. Let harden in the freezer for an addition few hours before serving.
