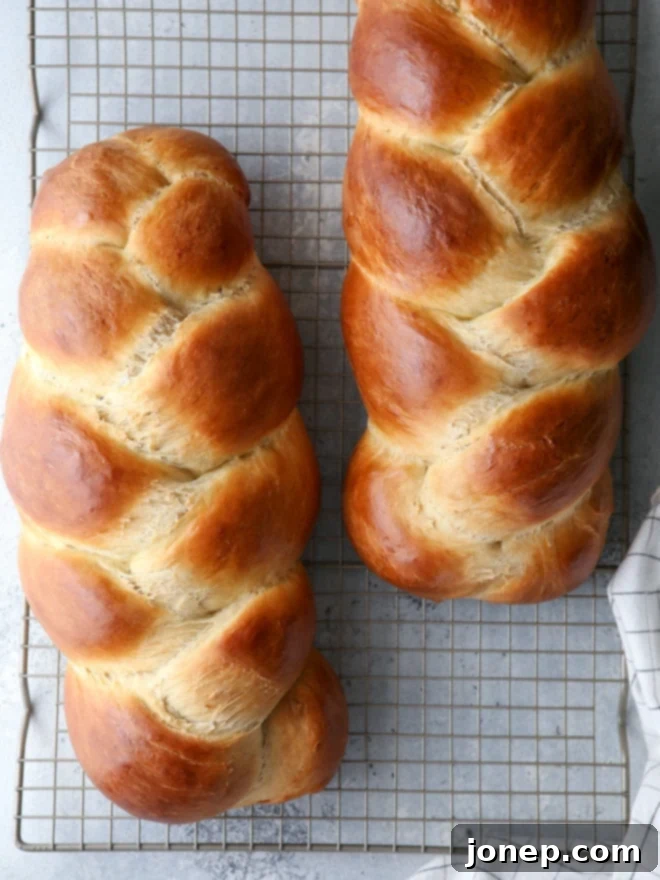
Master the Art of Baking: Your Guide to Irresistibly Soft Braided Egg Bread
There’s a special kind of magic that fills the kitchen when a fresh loaf of homemade bread is baking. The aroma alone is enough to transport you to a place of comfort and warmth. Among the many delightful bread varieties, this light, tender, and incredibly flavorful braided egg bread holds a unique spot in my heart. It’s not just bread; it’s a culinary masterpiece that’s as beautiful to behold as it is delicious to eat. While I often reserve it for special occasions, its ease of preparation might just convince you to make it a regular treat.
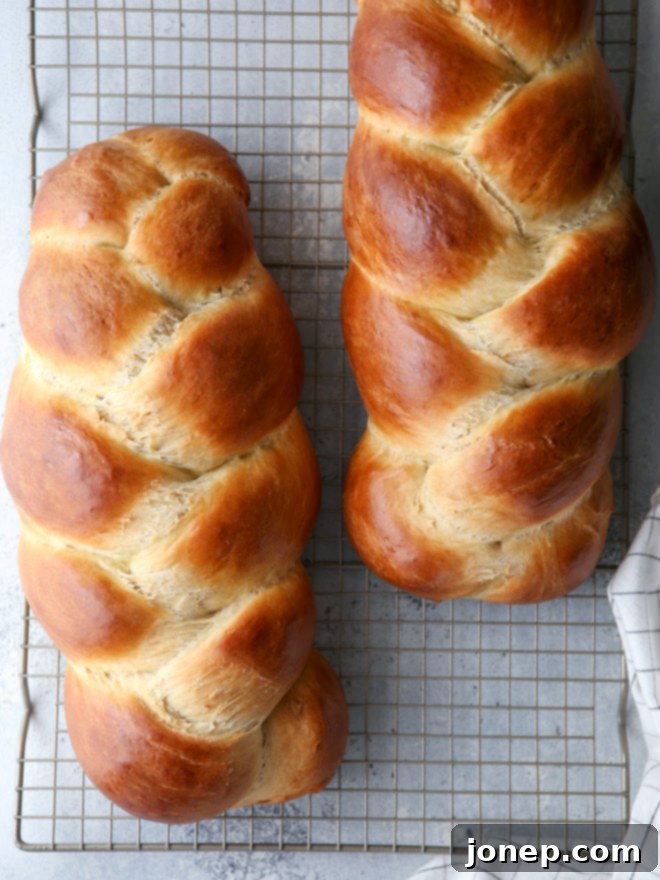
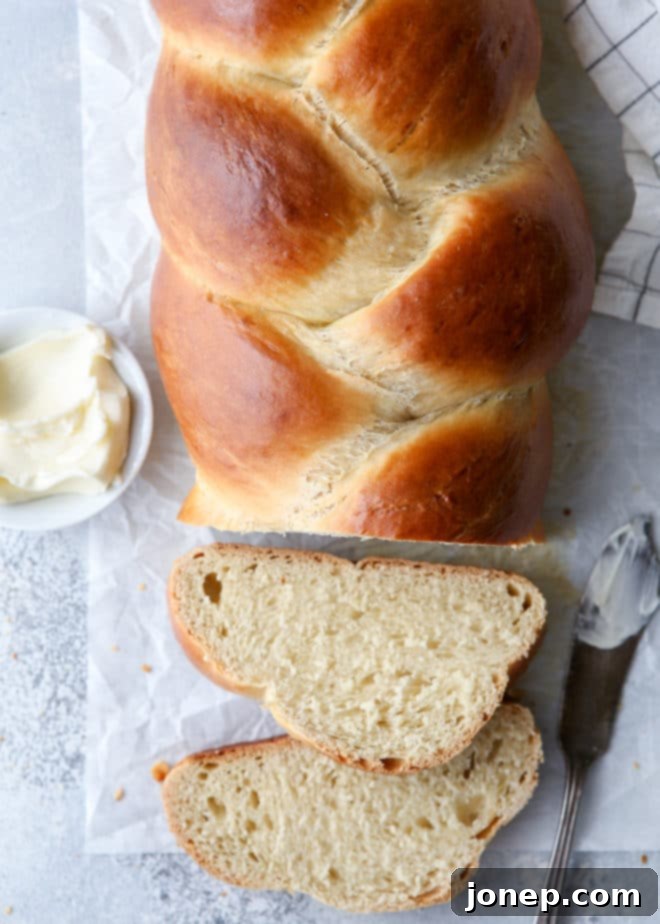
My journey with this magnificent egg bread began in culinary school, where I first discovered the secrets to crafting an enriched dough that yields such an incredible texture and taste. From that moment on, I was captivated. Each loaf emerges from the oven golden brown, with a glistening crust and an interior so soft it practically melts in your mouth. Its rich, slightly sweet flavor makes it an incredibly versatile bread, perfect for elevating any meal.
Imagine serving a slice of this gorgeous loaf alongside a hearty stew, or as the star of your breakfast table. It transforms ordinary French toast into an extraordinary experience, adds an unparalleled richness to bread pudding, and even makes for a truly gourmet sandwich. This isn’t just a recipe; it’s an invitation to create something truly special in your own home.
If the thought of baking such an elegant-looking loaf makes you a little nervous, please, relax! While its braided appearance might suggest complexity, I assure you, it’s no more difficult than many other homemade bread recipes. The techniques are straightforward, and the results are incredibly rewarding. I first shared this beloved braided egg bread recipe back in 2009, and over the years, it has become a tried-and-true favorite. Today, I’m excited to present it with a complete overhaul, offering even more detailed information, tips, and resources to ensure your baking success. The core recipe remains unchanged—because perfection doesn’t need tinkering!
What is Braided Egg Bread? Unveiling the Magic of Enriched Dough
At its heart, braided egg bread is what bakers call an “enriched yeast bread.” This classification is key to understanding its unique characteristics. Unlike lean breads (think crusty baguettes or simple dinner rolls) that primarily rely on flour, water, yeast, and salt, enriched breads incorporate additional ingredients like eggs, butter, and sugar (or honey, in this case). These additions do more than just add flavor; they dramatically change the dough’s texture and behavior.
The eggs contribute to a richer flavor, a beautiful golden color, and a tender crumb. Butter adds incredible richness and softness, making the bread almost melt in your mouth. Honey provides a subtle sweetness and helps with browning, giving the crust that desirable golden hue. Bread flour, with its higher protein content, provides the necessary structure to support these rich additions, allowing the dough to rise beautifully and maintain its shape during the long fermentation and baking process. Together, these ingredients create a dough that is not only incredibly flavorful but also remarkably soft and luxurious, distinguishing it from simpler bread varieties. Other famous examples of enriched doughs include Challah, Brioche, and Babka, all known for their indulgent textures and flavors.
Why Do We Braid Egg Bread? Form, Function, and Beauty
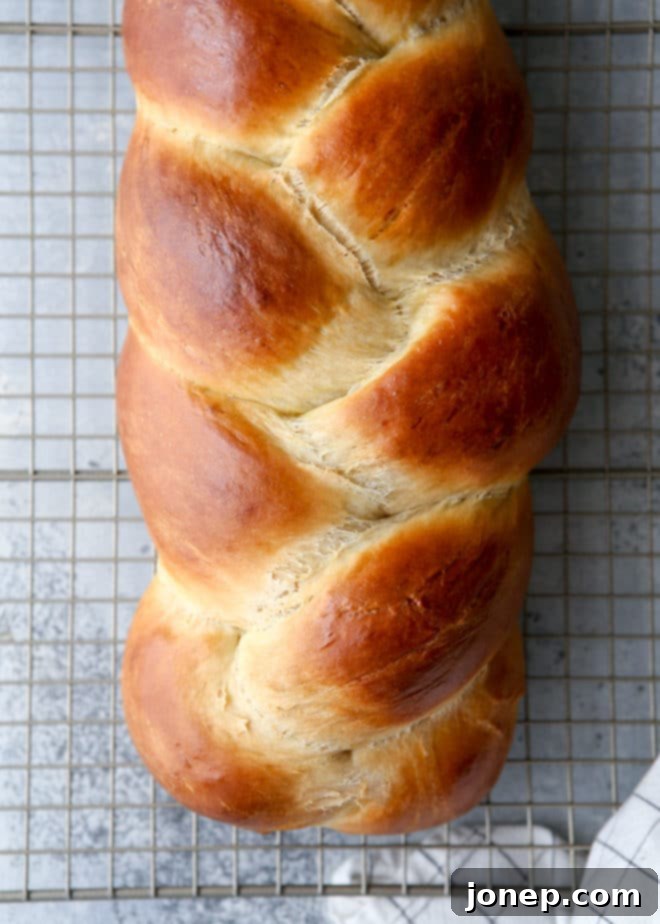
The braiding of egg bread is more than just an aesthetic choice; it serves a crucial functional purpose for this particular type of enriched dough. Because an enriched dough, like our egg bread, has a higher fat and sugar content, it tends to be very soft and less structured than a lean dough. If you were to simply form it into a round or oval loaf without braiding, it might spread out excessively during proofing and baking, leading to a flatter, less appealing result.
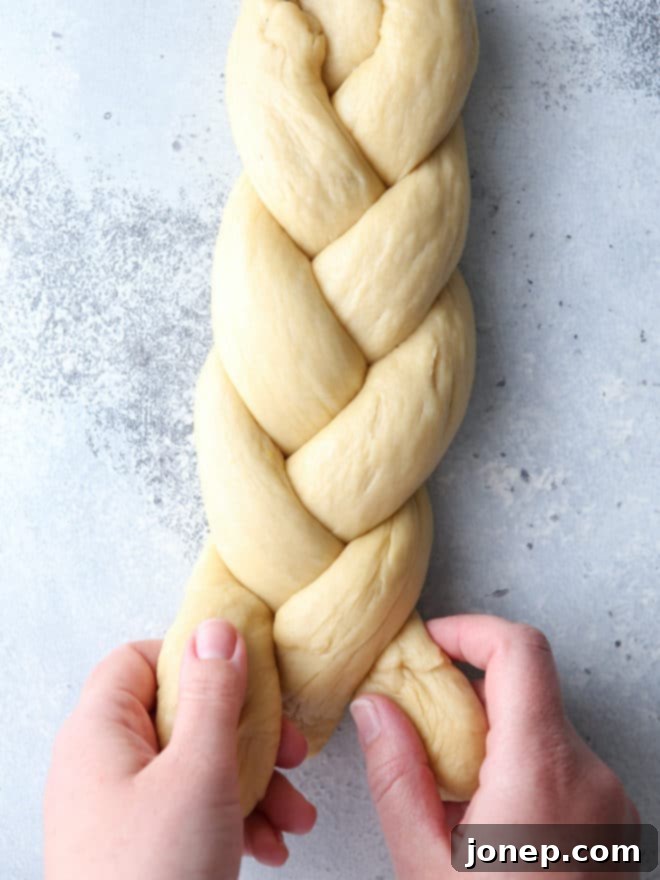
Braiding the dough provides essential structure. The interwoven strands create a framework that helps the loaf hold its shape as it rises, both during the final proof and in the hot oven. This structural support ensures a beautifully tall, airy loaf with an even crumb. Beyond function, however, the braid is undeniably part of the bread’s charm. It transforms a simple loaf into an elegant centerpiece, perfect for special occasions or simply to impress your family and friends.
You can opt for a simple yet stunning three-strand braid, which is what I’ve demonstrated here and is perfect for beginners. But don’t hesitate to explore more intricate designs! If you’re feeling adventurous, you can try a four-strand, five-strand, or even a six-strand braid for an even more impressive presentation. For a truly unique look, consider a round braided loaf, often seen in holiday baking. These video tutorials are incredibly helpful and will guide you step-by-step through each braiding technique. Don’t be intimidated by their appearance; with a little practice, braiding truly is quite easy and incredibly satisfying!
Can Egg Bread be Made Ahead? Smart Tips for Convenient Baking
Yes, absolutely! While there’s nothing quite like the taste of freshly baked bread, life often calls for a little planning ahead. The good news is that this braided egg bread lends itself beautifully to make-ahead strategies, allowing you to enjoy homemade goodness with less last-minute stress. Here are several effective ways to prepare your bread in advance, ensuring maximum flavor and freshness:
- Overnight Refrigeration for Unbaked Dough: This is a fantastic option for breaking up your baking process. After braiding your loaf, instead of letting it proof at room temperature, simply cover it loosely with plastic wrap and place it in the refrigerator overnight (up to 12-18 hours). The cold temperature will significantly slow down the yeast activity, allowing for a long, slow rise that often develops deeper flavors. The next morning, remove the loaf from the fridge and let it come to room temperature and finish rising for about 1-2 hours, or until doubled in size, before baking. This method is perfect for having fresh bread ready for breakfast or brunch without an early start.
- Freezing Unbaked Braided Loaf: For longer-term planning, you can freeze an unbaked, braided loaf. After braiding, ensure the loaf is double-wrapped very tightly in plastic wrap, then an additional layer of aluminum foil to prevent freezer burn. It can be frozen for up to 1 month, or even longer if stored properly. When you’re ready to bake, transfer the frozen loaf to the refrigerator overnight to thaw slowly. Once thawed, let it come to room temperature and proof until doubled in size before proceeding with the egg wash and baking instructions. This is a game-changer for holiday baking or unexpected guests!
- Freezing Baked Braided Loaf: If you prefer to bake the bread and then freeze it, that’s also an excellent option. You can freeze an entire baked and cooled loaf or slice it first and freeze individual portions. Again, double-wrap it meticulously in plastic wrap and then foil to protect its delicate texture. Baked bread can be frozen for up to 1 month or more. To thaw and serve, unwrap the frozen loaf (or slices) and heat it in a 325°F (160°C) oven. A full loaf will take approximately 20-25 minutes, while individual slices will be ready in about 5 minutes. A crucial tip: do not let baked bread thaw at room temperature, as this can actually cause it to go stale and dry out. Reheating from frozen helps preserve its tenderness.
Essential Bread Baking Tips: Your Path to Perfection
Baking bread is a rewarding experience, but a few key principles can make all the difference between a good loaf and a truly great one. Whether you’re a novice or an experienced baker, keeping these tips in mind will help you achieve consistent success with your braided egg bread and any other yeast dough recipe.
- Understand Your Flour: For enriched breads like this, using the right flour is crucial. What is bread flour? Bread flour has a higher protein content than all-purpose flour, which means it forms stronger gluten strands. These stronger strands are essential for capturing the gases produced by yeast, resulting in a lighter, airier, and chewier texture – exactly what we want in a soft, tender egg bread.
- The Art of Proofing: Yeast is a living organism, and proper proofing (rising) is vital. Tips for rising and proofing bread dough are invaluable. Ensure your dough rises in a warm, draft-free environment. Over-proofing can lead to a collapsed loaf, while under-proofing results in dense bread. Look for the dough to double in size, and perform the “poke test” – gently press a floured finger into the dough; if the indentation slowly springs back, it’s ready.
- Temperature Matters: Yeast thrives in warm, not hot, conditions. The water and butter mixture should be warm enough to activate the yeast (120-130°F / 49-54°C) but not so hot that it kills it. Similarly, the ambient temperature of your kitchen affects rising times. For those wondering, will yeast dough rise in the fridge? Yes, it will, just much slower, which can be a great technique for flavor development and convenience, as discussed above.
- Don’t Be Afraid to Knead: Kneading develops the gluten, creating the elastic structure needed for a good rise. Whether by hand or with a stand mixer, knead until the dough is smooth and elastic. It should pass the “windowpane test,” where a small piece can be stretched thin enough to see light through it without tearing.
- Why Punch Down Dough? You might ask, why do you punch down risen yeast dough? Punching down releases excess gases and redistributes the yeast, sugars, and warmth, encouraging a more even second rise and finer crumb structure. It’s not about being aggressive, but a gentle deflate.
- Knowing When It’s Done: A perfectly baked loaf is a joy. How do you know when bread is done baking? Beyond a golden-brown crust, a common test is to tap the bottom of the loaf; it should sound hollow. An internal temperature of 200-210°F (93-99°C) is also a reliable indicator for enriched breads.
- Storing Yeast: Proper storage ensures your yeast stays active and effective. Tips for storing yeast correctly will prevent wasted ingredients and ensure your bread always rises as expected.
Serving Suggestions for Your Beautiful Braided Egg Bread
This versatile bread is truly a chameleon in the kitchen, adapting to a wide array of culinary pairings. While it shines brightly on its own, especially fresh from the oven, here are some ideas to help you savor every tender crumb:
- Breakfast & Brunch Star: Transform stale slices into the most incredible French toast you’ve ever had, or use it as the base for a decadent bread pudding. It’s also superb simply toasted with butter and jam, or alongside scrambled eggs and bacon for a comforting morning meal.
- Accompaniment to Savory Dishes: Serve thick slices with hearty soups, stews, or roasts. Its slightly sweet notes complement savory flavors beautifully, making it an ideal side for holiday dinners like Thanksgiving or Easter.
- Elegant Sandwiches: Elevate your sandwich game! Whether for a simple turkey and cheese or a more elaborate gourmet creation, the softness and richness of egg bread make for an exceptional foundation.
- Sweet Spreads: Enjoy it with homemade fruit preserves, chocolate hazelnut spread, or a simple drizzle of honey. It’s also delightful with cream cheese or a light ricotta.
- Garlic Bread Reinvented: For a unique twist, slice the bread, spread with garlic butter, and bake until golden for a more luxurious garlic bread experience.
You Might Like These Other Enriched Dough Recipes
If you’ve fallen in love with the richness and tenderness of this braided egg bread, you’ll be thrilled to explore more recipes that utilize similar enriched dough techniques. These breads are known for their luxurious textures and comforting flavors, perfect for expanding your baking repertoire:
- Cinnamon-Walnut Stuffed Challah Bread: A delightful twist on classic challah, filled with warm spices and crunchy walnuts.
- Mini Chocolate Chip Braided Buns: Perfect for a sweet treat or a delightful breakfast, these mini buns are irresistible.
Shop Tools for This Recipe
Note: This recipe was originally published in February 2009 and has been updated with enhanced content and resources to provide an even better baking experience.
Braided Egg Bread
Pin Recipe
Leave a Review
Ingredients
- ½ cup unsalted butter (113 grams), melted
- ¾ cup honey (255 grams)
- 1 cup water (250 ml)
- 1 teaspoon salt
- 5-6 cups bread flour (600-720 grams), divided
- 1 envelope active dry yeast (2 ¼ teaspoons)
- 4 large eggs
- 1 egg , for egg wash
Instructions
-
Melt butter in a small saucepan over low heat. Add honey and water and heat to 120-130°F, or until very warm but not too hot to the touch.
-
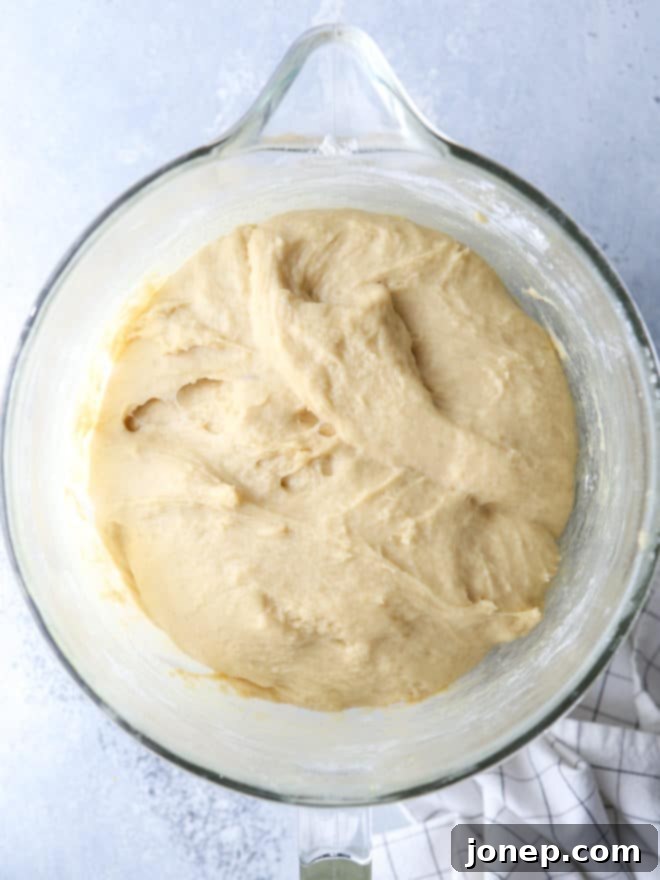
Add 3 cups of the flour, salt and yeast to the bowl of a stand mixer. Add butter mixture and eggs and mix until it forms a very wet dough.
-
With the mixer fitted with a dough hook on medium speed, add the remaining flour 1/4 cup at a time. You may not need all 6 cups of the flour, or you may need more. Use only enough dough to achieve a dough that is moist and sticky, but does not actually stick and come off on your hands when handled.
-
Knead the dough until smooth and elastic, another few minutes more.
-
Place dough in lightly greased bowl, cover and let rise in a warm place until doubled, about 1 to 1 ½ hours.
-
Punch down dough and divide into 6 equal portions. On a clean un-floured surface, roll each portion into rope-like pieces approximately 18 inches long. Work with 3 ropes at a time to braid into two loaves, pinching and tucking the ends under.
-
Place dough on parchment paper lined sheet pans. Cover with plastic wrap and let rise until doubled again, about 45 minutes.
-
Whisk together egg and brush onto loaves. Bake at 350°F until loaves are golden brown and sound hollow when thumped, approximately 40 minutes. Cool completely before slicing.
