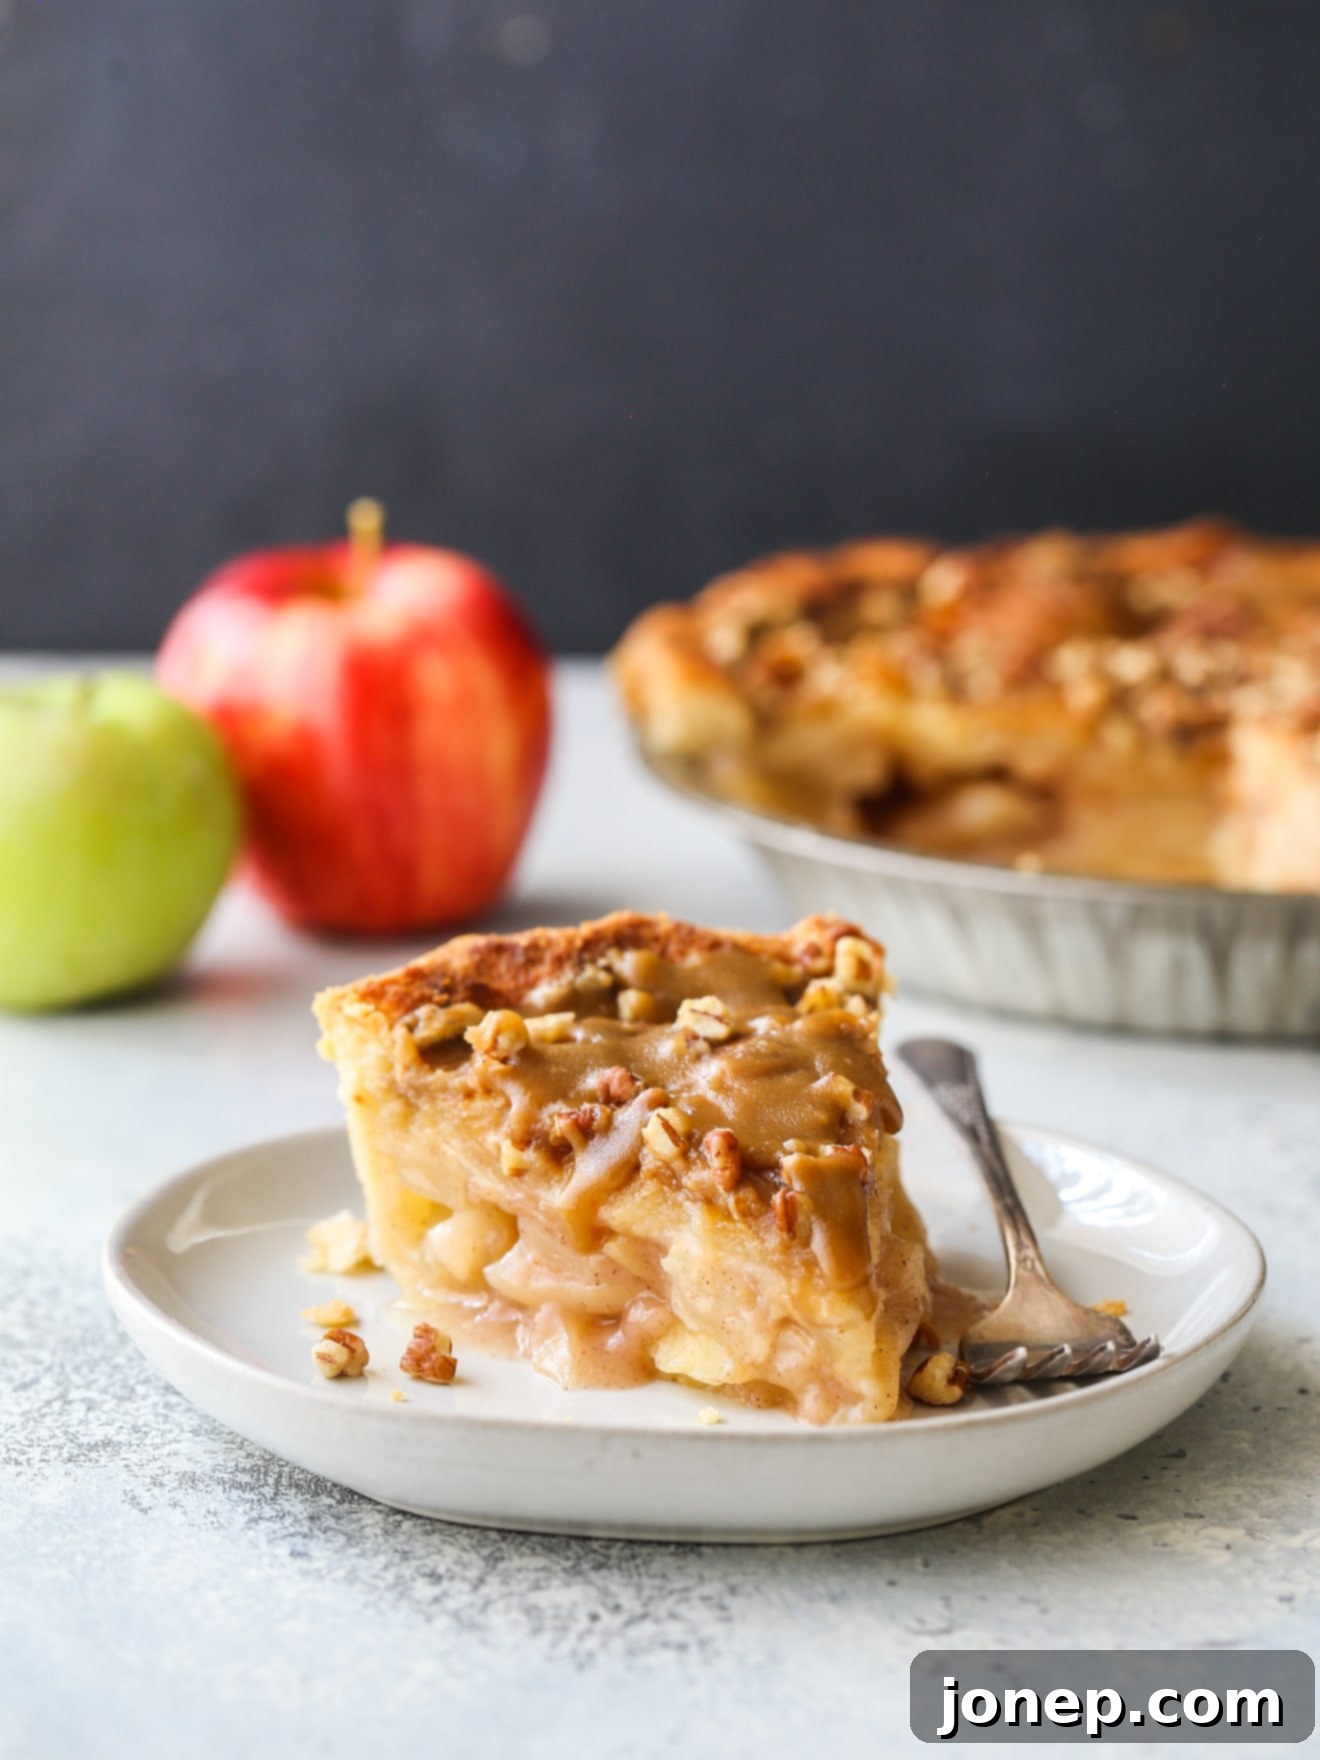
The Ultimate Apple Pear Praline Pie: A Flavorful Fall & Holiday Dessert for Any Occasion
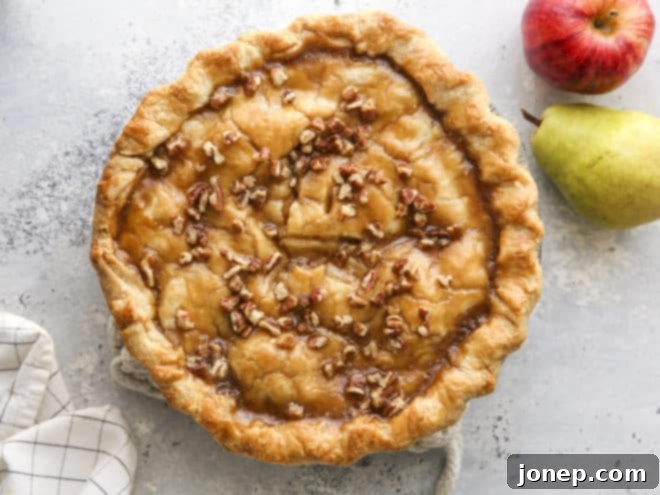
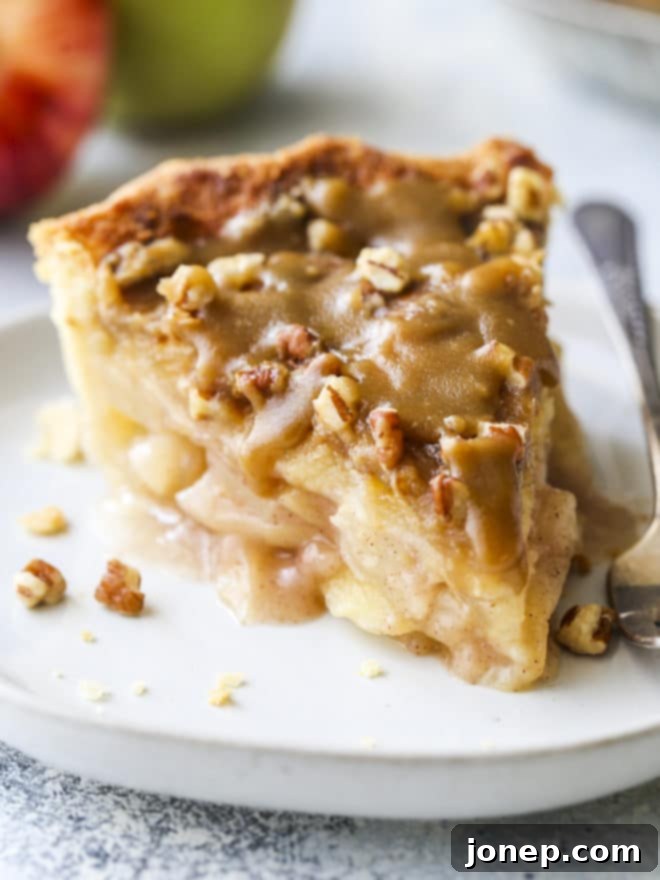
Prepare to elevate your autumn and holiday baking with a pie that truly stands out: the Apple Pear Praline Pie. This exquisite dessert features a harmonious blend of crisp apples and sweet pears, nestled within a perfectly flaky butter pie crust. What truly sets it apart is the luxurious caramel pecan topping, adding a layer of rich, nutty sweetness that transforms a classic fruit pie into an unforgettable culinary experience. It’s more than just a dessert; it’s a celebration of seasonal flavors, perfect for cozy gatherings and festive feasts.
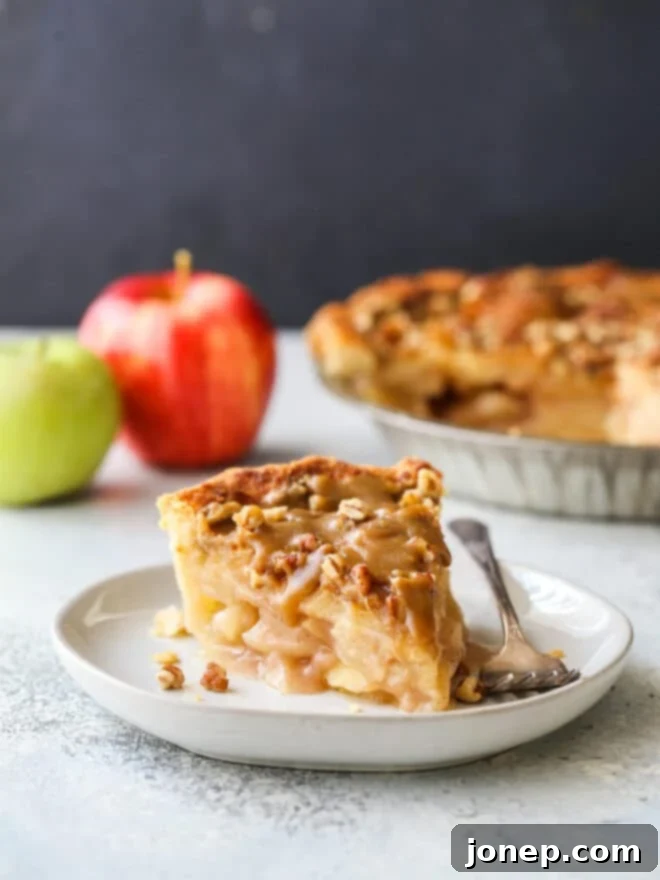
This particular Apple Pear Praline Pie recipe has been a treasured family favorite for many years, and its popularity is well-deserved. It captures the comforting essence of a classic apple-cinnamon pie, but the addition of ripe pears introduces a nuanced sweetness and tender texture that is simply divine. The star of the show, however, might just be the caramel nut praline topping – a delightful, crunchy, and buttery twist that adds incredible depth and appeal, making every slice an indulgent treat. This pie truly offers the best of both worlds: familiar warmth with an exciting, gourmet touch.
We are confident that you and your loved ones will adore this apple pear praline pie as much as we do! It’s an ideal showstopper for Thanksgiving, Christmas, or any special occasion throughout the fall and winter seasons. Be prepared for a chorus of oohs and ahhs as your guests savor this delectable creation. To ensure your pie-making endeavors are always a success, don’t forget to explore our comprehensive tips for baking perfect pies, covering everything from crust to filling.
Table of Contents
- Ingredients You’ll Need
- The best apple and pear varieties for baking
- How to Make this Apple Pear Praline Pie
- Can this Pie be Made Ahead?
- More Pie Tips
- More Pie Recipes
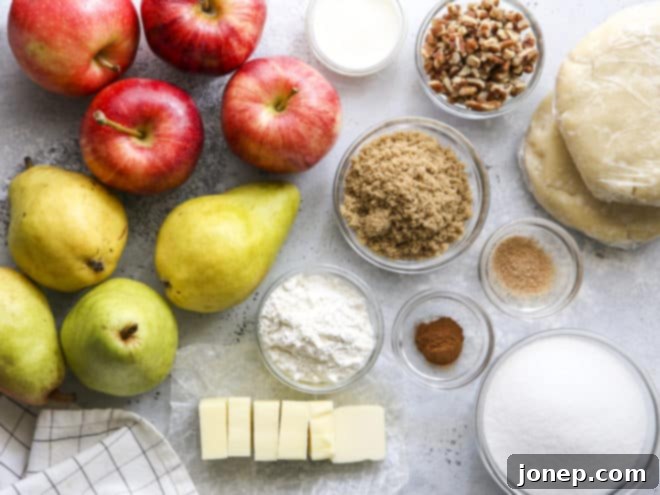
Essential Ingredients for Your Apple Pear Praline Pie
Crafting this incredible apple pear praline pie starts with a selection of fresh, high-quality ingredients. Each component plays a crucial role in building the layers of flavor and texture that make this dessert so special. Here’s what you’ll need to gather:
- Chilled Pie Crust (enough for both top and bottom crusts): The foundation of any great pie is its crust. Whether you opt for homemade or store-bought, ensure it’s well-chilled for maximum flakiness.
- Apples: The primary fruit, providing tartness and structure to the filling.
- Pears: Adding a unique sweetness and softer texture that beautifully complements the apples.
- Granulated Sugar: For the perfect level of sweetness in the fruit filling.
- Light or Dark Brown Sugar: Essential for the rich, caramelized flavor of the praline topping. Dark brown sugar will lend a deeper molasses note.
- All-Purpose Flour: Used as a thickening agent for the fruit filling, ensuring it’s not too watery.
- Unsalted Butter: For richness in both the pie filling and the decadent praline topping. Unsalted allows you to control the salt content.
- Ground Cinnamon: The quintessential spice for apple and pear pies, adding warmth and aroma.
- Grated or Ground Nutmeg: A subtle yet important spice that enhances the fruit flavors. Freshly grated is always recommended for the best aroma.
- Chopped Pecans: The “praline” in the topping, offering a delightful crunch and nutty flavor.
- Heavy Cream: To create a smooth, luxurious caramel base for the praline topping.
Having all your ingredients prepped and ready before you start baking will ensure a smooth and enjoyable pie-making process.
Choosing the Best Apple and Pear Varieties for Baking Perfection
The success of your apple pear pie largely depends on selecting the right fruit. You want apples and pears that hold their shape well during baking, contribute a balanced flavor, and don’t turn into mush. Here’s a guide to making the best choices:
For Apples:
When baking, seek out apples that are firm, slightly tart, and maintain their structure under heat. This prevents your pie filling from becoming a watery, mushy mess. Excellent varieties to consider include:
- Granny Smith: A classic for pies due to its tartness and firm texture. It balances the sweetness of other ingredients beautifully.
- Honeycrisp: Known for its crispness and sweet-tart flavor, it holds up exceptionally well during baking.
- Jonagold: A cross between Jonathan and Golden Delicious, offering a good balance of sweet and tart with a firm flesh.
- Jonathan: A tart and tangy apple that softens nicely without losing its form.
- Gala: A sweeter option that still maintains a good texture, perfect for mixing with tarter apples.
- Pink Lady/Cripps Pink: Offers a delightful sweet-tart flavor and a wonderfully firm texture that bakes well.
Feel free to use a combination of these varieties to achieve a more complex and balanced flavor profile in your pie.
For Pears:
Pears, while naturally sweeter and softer than apples, also need to be chosen carefully to prevent them from dissolving in the oven. Look for pears that are slightly ripe but still firm to the touch – avoid overly soft or mushy ones. The best pears for baking are:
- Bartlett: A popular choice that retains flavor and a good texture when baked, offering a sweet, juicy contribution.
- Bosc: With its firm flesh and crisp texture, Bosc pears hold their shape beautifully and have a slightly spicier flavor.
- Anjou: A versatile pear that remains firm when cooked, providing a subtly sweet and juicy element.
By selecting the right combination of apples and pears, you’ll ensure a pie filling that’s both flavorful and texturally appealing.
Step-by-Step Guide: How to Make this Apple Pear Praline Pie
Baking a homemade pie can be a rewarding experience, especially when it results in something as delicious as this Apple Pear Praline Pie. Follow these detailed steps to create your masterpiece:
-
1. Preheat Oven & Prep Pan: Begin by preheating your oven to 375°F (190°C). Line a sturdy baking sheet with parchment paper. This sheet pan is essential for easy transfer of the pie to and from the oven, and it will catch any potential drips, keeping your oven clean.
-
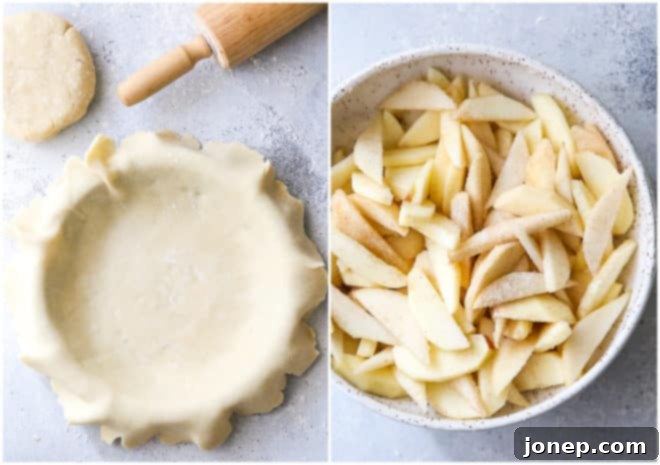
2. Prepare Pie Crusts: You’ll need a double-crust pie recipe ready. Here is my favorite all-butter flaky pie crust recipe, which guarantees a tender, buttery base and top. Alternatively, you can use your preferred homemade recipe or a good quality store-bought crust for convenience. On a lightly floured surface, roll out one pie crust into a roughly 13-inch circle. Carefully transfer this circle into a 9-inch pie dish, gently pressing it into the bottom and sides without stretching. Trim any excess, leaving about a 1-inch overhang. Roll out your second pie crust to the same size and set aside.
-
3. Combine the Flavorful Filling: In a large mixing bowl, combine the peeled, cored, and thinly sliced apples and pears. Add the granulated sugar, all-purpose flour (which helps absorb excess moisture from the fruit), ground cinnamon, ground nutmeg, and salt. Toss everything gently until the fruit is evenly coated. This ensures every bite is seasoned to perfection and the filling sets beautifully.
-
4. Fill the Pie & Add Butter: Carefully transfer the prepared fruit filling into the crust-lined pie dish, mounding it slightly in the center. Break the unsalted butter into small pieces and scatter them evenly over the top of the fruit filling. These butter pieces will melt into the fruit, adding extra richness and moisture. Place the second rolled-out pie crust over the top of the filling. Trim the edges to match the bottom crust’s overhang, then crimp the edges as desired to seal the pie. For an elegant finish, use your fingers or a fork to create a decorative edge. Cut several slits (vents) into the top crust using a sharp knife; these vents are crucial for allowing steam to escape during baking, preventing a soggy crust and ensuring even cooking.
-
5. First Bake & Browning: Place the assembled pie onto your prepared sheet pan. For the initial baking phase, loosely cover the pie with aluminum foil. This prevents the crust from browning too quickly. Bake for 30 minutes at 375°F (190°C). After 30 minutes, remove the foil and continue baking for an additional 20-30 minutes, or until the top crust is a beautiful golden brown and you can see the fruit filling bubbling vigorously through the vents. This bubbling indicates the filling is cooked through and thickening properly.
-
6. Prepare & Add Praline Topping: While the pie is in its final minutes of baking, prepare the irresistible praline topping. In a small saucepan, melt the ¼ cup of unsalted butter over medium heat. Add the packed light or dark brown sugar and heavy cream. Bring the mixture to a gentle boil, stirring constantly, then reduce the heat slightly and cook for about 1 minute until the sauce thickens slightly. Remove the pie from the oven and immediately spoon the warm caramel sauce evenly over the top crust. Generously sprinkle the chopped pecans over the sticky caramel. Return the pie to the oven for a final 3-4 minutes, just until the praline sauce is bubbly and slightly set, allowing the pecans to lightly toast and adhere.
-
7. Cool & Serve: Once removed from the oven, allow the pie to cool on a wire rack for at least 30 minutes before slicing and serving. This crucial cooling time allows the fruit filling to set properly, ensuring clean, beautiful slices. If you cut into it too soon, the filling may be too runny. Store any leftovers in the refrigerator, though it’s best enjoyed within 3-4 days.
Enjoy your homemade Apple Pear Praline Pie! It’s a delightful treat that will surely impress.
Can this Apple Pear Praline Pie be Made Ahead? Prep and Storage Tips
Planning ahead for holiday meals or special events often involves preparing desserts in advance. Fortunately, this Apple Pear Praline Pie is quite versatile and can be prepped or even fully baked ahead of time. Here are your best options for making this delicious pie in advance:
- Pie Crust Preparation: The pie crust is an excellent component to make ahead. You can prepare your dough and store it tightly wrapped in plastic wrap in the refrigerator for up to 5 days. For longer storage, double wrap the dough (in plastic wrap and then foil) and freeze it for up to 2 months. When you’re ready to bake, simply thaw the frozen dough overnight in the refrigerator before rolling it out.
- Baked Pie Storage (Refrigerated): A fully baked and cooled pie can be stored in the refrigerator for up to 1 week. For optimal freshness and flavor, however, it is best enjoyed within 3-4 days of baking. Cover the pie loosely with plastic wrap or aluminum foil to prevent it from drying out or absorbing refrigerator odors.
- Freezing the Baked Pie: This pie freezes remarkably well, making it a fantastic option for future enjoyment! After baking, allow the pie to cool completely to room temperature. Once cooled, double wrap it securely with plastic wrap, followed by a layer of aluminum foil. This helps prevent freezer burn. Store in the freezer for a month or even longer.
- Thawing and Reheating Frozen Pie: To thaw, simply transfer the wrapped pie to the refrigerator overnight. To reheat a thawed pie, cover it with foil and warm it in a 350°F (175°C) oven for about 30 minutes, or until warmed through. If you’re reheating from frozen, remove the plastic wrap (but keep the foil cover), and bake in a 350°F (175°C) oven for 35-40 minutes, or until the center is warm and bubbly.
Serving this pie warm is always a delight, especially with a scoop of vanilla ice cream or a dollop of whipped cream!
Unlock Your Best Baking: Essential Pie Tips for Success
Achieving pie perfection can feel daunting, but with a few tried-and-true tips, you’ll be baking like a pro in no time. These insights will help you navigate common pie-making challenges and elevate your results:
- Fruit Measurement Made Easy: As a general rule of thumb, plan for approximately 1 medium apple or pear to yield about 1 cup of sliced fruit. For this recipe, that means you’ll need around 4 medium apples and 4 medium pears to get the recommended 4 cups of each, ensuring a generous and satisfying fruit filling.
- Efficient Fruit Preparation: Peeling and coring can be the most time-consuming part of pie making. To speed up the process, consider watching this video on how I quickly peel and core apples and pears for baking. It’s a game-changer!
- Crimping for Crumbly Perfection: The edges of your pie crust can be as simple or as elaborate as you wish! For a quick yet elegant finish, I often use just my fingers to create a beautiful, rustic design. If you’re looking for more decorative options, this video demonstrates 4 additional easy crimping techniques that can add a professional touch to your homemade pie.
- The Magic of an Egg Wash: For a gorgeously golden and slightly shiny pie crust, always brush it with a simple egg wash before baking. This is typically made by whisking 1 egg with 1 tablespoon of water. Without this step, your pie crust can appear dull and pale, lacking that inviting, perfectly baked appeal.
- The Indispensable Sheet Pan: Always place your pie dish on a sturdy baking sheet before putting it in the oven. This not only makes it incredibly easy to transfer the hot pie safely but also serves as a crucial safeguard, catching any potential drips or bubbling over from the filling, keeping your oven clean and preventing burnt messes.
- Patience for the Perfect Slice: For the cleanest, prettiest slices of pie, resist the urge to cut into it immediately after baking. It’s vital to let the pie cool completely to room temperature, which typically takes several hours. This cooling period allows the fruit filling to set, thicken, and firm up, ensuring that each slice holds its shape beautifully. I often bake my pies the day before I plan to serve them and then gently reheat them in the oven just before presentation.
- Time-Saving Crust Hacks: If making pie crust from scratch intimidates you or if you’re simply short on time, learning how to make pie crust in a food processor can be a revelation. It significantly reduces prep time and delivers a consistently excellent dough.
- Troubleshooting Pie Problems: If pie baking has been a source of frustration for you, or if your pies don’t always turn out as expected, be sure to consult my comprehensive guide to making perfect pies. I address the most common pie baking challenges and provide practical solutions to help you achieve consistent success.
- My Go-To Pie Tools: Having the right equipment can make all the difference. Check out my list of favorite pie tools that I rely on for perfect pies every time.
baking tip: How to prevent a soggy bottom pie crust
- Use the right pie dish: Ceramic and metal pie pans are best because they transfer heat well and evenly, producing an even golden brown bottom. Glass pie pan are notorious for being bad heat conductors and producing under-baked bottom pie crusts.
- Wait to add your filling: Once you mix fruit and sugar, it will start releasing liquid and too much liquid causes soggy crusts. Preheat the oven, place the bottom crust in the pan, and have the top crust rolled out and standing by, and only then combine your filling. And then quickly finish your pie.
- Par-bake the crust: If you have a single-crust pie, consider partially baking the crust before adding the filling to ensure it’s cooked all the way through.
- Bake on a hot sheet pan or baker’s stone: Let it preheat along with your oven. When ready to bake your pie, set it directly on the hot sheet pan. This will help the bottom crust cook and brown more quickly.
Explore More Delicious Pie Recipes
If you loved this Apple Pear Praline Pie and are looking for more baking inspiration, we have a variety of other fantastic pie recipes that are perfect for any occasion, from cozy family dinners to grand holiday celebrations. Expand your baking repertoire with these delightful options:
- Mile High Apple Pie: A true classic, stacked high with juicy apples and a perfectly spiced filling.
- Cranberry Blueberry Pie: A vibrant and tangy pie that’s bursting with berry flavor, ideal for a refreshing twist.
- Pumpkin Pie with Nut Praline: A holiday staple reimagined with a crunchy praline topping for an extra layer of texture and sweetness.
- Cranberry Pear Pie: Another wonderful combination of fruit, offering a balance of tart cranberries and sweet pears.
Each of these recipes brings its own unique charm and flavor profile, guaranteeing a delicious outcome for your next baking adventure. Happy baking!

Apple Pear Praline Pie
Pin Recipe
Leave a Review
Ingredients
For the pie:
- 1 double-crust pie recipe
- ¾ cup granulated sugar (150 grams)
- ¼ cup all-purpose flour (30 grams)
- ½ teaspoon ground cinnamon
- ¼ teaspoon ground nutmeg
- ½ teaspoon salt
- 4 cups apples , peeled, cored, and sliced thin (380 grams)
- 4 cups pears , peeled, cored, and sliced thin (513 grams)
- 2 tablespoons unsalted butter , cubed (28 grams)
For the praline topping:
- ¼ cup unsalted butter (56 grams)
- ½ cup packed light or dark brown sugar (55 grams)
- 2 tablespoons heavy cream
- ¼ cup chopped pecans (25 grams)
Instructions
-
Preheat oven to 375°F. Line a sheet pan with parchment paper.
-
On a lightly floured surface, roll one pie crust out into a 13-inch circle. Transfer to a 9-inch baking dish. Roll out the second pie crust.
-
In a large bowl, toss together the sugar, flour, nutmeg, salt, apples, and pears. Dump into the pie crust lined pie dish. Top with the bits of butter. Place second pie crust on top. Tuck pie crust into dish and crimp as desired. Cut slits in the top crust for vents.
-
Place pie on the prepared sheet pan and cover with foil. Bake for 30 minutes. Remove foil and bake an additional 20-30 minutes until crust is golden brown and filling is visibly bubbling through the vents.
-
In a small saucepan, melt the butter. Add the brown sugar and heavy cream and bring to a boil. Cook for 1 more minutes. Drizzle on top on the cooked pie and sprinkle with pecans. Return pie to oven and bake for 3-4 minutes, just until praline sauce is bubbly.
-
Remove and let cool at least 30 minutes before serving. Store leftovers in the fridge.
Notes
This delightful recipe was originally published in November 2014, and continues to be a cherished favorite for its timeless appeal and irresistible flavor.
