Spooktacular Halloween Monster Cookies: The Ultimate Guide to Festive Baking Fun
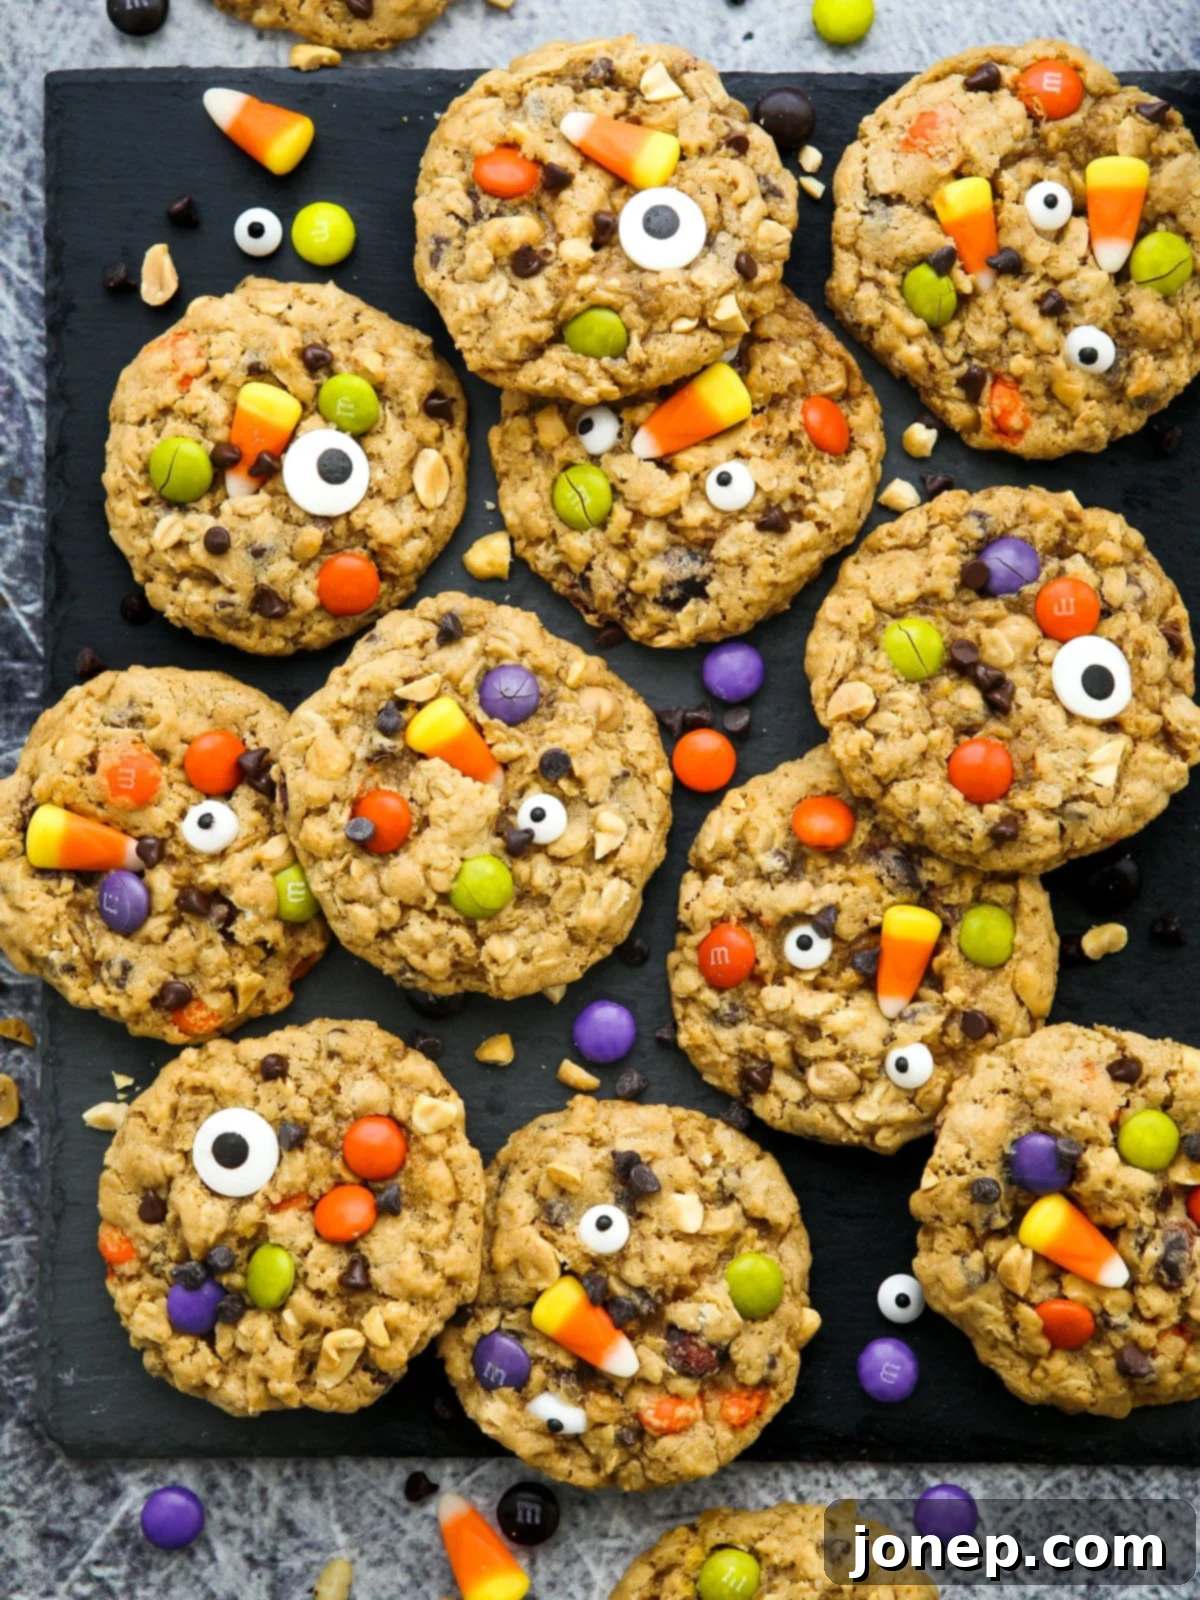
Get ready to conjure up some magic in your kitchen with these wonderfully playful and undeniably delicious Halloween monster cookies! Imagine a cookie bursting with vibrant M&M’s, satisfyingly crunchy peanuts, rich chocolate chips, classic candy corn, and a host of other delightful surprises. These cookies are not just easy to whip up; they’re an absolute blast to create and even more fun to share, making them the perfect centerpiece for any Halloween celebration.
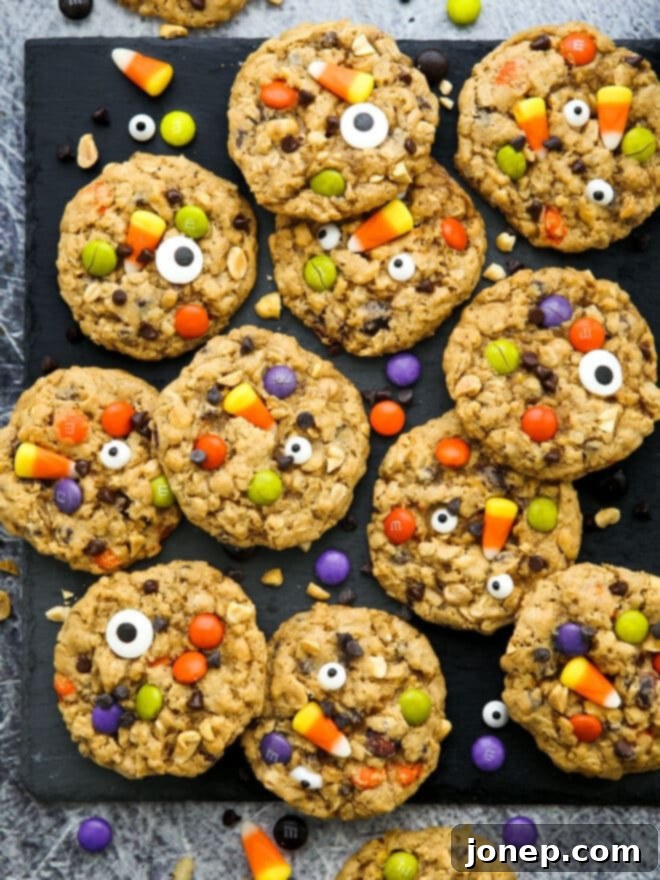
Transforming a classic monster cookie recipe into a Halloween-themed delight felt like a natural fit. However, I was genuinely surprised by just how charming and irresistible they turned out to be. There’s something truly special about these cookies that elevates them beyond just a simple treat. They embody the spirit of the season, making them an ideal project for baking with your children, or for bringing a touch of spooky sweetness to any Halloween party, school event, or festive gathering.
These Halloween monster cookies boast an incredibly rich, buttery flavor that forms the perfect foundation for their indulgent mix-ins. You’ll find a delightful interplay of textures, from the satisfying chewiness contributed by the old-fashioned rolled oats to the unexpected, delightful crisp of rice cereal. But the real magic lies in what’s packed inside! Each bite is a journey through a medley of fun: vibrant M&M’s, melt-in-your-mouth chocolate chips, creamy peanut butter chips, robust chopped peanuts, festive candy corn, and, of course, those whimsical edible candy eyeballs that bring these friendly monsters to life. They are more than just cookies; they are an experience, a celebration of all things Halloween in a single, delightful bite.
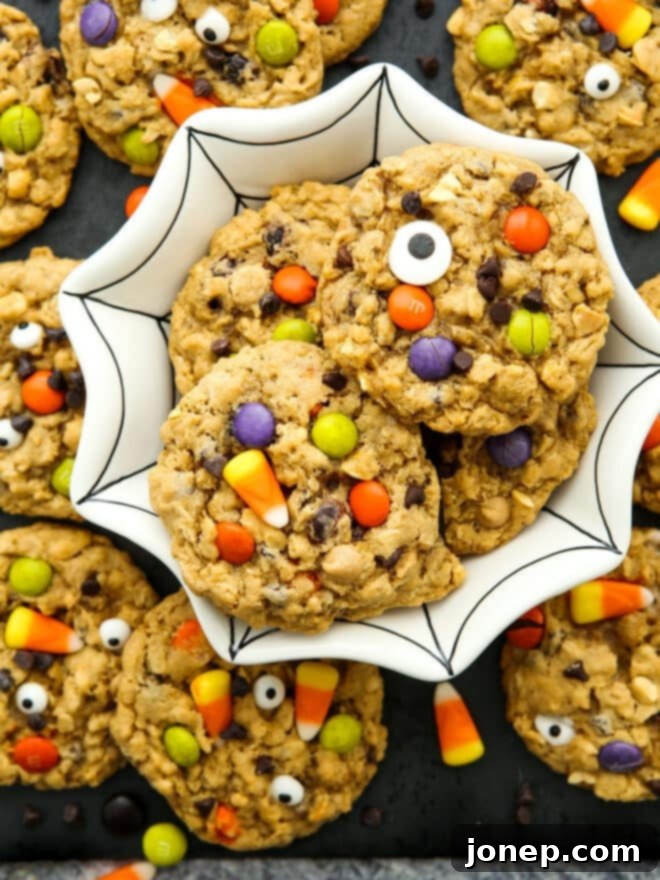
Table of Contents
- What’s in these cookies
- How to make Halloween monster cookies
- Recipe tips & FAQs
- More Halloween recipes
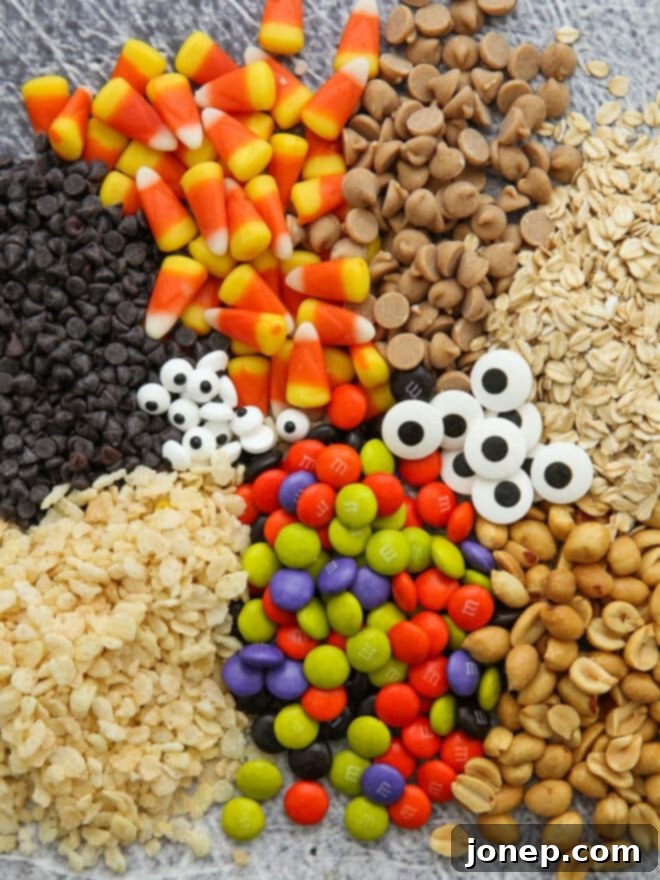
What’s in These Fun & Festive Halloween Monster Cookies?
At its heart, this is a straightforward drop cookie recipe, built upon a foundation of classic baking essentials like creamy butter, rich brown sugar, granulated sugar, fresh eggs, fragrant vanilla extract, and all-purpose flour. These core ingredients work in harmony to create a wonderfully chewy and flavorful cookie base. However, what truly makes these cookies “monster” cookies – and specifically Halloween monster cookies – are the exciting and imaginative mix-ins that transform them into edible works of spooky art.
These Halloween monster cookies are generously loaded with an array of treats that contribute to their unique flavor, texture, and festive appearance:
- Old-fashioned rolled oats: These are crucial for the signature chewy texture of monster cookies. Unlike quick-cooking oats, old-fashioned oats hold their shape better during baking, providing a satisfying bite without dissolving into the dough.
- Crispy rice cereal: This is a secret weapon for an incredible textural contrast! The crispy rice cereal adds a light, airy crunch that perfectly complements the chewiness of the oats and the softness of the cookie. Don’t skip this for that unexpected “pop!”
- Mini chocolate chips: A timeless favorite, mini chocolate chips melt slightly, adding pockets of rich, sweet chocolate flavor throughout the cookie. Their smaller size ensures chocolate in every bite without overwhelming the other flavors.
- Peanut butter chips: For an extra layer of nutty, sweet, and creamy goodness, peanut butter chips are essential. They amplify the “monster” cookie flavor profile, which traditionally features peanut butter.
- Chopped peanuts: Adding another dimension of texture and flavor, chopped peanuts provide a salty crunch that balances the sweetness of the candies and chips. They also reinforce the classic peanut butter taste.
- M&M candies: These iconic candies bring a burst of color and a delightful candy crunch. You can find Halloween-themed mixes with seasonal colors like orange, purple, and black to enhance the spooky vibe, or simply use regular colorful M&M’s for a vibrant look.
- Candy corn: A classic Halloween staple, candy corn adds a distinctive waxy chewiness and a unique, sweet flavor. It’s often added *after* baking to prevent it from melting and losing its iconic shape, which makes the cookies even more visually appealing.
- Candy eyeballs: These are the ultimate touch for transforming your cookies into adorable, edible monsters! Most grocery stores stock them in the baking aisle year-round, especially around Halloween, but they are also readily available for purchase online.
Note on Customization: One of the best aspects of these monster cookies is their versatility. Many of the fun mix-ins listed above can be easily substituted or even omitted to suit your preferences or dietary needs. For example, if candy corn isn’t your favorite, feel free to leave them out without impacting the cookie’s structure. If you’re looking to make these cookies nut-free, simply substitute the peanut butter chips with another variety of baking chip (like white chocolate or butterscotch) and omit the chopped peanuts entirely. The key is to maintain a similar overall volume of mix-ins to ensure the cookies have that satisfying, loaded feel without becoming too dry or crumbly.
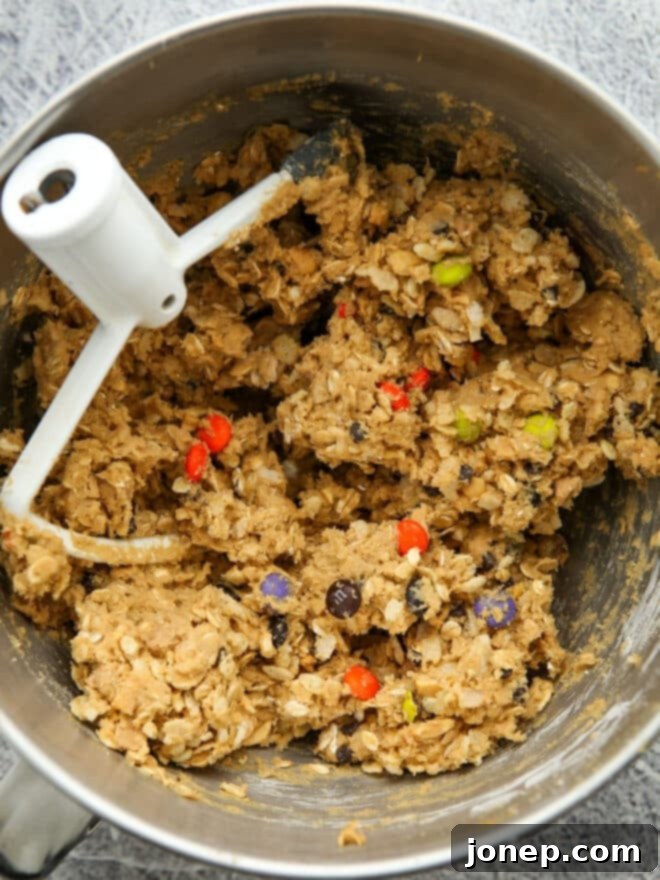
How to Make These Spooktacular Halloween Monster Cookies
Creating these festive Halloween Monster Cookies is a delightful process that’s straightforward enough for bakers of all skill levels. Follow these steps to ensure your cookies turn out perfectly monstrous and delicious:
- Prepare the Cookie Dough: This is where the magic begins! Start by creaming together your room-temperature butter and sugars (both brown and granulated) until the mixture is light, fluffy, and pale in color. This process incorporates air, which contributes to a tender cookie. Next, beat in the eggs one at a time, ensuring each is fully incorporated before adding the next, followed by the vanilla extract. In a separate bowl, whisk together your dry ingredients: flour, old-fashioned rolled oats, baking powder, baking soda, and salt. Gradually add these dry ingredients to the wet mixture, mixing on low speed until just combined. Be careful not to overmix, as this can lead to tough cookies. Finally, fold in the crispy rice cereal, M&M’s, peanuts, peanut butter chips, and mini chocolate chips until they are evenly distributed throughout the dough.
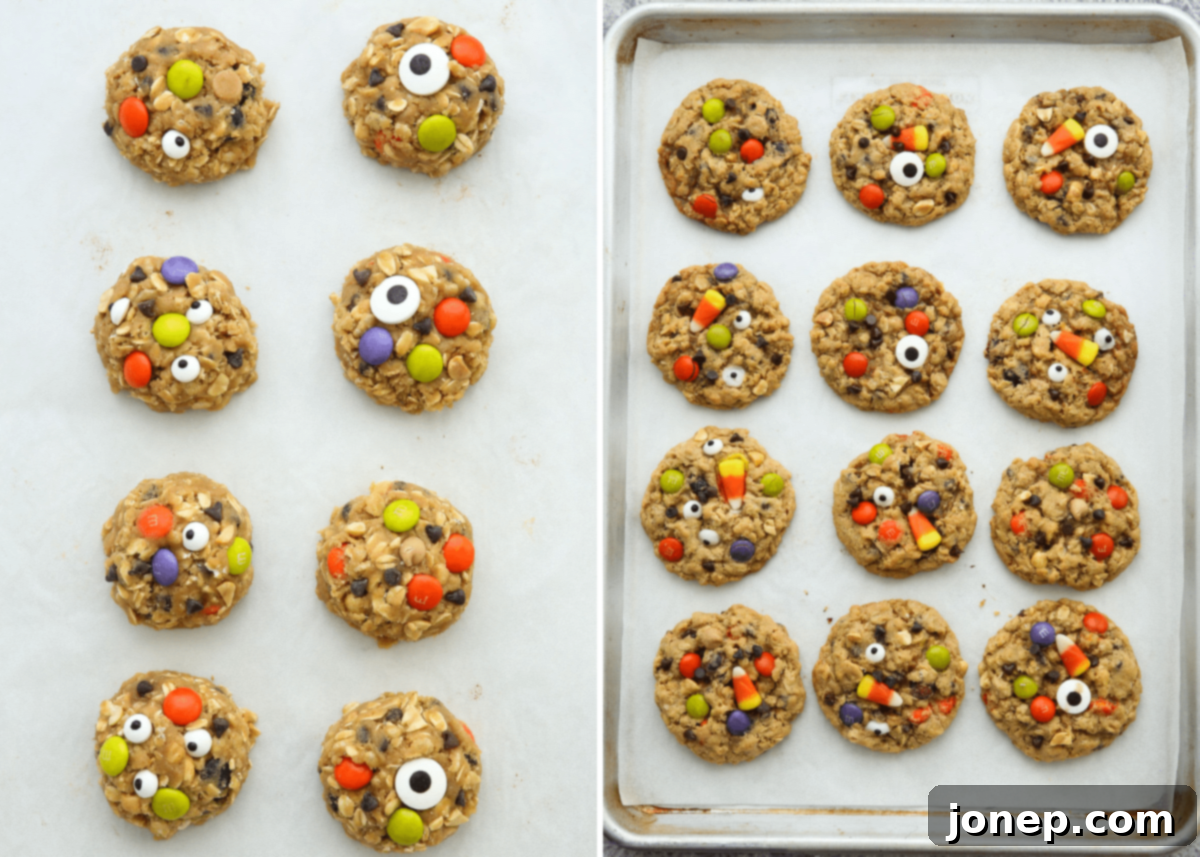
- Portion into Cookie Dough Balls: Given the abundance of wonderful mix-ins in these monster cookies, they truly shine when baked as larger cookies. This allows them to spread properly and maintain their chewy-crispy texture. For best results, I highly recommend using a large #20 (3 Tbsp) cookie scoop. This ensures uniform size and even baking. Place the generously sized dough balls onto your prepared baking sheet, leaving ample space between them to account for spreading.
- Add Mix-ins on Top for Visual Appeal: This step is crucial for achieving that “wow factor” and making your Halloween monster cookies truly impressive. Once you’ve scooped your dough balls onto the baking sheet, gently flatten them slightly with the palm of your hand. Then, strategically press a few extra candy eyeballs, M&M’s, or other desired mix-ins onto the top of each cookie dough round. Without this extra step, many of the fun elements might get lost inside the cookie during baking, diminishing their spooky charm.

- Bake to Perfection: Transfer your baking sheets to a preheated 350°F (175°C) oven. These hearty cookies will typically need about 11-12 minutes to bake. Look for edges that are just beginning to turn a delicate golden brown, while the centers should appear just barely set. They will continue to set up as they cool. Overbaking can lead to dry cookies, so keep a close eye on them!
- Add Candy Corn (if using): Here’s a pro tip for candy corn: because it tends to melt and lose its shape at high oven temperatures, it’s best to add it *after* baking. As soon as you remove the cookies from the oven, and while they are still warm and soft, gently press 1-2 pieces of candy corn into the tops of each cookie. The residual heat will soften the candy corn just enough to adhere without completely melting.
- Enjoy Your Monstrous Creations! Once your cookies have cooled slightly, they are ready to be devoured. These fun, flavorful, and festive Halloween monster cookies are so irresistible, they are guaranteed to disappear quickly! Share them with friends, family, or keep them all to yourself – we won’t tell.

Recipe Tips & Frequently Asked Questions
Here are some additional tips and answers to common questions to help you master your Halloween Monster Cookies and make them truly your own!
Absolutely! One of the joys of monster cookies is their flexibility when it comes to inclusions. You can certainly get creative and adapt the mix-ins based on your preferences or what you have on hand. However, I strongly recommend keeping the rolled oats and crispy rice cereal as they are fundamental to the unique texture and composition of these cookies. Feel free to experiment with other baking chips, candies, and nuts. Fantastic alternatives include white chocolate chips, butterscotch chips, Reese’s Pieces for an extra peanut butter punch, chopped candy bars (like Snickers or Kit Kats), or even festive sprinkles. For best results and a perfectly balanced cookie, aim for a total of 1 1/2 to 2 cups of these optional mix-ins (this measurement excludes the candy corn and candy eyeballs, which are added primarily for decoration).
These Halloween monster cookies are truly at their best within the first 1-2 days after baking, when they are perfectly soft and chewy. However, they will maintain their deliciousness and texture in an airtight container at room temperature for up to 1 week. If you’re planning ahead or want to minimize baking day stress, you can absolutely prep components in advance. Prepare the cookie dough balls as directed and store them in the refrigerator for up to 2 days before baking. This is a great way to have fresh-baked cookies on demand! Alternatively, you can freeze the portioned cookie dough balls for up to 1 month by placing them in a freezer-safe ziplock bag. When you’re ready to bake, simply let the frozen dough balls thaw on the counter and come to room temperature while your oven preheats, then bake as usual.
Yes, absolutely! Freezing baked cookies is a fantastic way to preserve their freshness and enjoy them at a later date. First, ensure the cookies have cooled completely to room temperature. Then, transfer them to a freezer-safe ziplock bag or an airtight container, making sure to remove as much excess air as possible to prevent freezer burn. They can be frozen for up to 1 month. To enjoy, simply thaw them at room temperature for an hour or two. You’ll be amazed; they will taste wonderfully fresh, almost as if they were baked that very day!
You can certainly adapt these cookies to accommodate dietary needs! For a gluten-free version, substitute the all-purpose flour with a high-quality 1:1 gluten-free baking flour blend that contains xanthan gum. Ensure your oats are certified gluten-free as well, as oats can sometimes be cross-contaminated during processing. For a nut-free version, simply omit the chopped peanuts and substitute the peanut butter chips with an alternative, such as white chocolate chips, butterscotch chips, or even sunflower seed butter chips for a similar flavor profile without the allergens. Always double-check ingredient labels to ensure all components are truly nut-free.
Cookie spreading is a common challenge, but often easily fixed! Several factors can contribute to flat, greasy cookies. The most frequent culprits include butter that is too soft (it should leave a slight indent when pressed, not be completely squishy), over-creaming butter and sugar (which incorporates too much air that collapses during baking), or using a greased baking sheet instead of parchment paper or a silicone mat. If you find your cookies spreading in the oven, a quick fix is to remove the sheet, chill the dough on the pan in the refrigerator for 10-15 minutes, and then return to the oven. This helps the butter solidify again, slowing down the spread. Make sure your oven temperature is accurate as well; an oven that runs too cool can also cause spreading.
baking tip:How to keep cookies from spreading
Isn’t it the biggest bummer when you pop a tray full of cookie dough into the oven, only to pull out flat, greasy cookies? It happens to me too! Thankfully, there are several common culprits and simple solutions to prevent this baking disappointment.
- The temperature of the butter. I believe this is the number one reason why cookies spread excessively! If your recipe calls for room temperature butter, it’s crucial that it isn’t too soft or melted when you start making your dough. Butter that is too warm will melt too quickly in the oven, causing the cookies to spread out before they have a chance to set. When you press a finger into the butter, it should just barely leave a slight indent – it should still feel cool to the touch and hold its shape.
- Over-creaming the butter and sugar. While creaming butter and sugar until light and fluffy is important for texture, overbeating can incorporate too much air into the mixture. This excess air can cause the butter to break down and release its fat too quickly when heated, leading to flat and dense cookies rather than chewy ones. Mix just until combined and lightened, usually 2-3 minutes.
- A greased cookie sheet. While it seems intuitive to grease a pan to prevent sticking, for most cookie recipes, especially those already rich in butter, a greased sheet can actually encourage spreading. The extra fat creates a slippery surface, allowing the dough to flatten out easily. Instead, always use parchment paper or a silicone baking mat. These provide a non-stick surface without adding additional fat, promoting even baking and better shape retention.
So what if you’re in the middle of baking a batch of cookies, they’re spreading in the oven, and you want to fix it? Don’t despair! Try chilling the dough on the cookie sheet in the refrigerator for 10-15 minutes before baking your next batch. This will hopefully solidify the butter and slow down the process of spreading, giving your cookies a better chance to hold their delightful shape.
More Spooky & Sweet Halloween Recipes
Looking for more ways to celebrate Halloween with delicious treats? Explore some of these other fantastic recipes that are perfect for the spooky season:
- Halloween Candy Bark: A quick and easy treat that lets you use up all your favorite Halloween candies.
- How to Make Homemade Caramel Apples: A classic fall favorite, perfect for harvest festivals and Halloween parties.
- Soft Caramel Popcorn: Chewy, sweet, and utterly addictive – a perfect snack for a spooky movie night.
- Pumpkin Roll: A beautiful and flavorful dessert that celebrates the flavors of autumn.

Halloween Monster Cookies
Pin Recipe
Leave a Review
Ingredients
- ¾ cup (85 grams) unsalted butter , at room temperature (softened, but still cool to the touch)
- 1 cup (215 grams) packed light or dark brown sugar
- ½ cup (100 grams) granulated sugar
- 2 large eggs
- 1 tablespoon pure vanilla extract
- 2 cups (240 grams) all-purpose flour , measured correctly (spoon & sweep method or by weight)
- 1 ½ cups (150 grams) old-fashioned rolled oats
- ½ teaspoons fine sea salt
- 1 teaspoon baking powder
- ½ teaspoon baking soda
- 1 ½ cups (45 grams) crispy rice cereal
- ½ cup (120 grams) Halloween colored M&Ms , plus more for adding to tops of cookie dough for decoration
- ½ cup (70 grams) roughly chopped peanuts
- ½ cup (200 grams) peanut butter chips
- ¼ cup (55 grams) mini semisweet chocolate chips
- Candy eye balls , as desired (for decorating tops)
- Candy corn , as desired (for decorating tops after baking)
Equipment
Instructions
-
Preheat your oven to 350°F (175°C). Prepare your baking sheet(s) by lining them with parchment paper or a silicone baking mat. This helps prevent sticking and promotes even baking.
-
In the bowl of a stand mixer fitted with a paddle attachment (or using a hand mixer), beat together the unsalted butter, light/dark brown sugar, and granulated sugar until the mixture is light, fluffy, and creamy. This typically takes about 2-3 minutes. Remember to scrape down the sides and bottom of the bowl at least once to ensure all ingredients are uniformly combined. Add the large eggs one at a time, mixing well after each addition, then stir in the vanilla extract until fully incorporated.
-
In a separate medium bowl, whisk together the all-purpose flour, old-fashioned rolled oats, salt, baking powder, and baking soda. Gradually add this dry ingredient mixture to the wet ingredients in the mixer bowl. Mix on low speed until just mostly combined, and you still see a few streaks of dry ingredients remaining. Be careful not to overmix, as this can develop the gluten and result in tougher cookies.
-
Now for the fun part! Add the crispy rice cereal, Halloween-colored M&M’s, chopped peanuts, peanut butter chips, and mini semisweet chocolate chips to the dough. Mix on low speed again, or fold by hand, until these mix-ins are just evenly distributed throughout the cookie dough.
-
Using a large #20 (3 Tbsp) cookie scoop, drop generous rounds of cookie dough onto the prepared baking sheet. Arrange them about 2-3 inches apart, typically 8 cookies per standard sheet pan, to allow for proper spreading. Gently flatten each cookie dough round slightly with your palms. For a truly impressive presentation, press a few extra candy eyeballs and additional M&M’s onto the tops of each cookie dough ball. This ensures they are visible and vibrant after baking.
-
Bake for approximately 11-12 minutes, or until the edges of the cookies begin to turn a light golden brown and the centers are just barely set. They may look slightly underbaked in the middle, but they will continue to set as they cool. Immediately upon removing the cookies from the oven, if desired, use the back of a spatula or a round cookie cutter slightly larger than the cookies to gently push the edges back in, reshaping them into perfect circles. While the cookies are still hot and soft, press 1-2 pieces of candy corn into the top of each cookie for added festive charm.
-
Allow the cookies to cool on the baking sheet for about 5 minutes. This crucial step helps them firm up before you move them. Then, carefully transfer the warm cookies to a wire rack to cool completely. Once fully cooled, store your delightful Halloween monster cookies in an airtight container at room temperature for several days, and enjoy every monstrously delicious bite!
Notes
- Mix-in substitutions and variations: Feel free to play around and use what you want or have available in your pantry. Other excellent options include white chocolate chips, butterscotch chips, Reese’s Pieces, chopped pretzels for a salty crunch, or even other chopped candy bars. I recommend using a total of 1 1/2-2 cups of additional mix-ins (excluding the candy corn and candy eyeballs, which are primarily for decoration). While flexible with other candies, I do not recommend changing the ratio of old-fashioned rolled oats or crispy rice cereal, as these are critical for the unique texture and composition of these monster cookies.
- Be sure to measure flour correctly to achieve the best cookie texture and prevent spreading. Use the “spoon and sweep” method (spoon flour into a measuring cup and level off with a straight edge), or for ultimate accuracy, use a kitchen scale to measure by weight. Too much flour can lead to dry, dense, or crumbly cookies, while too little can cause excessive spreading.
- Room Temperature Ingredients: Ensure your butter and eggs are at proper room temperature. This allows for better emulsification and a more uniform cookie dough, leading to a better texture in the final product.
