Effortless & Delicious: The Best No-Chill Frosted Sugar Cookie Cut Outs Recipe
Imagine soft, tender, and utterly delicious sugar cookies, perfectly frosted and ready for any celebration, all without the endless waiting game of chilling dough. Sound like a dream? It’s not! These frosted sugar cookie cut outs are incredibly easy to make, and the best part? My revolutionary recipe requires absolutely no dough chilling time. This means you can go from craving to creation and enjoyment in a single, delightful baking session.

For many families, including mine, making and decorating sugar cookies is a cherished holiday tradition. There’s a special kind of joy in rolling out dough, cutting festive shapes, and then transforming them into edible works of art with vibrant frosting and sprinkles. Kids adore it, and if I’m being honest, so do I! Who can resist a homemade vanilla sugar cookie, baked to perfection and crowned with a generous swirl of fluffy, sweet buttercream? These cookies aren’t just for holidays; they’re perfect for birthdays, baby showers, or simply a fun afternoon activity with loved ones.
This recipe for frosted sugar cookie cut outs is a fantastic adaptation of my popular no-chill, no-roll easy sugar cookies. While this version is designed specifically for rolling and cutting with your favorite cookie cutters, it proudly maintains its most incredible feature: it requires no chilling time. This is a complete game-changer for busy bakers and spontaneous decorators. No more planning ahead, no more waiting hours for the dough to firm up – these delicious, soft sugar cookies can be mixed, shaped, baked, and decorated, all within the same setting, allowing for immediate gratification and endless fun.
I am absolutely confident that once you try these easy frosted sugar cookie cut outs, they’ll become a beloved staple in your baking repertoire, just as they have in ours!
Craving more amazing sugar cookie creations? Be sure to explore some of my other fantastic recipes, including my delightful sugar cookie bars, rich chocolate sugar cookies, and the adorable snowman sugar cookies.
Why This No-Chill Cookie Dough is a Game Changer for Baking Success
You might be wondering, “How can sugar cookie dough not require chilling?” Traditionally, chilling cookie dough is a crucial step for cut-out cookies to prevent them from spreading excessively in the oven and losing their intricate shapes. However, this innovative recipe cleverly bypasses that waiting period thanks to two key adjustments:
- Reduced Butter Content: Cookie dough with a high butter content tends to spread a lot when baked because butter melts quickly. To counteract this, traditional recipes often call for chilling the dough, which solidifies the butter and helps the cookies maintain their shape. My recipe uses only ¾ of the butter typically found in most sugar cookie recipes. This reduction in fat significantly minimizes spreading, allowing the cookies to hold their cut-out forms beautifully, yet they still retain an incredibly rich and buttery flavor.
- Strategic Addition of Powdered Sugar: Chilling also gives the gluten in the dough time to relax, resulting in a softer, more tender cookie. Furthermore, it allows the flour to fully absorb moisture, which also helps prevent spreading. This recipe expertly addresses both concerns by incorporating powdered sugar. Powdered sugar contributes to an incredibly soft, melt-in-your-mouth texture, mimicking the effect of gluten relaxation. Crucially, powdered sugar contains cornstarch, a fantastic ingredient that helps absorb excess moisture in the dough. This dual action of powdered sugar ensures your cookies remain soft and resist spreading, eliminating the need for any chilling whatsoever.
So, forget the waiting game and let’s get straight to the fun part – baking these perfectly shaped, soft, and delicious sugar cookies, shall we?
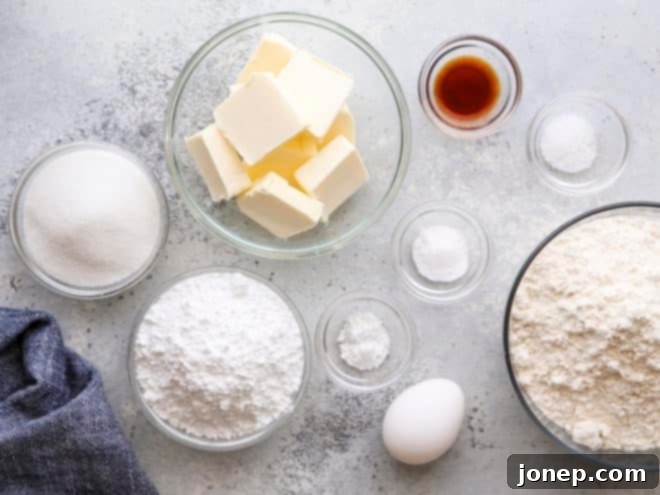
Essential Ingredients You’ll Need for Perfect Frosted Sugar Cookies
Gathering your ingredients is the first step to baking success. You’ll find most of these staples readily available in your pantry, ensuring a smooth and enjoyable baking experience. Here’s a detailed look at what you’ll need for both the delightful cookies and their dreamy frosting:
For the Soft & Chewy No-Chill Sugar Cookies:
- Unsalted Butter: Using unsalted butter gives you complete control over the salt content in your cookies. Ensure it’s at the perfect room temperature for optimal creaming.
- Granulated Sugar: Provides sweetness and helps create a crisp edge.
- Powdered Sugar (Confectioners’ Sugar): This is one of our secret weapons for tender cookies and preventing spread, as it contains cornstarch.
- Vanilla Extract: The star flavor for classic sugar cookies. Use a good quality extract for the best taste.
- Large Egg: Acts as a binder and adds richness to the dough.
- All-Purpose Flour: The structural base of our cookies. Proper measurement is crucial!
- Baking Soda: A leavening agent that helps the cookies puff slightly.
- Salt: Balances the sweetness and enhances all the other flavors.
- Cream of Tartar: A lesser-known hero, cream of tartar helps produce a soft, chewy texture and prevents sugar from crystallizing, contributing to the cookie’s stability.
For the Fluffy & Flavorful Frosting:
- Heavy Cream: Essential for achieving a light, whipped, and creamy consistency in your buttercream.
- Almond Extract: While optional, a touch of almond extract pairs beautifully with vanilla, adding an extra layer of gourmet flavor to the frosting.
- Gel Food Coloring: Preferred over liquid colors for vibrant hues without altering the frosting’s consistency.
- Sprinkles: The ultimate fun factor for decorating! Choose your favorites to match any theme or occasion.
Step-by-Step Guide: How to Make Frosted Sugar Cookie Cut Outs
Creating these beautiful and delicious frosted sugar cookie cut outs is a straightforward and enjoyable process. Follow these detailed steps to ensure perfect results every time:
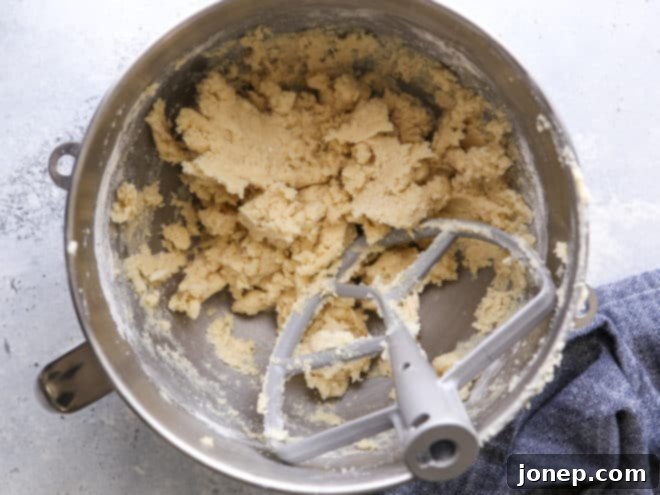
1. Prepare the Cookie Dough with Precision: Begin by creaming together your room temperature butter, granulated sugar, powdered sugar, and vanilla extract in a stand mixer (or with a hand-held mixer). This “creaming method” is crucial: beat until the mixture is light, fluffy, and pale, which usually takes 3-5 minutes. This incorporates air, resulting in a tender cookie. Next, mix in the egg until it’s just combined, being careful not to overmix. Finally, gradually add your dry ingredients (flour, baking soda, salt, and cream of tartar) to the wet mixture. Mix on low speed until everything is just incorporated. The dough will initially appear quite thick and even a little crumbly, but don’t worry, it will come together. (For an in-depth understanding of the creaming method, check out my detailed post on baking essentials.)
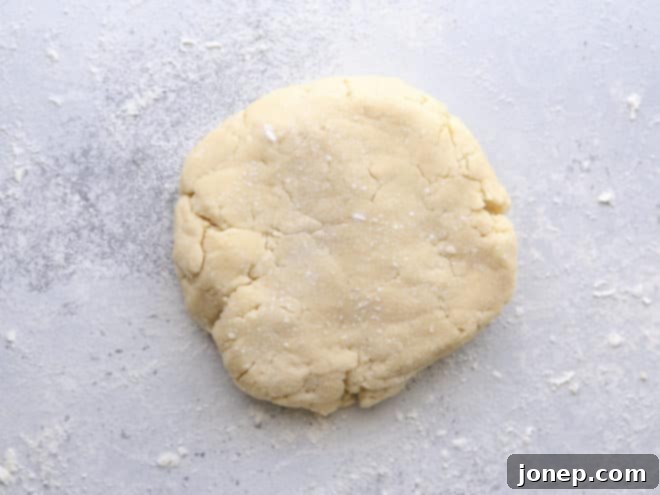
2. Form the Dough and Get Ready to Roll – No Waiting Required!: Once the dough is mixed, gently dump it out onto a lightly floured surface. At this stage, it might still look a bit loose or crumbly, but a few light massages and gentle presses will bring it together into a cohesive, thick disk. Avoid overworking the dough, which can lead to tough cookies. The beauty of this recipe is that the dough is now ready to be rolled out immediately!
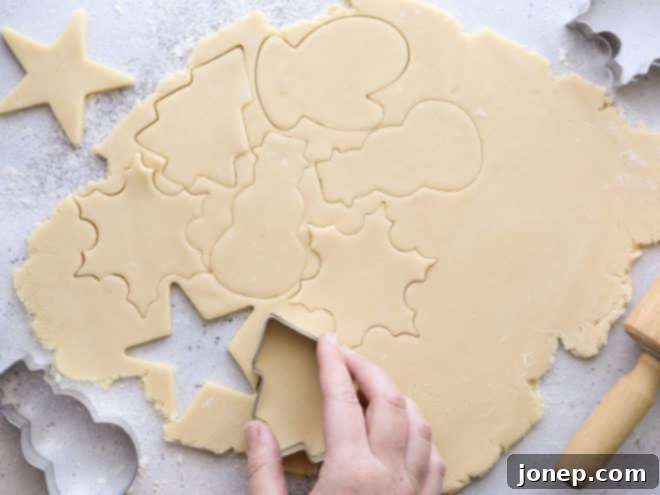
3. Roll and Cut Your Festive Shapes: Using a rolling pin, roll your dough out to your desired thickness. For classic sugar cookies, aim for about ¼ inch thick. If you prefer a more substantial, chewier cookie, you can go up to ½ inch thick. As you roll, ensure your work surface and the top of the dough are lightly floured to prevent sticking. Use your favorite cookie cutters to cut the dough into a variety of fun and festive shapes. Carefully transfer the cut-out cookies to a parchment-lined baking sheet, leaving adequate space between each. Gather any dough scraps, gently press them back into a disk, and re-roll and cut until all the dough is used up. (A crucial note: only add as much flour as needed during rolling. Too much flour will make the dough scraps dry and difficult to re-roll without cracking.)
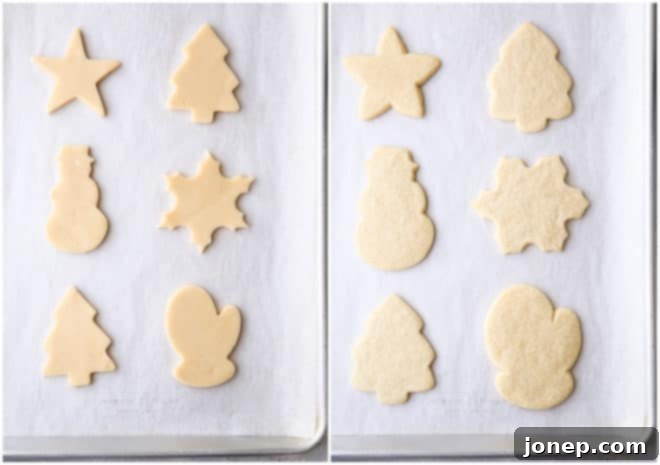
4. Optional Freeze for Extra Insurance: While this recipe is designed to prevent spreading, if you’ve used particularly intricate cookie cutters or simply want absolute assurance that your cookies will hold their precise shape perfectly, you can opt for a quick freeze. Place the cut-out dough on a parchment-lined sheet pan and freeze for about 15 minutes before baking. During my recipe development, I found virtually no noticeable difference in baked cookies that were frozen versus those that weren’t, showcasing the robust stability of this no-chill dough. However, it’s always a good idea to bake one test cookie first to observe how it behaves in your specific oven.
5. Bake to Golden Perfection: Preheat your oven to 350°F (175°C). Bake the cookies for approximately 8-12 minutes. The exact baking time will depend significantly on the size, thickness, and intricacy of your cookie shapes. For instance, the approximately 4-inch cookies featured in this post took precisely 11 minutes in my oven. Cookies are done when they appear puffed in the center and their tops look completely dry. For a slightly crispier edge, bake until the edges are just lightly golden brown. Remember, ovens can vary, so baking a test cookie is your best bet to determine the perfect timing for your batch!
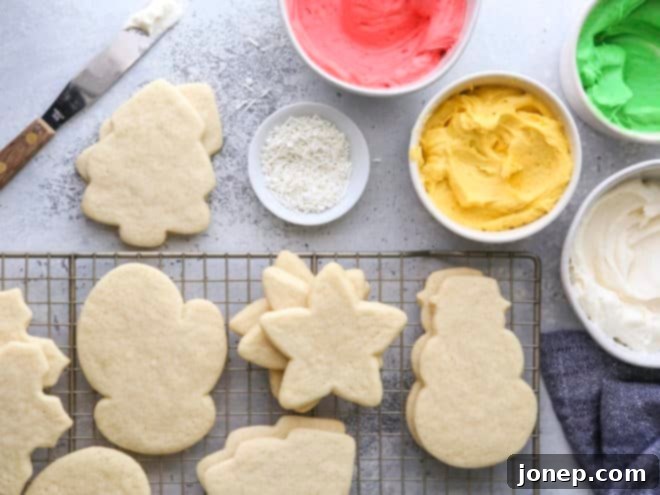
6. Frost and Unleash Your Creativity: Once your beautifully baked sugar cookies have cooled completely on a wire rack (this is important to prevent the frosting from melting), it’s time for the most exciting part – frosting and decorating! I highly recommend using my favorite whipped vanilla buttercream frosting, which consistently receives rave reviews. Feel free to divide the frosting and color it with vibrant gel food coloring to create a dazzling array of hues. Then, let your imagination run wild! Decorate with sprinkles, edible glitter, or whatever your heart desires to make each cookie unique.
My Go-To Technique for Effortless Yet Elegant Frosted Cookies
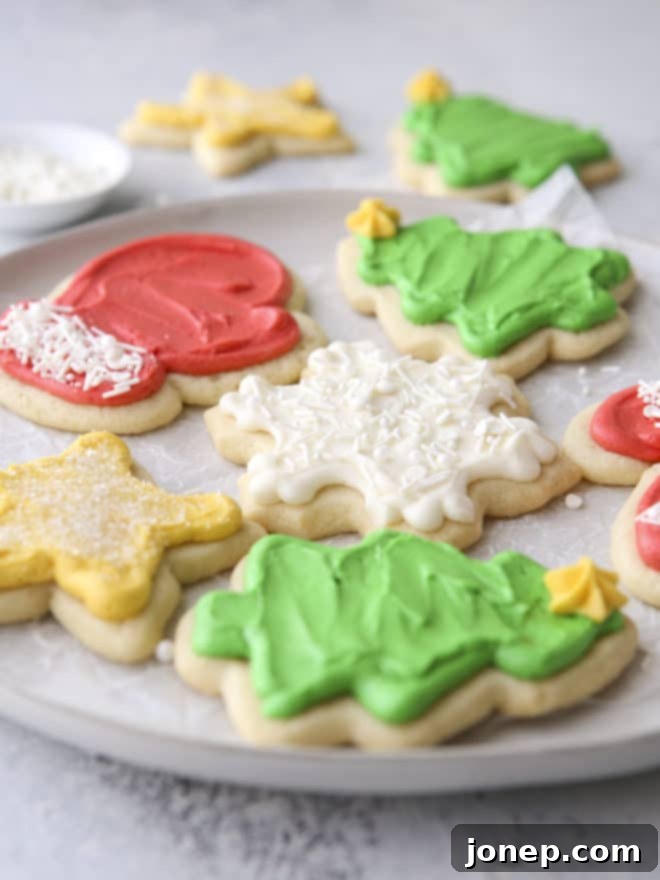
When it comes to decorating these delightful frosted sugar cookie cut outs, I’ve found a method that achieves a polished look without requiring the precision of a professional decorator. Here’s how I typically approach it: I use a piping bag fitted with a small round tip (like an Ateco #3 or #4) to pipe a neat, defined border around the entire edge of each cooled cookie. This border acts as a dam. Once the outline is complete, I pipe a generous amount of frosting inside this border. Then, using a small, flat spatula or the back of a spoon, I casually spread the frosting within the piped border until the surface is smooth and even. This technique ensures that the edges of the frosting have clean, crisp lines, giving a refined appearance, while the interior filling is quickly and easily smoothed. I’m certainly not a master confectioner, but this method consistently helps me create cookies that look impressive with minimal effort.
Ultimately, no matter if you meticulously pipe intricate designs or simply spread the frosting with joyful abandon, the most important thing is that these frosted sugar cookie cut outs will taste absolutely incredible! And that, after all, is the true magic of homemade cookies, isn’t it?

Pro Tips for Baking the Best No-Chill Frosted Sugar Cookies
Achieving bakery-quality sugar cookies at home is easier than you think, especially with these helpful tips and tricks:
- Mastering Butter Temperature is Key!: The temperature of your butter can make or break your cookies. Butter should be soft enough that when you gently press it with your finger, it leaves a slight indent, but not so soft that your finger can easily push all the way through, or that it appears shiny and greasy. If your butter is too cold, it won’t cream properly, leading to a dense dough. If it’s too warm or even slightly melted, your cookies are far more likely to spread excessively in the oven, losing their beautiful cut-out shapes. Plan ahead and let it come to room temperature naturally, or use quick softening methods carefully.
- Measure Flour with Precision: Accurate flour measurement is paramount for consistent baking results. All of my recipes are meticulously tested using the “spoon and level” method. This involves lightly spooning flour into your measuring cup until it overflows, then leveling off the excess with the straight edge of a knife. Never scoop flour directly from the bag, as this compacts it and can lead to using far too much flour, resulting in dry, tough cookies. (For a visual guide, refer to my detailed post on how to measure flour correctly.)
- Embrace Parchment Paper: Using pre-cut parchment sheets or rolling out a sheet from a roll is a simple yet effective way to ensure your cookies don’t stick to the baking sheet. It also promotes even baking and makes for effortless cleanup.
- Opt for Gel Food Coloring: When coloring your frosting, gel food coloring is vastly superior to liquid varieties. Gel colors are highly concentrated, allowing you to achieve vibrant and rich hues with just a tiny amount. Liquid food coloring, on the other hand, requires more volume to achieve the same intensity, potentially adding too much liquid to your frosting and altering its ideal consistency. Look for gel food coloring at specialty baking stores, craft supply stores, or readily available online.
- DIY Piping Bag Solution: No piping bag or fancy tips? No problem! You can easily create a makeshift piping bag using a sturdy plastic ziplock bag. Simply fill the bag with frosting, snip a tiny corner off the bottom, and you’re ready to pipe! (For a quick tutorial, follow this guide on how to use a plastic ziplock bag.)
- Smart Storage Solutions: These frosted sugar cookie cut outs store beautifully. Keep them in an airtight container at room temperature for several days to maintain their freshness and soft texture. For longer storage, both frosted and unfrosted cookies freeze exceptionally well. Simply layer them between sheets of parchment paper in an airtight freezer-safe container or bag. Thaw at room temperature when ready to enjoy!
Shop Essential Tools for this Recipe
To make your baking process even smoother, here are some recommended tools:

Frosted Sugar Cookie Cut Outs
Pin Recipe
Leave a Review
Ingredients
For the cookies:
- ¾ cup unsalted butter (170 grams), at room temperature
- ½ cup granulated sugar (100 grams)
- ½ cup powdered sugar (112 grams)
- 1 large egg
- 2 teaspoons vanilla extract
- 2 ¼ cups all-purpose flour (270 grams)
- ½ teaspoon baking soda
- ½ teaspoon salt
- ½ teaspoon cream of tartar
For the frosting:
- ½ cup unsalted butter (113 grams), softened to room temperature
- 2 cups powdered sugar (450 grams), sifted
- ½ teaspoon vanilla extract
- ¼ teaspoon almond extract
- Pinch of salt
- 1-3 tablespoons heavy cream
- Food coloring (optional)
- Sprinkles (optional)
Instructions
To make the cookies:
-
Preheat oven to 350°F (175°C). Line a sheet pan with parchment paper or a silicone baking mat.
-
In the bowl of a stand mixer fitted with a paddle attachment, or in a bowl with a hand-held mixer, beat the butter, sugars and vanilla together until smooth and creamy, about 3-5 minutes. Add the egg and and mix until just combined. Scrape down the sides of the bowl as needed to ensure even mixing.
-
In a separate medium bowl, whisk together the flour, baking soda, salt, and cream of tartar. Gradually add these dry ingredients to the wet mixture in the mixer, mixing on low speed until just combined. The mixture will initially be quite crumbly but will soon come together into a thick, workable dough. Be careful not to overmix, which can result in tough cookies.
-
Transfer the dough onto a clean, lightly floured surface. Gently massage and knead the dough a bit until it fully comes together and forms a cohesive ball or disk. It will be thick, but pliable.
-
Using a rolling pin, roll the dough out to your desired thickness – approximately ¼ inch thick for standard cookies, or up to ½ inch for extra thick and chewy cookies. Ensure you add more flour to your work surface and to the top of the dough as needed to prevent sticking, but use sparingly.
-
Use your favorite cookie cutters to cut the dough into desired shapes. Carefully transfer the cut-out cookies to the prepared sheet pan lined with parchment paper, leaving several inches of space between each cookie to allow for slight spreading. Collect any dough scraps, gently press them back into a disk, and re-roll and cut until all dough is used.
-
If desired for extra shape insurance (especially with intricate cutters), freeze the cut-out cookies on the pan for 15 minutes before baking. This step is optional as the recipe is designed not to spread, but can offer peace of mind.
-
Bake in the preheated oven until cookies are puffed in the center and the tops appear completely dry. The edges may be very lightly golden. Baking time will typically be about 8-12 minutes, varying based on the size and thickness of your cookies (see Notes below for more details on doneness). Let the cookies cool on the baking pan for 5 minutes before carefully transferring them to a wire rack to cool completely. This prevents them from breaking.
To make the frosting:
-
In a clean stand mixer bowl with a paddle attachment, or with a hand-held mixer, beat the softened butter, sifted powdered sugar, vanilla extract, almond extract (if using), pinch of salt, and 1 tablespoon of heavy cream on medium speed until combined. Once combined, increase the speed to high and beat for another 3-5 minutes until the frosting is incredibly smooth, light, and very fluffy. Add additional heavy cream, 1 tablespoon at a time, if a thinner consistency is desired for piping or spreading.
-
Divide the frosting into separate bowls and add gel food coloring as desired, mixing until the color is even. Once the cookies are completely cool, frost and decorate them to your heart’s content with sprinkles or other adornments. Enjoy your beautiful and delicious creations!
Notes
- To Make Almond Sugar Cookies: For a delightful almond twist, substitute 1 teaspoon of almond extract for the vanilla extract in the cookie dough. For the frosting, omit the vanilla and increase the almond extract to ½ teaspoon. This creates a wonderfully fragrant and flavorful cookie.
- Judging Doneness Precisely: A common mistake is waiting for the edges of sugar cookies to turn golden brown, which often means they are already slightly overbaked and will result in a crispier texture than desired. For soft, tender sugar cookies, look for a pale, puffed appearance with dry tops. When trying a new cookie recipe or your oven, I highly recommend baking one test cookie first. This allows you to check it frequently and determine the exact baking time needed for your preferred level of doneness. In my oven, these cookies achieve a barely golden bottom and perfect softness at exactly 12 minutes.
