Easy Homemade Grilled Flatbread: Your Go-To Recipe for Delicious & Versatile Bread
There’s nothing quite like the aroma and taste of freshly baked bread, and making it at home might seem daunting to some. But with this incredibly easy grilled flatbread recipe, you can effortlessly add fresh, homemade bread to any meal without the fuss. Requiring just a handful of common pantry ingredients, this recipe boasts a remarkably short rise time and is incredibly forgiving – truly, it’s almost impossible to mess up! Get ready to impress your family and friends with warm, tender, and slightly charred flatbread that rivals any bakery.
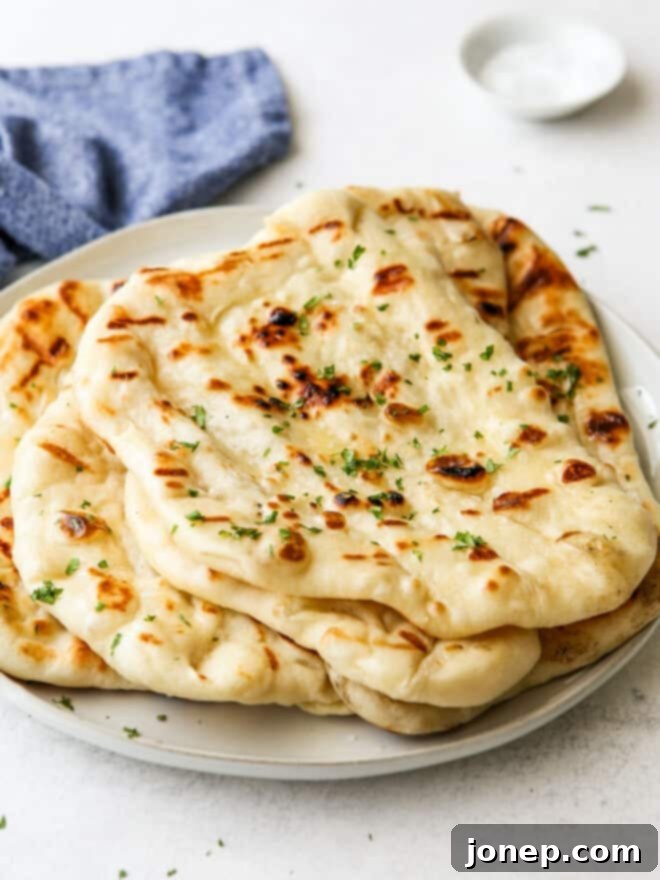
While this grilled flatbread is a summer favorite, perfect for avoiding heating up your kitchen with the oven, its incredible versatility makes it a fantastic addition to your culinary repertoire all year round. Imagine serving it as a simple, yet elegant, side dish to almost any meal. It’s also superb alongside your favorite creamy dips or even as a sturdy, flavorful base for a quick flatbread pizza. From casual weeknight dinners to impressive entertaining, this easy homemade flatbread truly shines.
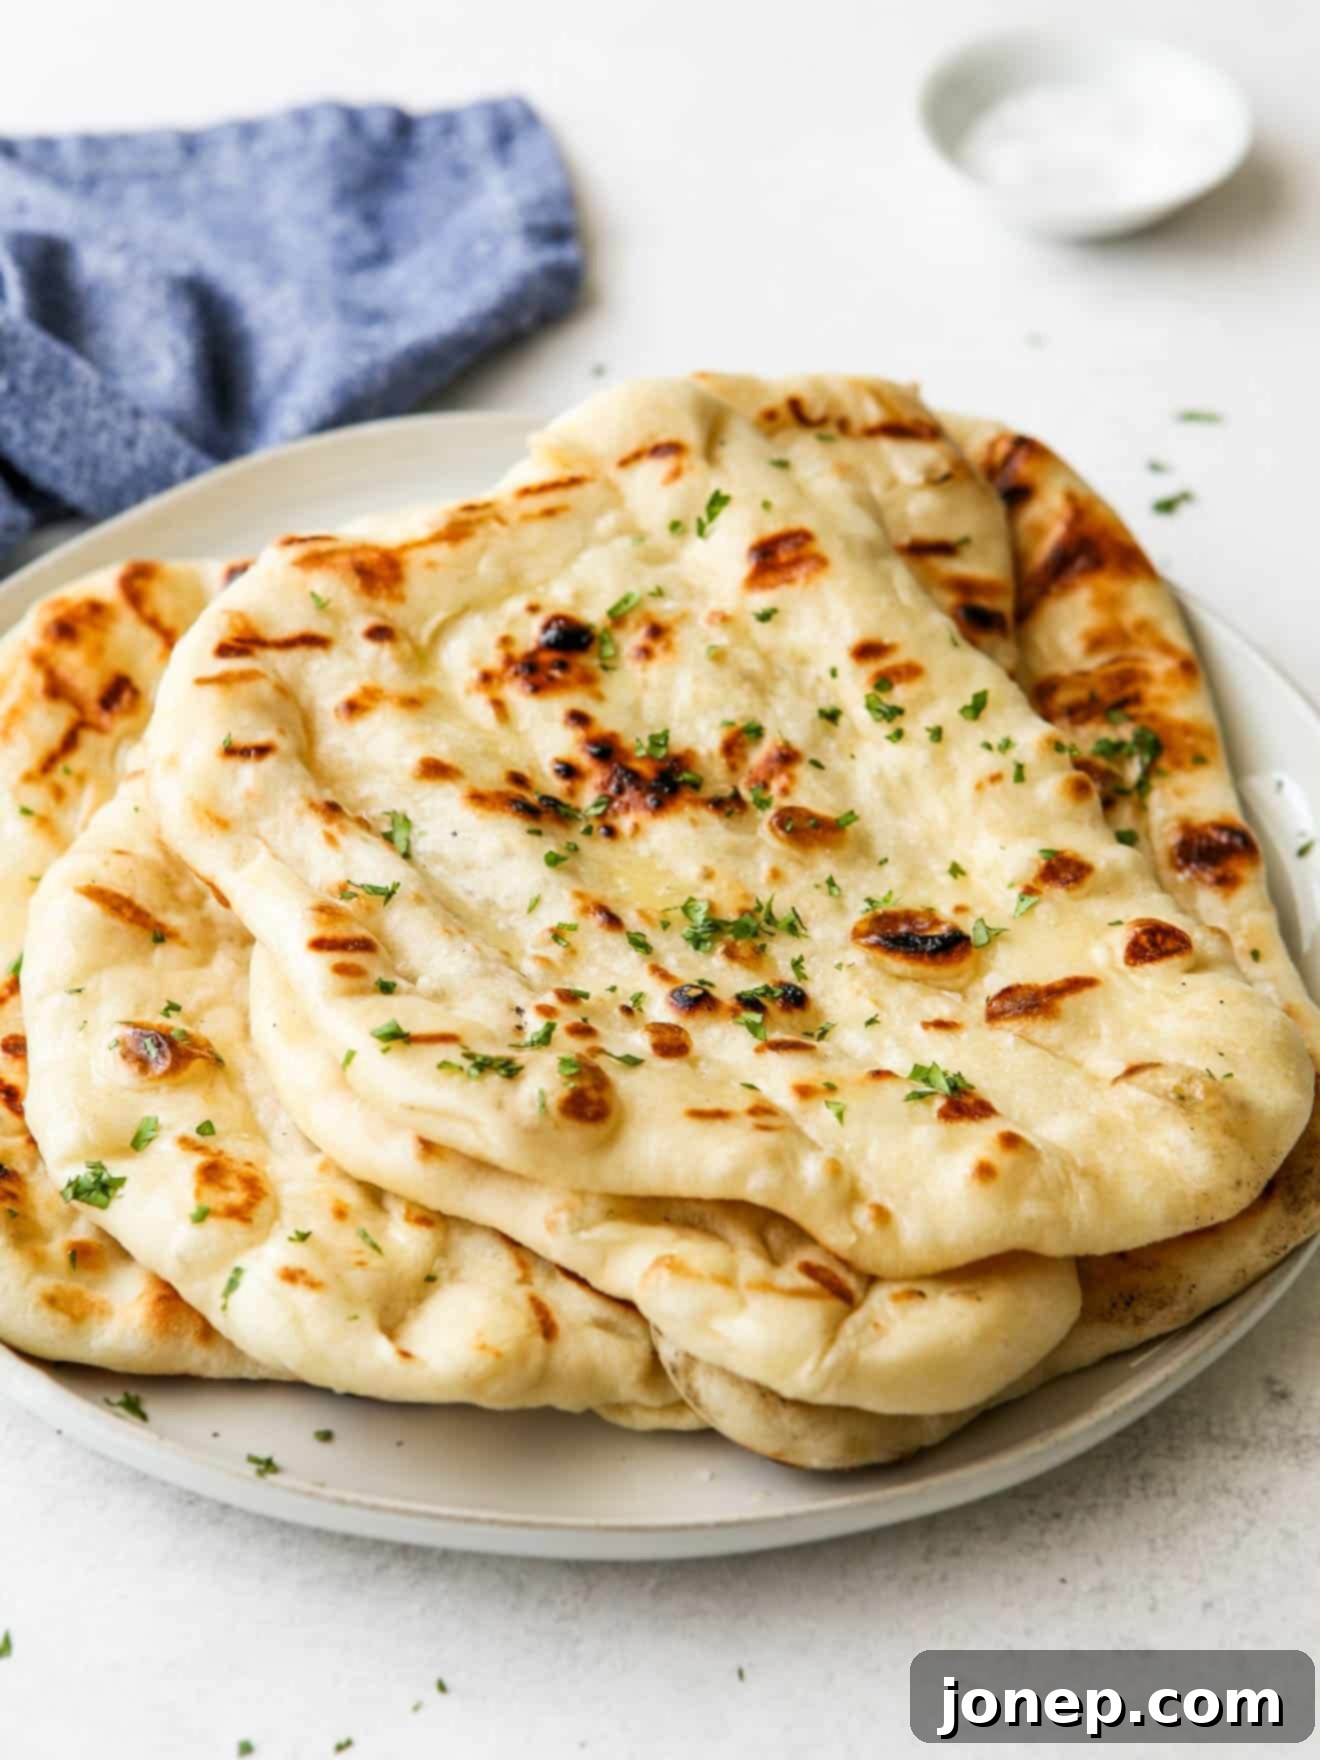
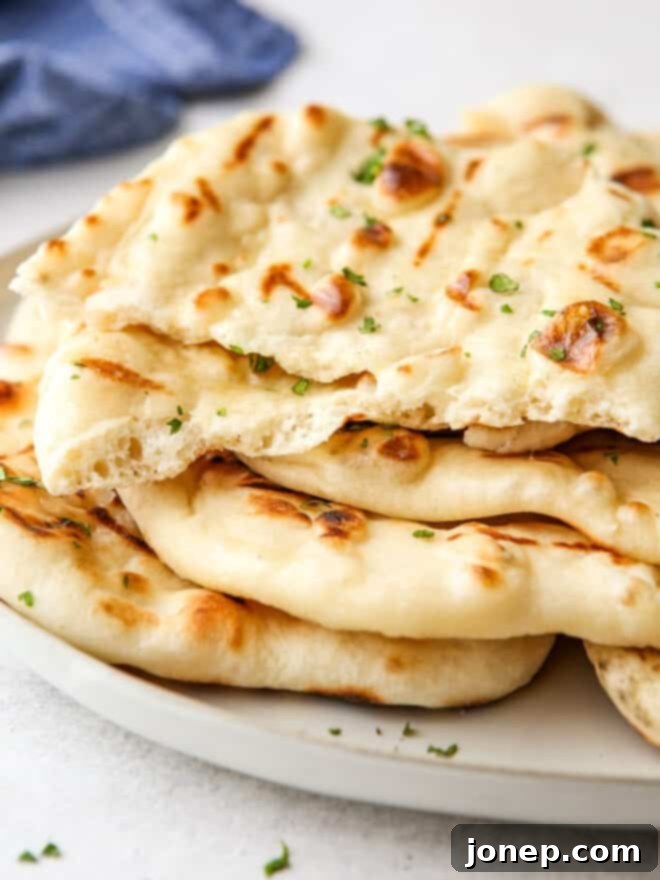
The magic begins with a straightforward yeast-risen dough that comes together quickly. Once kneaded and briefly risen, it’s rolled out thinly and cooked to perfection on a hot grill or in a trusty cast iron skillet. The high heat creates a beautiful golden-brown exterior, complete with irresistible crisp edges and delicate char marks, while the interior remains wonderfully soft, chewy, and tender. The contrast in textures and the subtle smoky flavor from grilling make this flatbread absolutely delicious and utterly addictive!
Table of Contents
- Essential Ingredients for Grilled Flatbread
- Choosing Your Flour: Bread Flour vs. All-Purpose
- Step-by-Step Guide: How to Make Grilled Flatbread
- Exciting Flavor Variations for Your Flatbread
- Creative Ways to Serve Homemade Flatbread
- Prep Ahead: Making Flatbread in Advance
- Get the Full Recipe
Essential Ingredients for Perfect Grilled Flatbread
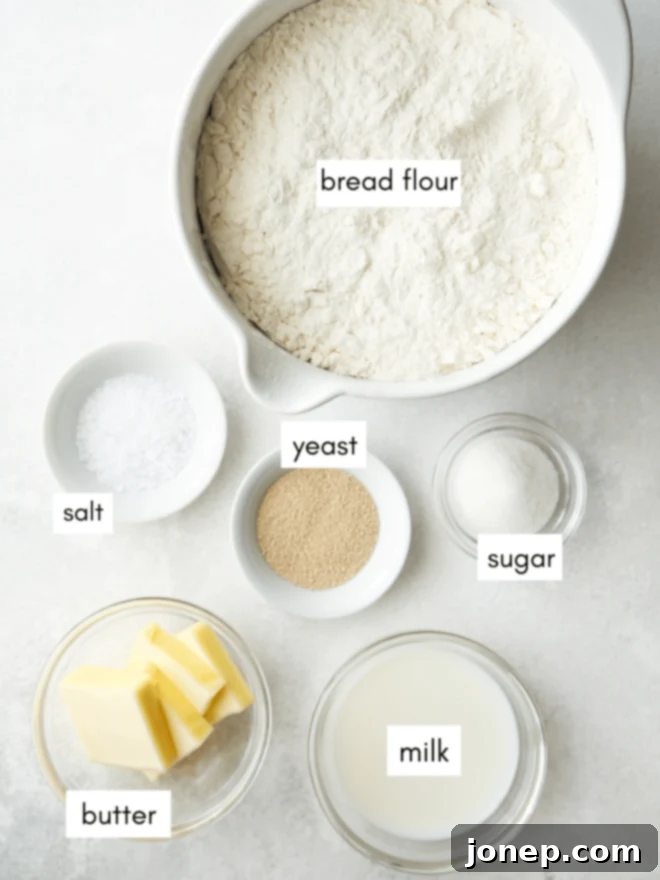
Crafting delicious homemade grilled flatbread starts with a few simple, accessible ingredients that you likely already have in your pantry. The beauty of this recipe lies in its simplicity and the ability of these basic components to transform into something truly extraordinary. You’ll need active-dry or instant yeast, warm water, milk (whole or 2% works best for richness), your choice of flour (bread flour is recommended, but all-purpose works too), a touch of granulated sugar to feed the yeast, salt for flavor balance, and melted butter or olive oil for brushing. That’s it! With these foundational ingredients, you’re well on your way to creating incredible flatbread.
Choosing Your Flour: Bread Flour vs. All-Purpose
When it comes to baking, the type of flour you choose can significantly impact the final texture and structure of your bread. For this grilled flatbread recipe, **bread flour is genuinely ideal** (and highly recommended) due to its higher protein content compared to all-purpose flour. This elevated protein level is crucial because it leads to greater gluten development during kneading. Gluten is what gives dough its elasticity and strength, allowing it to trap gases produced by the yeast and rise beautifully. The result is a more robust dough that holds its shape well, yielding a flatbread that is delightfully chewy, yet still incredibly light and airy – the perfect balance for a truly satisfying bite.
If you happen to have bread flour in your pantry, I strongly encourage you to use it for this recipe to achieve the best possible texture. However, don’t let a lack of bread flour stop you! If all you have is **all-purpose flour, it will absolutely work just fine**. I’ve tested both, and while bread flour consistently produced a slightly chewier and more structured flatbread, the results with all-purpose flour were not dramatically different. You’ll still achieve a delicious homemade flatbread that’s perfect for grilling.
**Important Note on Flour Substitution:** If you opt for all-purpose flour, be aware that it absorbs liquid differently than bread flour. All-purpose flour generally absorbs less liquid, so you may need to adjust the recipe slightly. Start with the recommended amount of flour, but be prepared to add **as much as an additional 1/4 cup more flour**, a tablespoon at a time, until your dough reaches the desired soft, slightly tacky consistency that pulls away from the sides of the bowl during kneading.
Step-by-Step Guide: How to Make Delicious Grilled Flatbread
Making grilled flatbread is a rewarding and relatively quick process that yields impressive results. Follow these detailed steps to achieve perfectly golden, chewy, and flavorful flatbread every time:
- Hydrate the Yeast: In a small bowl, combine the specified amount of warm water (ideally between 105-115°F or 40-46°C, which is warm to the touch but not hot) with your active-dry yeast or instant/quick-rise yeast. Stir gently and let it sit undisturbed for about 5 minutes. You’ll know your yeast is active and healthy when the mixture becomes visibly foamy or bubbly on the surface. This “bloom” indicates the yeast is alive and ready to work its magic.
- Make and Knead the Dough: In a large mixing bowl (or the bowl of a stand mixer fitted with a dough hook), combine the bread flour (or all-purpose flour, adjusted as noted above), salt, and granulated sugar. Add the activated yeast mixture and the milk. Stir these ingredients together with a sturdy spoon or a dough whisk until a shaggy, somewhat sticky dough forms. If using a stand mixer, turn it to low speed and knead the dough for about 6-8 minutes. If kneading by hand, turn the dough out onto a lightly floured surface and knead vigorously for 8-10 minutes. The goal is to achieve a dough that is smooth, elastic, and mostly clears the sides of the bowl (or is less sticky and more manageable by hand). It should still be quite soft and slightly tacky, but not so sticky that it adheres firmly to your fingers. Adjust with a tablespoon of flour or a teaspoon of water if needed to reach this consistency.

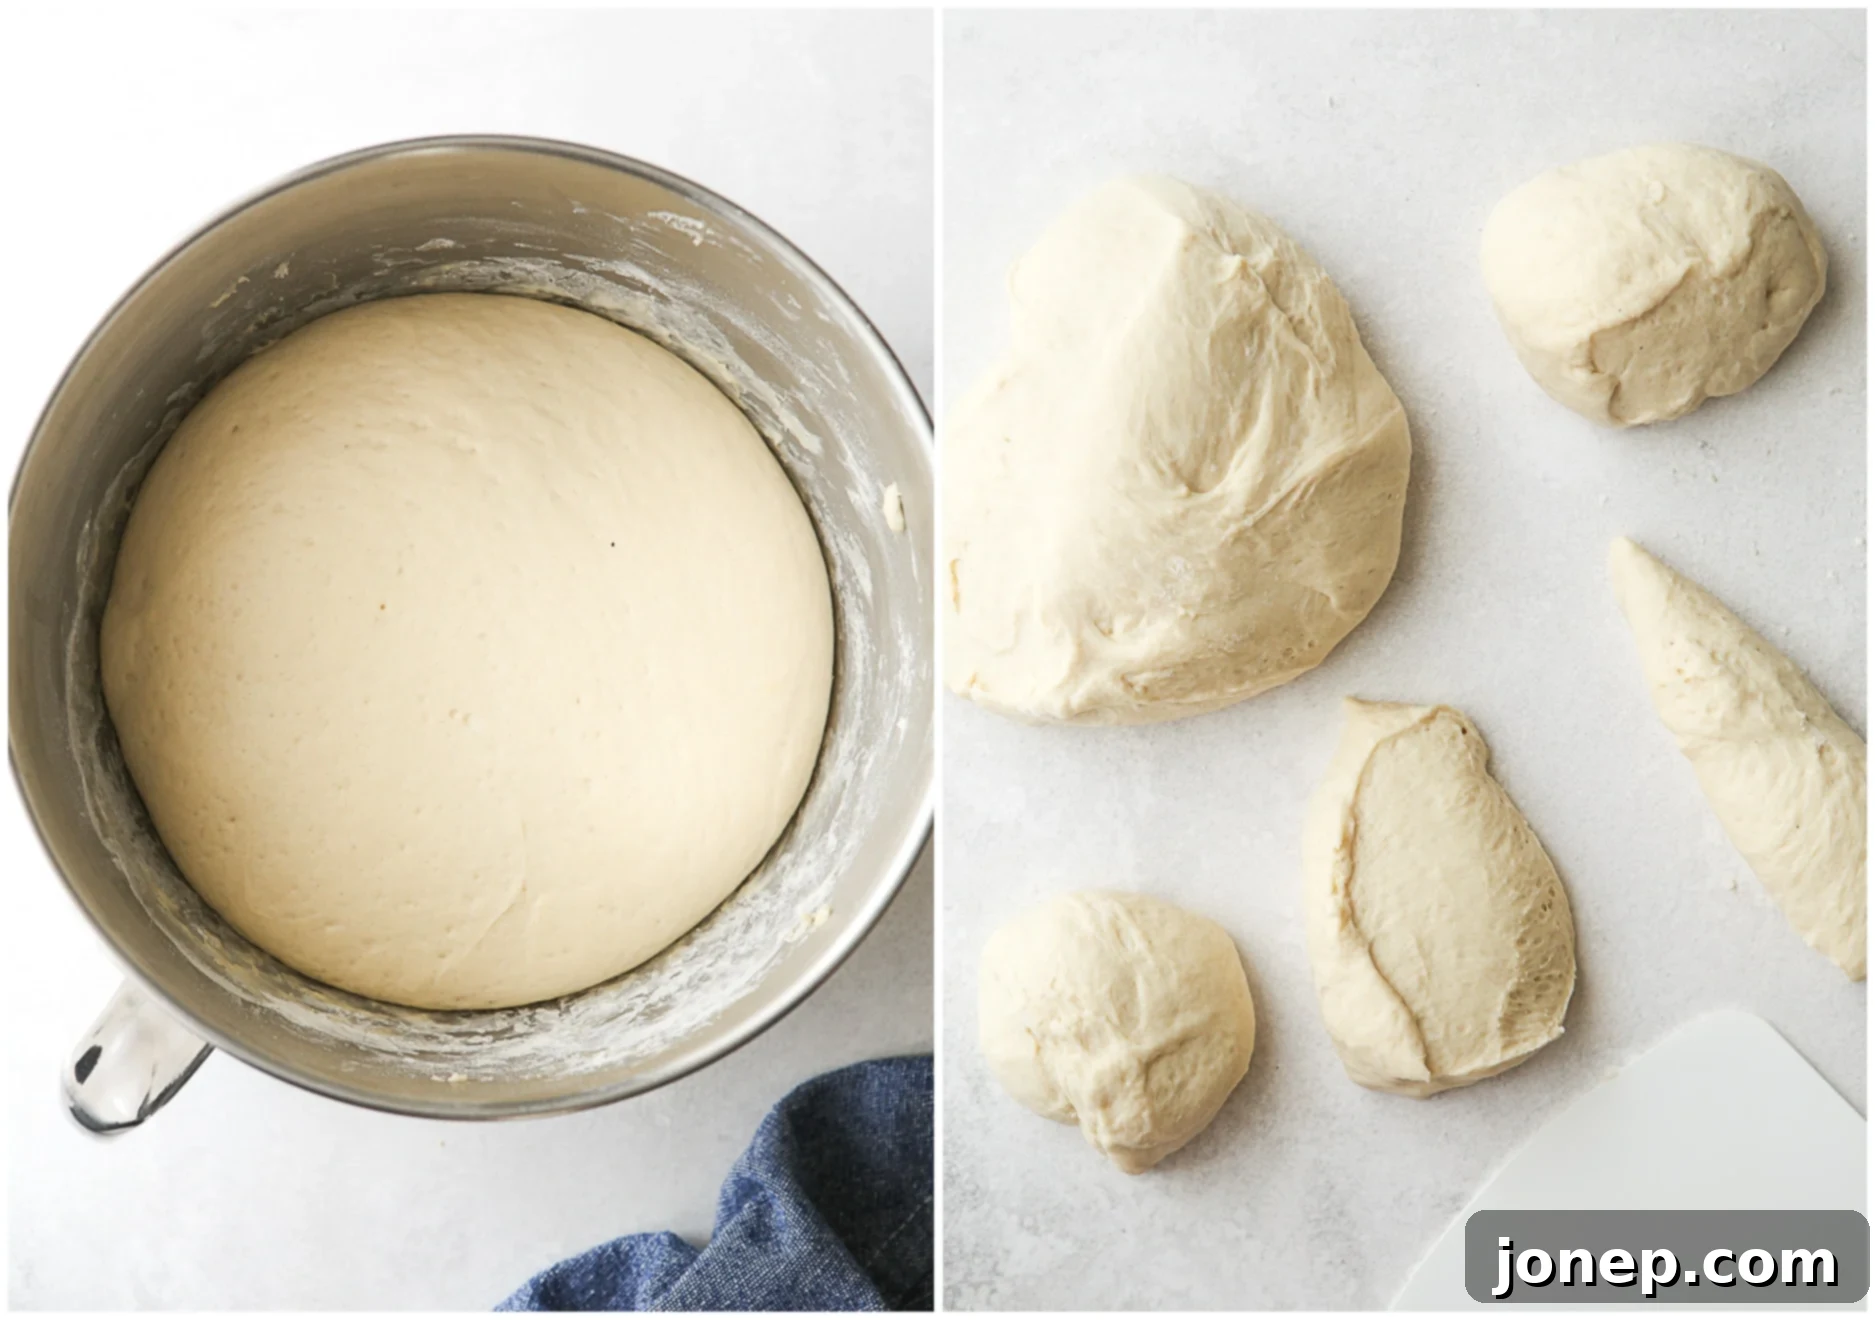
- First Rise: Once the dough is kneaded, lightly grease the bowl or a separate clean bowl. Place the dough in the bowl, turn it once to coat, then cover the bowl tightly with plastic wrap or a clean kitchen towel. Allow the dough to rise in a warm, draft-free place for approximately 30-60 minutes. The exact time will depend on the warmth of your kitchen and the type of yeast used. The dough should visibly increase in size, becoming puffy and soft.
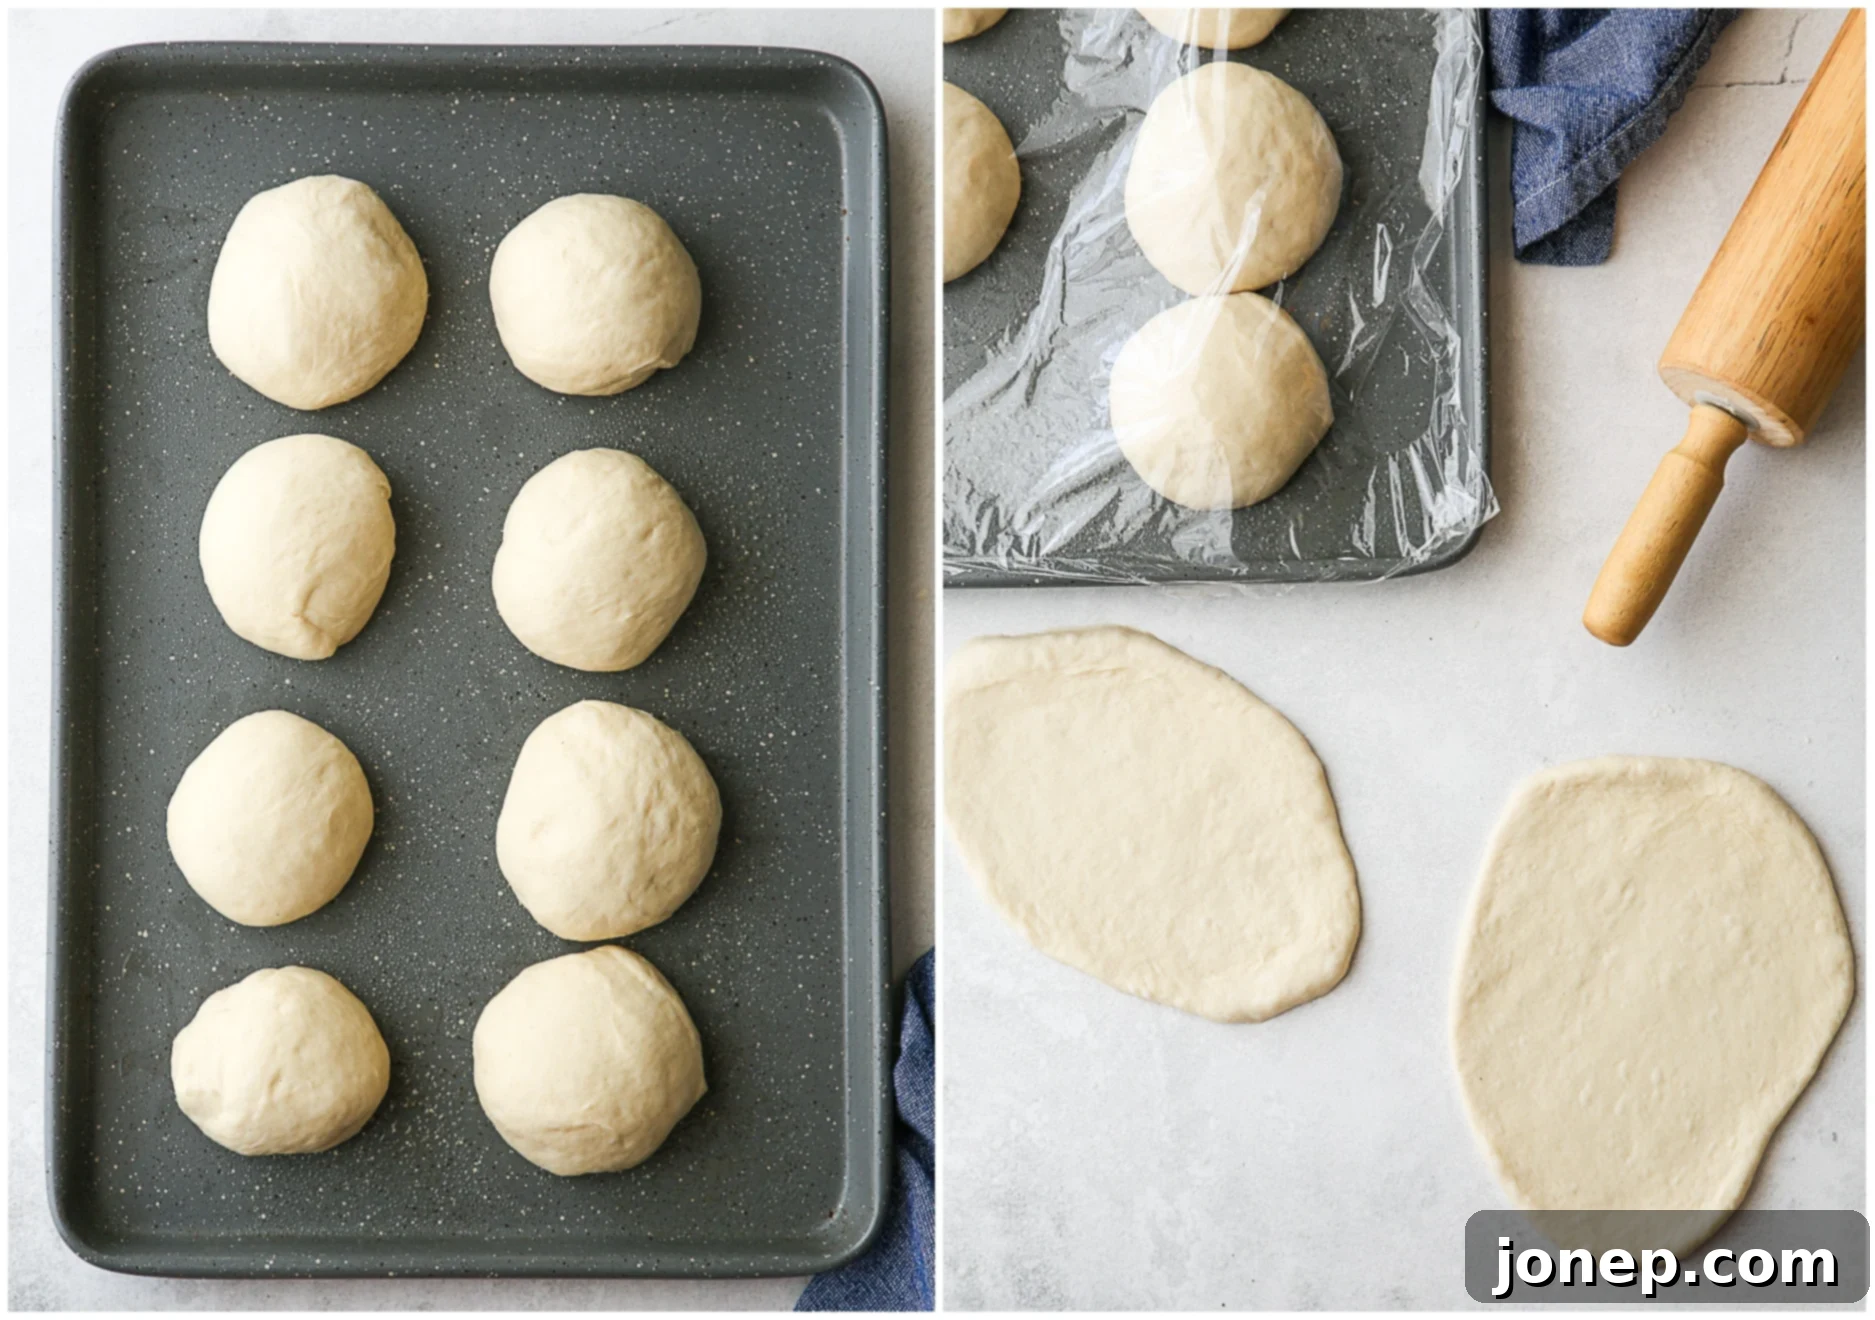
- Divide into Portions and Second Rest: Gently punch down the risen dough to release the accumulated gases. Turn the dough out onto a lightly floured surface and divide it into 8 equal portions. For perfectly even pieces, a kitchen scale is helpful, or you can use a bench scraper (as described in the notes) to cut the dough. If you prefer larger flatbreads, you can divide it into 6 portions. Roll each portion into a smooth ball.

- Roll Out Flat: Take one dough ball at a time and, using a rolling pin on a lightly floured surface, roll it out as thinly as you possibly can. Aim for a thickness of about 1/8 inch or less. Don’t worry too much about achieving a perfect round shape; irregular shapes add to the rustic charm of homemade flatbread. Keep any rolled-out portions covered with plastic wrap on a lightly floured or parchment-lined baking sheet while you work on the others, to prevent them from drying out.

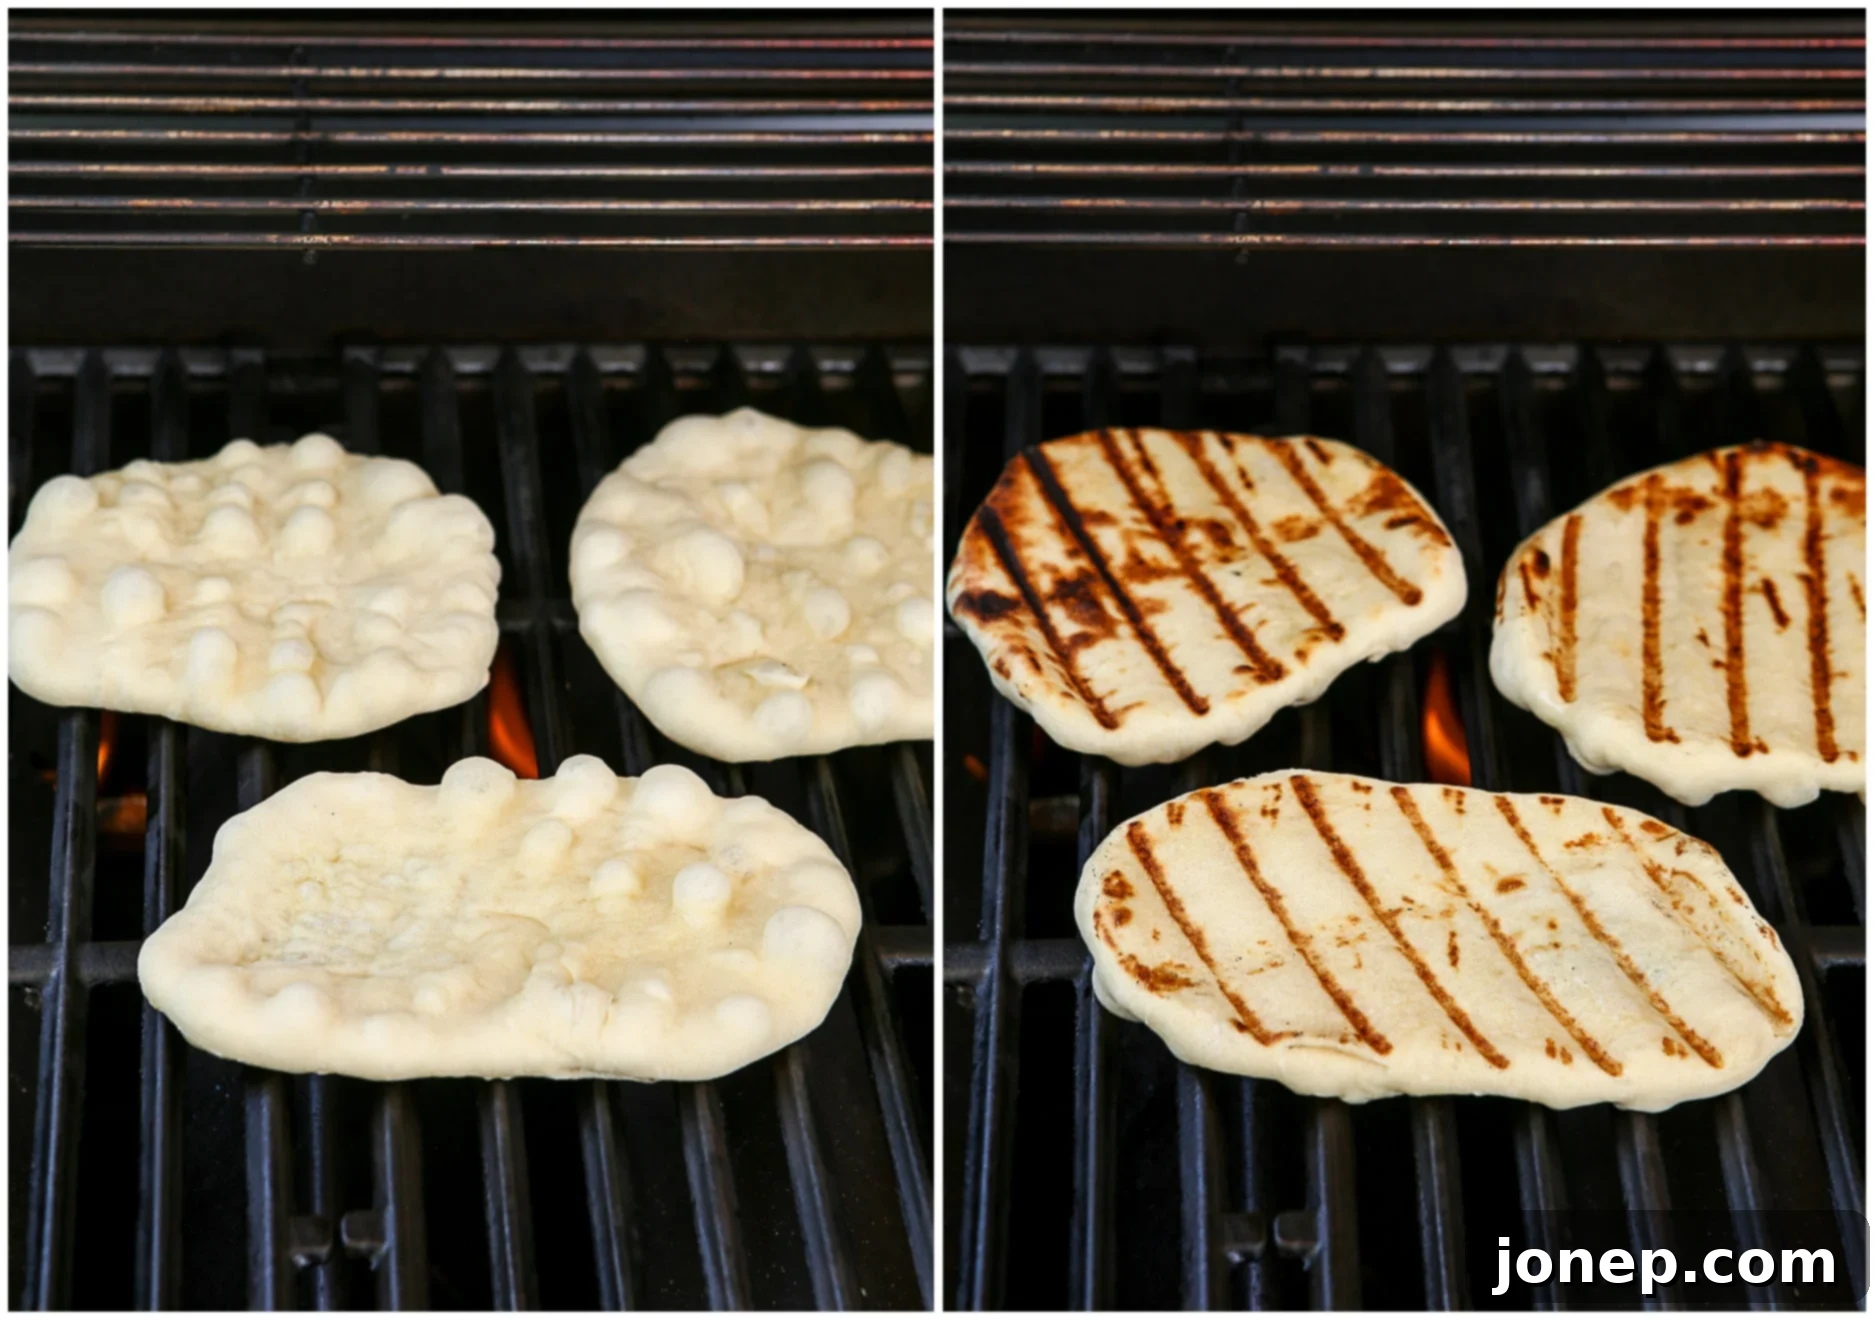
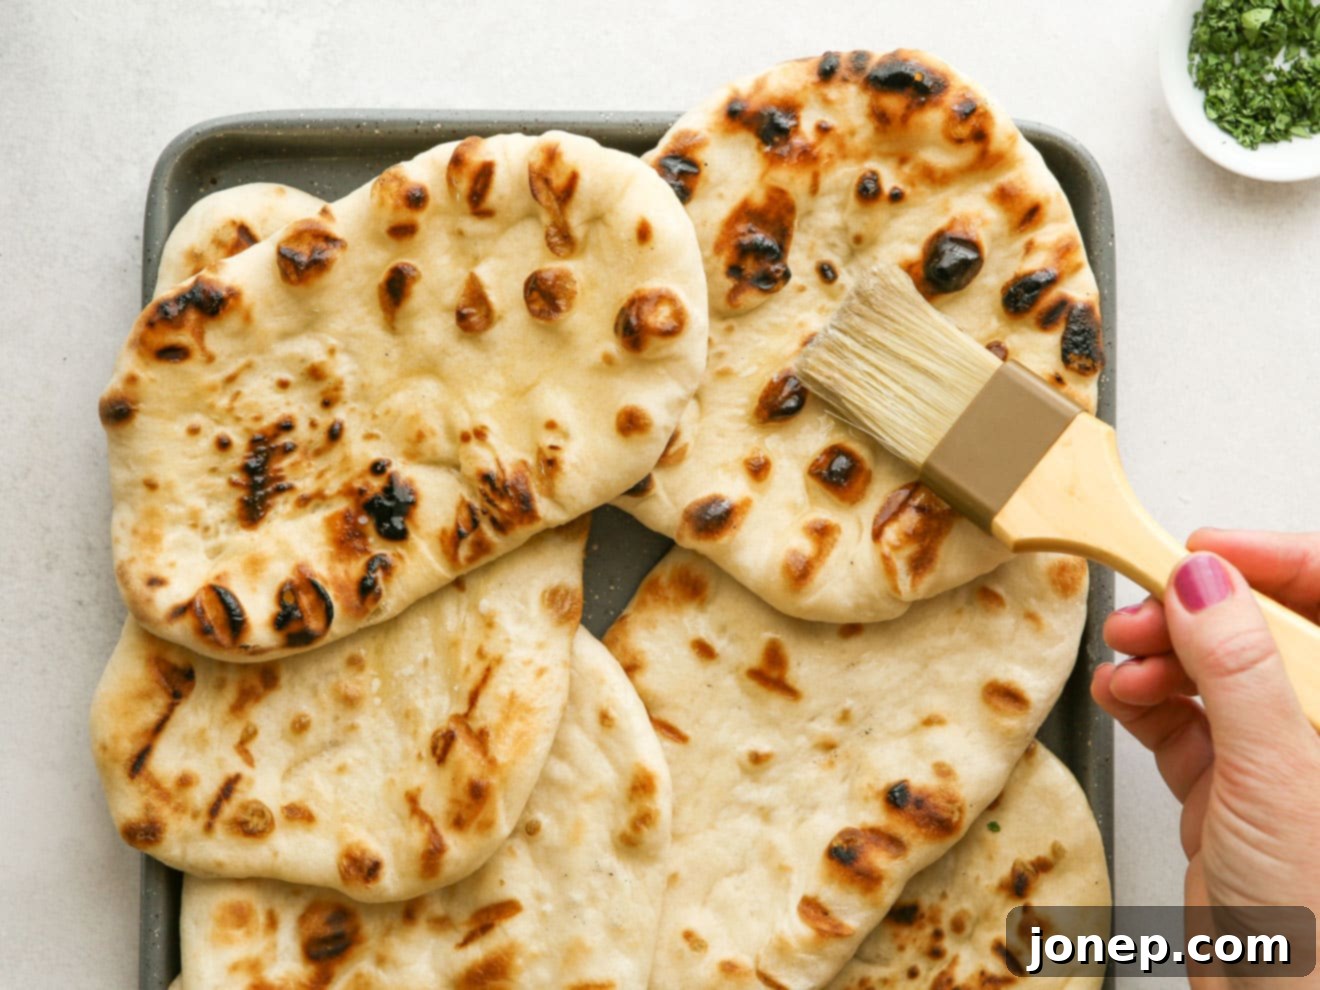
- Cook Over Grill or Cast Iron Skillet: Preheat your outdoor grill or a heavy-bottomed cast iron skillet to medium-high heat. Ensure your grill grates are clean and lightly oiled to prevent sticking. Brush one side of a rolled-out flatbread disk with melted butter or olive oil. Immediately place that brushed side face down onto the hot grill or skillet. Cook for 2-4 minutes, or until you see bubbles forming on the surface and the bottom side is beautifully golden brown with some charring. Watch carefully to avoid burning! While the first side cooks, brush the top (uncooked) side with more butter or oil. Flip the flatbread and cook for another 2-3 minutes on the second side, until it’s also golden brown and cooked through. Cook the flatbreads in batches, as needed, to avoid overcrowding your cooking surface, ensuring even cooking.

- Brush with Butter/Oil and Serve: As each flatbread comes off the grill or skillet, while it’s still hot, brush it generously with a little more melted butter or olive oil. This step adds moisture, flavor, and a lovely sheen. At this point, you can also sprinkle it with fresh herbs like chopped chives or parsley, a pinch of flaky sea salt, or any other desired toppings. Serve your homemade grilled flatbreads immediately to enjoy them at their absolute best – warm, soft, and fragrant!
Exciting Flavor Variations for Your Flatbread
While this grilled flatbread is undeniably delicious on its own, it also serves as a fantastic blank canvas for a myriad of flavor enhancements. You can easily infuse it with other ingredients and flavors, either by mixing them directly into the dough or by adding them on top just before serving. Experiment with these ideas to customize your homemade flatbread:
- **Herbaceous Delight:** Incorporate up to 1 tablespoon of finely chopped fresh herbs such as rosemary, thyme, oregano, or chives directly into the dough during the kneading stage. For a more intense flavor, use dried herbs, but reduce the quantity slightly.
- **Garlic Infusion:** Add 1-2 cloves of minced garlic to the dough along with the flour, or brush the finished, hot flatbread with garlic-infused olive oil or melted garlic butter.
- **Mediterranean Twist:** Mix in up to 1/4 cup of finely chopped sun-dried tomatoes (oil-packed, drained), pitted and chopped olives (like Kalamata or Castelvetrano), or finely grated hard cheeses such as Parmesan, Asiago, or Pecorino Romano into the dough.
- **Spicy Kick:** A pinch of red pepper flakes or a dash of cayenne pepper can be kneaded into the dough for a subtle warmth.
- **Sweet Treat:** For a dessert flatbread, skip the savory additions and instead brush the cooked flatbread with cinnamon sugar, a honey-butter glaze, or even a hazelnut spread (like Nutella).
- **Cheesy Goodness:** Sprinkle shredded mozzarella, cheddar, or a blend of Italian cheeses on top of the flatbread during the last minute or two of cooking on the grill, just until melted and bubbly.
- **Or, get creative and add whatever you’d like!** The possibilities are endless, so let your culinary imagination run wild!
Creative Ways to Serve Homemade Flatbread
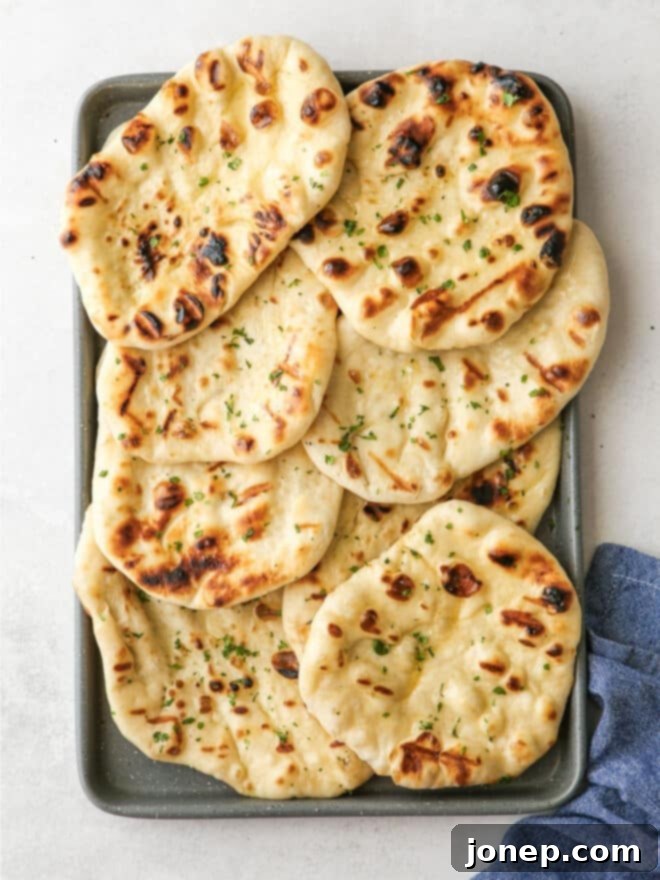
This homemade grilled flatbread is an incredibly versatile culinary creation that can serve as a delicious side dish, an appetizer, or even the foundation for a main course. Its soft, chewy texture and subtle flavor make it a perfect complement to a wide array of meals. Here are just a few ideas for how to incorporate this fantastic flatbread into your menu:
- Plain or with Dips (Appetizer/Snack): Serve the warm flatbread simply on its own as a delightful snack or appetizer. It’s also the perfect vehicle for scooping up your favorite dips. Think creamy hummus, smoky baba ghanoush, vibrant guacamole, fresh tzatziki, or even a simple olive oil and balsamic vinegar blend. Tear it into rustic pieces for easy dipping!
- As a Wrap or Sandwich Base (Main Course/Lunch): Utilize the pliable nature of the flatbread to create delicious wraps or open-faced sandwiches. Stuff it with savory fillings such as tender grilled chicken or beef, roasted or fresh vegetables, falafel, or even scrambled eggs for a unique breakfast wrap. Add a spread of cheese, crisp lettuce, juicy tomatoes, and a drizzle of ranch dressing, a zesty vinaigrette, or a creamy tahini sauce.
- As a Quick Flatbread Pizza (Main Course): This is an excellent alternative to traditional pizza crusts! Spread your grilled flatbread with your favorite pizza sauce, sprinkle with cheese, and add a selection of your preferred toppings (pepperoni, mushrooms, peppers, onions). Return it to the grill (over indirect heat with the lid closed) or place it under a broiler for a few minutes, just until the cheese is melted and bubbly and the toppings are warmed through.
- As a Salad Base (Light Meal): Get creative by using flatbread as a foundation for a hearty salad. You can either serve a fresh salad directly on top of a whole flatbread, or tear the cooked flatbread into bite-sized pieces and toss them into your salad for added texture and substance, much like croutons. It pairs wonderfully with Mediterranean-inspired salads or fresh greens with grilled halloumi.
- As a Dessert (Sweet Treat): Don’t limit flatbread to savory dishes! For a sweet ending, spread the warm flatbread with decadent Nutella, smooth peanut butter, a luscious fruit compote, or a sweet ricotta mixture. Top it with sliced fresh fruit (berries, bananas), chopped nuts, a sprinkle of cinnamon sugar, or chocolate chips.
TIP: To keep your freshly grilled flatbreads warm and soft while you finish cooking the batch or prepare the rest of your meal, stack them and wrap them loosely in a clean kitchen towel. A tortilla warmer also works perfectly. To reheat any cooled flatbread, simply place it in a dry skillet over medium heat for 1-2 minutes per side until warm and pliable again.
Prep Ahead: Making Flatbread in Advance
While this grilled flatbread truly shines when served immediately – fresh and hot off the grill with its perfect crisp-chewy texture and incredible aroma – its deliciousness makes it worth enjoying at its peak. However, if your schedule demands some pre-planning, you can certainly prepare parts of this recipe ahead of time to make grilling even easier later on.
To prep the dough in advance, follow the recipe instructions for making and kneading the dough as written in steps 1 and 2. Once the dough has completed its first rise and has been gently punched down, divide it into your desired 8 (or 6 for larger) equal portions. Roll each portion into a smooth ball. At this point, you have two excellent options for storage:
- Refrigeration: Place the dough balls on a lightly greased sheet pan, ensuring they have a little space between them. Cover the pan tightly with plastic wrap to prevent drying, and refrigerate for up to 24 hours. This slow cold proof can even enhance the flavor of the dough slightly!
- Freezing: For longer storage, place the dough balls on a parchment-lined baking sheet, spaced apart, and freeze them until solid (about 2-3 hours). Once fully frozen, transfer the solid dough balls to a freezer-safe ziplock bag or airtight container. They can be stored in the freezer for up to one month.
When you’re ready to make your flatbread, simply transfer the refrigerated dough balls from the fridge, or thaw the frozen dough balls in the refrigerator overnight or at room temperature for a few hours. Ensure the dough comes to room temperature before you proceed to rolling and grilling. This allows the gluten to relax and the yeast to reactivate, making the dough much easier to roll out and ensuring a tender final product. Once at room temperature, continue with step 5 (rolling out flat) and onward to cook your fresh, homemade grilled flatbread.
Get the Full Recipe for Grilled Flatbread
This recipe was originally published July 2010, and has been updated for clarity and enhanced instructions.

Grilled Flatbread
Pin Recipe
Leave a Review
Ingredients
- 2 ¼ teaspoons active-dry yeast or instant yeast (1 envelope, 7 grams)
- 1 cup warm water
- ¼ cup milk , whole or 2% (57 grams)
- 3 cups bread flour , plus more as needed (360 grams)
- 1 tablespoon granulated sugar
- 2 teaspoons salt
- ¼ cup melted butter or olive oil (56 grams)
- Chopped chives or parsley , for garnish (optional)
Equipment
Instructions
-
Combine the yeast and warm water in a small bowl. Stir gently and let sit for 5 minutes until the mixture becomes foamy and bubbly, indicating the yeast is active.
-
Add the activated yeast mixture to a large bowl (or the bowl of a stand mixer) along with the milk, flour, sugar, and salt. Combine with a spoon or a dough whisk until a shaggy dough forms. Knead the dough by hand for 8-10 minutes, or with an electric mixer fitted with a dough hook on low speed for 5-7 minutes. Continue until the dough is soft, smooth, elastic, and mostly clears the edges of the bowl. If needed, add more bread flour a few tablespoons at a time to achieve the right consistency (the dough should be very soft and slightly tacky, but it shouldn’t stick firmly to your fingers).
-
Lightly grease the bowl, place the dough in it, turn to coat, then cover with plastic wrap or a clean kitchen towel. Let the dough rise in a warm, draft-free spot for 30-60 minutes, or until noticeably puffy and slightly increased in size.
-
While the dough rests, preheat your outdoor grill or a heavy-bottomed cast iron skillet to medium-high heat. Ensure grill grates are clean and lightly oiled.
-
Gently punch down the dough to release any gases, then turn it out onto a lightly floured surface. Divide the dough into 8 equal portions (or 6 for larger flatbreads). Roll each portion out as thinly as you can with a rolling pin, aiming for about 1/8 inch thickness. Use greased or parchment-lined sheet pans to store rolled out flatbreads as you work, keeping them covered with plastic wrap to prevent drying out.
-
Brush one side of a rolled-out dough disk with the melted butter or olive oil. Immediately place that brushed side face down onto the preheated grill or cast iron pan. Cook for about 3-4 minutes, or until the surface shows bubbles and the bottom is beautifully golden brown with some char marks (watch carefully to prevent burning!). While cooking, brush the uncooked side with more butter or olive oil. Flip the flatbread and cook for another 2-3 minutes on the second side, until cooked through and golden. Cook the flatbreads in batches as needed to ensure even cooking.
-
Serve immediately for the best flavor and texture. For an extra touch, brush with a little more melted butter or olive oil as soon as it comes off the grill, and sprinkle with fresh chopped parsley or chives, if desired. Refer to the “Flavor Variations” section for more delicious ideas to customize your flatbread.
Notes
- This recipe yields 8 single-serving portions of grilled flatbread. If you desire larger pieces of flatbread, simply divide the dough into 6 larger balls instead of 8.
- For precise and equal portions, use a bench scraper. First, cut the dough in half, then cut each of those halves in half again to create 4 pieces. Finally, halve each of those four pieces to achieve 8 total, evenly sized portions.
- It’s crucial to brush the rolled-out flatbread with butter or oil just before you place it on the grill or skillet. If you brush them too far in advance, the dough can become sticky and much harder to handle, potentially tearing or sticking to your work surface.
- Consider these delicious flavor variations to add to your dough or sprinkle on top before serving:
- **Savory Herbs & Garlic:** Mix up to 1 tablespoon of finely chopped fresh or dried herbs (like rosemary, thyme, or oregano) or minced garlic into the dough.
- **Rich & Tangy Add-ins:** Incorporate up to 1/4 cup of chopped sun-dried tomatoes, chopped olives (such as Kalamata), or finely grated hard cheeses like Parmesan or Asiago into the dough.
- **Be Creative!** Don’t hesitate to experiment with your own favorite spices, seeds, or other mix-ins to personalize your homemade flatbread.
