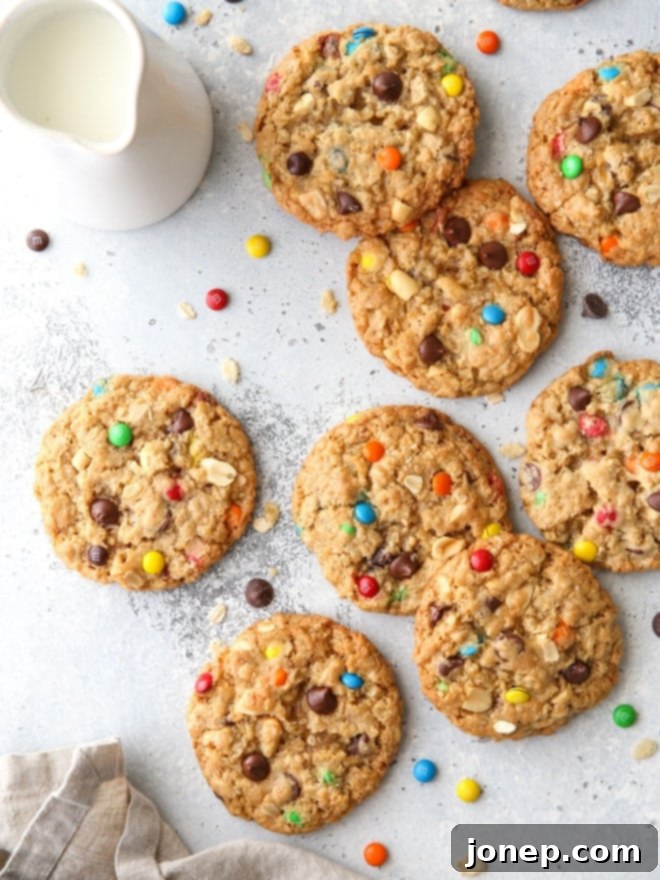
The Ultimate Guide to Extra-Large Monster Cookies: Chewy, Chunky & Customizable
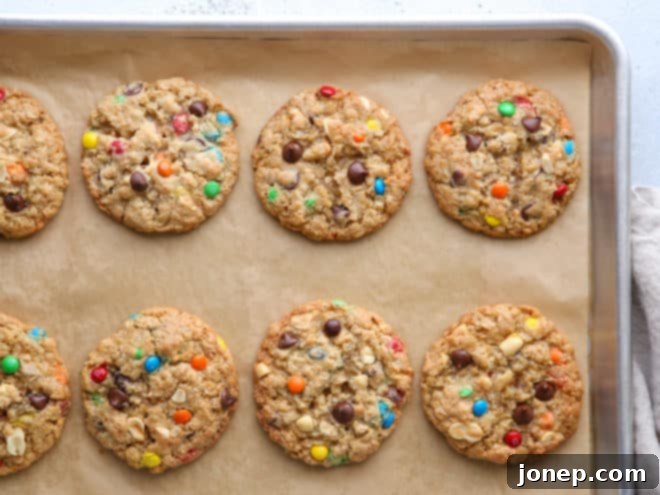
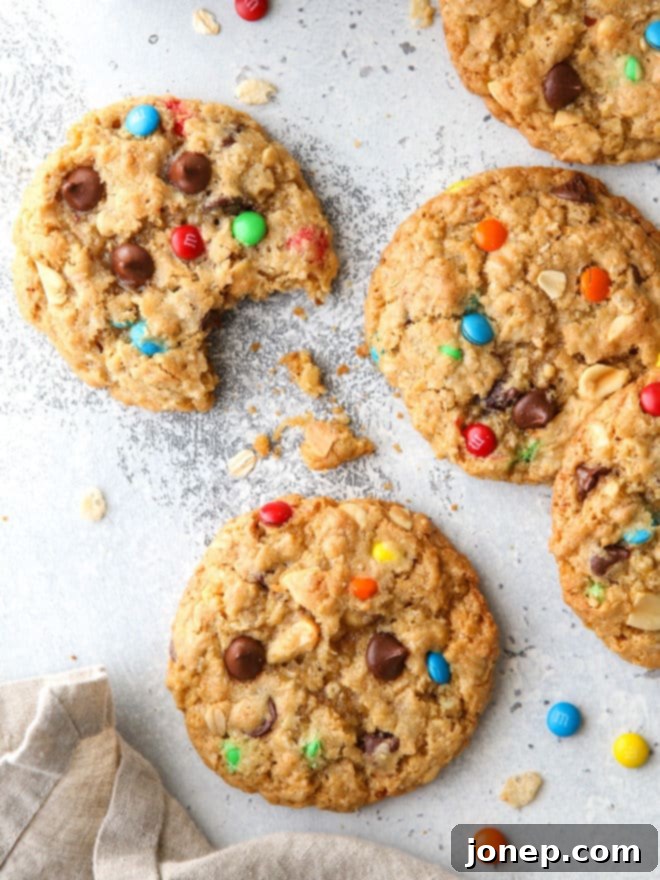
Get ready for the ultimate cookie experience! These extra-large monster cookies are a celebration of everything delicious, packed to the brim with a delightful mix of chocolate chips, vibrant M&M’s, crunchy peanuts, hearty rolled oats, and crispy rice cereal. Each bite offers a symphony of textures and flavors, making them an instant favorite for any cookie lover.
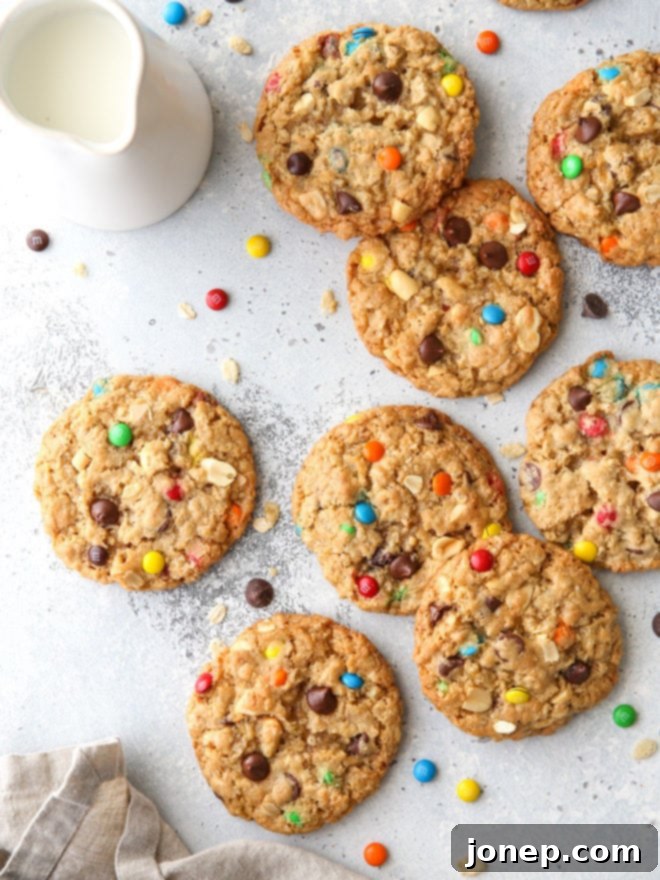
While classic chocolate chip cookies hold a special place in our hearts and are a regular fixture in our kitchen, sometimes it’s fun to shake things up. Don’t you agree? There are those days when you just want to unleash your inner baking monster, raiding the pantry and tossing in all the tempting goodies you can find – nuts, candies, cereals, and everything in between. That’s precisely when monster cookies come to the rescue!
These magnificent monster cookies are designed to be a “kitchen sink” kind of treat, incorporating a medley of your favorite mix-ins for an unbelievably tasty result. While their versatility means you can truly customize them to your heart’s content (and we’ll explore more variations later!), my go-to combination delivers a truly unforgettable experience. Imagine thick, chewy cookies boasting a perfect balance of sweet and salty, thanks to the delightful crunch of chocolate chips, the colorful pop of mini M&M’s, the nutty richness of peanuts, the wholesome chewiness of rolled oats, and the unexpected lightness of crispy rice cereal. It’s a combination that guarantees a fun flavor profile and an absolutely irresistible texture!
What Exactly Are Monster Cookies?
If you’re new to the world of monster cookies, prepare to be amazed. They are aptly named because they are truly the “monsters” of the cookie realm – a robust, flavorful fusion of various cookie recipes rolled into one colossal treat. Think of them as an upgraded, more exciting version of peanut butter oatmeal cookies with chocolate, but with so much more character and textural intrigue!
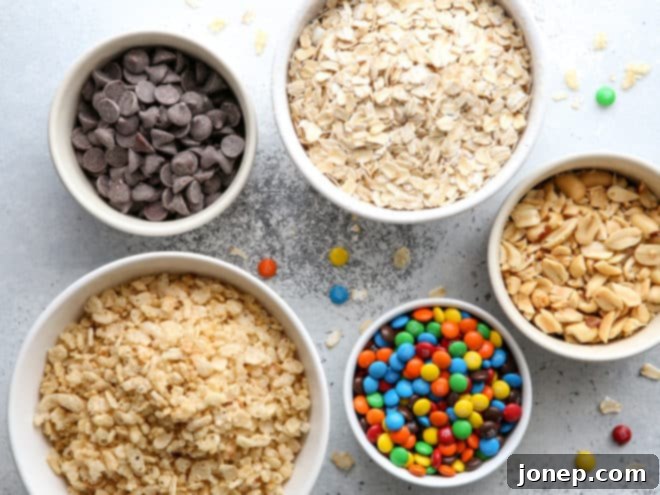
The beauty of monster cookies lies in their adaptability, allowing for a wide array of mix-ins. However, a classic monster cookie typically features a harmonious blend of the following elements, designed to create a wonderfully chewy, chunky, and satisfying cookie:
- Old-Fashioned Rolled Oats: These provide a delightful chewiness and a wholesome, earthy flavor that forms the backbone of the cookie. They also help bind the cookie and add structure.
- Semisweet Chocolate Chips: A classic cookie staple, chocolate chips deliver pockets of rich, melty chocolate goodness that everyone loves. Their semi-sweetness perfectly balances the other ingredients.
- Mini M&M’s: Not only do these add a burst of vibrant color to your cookies, but their candy shell provides a satisfying crunch and a sweet, chocolatey flavor. The mini size ensures they’re distributed evenly throughout.
- Chopped Peanuts: For a salty counterpoint and an irresistible crunch, chopped peanuts are essential. They bring a nutty depth that complements the sweetness of the chocolate and M&M’s beautifully.
- Crispy Rice Cereal: This might seem like an unusual addition, but it’s a game-changer! Crispy rice cereal adds an incredible lightness and a unique, airy crunch that elevates the texture of these monster cookies, preventing them from being overly dense.
Together, these ingredients create a cookie that is anything but ordinary. It’s a delightful adventure for your taste buds with every bite!
Creative Variations and Smart Substitutions
One of the most exciting aspects of monster cookies is their incredible versatility. They truly embody the spirit of “clean out the pantry” baking, encouraging you to experiment with whatever delicious ingredients you have on hand. Don’t feel limited by the original recipe; instead, let it inspire your own creative cookie concoctions! Here are some fantastic ideas to get you started, allowing you to tailor your monster cookies to your exact cravings or available ingredients:
- Chocolate Chips Alternatives: While semisweet chocolate chips are a classic, feel free to swap them out or combine them with other flavorful chips. Consider peanut butter chips for an extra nutty kick, butterscotch chips for a rich, caramel-like sweetness, or white chocolate chips for a creamy, milder chocolate flavor. A mix of two or three types can create a complex and exciting profile.
- M&M’s and Candy Swaps: If mini M&M’s aren’t available, regular M&M’s work just as well, providing a larger burst of color and chocolate. For a different flavor, try Reese’s Pieces for a delightful peanut butter and chocolate combination, or even chopped candy bars like Snickers or Twix for an extra indulgent treat. Seasonal M&M’s can also add a festive touch!
- Nutty Alternatives: Peanuts offer a wonderful crunch and salty note, but other nuts can be equally delicious. Pecans lend a buttery, slightly sweet flavor, walnuts add an earthy bitterness, and almonds provide a delicate crunch. For those with nut allergies, sunflower seeds or pumpkin seeds can be a great substitute, offering a similar crunch without the allergens.
- Add Shredded Coconut: To introduce a tropical flair and another layer of chewiness, try reducing the amount of crispy rice cereal slightly and adding shredded coconut. Toasted coconut would add an even deeper, more aromatic flavor.
- Dried Fruits: For a chewy, fruity element, consider adding dried cranberries, raisins, or chopped apricots. These can add a lovely tang and natural sweetness.
- Pretzels: If you love a salty-sweet combo, crushed pretzels can replace some of the crispy rice cereal or peanuts, adding an extra layer of crunch and a savory punch.
- Spices: A pinch of cinnamon, nutmeg, or even a touch of pumpkin pie spice can add warmth and complexity to your monster cookies, especially if you’re leaning towards more autumnal mix-ins like dried cranberries or pecans.
The possibilities are truly endless! Don’t be afraid to experiment and discover your own signature monster cookie blend.
Essential Cookie Baking Tips for Perfection
Baking delicious cookies is an art, but with a few key tips, you can ensure your monster cookies turn out perfectly every time. These fundamental guidelines will help you achieve the ideal texture, shape, and flavor:
- Room Temperature Butter is Crucial: Starting with butter that has softened to room temperature is paramount. It should be pliable enough for your finger to make a slight indent when pressed, but not so warm that it’s at all melted or greasy. Butter at the correct temperature creams properly with sugar, incorporating air and creating a light, fluffy dough that leads to tender cookies. If your butter is too cold, it won’t cream properly; if it’s too warm, it can lead to greasy, spreading cookies. For quick methods, see my 4 ways to bring butter to room temperature.
- Parchment Paper or Silicone Mats are Your Best Friends: For effortless baking and even easier cleanup, always line your sheet pans with pre-cut parchment sheets or silicone baking mats. They prevent sticking, promote even browning, and make transferring baked cookies a breeze. Say goodbye to scrubbing sticky pans!
- Shape Your Cookies Immediately After Baking: If your cookies bake up in an irregular shape, don’t fret! As soon as you remove them from the oven, while they are still warm and malleable, use a round cookie cutter slightly larger than your cookie, or even the back of a spoon, to gently push the edges back into a perfectly round shape. This trick works wonders for presentation.
- Chilling Dough (Optional, but Recommended for Thicker Cookies): This monster cookie recipe is designed to be baked straight from the mixer, offering delicious results without the need for chilling. However, if you prefer taller, thicker cookies with a chewier center, take the extra step of shaping your dough balls and chilling them on the sheet pan for 30 minutes before baking. The cold dough takes longer to spread in the oven, resulting in a more compact, elevated cookie. Both methods yield fantastic cookies, so choose what suits your preference!
- Proper Storage for Freshness: To keep your monster cookies at their best, store them in an airtight container at room temperature. They will remain wonderfully fresh and chewy for several days, perfect for enjoying throughout the week.
- Prep Ahead and Freezing Dough: Monster cookies are excellent for meal prepping. If you want to bake only a portion of the dough now and save the rest for later, or prepare a batch in advance, you can easily freeze the cookie dough. Portion the dough into balls, then freeze them on a baking sheet until solid before transferring them to an airtight freezer bag. You can then bake them from frozen (adding a minute or two to the baking time). For detailed instructions, refer to my tips for how to store and freeze cookie dough.
baking tip:How to Keep Your Cookies From Spreading
There’s nothing quite as disheartening as pulling a tray of what you hoped would be perfect, plump cookies out of the oven, only to find them flat, thin, and greasy. This is a common baking challenge, and rest assured, it happens to the best of us! Cookie spreading can be attributed to a variety of factors, but here are the most frequent culprits and how to avoid them:
- The Temperature of the Butter: This is, without a doubt, the number one reason cookies spread excessively. If your recipe calls for room temperature butter, ensure it’s precisely that – soft enough to leave a slight indent when pressed, but not oily or melting. Overly soft or melted butter will cause your dough to lose its structure too quickly in the oven, leading to flat pancakes instead of puffy cookies.
- Over-Creaming the Butter and Sugar: While creaming butter and sugar together is essential for light, tender cookies, overbeating can introduce too much air into the mixture. When baked, this excess air expands rapidly and then collapses, causing the cookies to spread and become dense. Cream until just light and fluffy, usually 1-2 minutes.
- A Greased Cookie Sheet: While it might seem intuitive to grease your cookie sheet to prevent sticking, for many cookie recipes, this actually encourages spreading. The added grease can make the cookie dough slide and flatten more rapidly. Instead, always opt for parchment paper or a silicone baking mat to prevent sticking without promoting spread.
- Too Little Flour: An insufficient amount of flour relative to the wet ingredients can result in a dough that is too wet and loose, making it prone to spreading. Always measure your flour accurately, preferably by weight for consistency.
- Oven Temperature Issues: An oven that isn’t hot enough can cause cookies to spread before they have a chance to set. Conversely, an oven that’s too hot might brown the edges too quickly while the center remains raw. Make sure your oven is preheated thoroughly and consider using an oven thermometer for accuracy.
So, what if you’re in the midst of baking a batch, and you notice your cookies spreading more than desired? Don’t panic! A quick fix is to remove the sheet pan from the oven and, if possible, transfer the dough balls to a fresh, ungreased (or parchment-lined) cold sheet pan. Chill the dough on this pan for 10-15 minutes in the refrigerator before returning them to the oven. This rapid cooling will help solidify the butter in the dough, slowing down the spreading process and giving your cookies a better chance to hold their shape.
More Outrageous Cookie Recipes You’ll Love
If you’ve fallen in love with the sheer joy of these monster cookies, then you’re ready to explore more extraordinary cookie creations. Here are a few other irresistible recipes that push the boundaries of deliciousness and are sure to become new favorites:
- One Giant Peanut Butter Chocolate Chip Cookie: For those days when one cookie is simply not enough, this colossal treat delivers maximum peanut butter and chocolate flavor in a single, impressive serving. It’s an experience in itself!
- Caramel-Stuffed Chocolate Chip Cookies: Take classic chocolate chip cookies to an indulgent new level with a gooey, molten caramel center. Each bite is a delightful surprise, combining chewiness with luxurious sweetness.
- Chocolate Marshmallow Cookies: Imagine soft, rich chocolate cookies topped with fluffy marshmallows and then draped in even more chocolate. These are a dream for anyone who loves s’mores or chocolate and marshmallow together.
Watch the Video: How to Make Monster Cookies
Prefer to see the baking process in action? Watch this helpful video tutorial to guide you through each step of making these incredible monster cookies. Visual cues can make all the difference, especially when combining so many delightful ingredients!
Shop Tools for This Recipe
To make your baking experience as smooth and enjoyable as possible, here are some recommended tools that will help you whip up these monster cookies with ease. From essential mixing equipment to handy gadgets, these items are chosen to ensure the best results:

Monster Cookies
Pin Recipe
Leave a Review
Ingredients
- ¾ cup (85 grams) unsalted butter , at room temperature
- 1 cup (215 grams) packed light or dark brown sugar
- ½ cup (100 grams) granulated sugar
- 2 large eggs
- 1 tablespoon vanilla extract
- 2 cups (240 grams) all-purpose flour
- ½ teaspoons salt
- 1 teaspoon baking powder
- ½ teaspoon baking soda
- 1 ½ cups (150 grams) rolled oats
- ½ cup (108 grams) mini M&Ms
- ¾ cup (128 grams) semisweet chocolate chips
- ½ cup (70 grams) peanuts , chopped
- 2 ¼ cups (70 grams) crispy rice cereal
Instructions
-
Preheat oven to 375°F. Line a sheet pan with parchment paper or a silicone baking mat.
-
In the bowl of a stand mixer fitted with a paddle attachment, beat together the butter and sugars until light and creamy, about 1-2 minutes. Add the eggs one at a time, followed by the vanilla and mix until combined.
-
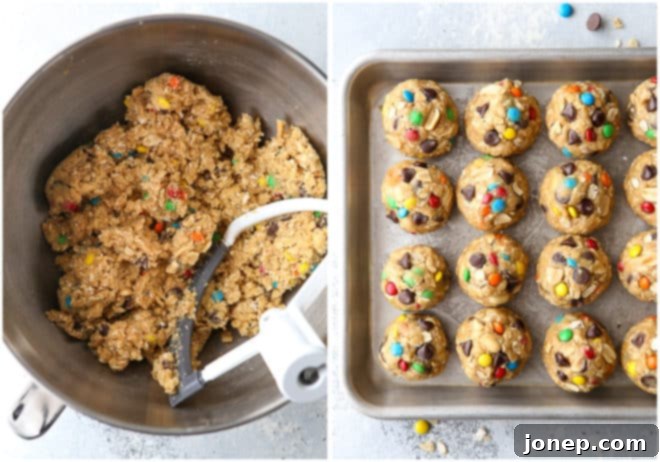
Add the flour, salt, baking powder, and baking soda and mix on low until just combined. Add the oats, chips, and nuts, M&Ms, and crispy rice cereal and mix until just combined.
-
Drop large rounds (I use a #20 – 3 tablespoon cookie scoop) onto the prepared sheet pan, 6-8 per pan. Bake until edges are golden brown and centers are just barely set, about 12 minutes.
-
Let cool on the sheet for 5 minutes, then transfer to a wire rack to cool completely. Store in an airtight container for several days.
