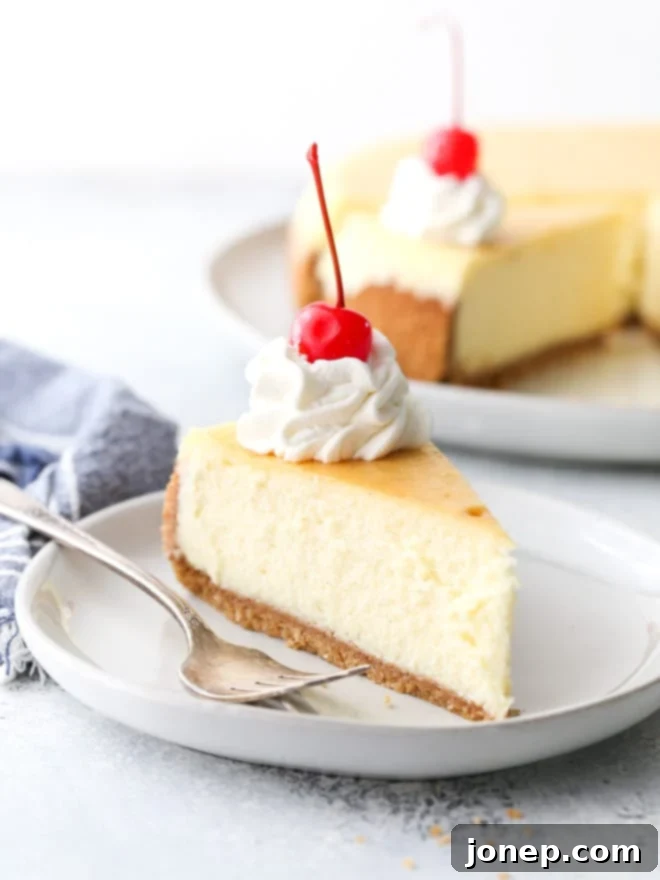
Mastering the Water Bath: Your Essential Guide to Silky Smooth, Crack-Free Cheesecake
Imagine slicing into a cheesecake so perfectly smooth, its surface unblemished, its texture incredibly creamy, and its taste absolutely divine. This isn’t just a dream for experienced bakers; it’s an achievable reality for everyone, and the secret lies in one simple technique: the water bath. Often perceived as an intimidating or complicated step, using a water bath is, in fact, incredibly straightforward and absolutely essential for achieving professional-level results when baking delicate desserts like cheesecake. Let me guide you through the process, demystifying the water bath and showing you how to make an easy water bath for cheesecake that guarantees perfection every time.
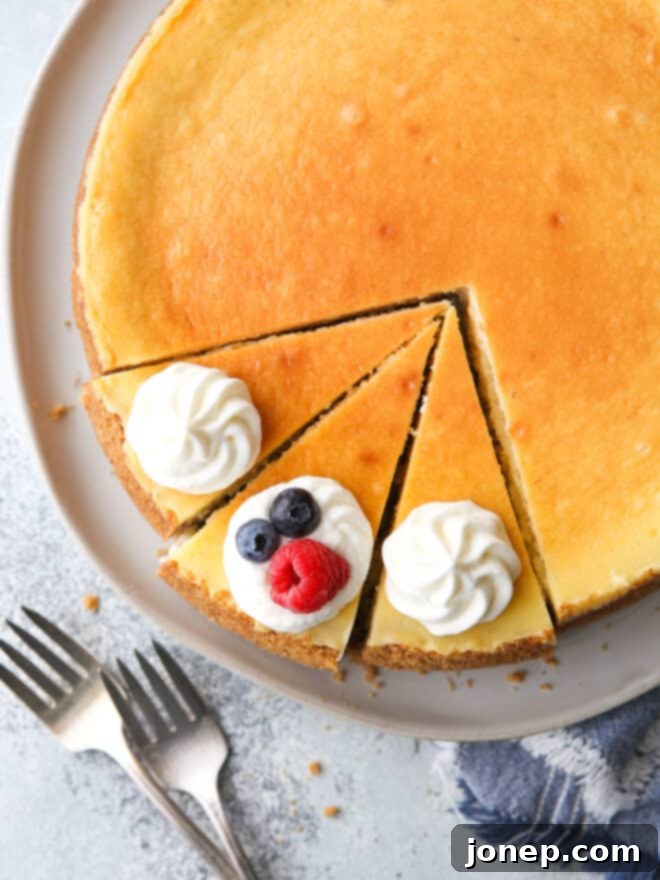
At its core, a water bath, also known by its sophisticated French name “bain-marie,” is a method of baking a dish within a larger pan of hot water. This culinary technique creates a remarkably gentle and moist cooking environment inside your oven, which is crucial for the delicate structure of egg-rich custards and cheesecakes. The steam generated by the hot water prevents the cheesecake from drying out too quickly, ensuring it bakes evenly and gradually. This slow, steady cooking process allows the filling to set beautifully from the edges to the center, leading to that coveted silky smooth texture and a pristine, crack-free surface. Without this essential step, cheesecakes are far more prone to cracking, drying out, and developing a less desirable crumbly texture. Don’t let the idea of it intimidate you; mastering the water bath for cheesecake is a game-changer you’ll master in no time!
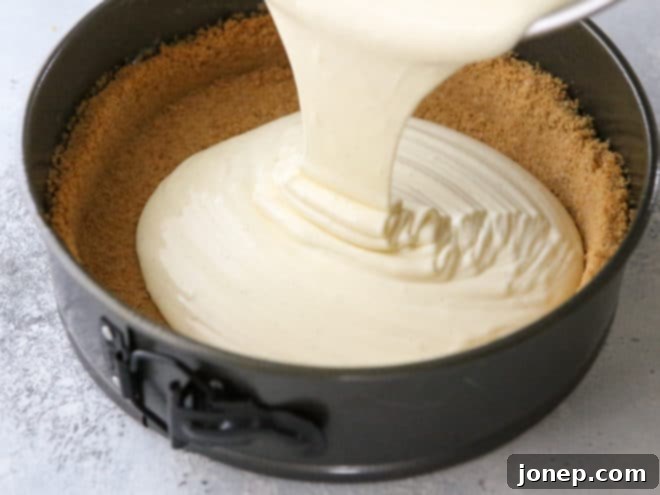
Table of Contents
- What is a Water Bath (Bain-Marie)?
- Why Use a Water Bath for Cheesecake?
- Essential Materials You’ll Need
- How to Make an Easy Water Bath for Cheesecake: Step-by-Step
- Troubleshooting: What to Do if My Cheesecake Cracks?
- Pro Tips for Cheesecake Perfection
- Delicious Cheesecake Recipes
What is a Water Bath (Bain-Marie)?
A “water bath,” often referred to as a “bain-marie” in professional kitchens, is a cooking technique where a container of food is placed into a larger pan filled with hot water. This entire setup is then put into an oven or sometimes heated on a stovetop. The fundamental purpose of the water bath is to create a controlled, moist, and gentle heat environment, which is vastly different from direct, dry oven heat. Instead of the food being exposed to potentially harsh, fluctuating temperatures, it cooks while being surrounded by the steady, even warmth of the water.
The science behind this method is quite simple yet incredibly effective. Water has a high thermal mass and heats and cools much more slowly than air. By surrounding your cheesecake with hot water, you ensure that the temperature around it remains consistent and never exceeds the boiling point of water (212°F or 100°C). This indirect heating prevents rapid temperature fluctuations, which are often the culprits behind cracked surfaces and unevenly cooked textures in delicate dishes. Furthermore, the steam generated by the hot water saturates the oven air, significantly increasing humidity. This moist atmosphere is absolutely critical for preventing the surface of your cheesecake from drying out prematurely and forming a tough “skin,” which can then lead to unsightly cracks as the cheesecake cools and contracts.
Why Use a Water Bath for Cheesecake?
Cheesecakes, with their rich, egg-based fillings, are particularly susceptible to the harshness of dry oven heat. Understanding precisely why a water bath is indispensable for cheesecake success will motivate you to embrace this simple technique:
- Ensures Even, Gentle Baking: The water bath acts as a perfect thermal buffer, distributing heat evenly around the cheesecake. This prevents the delicate edges from baking faster and drying out before the center has a chance to cook through. The result is a cheesecake that sets uniformly, from rim to core, with a consistent, smooth texture.
- Prevents Unsightly Cracks: This is arguably the most celebrated benefit. Cheesecakes commonly crack due to extreme temperature changes or overbaking, which causes the filling to expand and contract too rapidly. The moist, gentle heat of a water bath minimizes this thermal stress, allowing the cheesecake to set smoothly without developing surface fissures. It helps maintain the integrity of the custard-like structure.
- Promotes a Moist and Creamy Texture: The high humidity in the oven, a direct result of the water bath, prevents the cheesecake’s surface from drying out and forming a firm “skin.” This is crucial for achieving that signature velvety, melt-in-your-mouth creamy texture that defines a truly exceptional cheesecake. Without it, your cheesecake might be denser or have a dryer consistency.
- Stabilizes Oven Temperature: As mentioned, water heats and cools slowly. This property helps to stabilize the temperature around your cheesecake, protecting it from minor fluctuations that might occur within your oven. This consistent environment is ideal for the slow, controlled coagulation of the egg proteins in the cheesecake batter.
Beyond cheesecakes, this gentle cooking method is also perfect for other delicate egg-based dishes such as crème brûlée, flan, custards, mousses, and even certain pâtés or terrines, where a smooth, stable set and moist finish are desired.
Essential Materials You’ll Need
Rest assured, you won’t need any highly specialized or expensive equipment for a water bath. Most of these items are likely already staples in your well-stocked kitchen. (Affiliate links are provided below for your convenience if you wish to purchase quality options or upgrade your existing gear):
- 9×3-inch Springform Pan (or similar size): This is the gold standard for baking cheesecakes due to its removable sides, which allow for incredibly easy release and stunning presentation without needing to invert the cake. However, springform pans are notorious for not being perfectly airtight, meaning they are prone to leaking water into your cheesecake. This makes a reliable waterproof barrier an absolutely critical component of your water bath setup. If you don’t have a springform, a standard round cake pan can be used, but turning out the cheesecake will be significantly more challenging and may affect its presentation.
- Large Roasting Pan: This pan will serve as the outer vessel for your hot water bath. It needs to be substantially larger than your springform pan, allowing for at least an inch or two of space around the springform on all sides. Crucially, it must also be deep enough to hold 1 to 2 inches of water without overflowing. A standard turkey roasting pan, a large lasagna pan, or a deep stockpot usually works perfectly.
- A Reliable Waterproof Barrier: This is arguably the most crucial step to ensure your cheesecake’s crust remains perfectly crisp and not soggy. You absolutely must prevent water from seeping into your springform pan. Choose one of these highly effective and proven methods:
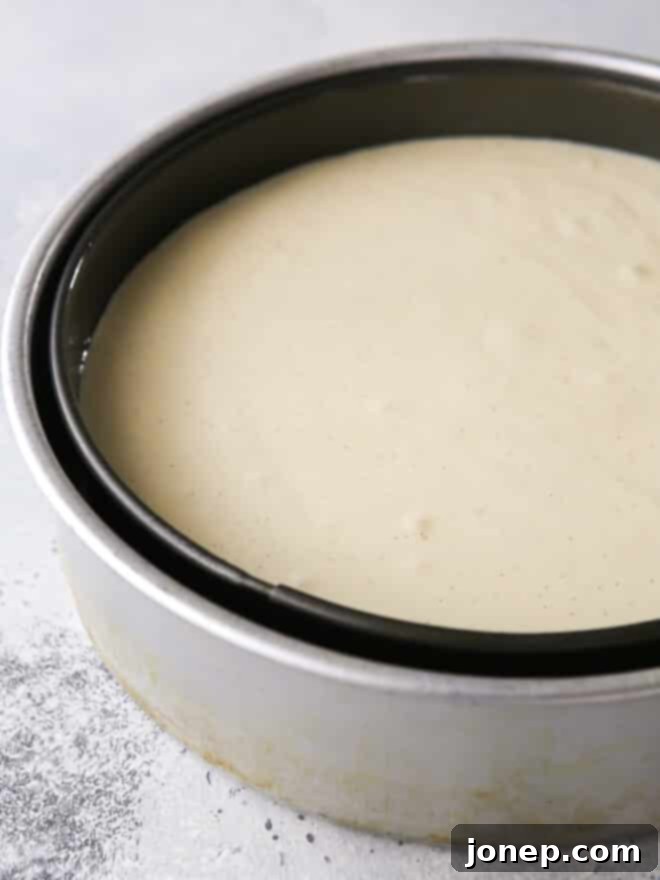
- My Preferred Method: The Pan-in-Pan Technique: For unparalleled reliability, place your 9-inch springform pan (after the crust and filling are added) inside a 10-inch round cake pan. This creates an airtight seal and an air gap between the two pans, completely preventing any direct water contact with your springform. It’s incredibly reliable, reusable, and eliminates the fuss and uncertainty of wrapping foil. (Watch a quick video on why it works so great here!)
- Heavy-Duty Aluminum Foil: If you don’t have an extra cake pan, several layers of wide, heavy-duty aluminum foil can be used. You will need at least two, and preferably three, sheets of wide, heavy-duty foil. Wrap them securely around the bottom and up the sides of your springform pan, ensuring every seam is tightly crimped and there are no gaps or tears. While generally effective, foil can sometimes develop small tears or leaks, so diligence in wrapping is key. (See a video on how to properly foil wrap here)
- Slow Cooker Plastic Liner Bag: Some bakers find great success using a large, heavy-duty slow cooker liner bag. Simply place your springform pan inside the bag, gather the top, and tie it tightly above the cheesecake level. This provides a robust, pre-formed barrier against water intrusion. (Learn more about this method here)
- Kettle or Pot for Hot Water: You’ll need a convenient way to heat water just before adding it to the roasting pan in the oven. A standard tea kettle is perfect for this, or you can simply heat water in a pot on your stovetop. Using hot water (not necessarily boiling, but hot tap water or just-simmered) is better than cold, as it helps prevent a significant drop in oven temperature when introduced.
How to Make an Easy Water Bath for Cheesecake: Step-by-Step
Following these precise steps will ensure a perfectly baked cheesecake with an irresistibly smooth, crack-free top and a luxurious creamy texture. It’s truly simpler than you might imagine!
- Prepare Your Cheesecake: Begin by preparing your cheesecake crust and then the creamy filling according to your chosen recipe. Take care to ensure your cheesecake filling is perfectly smooth and free of any lumps, as this contributes to the final texture. (You can find my classic cheesecake recipe here for a fantastic and reliable starting point.)
- Protect Your Springform Pan (Crucial Step): This step is paramount for preventing a soggy crust.
- If using the “Pan-in-Pan” method or a slow cooker liner: Fill your springform pan with the cheesecake batter. Then, carefully place the filled springform pan into the larger 10-inch cake pan, or snugly inside the slow cooker liner bag, ensuring it’s sealed securely above the cheesecake level.
- If using heavy-duty foil: Wrap your empty springform pan (after preparing the crust but *before* adding the filling) with at least 2-3 layers of wide, heavy-duty aluminum foil. Crimp the foil tightly around the bottom and extend it well up the sides, creating a robust, watertight barrier. Then, carefully pour your cheesecake filling into the protected pan. Double-check for any potential weak spots in the foil.
- Assemble the Bath: Place your prepared and thoroughly protected springform pan (which now contains your delicious cheesecake) gently into the center of your large roasting pan. Ensure there’s a little space around all sides for even heat distribution.
- Transfer to the Oven: Carefully place the entire roasting pan (with the cheesecake nested inside) onto the middle rack of your preheated oven. It is significantly safer and easier to add the hot water once the pan is already in the oven, as this prevents awkward lifting and minimizes the risk of spills or burns from carrying a heavy pan full of hot water.
- Pour Hot Water: Once the roasting pan is securely positioned in the oven, carefully pour hot (but not vigorously boiling) water into the roasting pan. The water should come up about 1 to 2 inches along the sides of your springform pan. Use a kettle or a measuring cup with a spout for easy, controlled, and safe pouring. Be extremely cautious not to splash any water directly into the cheesecake batter itself.
- Bake and Monitor: Close the oven door gently and bake your cheesecake according to your recipe’s specified time and temperature. The water bath will now work its magic, maintaining that essential moist, even baking environment. It’s vital to resist the urge to open the oven door frequently, as sudden temperature drops can still disrupt the delicate setting process and potentially lead to cracks.
- Cooling is Key (Avert Cracks Post-Baking): Once baked (the edges should appear set, but the very center, about 2-3 inches in diameter, should still have a slight jiggle when you gently shake the pan), turn off the oven. For an extra measure against cracking, prop the oven door open slightly and allow the cheesecake to cool inside the oven for at least an hour. This crucial gradual cooling prevents thermal shock, which is a common cause of cracks after the baking process.
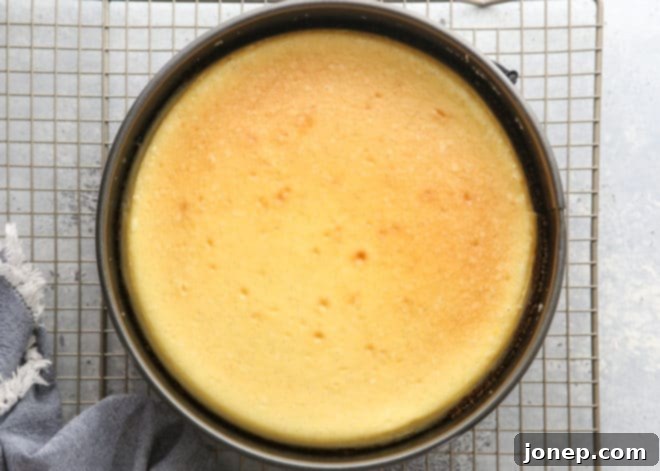
- Final Cooling and Chilling: Carefully remove the roasting pan from the oven, then gently lift the springform pan out of the water bath. Remove your waterproof barrier (whether it’s the outer cake pan, foil, or liner). Place the cheesecake on a wire rack to cool completely at room temperature, which can take several hours, before transferring it to the refrigerator. Chill the cheesecake for at least 4-6 hours, or preferably overnight. This final, thorough chilling is absolutely essential for the cheesecake to firm up, allow its flavors to meld, and achieve its optimal, rich texture.
That’s it! Following these detailed steps for how to make a water bath will transform your cheesecakes from merely good to truly exceptional. The effort is minimal compared to the incredibly silky smooth, exquisitely creamy, and perfectly crack-free results you’ll achieve. You’ll wonder why you ever hesitated!
Troubleshooting: What to Do if My Cheesecake Cracks?
Even with the best precautions, including using a water bath, sometimes a cheesecake still develops a crack. It can be frustrating, especially after putting in all that effort, but please, do not despair! A cracked cheesecake is still 100% delicious, and there are many delightful and creative ways to conceal any imperfections, ensuring no one ever has to know. Cracks often occur due to factors like slight overbaking (which dries out the edges and causes them to pull away and crack), cooling too quickly, or minor, unavoidable fluctuations in oven temperature.
The good news is that a crack affects only the appearance, not the incredible taste or creamy texture. Here are some fantastic ways to beautifully disguise any cracks and make your cheesecake presentation-ready:
- Classic Whipped Cream: A generous dollop or a full, smooth layer of freshly whipped cream is the most classic and easiest fix. You can spread it evenly over the entire top or pipe it decoratively around the edges and center.
- Vibrant Fruit Toppings: Fresh berries (strawberries, raspberries, blueberries, cherries), thinly sliced peaches, or a vibrant fruit compote can completely hide a crack while adding a beautiful burst of fresh flavor, color, and natural sweetness.
- Indulgent Chocolate Ganache or Sauce: A silky smooth, glossy chocolate sauce or a rich chocolate ganache poured evenly over the top creates a luxurious, irresistible finish that covers any flaws beautifully.
- Decadent Caramel or Butterscotch Sauce: Drizzle homemade caramel or butterscotch sauce generously for a truly decadent covering that adds another layer of flavor and visual appeal.
- Crunchy Chopped Nuts or Crushed Cookies: A sprinkle of toasted, finely chopped nuts (like pecans, walnuts, or almonds) or crushed cookies (Oreos, graham crackers, Biscoff) provides both a delightful textural contrast and excellent camouflage.
- Tangy Citrus Curd: A vibrant lemon or lime curd adds a bright, tangy contrast to the rich cheesecake and provides a smooth, opaque layer that perfectly conceals any cracks.
Remember, the taste and creamy texture of your cheesecake will remain unaffected by a small crack. Focus on the deliciousness, and let your creative toppings transform any perceived flaw into a stunning culinary achievement!
Pro Tips for Cheesecake Perfection
While the water bath is paramount for a perfectly baked, crack-free cheesecake, a few other expert tips can further elevate your cheesecake game, ensuring an outstanding dessert every time:
- Bring Ingredients to Room Temperature: This cannot be stressed enough. Ensure your cream cheese, eggs, and any other dairy ingredients are at room temperature before mixing. This helps them incorporate smoothly and evenly into the batter, preventing lumps and ensuring a uniform, velvety texture without overmixing.
- Do Not Overmix the Batter: Overmixing is a common culprit for cheesecake issues. It incorporates too much air into the batter, which can cause the cheesecake to puff up excessively in the oven and then tragically fall and crack as it cools. Mix only until the ingredients are just combined and smooth; stop as soon as any lumps of cream cheese disappear.
- Tap to Release Air Bubbles: After pouring the cheesecake batter into the prepared crust, gently tap the springform pan on your counter a few times. This simple action helps release any trapped air bubbles from the batter, contributing to an even smoother, denser texture in the final product.
- Avoid Opening the Oven Door Frequently: Resist the temptation to constantly check on your cheesecake while it’s baking. Each time you open the oven door, the internal temperature drops significantly, which can disrupt the delicate baking process and, you guessed it, potentially lead to cracks due to sudden temperature changes.
- Test for Doneness Carefully: A perfectly baked cheesecake will have set edges (about 1-2 inches from the rim), but the very center (a circle about 2-3 inches in diameter) will still have a slight, gentle jiggle when you delicately shake the pan. This indicates it’s cooked just right, as it will continue to set as it cools. Overbaking is a common cause of dry texture and cracks.
- Cool Gradually: As detailed in the step-by-step guide, allowing the cheesecake to cool slowly is critical. First, in the turned-off oven with the door propped open for an hour, then at room temperature, and finally in the refrigerator. Sudden temperature changes are a cheesecake’s worst enemy, leading to expansion and contraction that causes cracks.
- Chill Thoroughly: A cheesecake is truly at its absolute best after a full night of chilling in the refrigerator (at least 6-8 hours, preferably 12-24). This extended chilling time allows the flavors to fully meld, intensifies the creaminess, and ensures the texture firms up beautifully, making it easier to slice cleanly.
Delicious Cheesecake Recipes
Now that you’re thoroughly equipped with the knowledge and confidence to create a flawless water bath and achieve perfect cheesecake every time, it’s time to put your newfound skills to the test! Explore these incredible cheesecake recipes, each promising a delightful and satisfying baking experience. Whether you prefer a classic, fruity, or chocolatey indulgence, there’s a cheesecake here for every palate and occasion. Happy baking!
