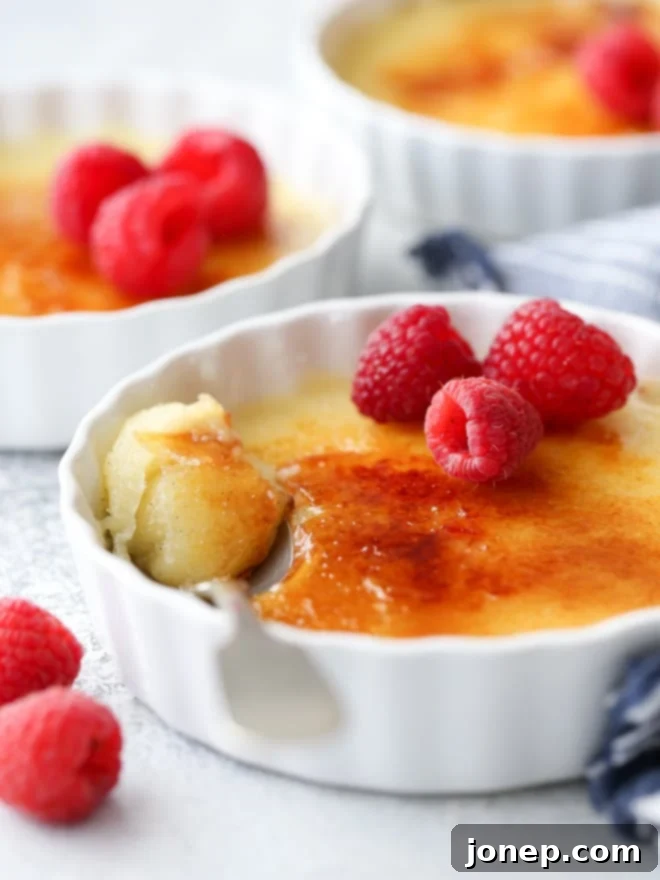
Easy No-Bake Crème Brûlée: Indulgent Dessert Without the Oven
Imagine the delight of a perfectly silky, rich crème brûlée, complete with that iconic, crackable caramelized sugar topping, all created with surprising ease right in your home kitchen. This no-bake crème brûlée recipe eliminates the need for an oven, making it an accessible and stress-free way to enjoy a traditionally complex French dessert. It’s an elegant treat that’s perfect for impressing guests at a dinner party, celebrating a special occasion, or simply indulging your sweet tooth with minimal effort.
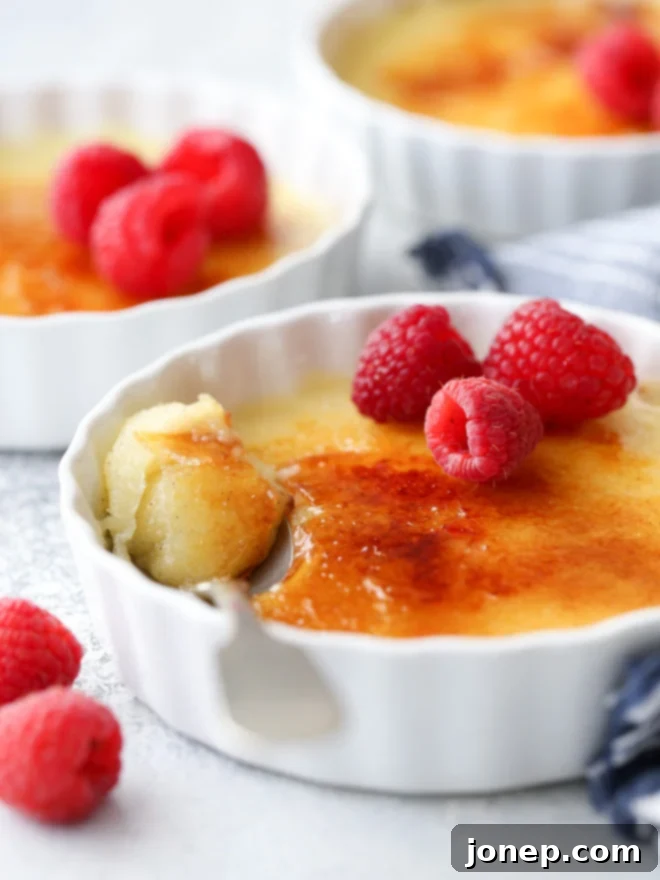
The classic crème brûlée is renowned for its smooth, delicate custard, which is traditionally baked in individual dishes within a water bath. This method, while yielding a beautiful result, often involves careful temperature control, extended baking times, and a certain level of culinary finesse that many home cooks find intimidating. It’s a labor of love often reserved for professional pastry chefs and high-end dining experiences.
However, this no-bake version changes the game entirely. We’ve taken all the luscious, rich, and intensely vanilla-flavored goodness of a traditional crème brûlée and streamlined the process, cutting down preparation time significantly. The result is a deliciously indulgent dessert that retains all the charm and sophistication of its baked counterpart, without any of the oven-related fuss. Get ready to discover your new favorite effortless dessert that tastes like it came straight from a gourmet patisserie!
Table of Contents
- How do you make no-bake crème brûlée?
- What you’ll need
- Ingredients
- Equipment
- More special homemade treats
- Easy No-Bake Crème Brûlée recipe
How do you make no-bake crème brûlée?
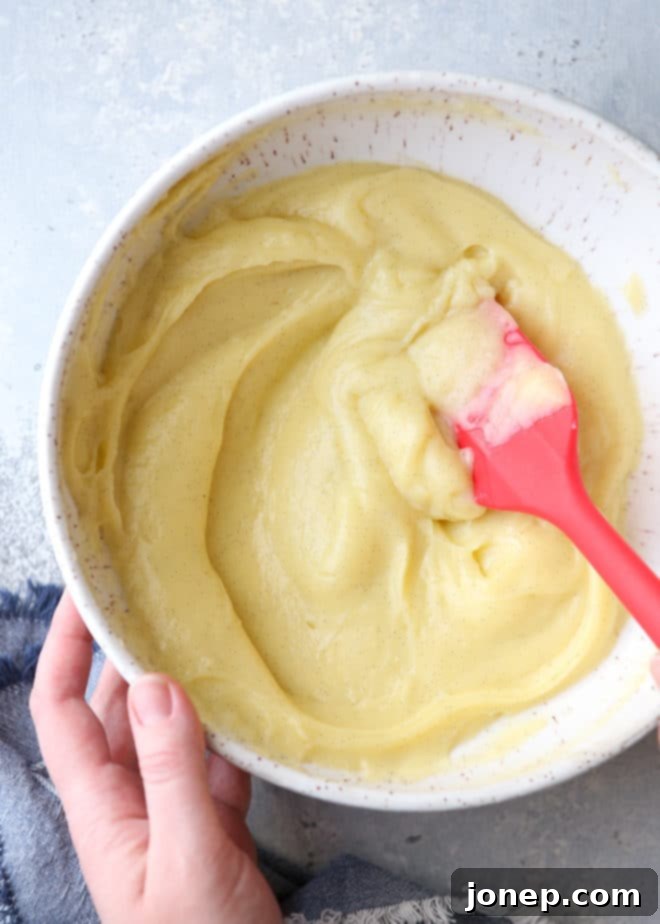
The ingenious secret behind this no-bake crème brûlée lies in a clever adaptation of the custard base. Unlike traditional recipes that rely on gentle oven baking for their set, we achieve a perfectly firm yet incredibly silky custard by incorporating additional thickening agents. A strategic combination of cornstarch and a generous amount of egg yolks works wonders, creating a rich mixture that sets beautifully when chilled, eliminating the need for a water bath or oven entirely.
While this method might initially remind you of a rich vanilla pudding, the similarities end there. Once this luxurious custard has thoroughly chilled and is crowned with its signature crisp, caramelized sugar topping, you’ll be hard-pressed to distinguish it from its baked counterpart. The mouthfeel is exquisitely rich, delightfully thick, and profoundly creamy, offering all the complex vanilla notes and velvety texture you expect from a classic crème brûlée.
If you’ve ever hesitated to tackle crème brûlée at home due to perceived difficulty or the need for special equipment, this easy no-bake version is your invitation to confidently create a truly impressive dessert. The process is remarkably straightforward: if you can separate eggs and diligently stir a pot on the stove, you absolutely possess the skills required for this recipe. It’s a fantastic opportunity to elevate your dessert repertoire with a sophisticated treat that’s surprisingly simple to execute, proving that elegance in the kitchen doesn’t always demand hours of painstaking effort. Prepare to surprise yourself with how easily you can achieve this gourmet delight!
What you’ll need to make this No-Bake Crème Brûlée
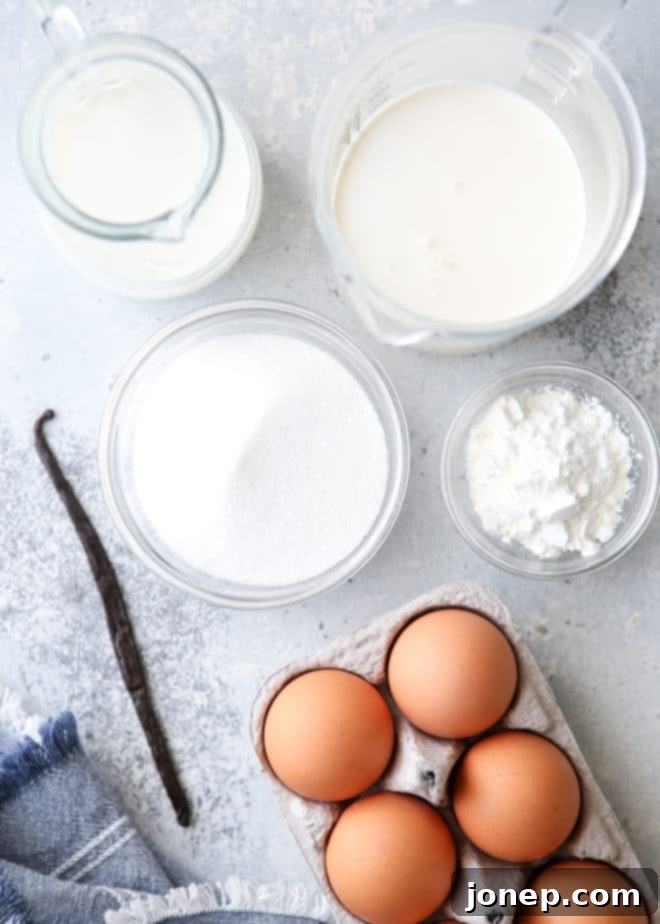
To embark on your no-bake crème brûlée journey, gathering all your necessary ingredients and equipment beforehand will make the process incredibly smooth and enjoyable. Here’s a comprehensive list to ensure you’re fully prepared to create this delectable dessert:
Ingredients for your No-Bake Crème Brûlée
- Heavy cream: This is the cornerstone of a truly rich and decadent custard. Its high-fat content provides the luxurious texture and mouthfeel that makes crème brûlée so satisfying. Do not substitute with lighter creams if you want an authentic experience.
- Whole milk: Used in conjunction with heavy cream, whole milk helps to balance the richness and contributes to the custard’s smooth, flowing consistency.
- Granulated sugar: Essential for sweetening the custard to perfection and, crucially, for creating that signature crisp, caramelized topping. You’ll need it for both parts of the recipe.
- Vanilla bean or vanilla extract: For an unparalleled, deeply aromatic vanilla flavor, a fresh vanilla bean, split lengthwise with its tiny seeds scraped out, is ideal. If a vanilla bean isn’t available, opt for a high-quality pure vanilla extract to ensure the best possible flavor profile. (See notes for substitution details).
- Egg yolks: These vibrant yolks not only contribute to the custard’s beautiful golden hue and rich flavor but also serve as a key thickening agent, working synergistically with cornstarch to create that creamy, velvety texture without baking.
- Cornstarch: The star ingredient for our no-bake magic! Cornstarch provides the necessary additional thickening power, allowing the custard to firm up perfectly as it chills. It’s vital for achieving a stable and wonderfully smooth set.
- Additional granulated sugar for brûléeing: You will need a separate, small amount of sugar exclusively for sprinkling on top of the chilled custards and caramelizing just before serving.
Essential Equipment for perfect No-Bake Crème Brûlée
While many of the tools you’ll need are standard kitchen items, a couple of specialized pieces will truly enhance your crème brûlée-making experience:
- Ceramic or porcelain ramekins: We highly recommend using wide and shallow ramekins. Their design provides a larger surface area, which is perfect for maximizing the glorious, crackable caramelized sugar crust. Individual portions also make for an elegant and impressive presentation.
- A kitchen torch: This tool is a game-changer for achieving that perfectly crisp and evenly caramelized sugar topping. A torch offers precise control over the heat, allowing you to melt and brown the sugar beautifully without inadvertently warming the delicate custard underneath. It’s highly recommended for the best results, though an alternative method is provided below.
- Fine-mesh strainer: Don’t skip this! Passing your cooked custard through a fine-mesh strainer ensures an impeccably smooth and lump-free texture, contributing to that professional finish.
- Medium, heavy-bottomed saucepan: Ideal for heating your cream mixture and cooking the custard evenly on the stovetop, preventing scorching.
- Whisk and heat-proof spatula: Essential for stirring, combining, and ensuring a smooth consistency throughout the cooking process.
baking tip:Brûlée Torching Tips for a Perfect Crust
Achieving that iconic, shatteringly crisp caramelized sugar topping is what truly makes crème brûlée special. Here are some detailed tips to help you get a perfectly golden, glassy, and delicious shell every single time, whether you’re using a torch or your oven’s broiler:
- Ensure your custard is completely chilled: This step is paramount. Your no-bake crème brûlée custard must be thoroughly cold, ideally having chilled for at least 2 hours, or even better, overnight. A well-chilled custard prevents it from warming up excessively during the brûléeing process, which could compromise its delicate, silky texture.
- Caramelize just before serving: For the absolute best crispness and “crack” when you break through the sugar, brûlée the topping right before you intend to serve. The caramelized sugar can begin to soften over time as it absorbs moisture from the air and the custard, so immediate enjoyment guarantees the most satisfying texture.
- Apply a thin, even layer of sugar: Sprinkle a generous, yet even, layer of granulated sugar across the entire surface of your chilled dessert. The key is consistent coverage for uniform caramelization. Gently tilt and rotate the ramekin to ensure the sugar is spread evenly, then tap off any excess that might be too thick.
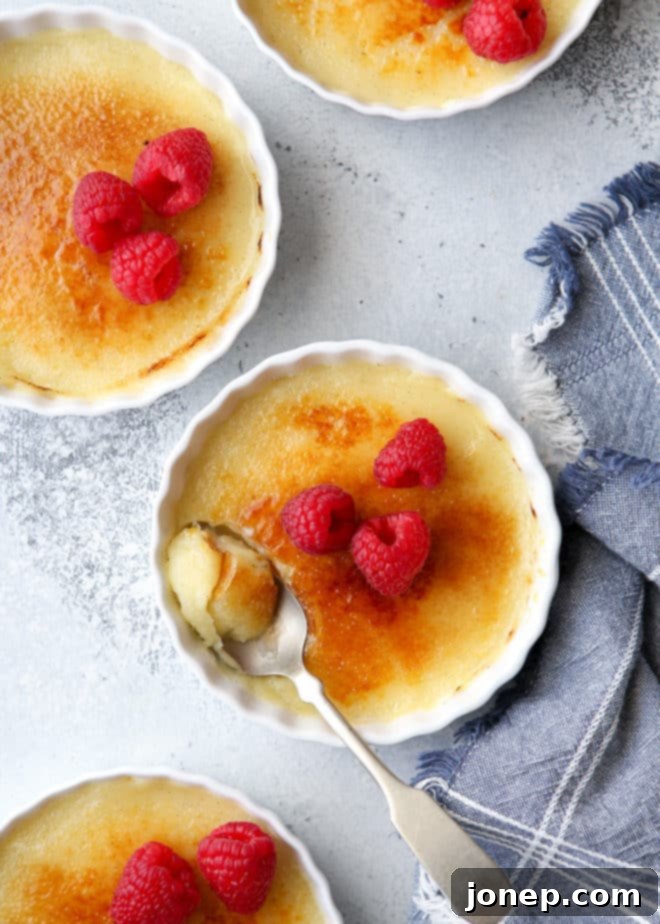
- Master the kitchen torch technique: If using a kitchen torch, hold the flame a few inches above the sugar, moving it constantly and evenly in a circular motion. You’ll observe the sugar melting, bubbling, and gradually transforming into a beautiful golden-amber color. The goal is to caramelize the sugar without burning it, which would impart a bitter taste. A rich, dark amber is perfect; avoid anything that turns black.
- Serve immediately for peak enjoyment! As soon as your sugar crust is perfectly caramelized, present your stunning no-bake crème brûlée. Savor the delightful contrast as your spoon cracks through the warm, crisp topping into the cool, creamy custard below.
No kitchen torch? Use your oven broiler as an effective alternative:
While a kitchen torch provides unparalleled precision and convenience, you can still achieve a very good caramelized topping using your oven’s broiler. The results might be less uniform, but it’s a perfectly viable option if a torch isn’t available. Here’s how:
Preheat your oven’s broiler to its highest setting. Position an oven rack on the highest possible slot, ensuring your ramekins will be directly underneath the broiler element. Carefully place your sugar-dusted ramekins on a sturdy baking sheet and slide them into the oven. This method requires constant, undivided attention! Sugar can go from perfectly golden to completely burnt in a matter of mere seconds. Watch continuously for the sugar to melt, bubble, and turn a rich amber color. Rotate the ramekins as needed for even browning. This process typically takes between 2 to 5 minutes. Remove them from the oven the moment the desired caramelization is achieved, as they will continue to cook slightly from residual heat. Be aware that the broiler’s intense heat might slightly warm the custard, so work quickly.
More Special Homemade Treats to Delight Your Guests
If you’ve enjoyed the simplicity and deliciousness of creating this easy no-bake crème brûlée, you’ll be thrilled to discover other impressive yet achievable desserts perfect for any occasion. These recipes offer a touch of gourmet elegance with all the warmth and charm of a homemade treat:
- Molten Chocolate Cakes for Two: A timeless romantic dessert, featuring a decadent warm, gooey chocolate center, ideal for a cozy evening.
- Chocolate Zabaglione (Chocolate Wine Sauce): A light, ethereal Italian custard, wonderfully aerated and perfect when served alongside fresh, ripe berries.
- Brownie Bottom Mini Cheesecakes: The ultimate fusion dessert, combining the chewy richness of a brownie with the creamy tang of cheesecake in delightful, bite-sized portions.
- Flourless Chocolate Almond Cake: A profoundly rich, dense, and naturally gluten-free chocolate cake that tastes incredibly luxurious, yet is surprisingly straightforward to prepare.
This recipe for Easy No-Bake Crème Brûlée was originally published in February 2014 and has been thoroughly updated with enhanced instructions, detailed tips, and improved clarity to ensure your success in the kitchen.
Easy No-Bake Crème Brûlée Recipe

Easy No-Bake Crème Brûlée
Pin Recipe
Leave a Review
Ingredients
- 1 cup (250 ml) heavy whipping cream
- ½ cup (125 ml) whole milk
- ½ cup (100 grams) granulated sugar
- 1 vanilla bean , split lengthwise (or 1 tbsp vanilla extract)
- 4 large egg yolks
- 2 tablespoons cornstarch
- Granulated sugar , for brûléeing the top
Instructions
-
1. Prepare the Cream Mixture: In a medium-sized, heavy-bottomed saucepan, combine the heavy cream, whole milk, and granulated sugar. If you are using a vanilla bean, carefully scrape the tiny, fragrant seeds from the split pod using a sharp knife and add both the seeds and the empty pod to the saucepan. Place the saucepan over medium heat and stir continuously with a whisk or spatula to ensure the sugar fully dissolves. Heat this mixture gently until you observe small bubbles forming around the edges of the pan and the mixture is visibly steaming, but do not allow it to come to a full rolling boil. Remove from heat and set aside for a moment.
-
2. Temper the Egg Yolks: In a separate medium bowl, whisk together the egg yolks and cornstarch vigorously until the mixture is smooth and pale yellow, with no lumps. This creates a stable base for tempering. Slowly and gradually, add about half of the hot cream mixture into the egg yolk mixture while whisking constantly and vigorously. This crucial step prevents the eggs from scrambling by slowly raising their temperature. Once combined, pour the tempered egg yolk mixture back into the remaining hot cream in the saucepan.
-
3. Cook the Custard: Return the saucepan with the combined mixture to medium heat. Cook, stirring constantly with a heat-proof spatula, making sure to scrape the bottom and sides of the pan to prevent sticking and ensure even cooking. Continue to stir until the mixture just comes to a gentle boil and visibly thickens to a pudding-like consistency. This process typically takes about 3 to 5 minutes. If it’s not thickening quickly enough, you can slightly increase the heat, but maintain constant stirring. Once thickened, continue to cook and stir for an additional 1 minute to ensure the cornstarch is fully cooked out and any starchy flavor is eliminated.
-
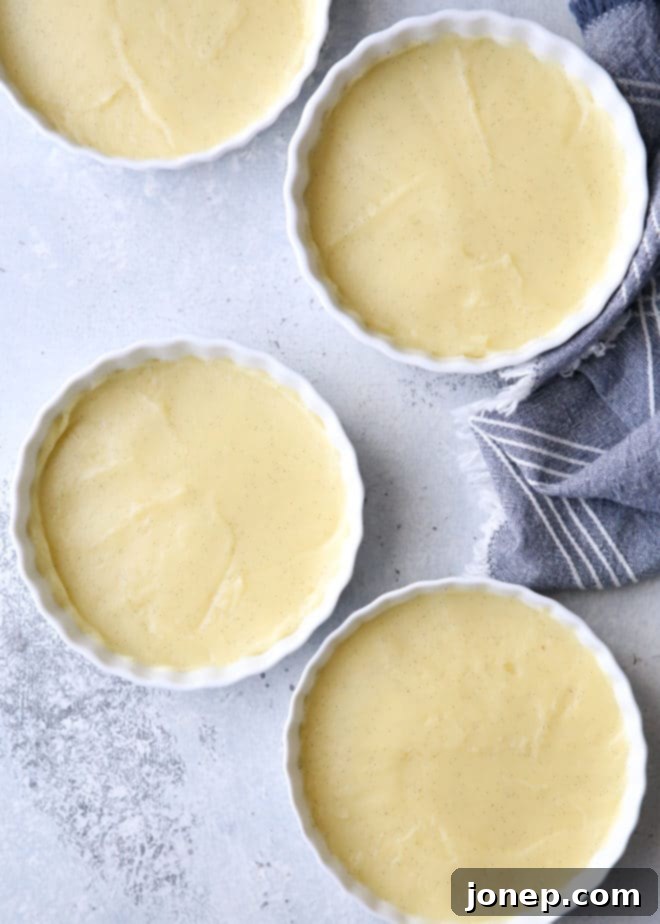
4. Strain and Chill: Immediately remove the thickened custard from the heat. If you used a vanilla bean pod, remove it now. For an impeccably smooth custard, pass the entire mixture through a fine-mesh strainer into a clean bowl or directly into your serving individual ramekins. This essential step removes any potential lumps of cornstarch or egg that might have formed. Divide the custard evenly among your ramekins. Place the ramekins in the refrigerator, uncovered, and allow them to chill and set up completely for at least 2 hours, or preferably until firm. Overnight chilling is even better for the best possible texture.
-
5. Caramelize and Serve: When you are ready to serve this delightful no-bake crème brûlée, remove the thoroughly chilled ramekins from the fridge. Sprinkle each ramekin generously and evenly with an additional layer of granulated sugar over the entire surface of the custard. Working with one ramekin at a time, carefully pass a kitchen torch over the sugar, moving it constantly until the sugar melts, bubbles, and caramelizes into a beautiful golden-amber, crisp shell. Be careful not to burn the sugar, as it will become bitter. If you are using the oven broiler method, please refer to the detailed instructions in the “Brûlée Torching Tips” section above. Serve your perfectly brûléed no-bake crème brûlée immediately to enjoy the delightful contrast of the warm, crisp topping and the cold, creamy custard.
Video Guide
Notes for Perfect No-Bake Crème Brûlée
- Vanilla Substitution: If you don’t have a vanilla bean or prefer a simpler option, you may substitute 1 tablespoon of high-quality pure vanilla extract for the vanilla bean. If using extract, add it *after* the custard has thickened and you’ve removed it from the heat, just before passing it through the mesh strainer. Stir it in thoroughly to distribute the flavor evenly.
- Make Ahead: This no-bake crème brûlée is an excellent dessert for preparing in advance, making it perfect for entertaining. The custard can be made, poured into ramekins, and chilled for up to 24 hours before you plan to serve it. Remember, always add the granulated sugar and brûlée the topping right before you’re ready to serve to ensure the crispiest, most satisfying crust.
- Storage: Any leftover crème brûlée (without the caramelized topping) can be stored, covered, in the refrigerator for up to 2-3 days. Once the sugar topping has been caramelized, it is best enjoyed immediately, as the crust will soften over time and lose its delightful crunch.
- Serving Suggestions: While undeniably delicious on its own, consider enhancing your crème brûlée with a few simple garnishes. Fresh berries (such as raspberries, blueberries, or thinly sliced strawberries) add a lovely burst of color and a tart counterpoint. A small dollop of homemade whipped cream or a fresh sprig of mint can also elevate the presentation and flavor.
