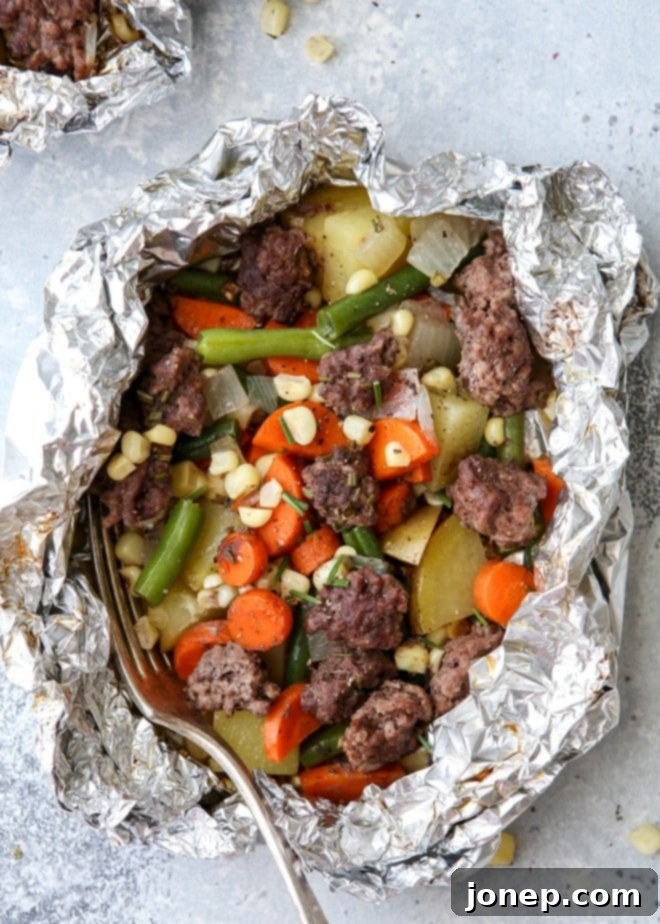
Hearty Beef & Veggie Foil Dinners: Your Easy Guide to Campfire, Grill, and Oven Meals
Picture this: a delicious, complete, and incredibly easy meal, all wrapped up in a tidy foil packet, cooking to perfection over an open fire, on your backyard grill, or right in your kitchen oven. That’s the magic of beef and veggie foil dinners! These versatile packets are not just a camping staple; they’re a fantastic solution for busy weeknights, offering minimal cleanup and maximum flavor.
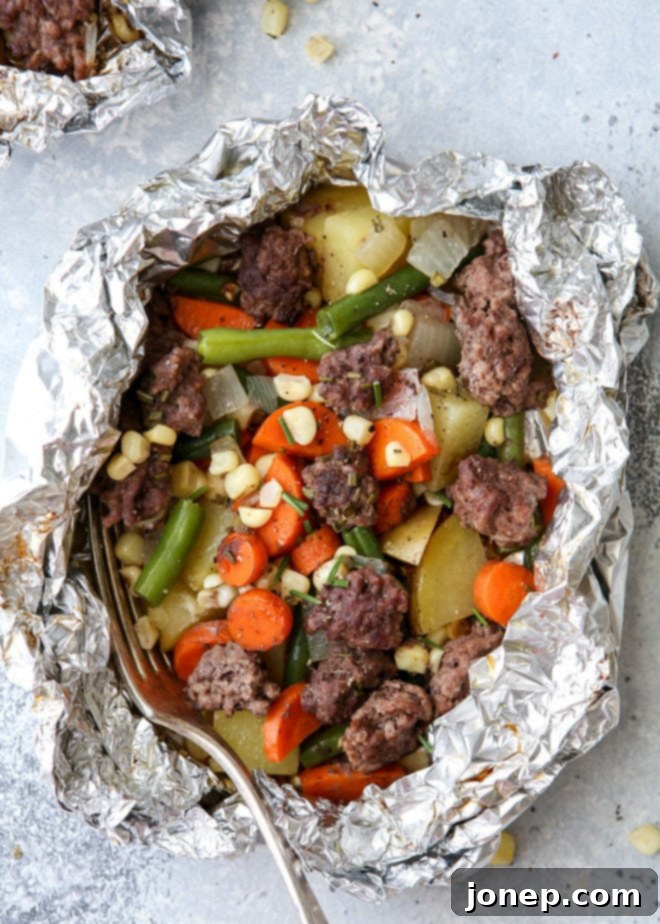
Our summers are often filled with camping adventures, and these foil dinner packets are always a highlight. They’re consistently one of my top choices for outdoor meals because they’re not only incredibly flavorful but also remarkably simple to prepare in advance. The convenience of having your meal prepped and ready to cook means more time enjoying the great outdoors or relaxing at home.
While I refer to this as a “recipe,” it’s more of a flexible template. The beauty of these beef and veggie tin foil dinners lies in their adaptability. You can truly combine almost any ingredients you love into a packet and cook it. However, the classic combination of seasoned ground beef, tender potatoes, and vibrant mixed vegetables remains a perennial favorite for good reason – it’s hearty, satisfying, and universally loved.
Table of Contents
- What are Foil Dinner Packets?
- Choose Your Ingredients Wisely
- How to Assemble Perfect Foil Dinner Packets
- Make-Ahead & Storage Tips for Foil Dinners
- 3 Easy Ways to Cook Foil Dinner Packets
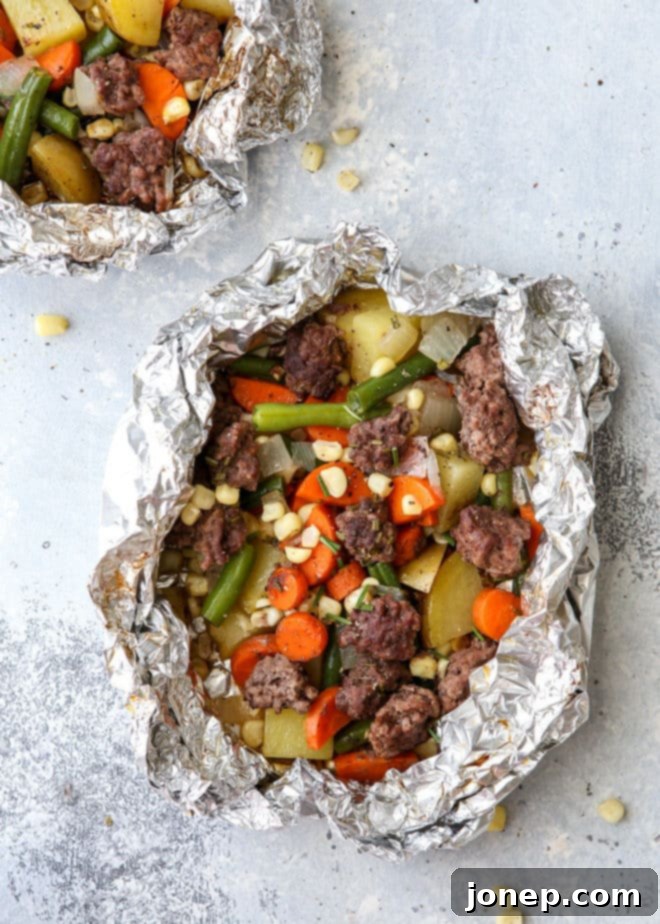
- How to Tell When Your Foil Dinners Are Done
- More Delicious Camping Recipes
What are Foil Dinner Packets?
Known by many names – “foil dinner packet,” “tin foil dinner,” “foil pack,” or even “hobo dinner” – these delightful meals are essentially individual portions of food meticulously wrapped in aluminum foil and cooked using various heat sources. The traditional origin often points to campfires, where minimal equipment and easy cleanup are paramount. Each packet contains a complete meal, combining protein, vegetables, and seasonings, all steaming together to create a flavorful and tender dish. They are celebrated for their simplicity, the ease of preparing them in advance, and, perhaps most appealingly, the incredibly quick and mess-free cleanup they offer. Just toss the foil, and dinner is done!
Beyond their practical benefits, foil dinners provide a unique cooking experience. The sealed foil traps steam, tenderizing meats and vegetables while infusing them with all the delicious flavors you’ve packed inside. This method ensures that your ingredients cook evenly and retain their moisture, resulting in a wonderfully succulent meal every time. As you continue reading, you’ll discover my top suggestions for crafting your own custom foil dinner packets, step-by-step instructions for assembly, and detailed guidance on the various cooking methods available.
Choose Your Ingredients Wisely for Flavorful Foil Packs
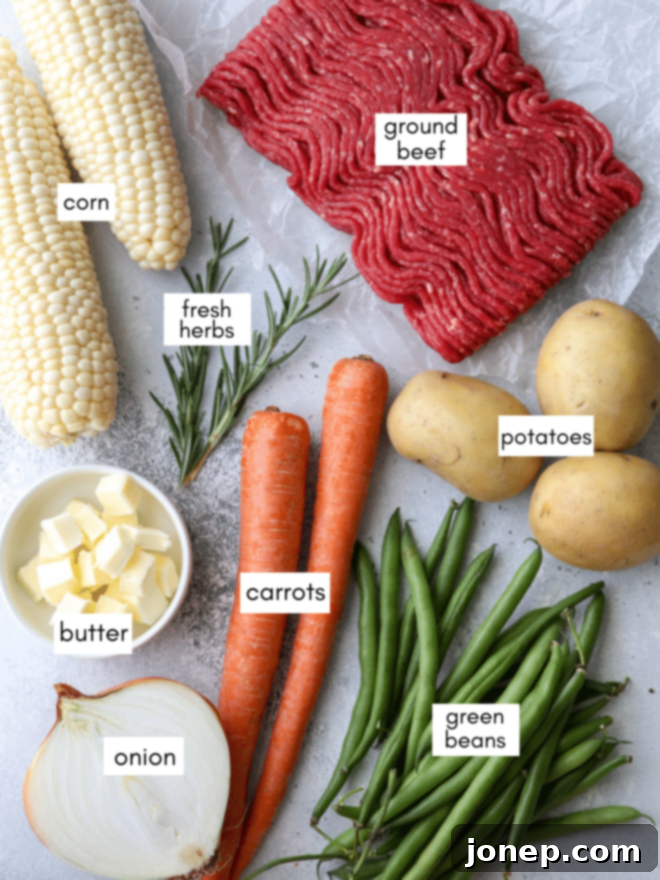
The beauty of foil dinner packets lies in their incredible versatility. While you can truly use almost any combination of ingredients and flavors, keeping a few key guidelines in mind will help ensure your meal cooks evenly and tastes amazing:
- Choose a Protein Thoughtfully: For these classic tin foil dinners, ground beef is a fantastic, flavorful choice. However, don’t limit yourself! Other great protein options include ground turkey, ground chicken, sausage (sliced), cubed chicken breast or thighs, tender steak pieces (like sirloin or tri-tip), salmon fillets, or shrimp. The key is to select proteins that cook relatively quickly alongside your chosen vegetables. For ground meats, a quick pre-browning can enhance flavor and reduce cooking time in the packet, ensuring everything finishes at the same time. Avoid larger cuts like whole chicken breasts or thick pork chops, as they typically require longer cooking times than most vegetables. For vegetarian options, consider firm tofu, black beans, or chickpeas.
- Pile on the Veggies: Aim for a generous ratio – for every 1 cup of protein, try to include 2 cups (or more!) of vegetables. You can stick to a few favorites or create a vibrant medley; it’s entirely up to your preference. Our featured beef and veggie tin foil dinners include onions, potatoes, carrots, corn, and green beans. Other delicious suggestions that cook well in foil include mushrooms, bell peppers (any color), sweet potatoes (cut small), zucchini, broccoli florets, cherry tomatoes, and asparagus. Both fresh and frozen vegetables work wonderfully here. If using frozen, there’s no need to thaw them beforehand; they’ll steam perfectly in the packet. Ensure all vegetables are cut into roughly 1-inch pieces to ensure even cooking.
- Master the Seasoning: Don’t underestimate the power of simple seasonings! Salt and pepper are essential, but don’t stop there. Elevate your flavors with additions like garlic powder, onion powder, a dash of Italian seasoning, smoked paprika, chili powder, or your favorite all-purpose seasoning blend. My personal secret for a burst of fresh flavor in tin foil dinners is to incorporate fresh herbs like finely chopped rosemary, thyme, or sage. These herbs release their aromatic oils as the food steams, adding a gourmet touch.
- Add Butter or Oil for Moisture and Flavor: A few pats of butter or a generous drizzle of olive oil are crucial. This not only adds a lovely richness and flavor to your meal but also helps prevent the ingredients from sticking to the foil during cooking. It also aids in the steaming process, ensuring your protein and veggies stay moist and tender.
- (Optional) Finish with Cheese or Sauce: Once your foil packet dinners are fully cooked, carefully open them up (watch out for steam!). This is the perfect moment to personalize each serving. Top with a slice or sprinkle of shredded cheddar cheese (or Monterey Jack, pepper jack, etc.) and return the packets to the heat source for just 1-2 minutes, or until the cheese is melted and bubbly. Alternatively, drizzle with your favorite BBQ sauce, hot sauce, or a dollop of sour cream or Greek yogurt for an extra layer of flavor and creaminess.
How to Assemble Perfect Foil Dinner Packets
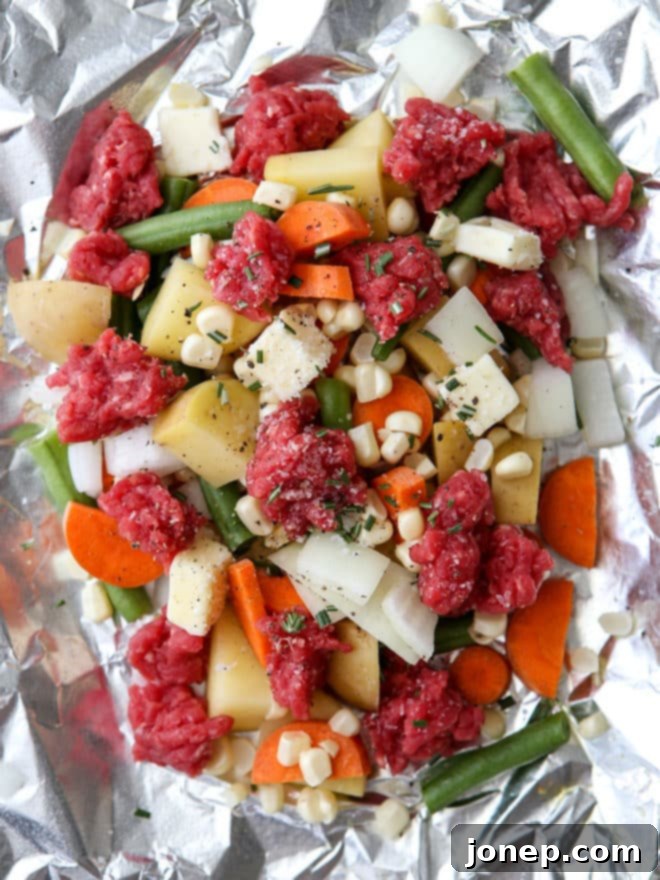
Assembling your foil dinner packets is straightforward, but a few key steps will ensure they cook perfectly and seal effectively. Proper preparation is essential for a delicious and mess-free experience, whether you’re at home or at the campsite.
- Prep All Ingredients Evenly: This is a critical step for uniform cooking. Both your chosen meat and all vegetables should be cut into pieces roughly 1/2 to 1-inch maximum in size. If pieces are too large, they won’t cook through in the typical 20-minute timeframe. For denser vegetables like potatoes or carrots, consider cutting them slightly smaller than softer ones like zucchini or bell peppers.
- Prepare Your Foil Sheets: Measure sheets of heavy-duty aluminum foil to approximately 18 inches long. Lay them out side-by-side on a clean workspace, allowing you to assemble all your packets efficiently at once. Heavy-duty foil is highly recommended as it’s less prone to tearing, especially when handling hot packets or cooking over a fire. Lightly grease the center of each foil sheet with nonstick cooking spray or a little olive oil to prevent your meal from sticking.
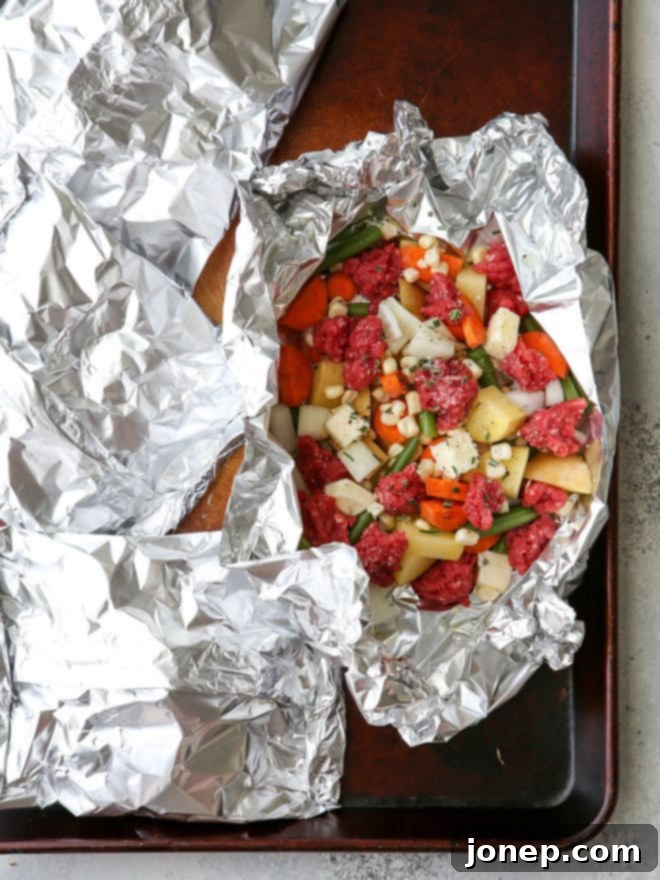
- Layer Ingredients into the Foil: Divide your prepped meat and vegetables evenly among each sheet of foil. Create a small mound in the center of the foil, making sure not to spread the ingredients too thinly or pile them too high, as this affects cooking consistency. Place denser vegetables (like potatoes) at the bottom, closer to the heat, with quicker-cooking items on top. Drizzle with your chosen butter or oil and generously season with salt, pepper, and any additional herbs or spices you’re using. Don’t be shy with the seasoning; a good amount ensures every bite is flavorful.
- Wrap Them Up Securely: Bring the two longer ends of the foil together over the mound of ingredients. Crimp them tightly, folding the seam over itself multiple times until it’s flush with the contents of the packet. Then, fold and crimp both short sides in the same manner, creating a completely sealed pouch. The goal is to create a tight seal that prevents any juices or steam from escaping, which is vital for both flavor and even cooking.
- Consider Double Wrapping for Durability: If you plan on cooking your tin foil dinners over a direct campfire or on a grill, it’s highly advisable to double-wrap them. This extra layer of protection significantly reduces the risk of the foil tearing open, especially when flipping or rotating the packets with tongs. A double wrap ensures that your delicious meal stays intact and all the savory juices remain locked inside.
Once your dinner foil packets are meticulously assembled and perfectly sealed, they are ready for their culinary journey! You have the flexibility to cook them immediately, savoring a freshly prepared meal, or store them for later, making them ideal for planned adventures or spontaneous dinners.
Make-Ahead & Storage Tips for Foil Dinners
One of the most appealing aspects of tin foil dinners is their incredible make-ahead potential. These packets can be fully assembled hours or even days in advance, then stored in your refrigerator or cooler until you’re ready to cook. This convenience is particularly valuable for camping trips, as it means less prep work at the campsite and more time enjoying nature. I often prepare all my packets at home before leaving for a trip; it streamlines the entire cooking process once we arrive.
To ensure food safety and quality, make sure your assembled packets remain properly chilled. Store them in the coldest part of your refrigerator and aim to use them within 2-3 days of assembly. For longer storage, these foil dinners are also excellent candidates for freezing. You can freeze them for up to several weeks ahead of time, which also makes them a fantastic way to keep your cooler cold during transit, acting as large, edible ice packs! When you’re ready to cook frozen packets, allow them to thaw overnight in the refrigerator or for several hours in a cooler. Always ensure the internal temperature of the food in the packet is adequately cold before beginning to cook.
3 Easy Ways to Cook Foil Dinner Packets for Any Occasion
The beauty of these beef and veggie foil packet meals lies in their versatility. You can cook them using several different methods, adapting to your environment and equipment:
- Over a Campfire (My Favorite Way!): There’s nothing quite like the smoky flavor and rustic experience of cooking over a campfire. For best results, wait until your fire has burned down to a bed of hot, glowing coals. These provide a more even and consistent heat than direct flames, which can easily scorch the foil. Spread the logs out slightly to create a flatter surface, or arrange them in a circle around a central, flat space. Carefully place your double-wrapped foil dinners directly onto the coals. Cook for approximately 20 minutes, making sure to flip and rotate the packets at least once (or more frequently if you notice uneven cooking) using long-handled tongs to ensure all sides cook evenly. Always exercise caution around an open flame.
- On the Grill: Grilling offers a fantastic and convenient way to cook foil dinners, especially when you’re at home or have access to a BBQ. Preheat your grill to medium-high heat, aiming for an internal temperature of about 400°F (200°C). Place the foil dinners directly on the grill grates. Cook for roughly 20 minutes, flipping them once halfway through to ensure even cooking and to prevent one side from over-browning or burning. The direct heat of the grill will cook the packets efficiently, creating tender, flavorful results.
- In the Oven: Don’t have a campfire or grill? No problem! Foil dinners are just as delicious when baked in your kitchen oven. This method is perfect for rainy days, cooler weather, or when you simply want an easy, mess-free weeknight meal indoors. Preheat your oven to 400°F (200°C). Place the foil dinners on a sturdy baking sheet – this makes them easier to handle and catches any accidental drips, though a well-sealed packet should contain everything. Bake for about 20 minutes. The oven provides a consistent, all-around heat that steams the ingredients to perfection.
Regardless of the method you choose, remember that cooking times are estimates and can vary based on the exact size of your ingredients and the intensity of your heat source. Always check for doneness before serving.
How to Tell When Your Foil Dinners Are Done
Determining when your foil dinner packs are perfectly cooked is crucial for a safe and delicious meal. While a general cooking time of about 20 minutes is a good guideline, the exact duration can vary based on the size and density of your meat and veggies, as well as how full each packet is. Our recommendation of 1-inch pieces for all ingredients helps ensure they should be done in that approximate 20-minute window.
To accurately check for doneness, carefully open up one packet. Be extremely cautious as the steam inside will be very hot and can cause burns. Once opened, check two things:
- Meat Doneness: Ensure any ground meat or cubed protein is cooked through. For ground beef, there should be no pink visible. If using chicken, it should be white throughout. If you have a meat thermometer, the internal temperature of beef should reach 160°F (71°C), and chicken 165°F (74°C).
- Vegetable Tenderness: Use a fork to test the firmest vegetables, like potatoes and carrots. They should be easily pierced and tender, not crunchy or hard.
If your test packet isn’t quite ready, simply re-seal it as best you can and return it to the fire, grill, or oven for an additional 5-10 minutes. Check again until everything reaches your desired level of doneness. Once cooked, serve immediately and savor the delightful flavors of your perfectly prepared foil dinner!
More Delicious Camping Recipes & Easy Meal Ideas
If you’ve enjoyed the simplicity and deliciousness of these Beef and Veggie Foil Dinners, you’ll love exploring other easy and satisfying recipes perfect for outdoor adventures or even just simple weeknight meals. Here are a few more fantastic ideas to inspire your next culinary creation:
- Chicken and Veggie Tin Foil Dinners: A lighter alternative to beef, equally customizable and just as easy to prepare and cook.
- Easy Weeknight Chili: A comforting and hearty dish that’s perfect for a cool evening, whether at home or around a campfire.
- Easy Dutch Oven Cobbler: A sweet treat that proves you can make incredible desserts even when cooking outdoors.
These recipes embrace the spirit of effortless cooking and delicious results, making your meal planning a breeze!
Beef and Veggie Tin Foil Dinners
Pin Recipe
Leave a Review
Ingredients
- 1 lb ground beef
- 2 large carrots , sliced
- 1 ear of corn , kernels removed (or 1 cup frozen)
- 1 lb potatoes (about 4 medium), chopped in 1 inch pieces
- Handful of green beans , chopped
- ½ small onion , chopped
- ¼ cup salted butter , cubed (can also use ¼ cup olive oil)
- Approximately 1 tablespoon fresh rosemary thyme or sage , chopped
- Salt and pepper , as needed
Instructions
-
Measure 4 sheets of heavy duty aluminum foil to about 18 inches. Spray with nonstick cooking spray.
-
Layer beef and veggies in a mound into the center of each sheet of foil, dividing ingredients evenly between all 4 sheets.
-
Top with butter or oil and fresh herbs.
-
Season heavily with salt and pepper, about ½ teaspoon of salt for each packet.
-
Fold edges of foil over and crimp tightly to seal. If cooking on grill or fire, consider double wrapping to prevent tears in foil.
-
To cook on fire:
Wait till fire has turned to coals and spread logs out to heat is as even as possible. Cook on logs for about 20 minutes, flipping and rotating as needed to promote even cooking, until meat is cooked through and veggies are soft.
-
To cook on grill:
Preheat grill to medium heat, about 400° and cook for 20 minutes, flipping halfway through, until meat is cooked through and veggies are soft.
-
To cook in oven:
Preheat oven to 400°F and cook for 20 minutes or until meat is cooked through and veggies are soft.
-
Carefully open up foil packets as the steam inside is very hot. You can eat straight out of the foil or dump contents onto a plate.
Video
Notes
- See post above for suggestions of other flavor and ingredient combinations. For creative twists, consider adding a splash of Worcestershire sauce or a dollop of pesto to your packets before sealing for an extra flavor boost.
- To make ahead: These foil dinners are perfect for meal prepping. Store prepared foil dinners in a fridge or cooler for a few days, ensuring they remain thoroughly chilled. For longer storage, they can be kept in the freezer for several weeks. When ready to cook frozen packets, let them thaw completely in the fridge overnight or in a cooler for several hours before placing them on your heat source. Always make sure prepared foil dinners are kept cold before cooking to maintain food safety.
