Irresistible Homemade Sea Salt Caramels: A Chewy, Sweet & Salty Delight
There’s something truly magical about a homemade caramel. The rich, buttery flavor, the perfectly chewy texture, and that delightful hint of sea salt that elevates it from a simple sweet treat to an unforgettable indulgence. These aren’t just any caramels; they’re the kind that will have you reaching for just one more, then another, until, like me, you realize the entire batch has mysteriously vanished! Get ready to embark on a delightful candy-making adventure that promises incredible rewards.
The Allure of Homemade Caramels: Easier Than You Think!
For too long, I hesitated to try making caramels from scratch. Perhaps it was the perception of candy making being overly complex or requiring specialized skills. Yet, variations of homemade caramels pop up constantly across the web, always looking incredibly inviting. And guess what? The truth is, they are surprisingly easy to make! You don’t need to be a professional confectioner to achieve perfect, store-quality (or even better!) caramels right in your own kitchen.
The beauty of homemade caramels lies in their simplicity and the control you have over the ingredients. You get to choose fresh, high-quality butter and cream, and the exact type of sea salt that sings to your palate. Forget those bland, mass-produced versions; these are caramels with character, depth, and a delightful chew that only a truly homemade batch can offer.
Essential Tools for Caramel Success
Crafting delicious homemade caramels truly only requires a few basic ingredients, some standard kitchen equipment, and, as I like to say, a little courage. Don’t let the idea of working with boiling sugar intimidate you. With the right tools and a focused approach, anyone can master this delightful craft.
The most crucial piece of equipment for consistent caramel making is a reliable **candy thermometer**. This isn’t an optional gadget; it’s your guide to achieving the perfect caramel consistency. Without it, you’re guessing, and candy making is a science where precision leads to perfection. Beyond that, a sturdy **heavy-bottomed saucepan** is essential for even heat distribution, preventing hot spots that can burn your sugar. And of course, your trusty **stove top** is where the magic happens.
Demystifying Candy Making: Focus is Key
I understand that the phrase “boiling sugar” can sound a bit daunting, conjuring images of sticky messes or burnt batches. But truly, candy making is a skill that any home cook can easily manage with a bit of attention and patience. The most important lesson to remember is this: **candy making and multitasking do not mix.** This is not the moment to check your phone, reply to emails, or even apply mascara. Your full attention is the secret ingredient for success.
Think of it as a meditation. You’re observing, monitoring, and reacting to the subtle changes in your caramel mixture. Your stove top does the heavy lifting, providing the heat, while you act as the careful supervisor. Keeping a close watch and diligently following the recipe’s instructions, especially regarding temperature, will ensure you achieve perfectly chewy, rich caramels every single time. Remove the caramel from the heat at exactly the instructed temperature, and you’ll be rewarded with a confection so delicious, you won’t be able to stop eating them. Trust me on this – my last batch disappeared alarmingly fast, because, yes, I ate them all!
Understanding the Role of Ingredients
- Heavy Cream and Unsalted Butter: These are the backbone of any rich caramel, providing the essential fat and dairy that contribute to its luxurious flavor and creamy texture. Using unsalted butter gives you control over the final salt content.
- Granulated Sugar: The star of the show, providing the sweetness and structure. When heated, it transforms into that beautiful amber color we associate with caramel.
- Light Corn Syrup: This is a crucial anti-crystallization agent. It prevents the sugar from forming large crystals, ensuring your caramels remain smooth and chewy, not grainy.
- Water: Helps dissolve the sugar initially and controls the temperature as the mixture heats up.
- Vanilla Extract: Added at the end, vanilla rounds out the flavors, adding warmth and depth to the sweet caramel.
- Sea Salt (Fleur de Sel): The magic ingredient that balances the sweetness and adds an addictive complexity.
The Irresistible Sweet and Salty Harmony
One of the true highlights of these caramels is the addition of sea salt. It creates a perfect marriage of “sweet and salty” flavors that tantalizes the taste buds and leaves you craving more. The salt doesn’t just cut through the sweetness; it enhances the caramel’s inherent richness, bringing out deeper notes of butter and brown sugar. This harmonious contrast is why salted caramel has become such a beloved flavor combination in desserts worldwide.
For this particular recipe, I opted for “fleur de sel,” a delicate, flaky, and indeed, somewhat expensive sea salt that I reserve for special occasions (and these caramels certainly qualify!). Its unique texture and nuanced mineral flavor are truly exquisite. However, don’t feel limited! Any coarse sea salt will do just fine. A good quality flaky sea salt or even a coarser kosher salt can provide that delightful crunch and burst of salinity. I find that the salty addition to these caramels makes them extraordinarily addictive, so consider yourself warned!
baking tip:How to do the caramel “swirl” for even cooking
When making caramel, recipes often instruct you to “swirl” the pan to ensure even browning and to not stir once the sugar has dissolved. Stirring crystallized sugar can lead to a grainy caramel, as it encourages sugar crystals to form on the sides of the pan and fall back into the mixture, seeding further crystallization.
Instead, after your initial stir to dissolve the sugar, put down your whisk. While you’re watching the sugar mixture cook, **if you notice certain areas of the pan browning faster than others, simply lift the pan by the handle and use your wrist to gently swirl the contents around.** This technique allows the caramel to cook uniformly without introducing any elements that might cause crystallization. Maintain this careful swirling until the desired amber color and temperature are reached.
Expert Tips for Perfect Homemade Caramels
- Use a Heavy-Bottomed Pan: This ensures even heat distribution and prevents burning. Thin pans can cause hot spots.
- Patience is a Virtue: Don’t rush the caramel-making process. Cooking sugar too quickly can lead to a burnt taste or an inconsistent texture.
- Clean Sides of the Pan: After the sugar has dissolved, if you see sugar crystals clinging to the sides of the pan, use a pastry brush dipped in water to gently brush them down into the mixture. This prevents crystallization.
- Prepare Everything in Advance: Once the caramel reaches its target temperature, things move quickly. Have your parchment-lined pan, warm cream mixture, and vanilla extract ready to go.
- Be Careful When Adding Cream: The mixture will bubble up vigorously when you add the warm cream. Pour it in slowly and whisk constantly to incorporate it safely and smoothly.
- Accurate Thermometer Reading: Ensure your candy thermometer isn’t touching the bottom of the pan to get an accurate reading of the liquid’s temperature.
- Humidity Matters: High humidity can make caramels softer and stickier. On very humid days, you might need to cook the caramel a degree or two higher.
Serving and Storing Your Homemade Caramels
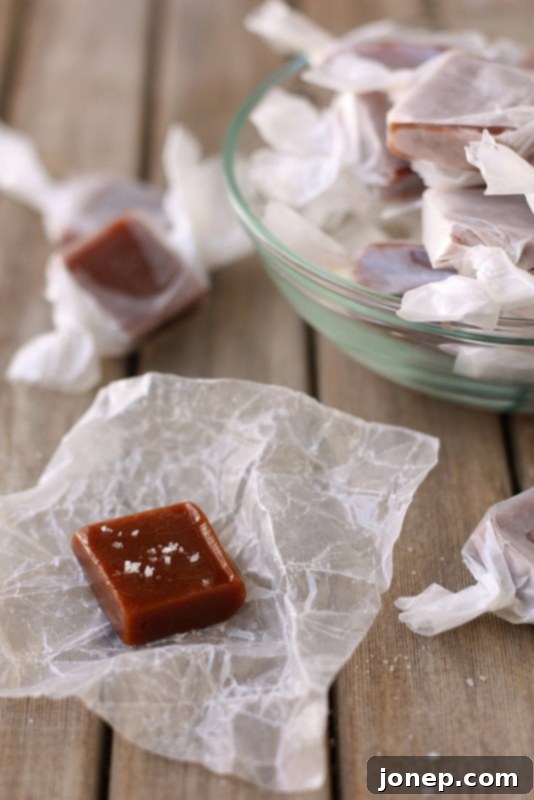
Once your delectable sea salt caramels have cooled and firmed up, the fun truly begins! Cut them into charming 1-inch squares – a sharp, greased knife will make this task much easier, ensuring clean cuts. To prevent sticking and preserve their freshness, individually wrap each caramel in a 4-inch square of wax paper or parchment paper, twisting the ends like a classic candy wrapper.
These glorious treats can be stored at room temperature in an airtight container for up to two weeks, though they rarely last that long! They make a fantastic homemade gift, perfect for holidays, hostess gifts, or just a thoughtful gesture to a sweet-toothed friend. Imagine them arranged in a pretty box with a ribbon – a truly gourmet present crafted with love.
Enjoy them as a luxurious after-dinner treat, a delightful midday pick-me-up, or even chopped and sprinkled over ice cream or other desserts. The versatility and sheer deliciousness of these sea salt caramels are boundless!

Sea Salt Caramels Recipe
Pin Recipe
Leave a Review
Ingredients
- 1 cup heavy cream (236 ml)
- 5 tablespoons unsalted butter (70 grams)
- 1 teaspoon fleur de sel or other coarse sea salt , plus extra for sprinkling
- 1 ½ cup granulated sugar (300 grams)
- ¼ cup light corn syrup (60 ml)
- ¼ cup water (60 ml)
- ½ teaspoon vanilla extract
Instructions
-
Line an 8-inch square baking pan with parchment paper, leaving an overhang on the sides to easily lift the caramel later.
-
In a small saucepan, bring the heavy cream, butter, and 1 teaspoon of sea salt to just a boil over medium-low heat. Once it gently boils, remove it from the heat and keep it warm. Do not let it cool down too much.
-
Meanwhile, combine the granulated sugar, light corn syrup, and water together in a separate, large, heavy-bottomed saucepan over medium heat. Stir continuously with a clean spoon or whisk until the sugar is completely dissolved. Once dissolved, stop stirring. Allow the mixture to simmer gently without stirring until it begins to turn a lovely amber color. Watch closely to prevent burning, and gently swirl the pan as needed to ensure the mixture caramelizes evenly, as described in our baking tip.
-
Carefully remove the sugar mixture from the heat. Slowly and cautiously, add the warm cream mixture into the caramelized sugar while whisking constantly. Be prepared for the mixture to bubble up violently; this is normal. Once fully combined and smooth, stir in the vanilla extract. Return the saucepan to the heat and immediately insert your candy thermometer. Continue to cook, without stirring, until the thermometer precisely reaches 248°F (120°C).
-
Immediately pour the hot caramel mixture into your prepared 8-inch square baking pan. Do not scrape the bottom of the pan, as this can introduce crystallized sugar. Allow it to sit undisturbed at room temperature for at least 2 hours, or until it is completely firm. Once firm, sprinkle with additional coarse sea salt (if desired) and then lift it out using the parchment paper overhang. Cut into 1-inch squares with a sharp, lightly greased knife. Wrap each individual caramel in 4-inch wax paper squares. Store at room temperature in an airtight container for up to 2 weeks.
Notes
