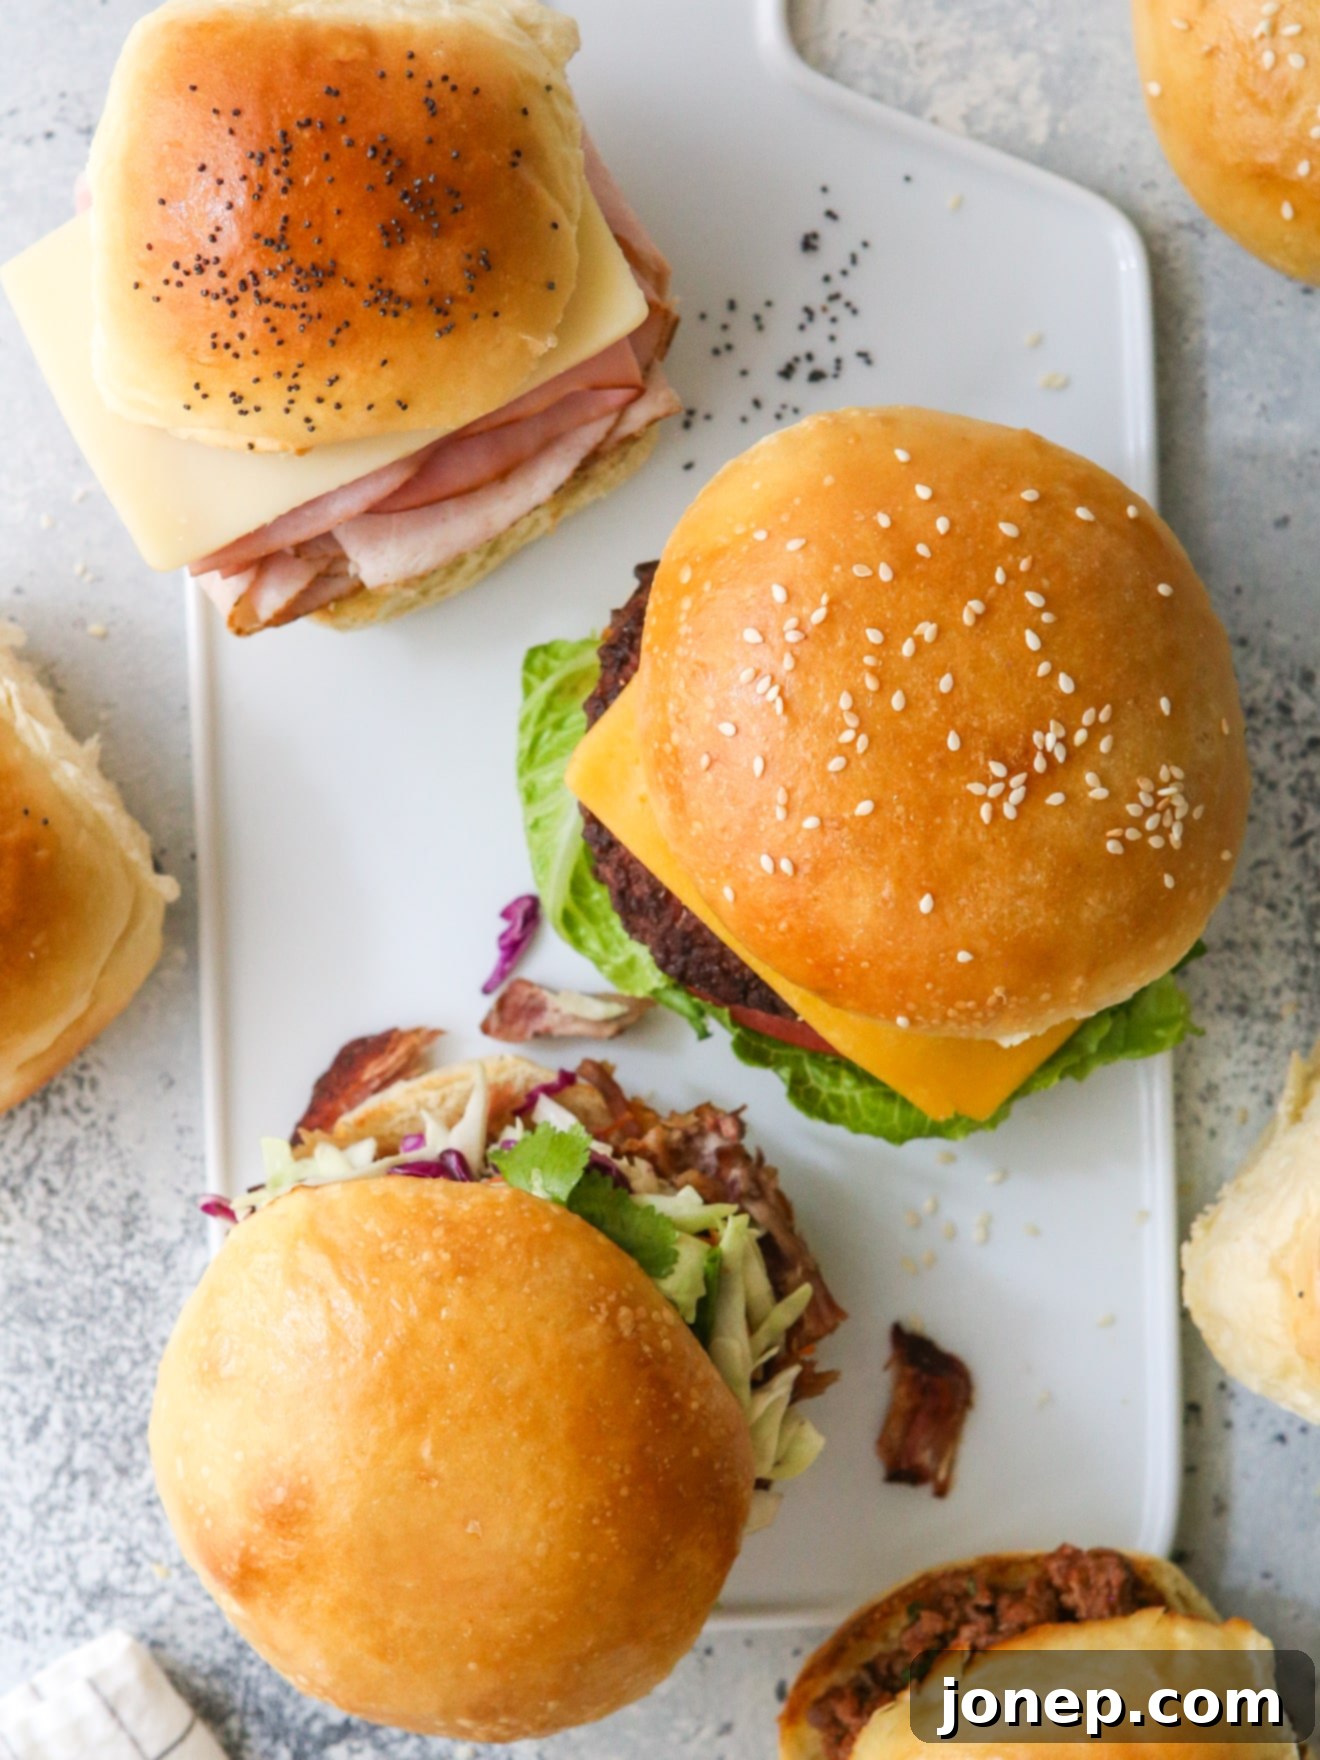
Mastering Homemade Brioche Buns: The Ultimate Recipe for Soft Burger, Slider, and Sandwich Rolls
Imagine sinking your teeth into a perfectly soft, rich, and slightly sweet bun that elevates any sandwich or burger from good to absolutely extraordinary. This isn’t just a dream; it’s a delicious reality with our incredible, versatile brioche bun recipe. Forget bland, dry store-bought options – with just a handful of common ingredients and a bit of love, you can create homemade sandwich rolls, burger buns, and slider buns that are incredibly soft, flavorful, and truly irresistible. This recipe is a game-changer for your culinary adventures, promising a melt-in-your-mouth experience every time.
Are you ready to elevate your summer potlucks, barbecues, and everyday lunches? Stepping up your game starts right here with these heavenly homemade brioche buns and sandwich rolls. While conventional store-bought buns often fall flat – tasting uniform, bland, and lacking any real character – our homemade version offers a truly superior experience. These buns are light as air, incredibly tender, and bursting with a rich, buttery flavor that complements whatever delicious fillings you choose to pile inside. They don’t just hold your meal; they enhance it, making every bite memorable.
Whether you’re crafting juicy homemade hamburgers, preparing savory pulled pork sliders for a crowd, or simply assembling a classic cold-cut sandwich for lunch, every creation deserves to begin with a genuinely tasty and fresh homemade bun. This recipe ensures that your foundational bread is just as delicious and satisfying as the star ingredients, transforming a simple meal into a delightful culinary event.
More homemade recipes to try: Expand your baking repertoire with my whole wheat brioche burger buns, cheesy herb burger buns, and classic homemade hot dog buns for every occasion.
Table of Contents
- One Brioche Bun Recipe, Endless Possibilities: Adaptable for All Your Needs!
- Essential Ingredients for Perfect Brioche Buns
- Crafting Your Homemade Brioche Buns: A Step-by-Step Guide
- Preparing the Rich Brioche Dough
- Baking Generous, Fluffy Burger Buns
- Crafting Delightful Smaller Sandwich & Slider Rolls
- Smart Make-Ahead Strategies for Homemade Buns
- Common Questions About Homemade Brioche Buns
- More homemade buns recipes
- Get the recipe
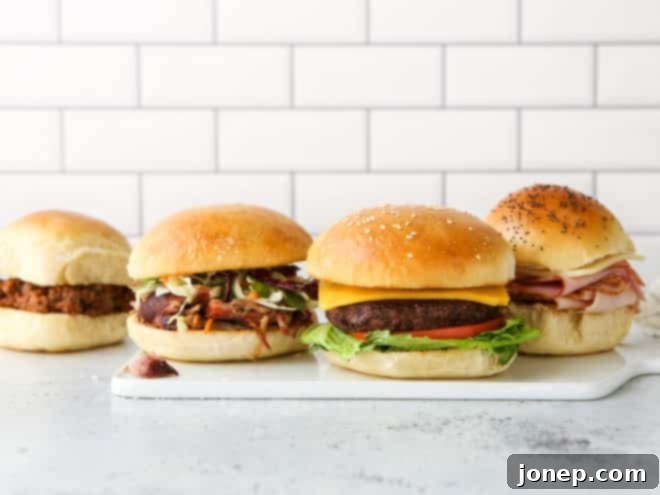
One Brioche Bun Recipe, Endless Possibilities: Adaptable for All Your Needs!
The true beauty of this brioche recipe lies in its incredible versatility. With just one master dough, you unlock a world of possibilities for baking buns tailored exactly to your needs. You can effortlessly transform this dough into generously sized, fluffy buns perfect for hearty burgers, colossal pulled pork sandwiches, or substantial chicken sandwiches. Alternatively, scale down your portions to create adorable, smaller rolls – ideal for classic cold cut sandwiches, messy but delicious sloppy joes, or crowd-pleasing burger sliders. The options are genuinely endless, ensuring you always have the perfect bread for any filling or occasion. And don’t worry, I’ve laid out clear, step-by-step instructions below for shaping both larger buns and smaller rolls, guiding you to baking perfection every time.
This single dough recipe offers unparalleled flexibility, making it a staple for any home baker. Its rich, tender texture is robust enough to hold up to juicy burger patties yet delicate enough to complement lighter fillings. Experiment with shapes and sizes to find your personal favorites, or simply follow our detailed guides for consistently fantastic results. This is more than just a recipe; it’s a foundation for countless delicious meals, ready to be customized to your culinary whims.
Essential Ingredients for Perfect Brioche Buns
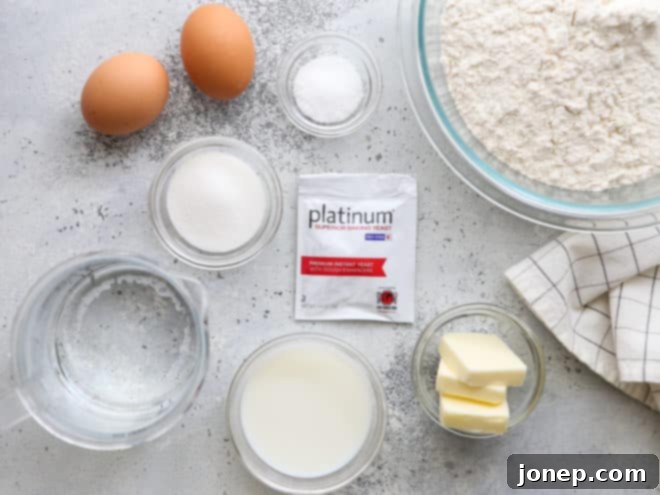
Crafting these delectable brioche buns relies on a combination of pantry staples, each playing a crucial role in achieving that signature soft texture and rich flavor. Here’s a closer look at what you’ll need and why:
- Milk, butter, sugar, and eggs: These are the superstars of brioche dough! They contribute significantly to the buns’ incredible flavor and richness, creating a wonderfully soft and tender crumb. The milk adds moisture and helps activate the yeast, while butter provides that luxurious, melt-in-your-mouth quality. Sugar not only sweetens the dough but also feeds the yeast, encouraging a beautiful rise, and eggs enrich the dough, making it more tender and golden.
- Bread flour: This is key for achieving the ideal structure and rise. Bread flour boasts a higher protein content compared to all-purpose flour, which means more gluten development. This extra gluten power results in a stronger dough that can trap more gas, leading to a higher rise and a delightfully chewy yet tender texture – precisely what you want in a substantial bun.
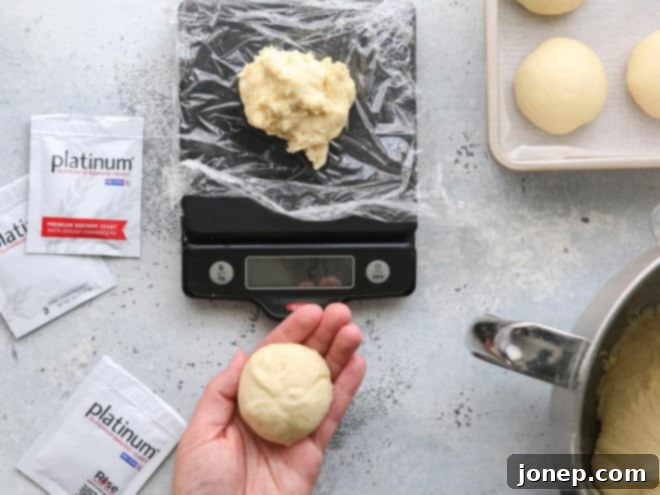
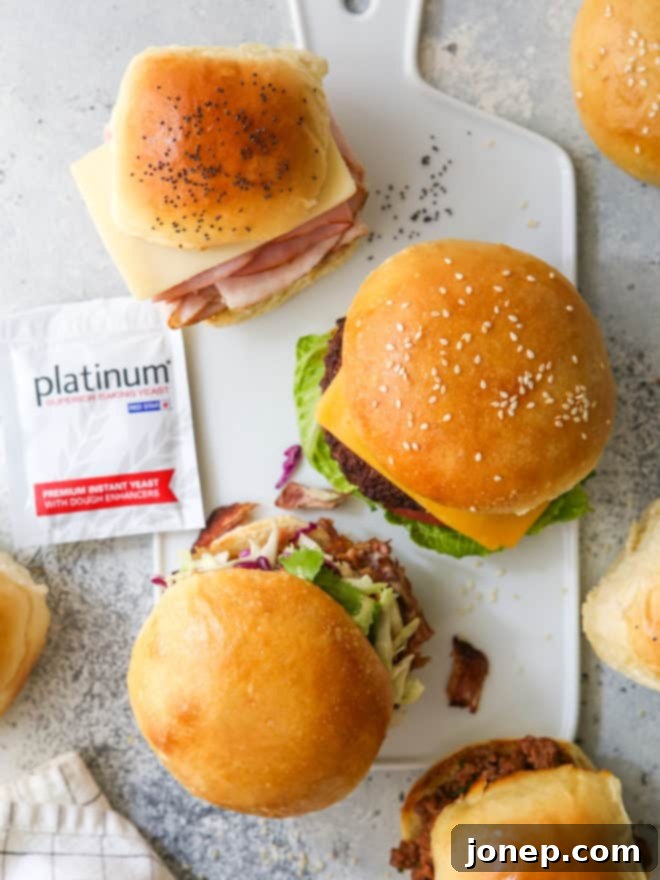
- Active-dry yeast or instant yeast: Both types of yeast will work perfectly for this recipe, giving your buns the necessary lift and airy quality. Instant yeast (also known as quick-rise or rapid-rise) can often speed up the rising process slightly. For an exceptional rise and consistent results, I particularly enjoy using Platinum Yeast from Red Star, which is specifically formulated for baking excellence.
- Salt: Don’t underestimate the power of salt! It’s essential not just for seasoning and enhancing the overall flavor of the buns, but also for controlling the yeast activity. It helps to strengthen the gluten structure, leading to a better texture and preventing the dough from over-proofing too quickly.
- Sesame seeds or poppy seeds: These are entirely optional toppings but add a fantastic textural contrast and a classic bakery-style finish to your homemade buns. A sprinkle of seeds can elevate the appearance and provide a subtle, nutty crunch.
Each ingredient works in harmony to create a truly exceptional brioche bun that’s far superior to anything you’ll find pre-packaged. Gather your ingredients, and let’s get baking!
Crafting Your Homemade Brioche Buns: A Step-by-Step Guide
Preparing the Rich Brioche Dough
The foundation of these incredible buns is a rich, tender brioche dough. The process is straightforward, whether you prefer the convenience of a stand mixer or the satisfying rhythm of kneading by hand. For stand mixer users, ensure you have your dough hook attachment ready. If you’re going manual, any large, sturdy mixing bowl will do the trick.
- Heat butter, milk and water to the perfect temperature: In a small saucepan, gently combine the milk, water, and butter. Heat this mixture over medium-low heat, stirring occasionally, until the butter is completely melted and the liquid reaches a temperature between 120-130°F (49-54°C). This temperature is crucial: it’s warm enough to activate the yeast without killing it. Always use an instant-read thermometer for accuracy; temperatures above 140°F (60°C) can unfortunately de-activate your yeast, preventing your dough from rising.
- Combine the foundational dry ingredients: In the bowl of a stand mixer fitted with a dough hook (or in a large bowl if planning to mix by hand), whisk together approximately 2½ cups of the bread flour, the yeast, granulated sugar, and salt. This ensures even distribution of the yeast and flavor components before liquids are added.
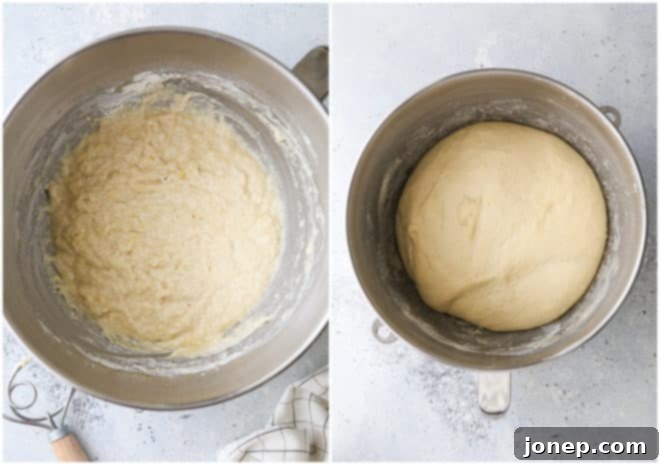
- Integrate liquids and eggs for a wet dough: Carefully pour the warmed milk mixture and the beaten eggs into the dry ingredients in your mixing bowl. Begin mixing on low speed (with a dough hook or by hand) until these ingredients are just combined. At this stage, the dough will be quite wet and shaggy – this is exactly as it should be, don’t worry!
- Gradually add remaining bread flour while kneading: Continue kneading the dough using your stand mixer with the dough hook, or by hand on a lightly floured surface. Add the remaining bread flour gradually, about 2 tablespoons at a time. Allow each addition to be fully incorporated into the dough before adding more. You’ll know you’ve added enough flour when the dough mostly pulls away from the sides of the bowl (or your hands) and is only slightly sticky to the touch. The exact amount of flour can vary based on humidity and flour type, so trust your dough! Knead until it becomes smooth, elastic, and supple, typically another 5-7 minutes.
- Allow for its first magical rise: Once kneaded, transfer the dough to a lightly greased bowl, turning it once to coat. Cover the bowl tightly with plastic wrap to prevent a skin from forming, and place it in a warm, draft-free spot. Let the dough rise until it has visibly doubled in size, which usually takes about 1 hour. This fermentation process develops the flavors and creates that characteristic airy structure.
With your perfectly prepared brioche dough now ready, the most exciting part begins: shaping it into your desired buns or rolls! The careful attention to these initial steps will guarantee a successful and delicious outcome.
Baking Generous, Fluffy Burger Buns
If your goal is to create substantial, bakery-quality hamburger buns – the kind that perfectly cradle a juicy patty and all its fixings – then follow these precise instructions for larger brioche burger buns:
- Divide the dough accurately: Gently punch down the risen dough to release the air. Then, portion the dough into 8 equal pieces. For the most consistent size and even baking, I highly recommend using a digital kitchen scale. Weigh the entire dough and divide that weight by 8 to determine the target weight for each piece. This ensures uniformity, which is crucial for professional-looking results.
- Master the art of shaping into a ball: Take each dough piece and gently shape it into a tight, round ball. The goal is to create surface tension on top, which helps the bun rise beautifully and maintain its shape. If you’re new to this technique, this video from King Arthur Baking Company is an incredibly helpful visual guide to show you how to tuck and roll like a seasoned pro.
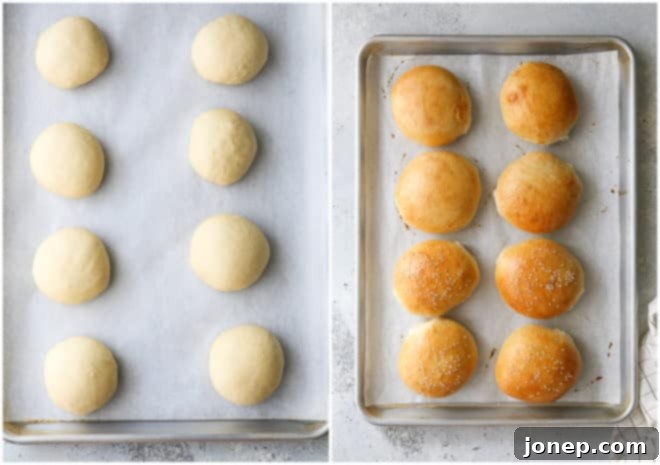
- Achieve the second rise to doubled size: Arrange the shaped dough balls on a parchment-lined sheet pan, leaving ample space between them for expansion. As they undergo their second rise, very gently pat the tops occasionally. This subtle action encourages them to spread outwards, creating that classic wide, flat burger bun shape, rather than rising too tall and narrow. However, exercise caution: press too hard, and you risk deflating all your hard work! Let them rise until visibly doubled, usually for about 30 minutes.
- Prepare for baking and achieve golden perfection: Once fully risen, brush the tops of the buns with an egg wash (typically one beaten egg mixed with a tablespoon of water) to give them a beautiful, shiny, golden-brown crust. If desired, sprinkle with sesame seeds for a classic finish. Bake in a preheated 400°F (200°C) oven for approximately 10 minutes, or until they are deeply golden brown and sound hollow when tapped on the bottom. Cool completely on a wire rack before slicing and serving.
Crafting Delightful Smaller Sandwich & Slider Rolls
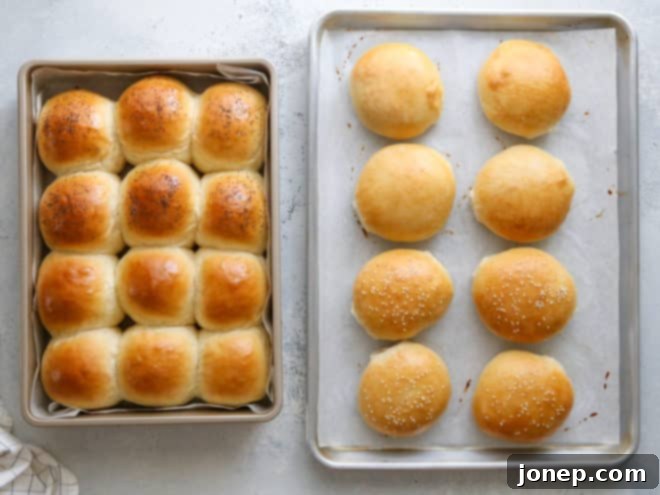
This same remarkable brioche recipe is equally fantastic for creating perfectly portioned smaller buns, about the size of a dinner roll. These mini marvels are absolutely perfect for delightful burger sliders, elegant tea sandwiches, or any occasion where a smaller, softer roll is desired. Here’s how to adapt the shaping and baking process for your homemade sandwich rolls:
- Divide the dough into smaller portions: After the first rise and punching down, divide the dough into 12 equal pieces. Again, for consistent results and a professional look, a kitchen scale is your best friend to ensure each roll is the same size.
- Shape each piece into a neat ball: Take each of the 12 dough portions and shape it into a smooth, tight ball, just as you would for larger buns. Creating that taut surface tension is essential for a good rise. If you need a refresher on the technique, this helpful video demonstrates the perfect method.
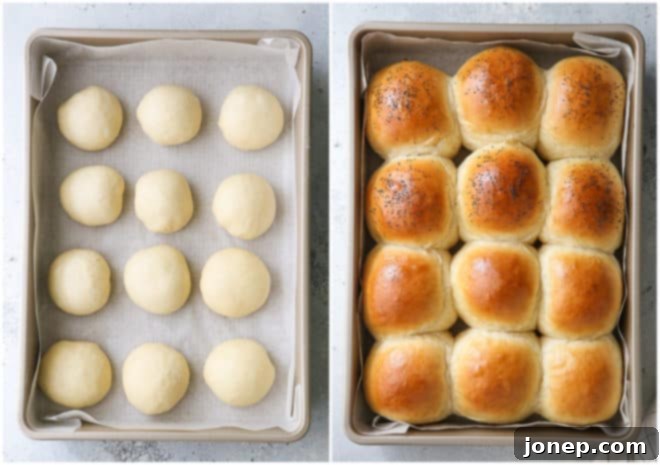
- Second rise in a pan for closeness: For a classic “pull-apart” style roll, arrange the shaped buns closely together in a parchment-lined 9×13-inch baking pan. This encourages them to rise up against each other, creating soft, uniform sides. Cover the pan loosely with plastic wrap (sprayed with non-stick spray to prevent sticking) and let them rise in a warm place until they have doubled in size, becoming beautifully puffy and touching one another (approximately 30 minutes).
- Bake to a golden hue: Once risen, gently brush the tops with egg wash for that irresistible sheen. For an added touch, sprinkle with poppy seeds or sesame seeds. Bake in a preheated 400°F (200°C) oven for approximately 15 minutes, or until their tops are beautifully golden brown. These smaller buns require a slightly longer baking time compared to individually spaced large buns because they are nestled together, retaining more moisture and needing more time to cook through evenly.
Note on shaping mini burger buns: If you love the wide, flat look of a classic burger bun but desire a miniature size for sliders, you can still achieve this! Instead of placing the 12 rolls closely in a 9×13-inch pan, arrange them on a larger parchment-lined sheet pan, spaced further apart. As they undergo their second rise, very gently pat the tops occasionally, as you would for larger buns, to encourage them to spread wider rather than rise too tall. This small adjustment results in perfectly shaped mini brioche burger buns, ideal for gourmet sliders.
Smart Make-Ahead Strategies for Homemade Buns
Life is busy, but that doesn’t mean you can’t enjoy fresh, homemade brioche buns! This recipe is incredibly adaptable for make-ahead convenience, allowing you to prepare parts of it in advance and bake fresh whenever you need them. Here are several effective strategies:
- Retard the dough rise in the fridge overnight: This is a fantastic option for developing deeper flavor and for scheduling your baking. After you’ve finished kneading the dough, place it in a lightly greased bowl, turn it once to coat, and cover it tightly with plastic wrap. Instead of letting it rise at room temperature, transfer it to the refrigerator overnight (for 8-12 hours). The cold temperature significantly slows down the yeast activity, resulting in a more complex, nuanced flavor and a firmer, easier-to-handle dough. The next morning, simply remove the dough, let it come to room temperature for about 30-60 minutes to relax, then punch it down, portion and shape your rolls, allow them to rise in a warm place until doubled, and bake as directed.
- Proof shaped rolls in the fridge overnight: For even greater convenience, you can shape your buns or rolls the night before. Place the shaped dough pieces in your prepared baking pan (lined with parchment paper) and cover them securely with plastic wrap, again sprayed with non-stick cooking spray to prevent sticking. Store the pan in the refrigerator overnight. The following morning, take the pan out of the fridge and allow the rolls to come to room temperature and complete their final rise for approximately 1 to 1½ hours, or until they are visibly doubled in size and feel light and airy. Once fully risen, they are ready to be brushed with egg wash and baked immediately.
- Freeze shaped rolls up to 2 months in advance: If you want to have homemade buns ready at a moment’s notice, freezing shaped dough is a brilliant solution. After shaping your buns or rolls, place them on a parchment-lined pan, ensuring they are not touching each other. Cover the pan with plastic wrap and freeze for at least 1 hour, or until solid. Once frozen, transfer the individual rolls to a heavy-duty freezer-safe ziplock bag or airtight container, removing as much air as possible to prevent freezer burn. They can be stored for up to 2 months. When you’re ready to use them, arrange the frozen buns/rolls in your prepared baking pan and let them thaw at room temperature for a few hours. Once completely thawed, allow them to complete their final rise (about 1-2 hours) before brushing with egg wash and baking according to the recipe instructions.
- Freeze baked rolls up to 1 month in advance: For the quickest serving solution, bake the buns or rolls as normal and allow them to cool completely on a wire rack. Once cooled, wrap each bun individually in aluminum foil, and then place them all into a large freezer-safe ziplock bag or airtight container. They will keep well in the freezer for up to 1 month. When you’re ready to serve, simply remove the desired number of buns from the bag, leave them wrapped in foil, and warm them in a preheated 350°F (175°C) oven for 20-25 minutes, or until they are heated through and soft again. This method is perfect for impromptu gatherings or busy weeknights when you need fresh-tasting bread with minimal effort.
Common Questions About Homemade Brioche Buns
Here are answers to some frequently asked questions to help you on your journey to baking perfect homemade brioche buns:
Both active-dry yeast and instant yeast (also known as quick-rise or rapid-rise yeast) will work wonderfully for this brioche bun recipe. If you opt for instant yeast, you might notice the dough rises a bit faster, potentially cutting down the rising time by about half. However, the final baked results – the texture and flavor – will be very similar with either type. This particular recipe has not been tested with fresh yeast, so it’s best to stick to active-dry or instant for reliable results in achieving those soft, fluffy homemade buns.
You’re right to ask, as many traditional bread recipes call for proofing yeast! However, I’ve adopted this efficient method, often used by experts like Red Star Yeast, and it’s a fantastic time-saver. If you’re confident that your yeast is fresh and has not expired, you can indeed skip the separate proofing step. Combining all the dry ingredients, including the yeast, with liquids heated to 120-130°F (which is considerably warmer than just “warm water”) simultaneously hydrates and activates the yeast effectively. This integrated approach achieves the same goal of ensuring your yeast is active and ready to make your dough rise beautifully, without an extra waiting period, streamlining the homemade bun baking process.
While you technically *can* use all-purpose flour if it’s all you have on hand, I highly recommend using bread flour for the best possible results with these homemade brioche buns. Bread flour contains a higher protein content, which translates to greater gluten-forming power. This stronger gluten network provides the optimal structure and elasticity for yeast-risen doughs, leading to a superior rise, a chewier crumb, and that perfect, airy texture characteristic of brioche. Using all-purpose flour might result in a slightly less robust and perhaps a bit denser bun, so if you’re aiming for perfection in your homemade burger buns or sandwich rolls, bread flour is the way to go!
The precise amount of flour required for baking can fluctuate due to various factors, such as the humidity in your kitchen, the brand of flour, and even the exact size of your eggs. This is why the recipe provides a range, typically 3 to 3½ cups. The key is to add flour gradually and observe your dough. You’ll know you’ve added sufficient flour when the dough forms a cohesive ball that mostly clears the sides of the mixing bowl (or is manageable by hand), yet remains very soft, pliable, and only slightly tacky to the touch. It should feel alive and elastic. Resist the urge to add too much flour, as this is a common pitfall that can lead to tough, dense, and dry rolls instead of the light, airy brioche you’re aiming for. Always prioritize the feel of the dough over hitting an exact measurement in a recipe range for the best homemade buns.
While a stand mixer with a dough hook offers undeniable convenience, especially for a rich dough like brioche, kneading by hand is absolutely possible and incredibly rewarding! It takes a bit more elbow grease and time, but the process is quite meditative and connects you to the craft of baking. You’ll typically knead on a lightly floured surface, using a push-fold-turn motion until the dough becomes smooth, elastic, and passes the “windowpane test” (where a small piece of dough can be stretched thin enough to see light through it without tearing). For a fantastic visual guide and clear instructions on proper hand-kneading technique for your homemade brioche dough, I highly recommend this tutorial on how to knead bread by hand.
More Homemade Buns Recipes to Explore
Get the Full Recipe for Homemade Brioche Buns

Homemade Sandwich, Slider and Burger Buns
Pin Recipe
Leave a Review
Ingredients
- ¼ cup (57 grams) milk
- ¾ cup (170 grams) water
- 3 tablespoons (42 grams) unsalted butter
- 3-3 ½ cups (360-420 grams) bread flour
- 2 ¼ teaspoons (7 grams) Red Star Platinum Yeast
- 2 tablespoons (25 grams) granulated sugar
- 1 ½ teaspoon salt
- 2 large eggs , beaten
- 1 large egg , beaten with 2 tablespoons water, for egg wash
- Sesame seeds or poppy seeds , optional
Equipment
Instructions
-
In a small saucepan, combine the milk, water, and butter. Warm over medium low heat until butter is melted. Cool for about 5 minutes, or until temperature is 120-130°F.
-
In the bowl of a stand mixer fitted with a dough hook (or in a large bowl if planning to mix by hand), combine 2½ cups of the bread flour, the yeast, sugar and salt. Add the warm water mixture, followed by the beaten eggs, mixing on low speed until incorporated.
-
Add the remaining bread flour 2 tablespoons at a time while mixing on medium low speed until dough almost clears the bowl and is only a slightly sticky to the touch (It’s okay if some dough sticks to your fingers). You may not need all of the remaining flour, or you may need more than is called for. Knead until smooth and elastic, about 5-7 minutes more.
-
Cover with plastic wrap and put in a warm place and allow to rise until doubled, about 1 hour.
-
Punch down dough and let rest for a few minutes. Divide dough into eight equal pieces for larger buns and 12 equal pieces for smaller rolls. Shape into balls.
-
Place on a sheet pan (for buns) or 9×13-inch pan (for smaller rolls) lined with parchment paper. Spray some plastic wrap with non-stick cooking spray and place over the shaped buns/rolls. Return to a warm place and continue to rise for an additional 30 minutes until doubled.
-
When ready to bake, preheat oven to 400°F. Brush buns with egg wash and sprinkle with sesame seeds or poppy seeds, if desired.
-
Bake until golden brown, about 10 minutes for larger buns and 15 minutes for smaller rolls. Cool completely on a wire rack.
Video
Notes
- Yields 8 larger burger buns or 12 smaller sandwich rolls. Nutritional information is for 8 burger buns.
- For the best rise and texture, ensure your yeast is fresh and your liquid temperature is within the specified range.
- Don’t overcrowd your baking sheets when rising, especially for larger burger buns, as this can inhibit their spread.
This recipe for homemade brioche buns was originally published in June 2021 and was proudly sponsored by Red Star Yeast. All opinions expressed are genuinely my own, as always. Thank you for supporting valuable partnerships with brands I truly believe in and trust to deliver quality ingredients for your baking endeavors.
