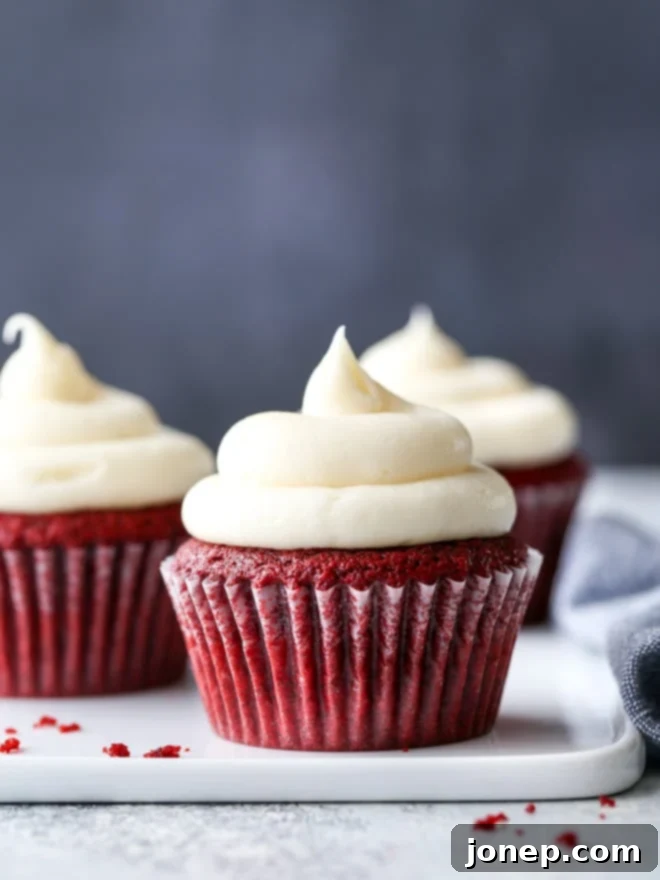
Irresistibly Moist Red Velvet Cupcakes with Velvety Cream Cheese Frosting: A Classic Recipe Guide
You just can’t beat a classic, especially when it comes to these tender and incredibly moist red velvet cupcakes generously crowned with a rich, tangy cream cheese frosting. This timeless dessert is a true masterpiece, beloved for its striking crimson hue, delicate crumb, and unique flavor profile that perfectly balances subtle cocoa notes with a hint of tang. They are, quite simply, about as good as it gets, offering a luxurious treat in every bite.
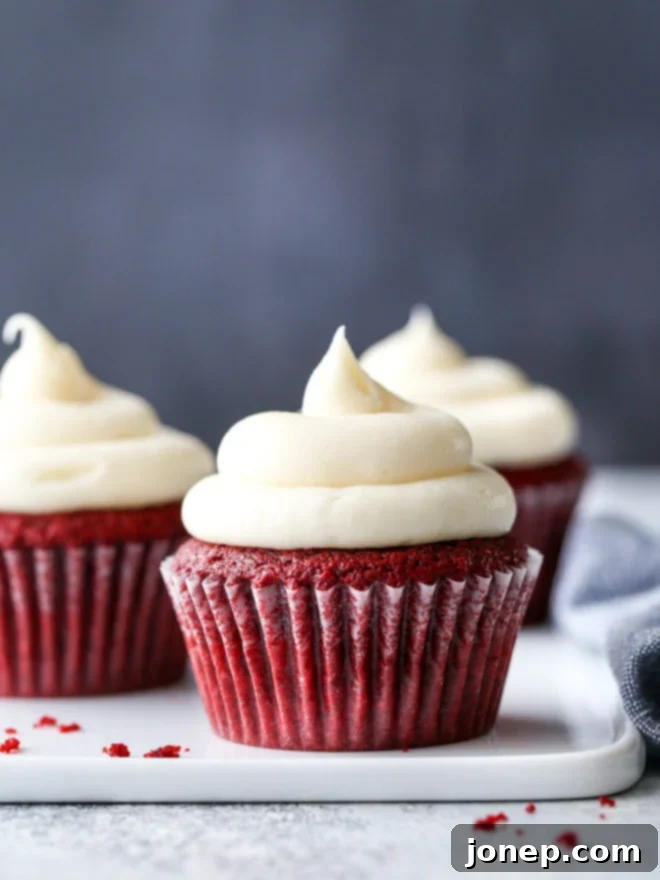
Do you find yourself drawn to the allure of red velvet cake as much as I do? While food crazes may ebb and flow, red velvet has long cemented its place as a perennial favorite, a dessert that never goes out of style. I adore its gorgeous, vibrant crimson color, its distinct and complex flavor, and the incredibly soft, velvety texture of its crumb. There’s something truly magical about a red velvet treat that feels both decadent and comforting.
These delightful red velvet cupcakes, finished with a luscious rich cream cheese buttercream frosting, are both adorable and utterly delicious. What’s even better is how simple they are to whip up! They’re the quintessential treat for any celebration – perfect for birthdays, festive holidays like Christmas and Valentine’s Day, or any special occasion that calls for a touch of elegance and indulgence. Each cupcake offers a perfect individual portion of this beloved classic, guaranteed to be a crowd-pleaser and disappear quickly from any gathering.
Unraveling the Mystery: What Exactly is Red Velvet Cake?
Red velvet cake is often mistakenly identified as merely a red-colored chocolate cake. However, its identity is far more intricate and distinct than just its famous vibrant hue. While its striking color is certainly its most recognizable quality, the true essence of red velvet lies in its unique flavor and texture. The earliest red velvet cake recipes, dating back over a hundred years, were quite different from today’s versions, often achieving a reddish tint through a reaction between natural cocoa and acidic ingredients like buttermilk.
Modern red velvet cake recipes, including these irresistible cupcakes, tend to share a common, beloved flavor profile: a unique and harmonious blend of vanilla with a subtle, yet unmistakable, hint of cocoa. This delicate cocoa note is perfectly complemented by a distinctive, tangy flavor derived from the buttermilk. This combination creates a depth of taste that is both comforting and sophisticated, providing a gentle acidity that brightens the overall profile. The buttermilk also plays a crucial role in achieving the characteristic tender “velvet” texture, ensuring each bite is exquisitely soft and fine-crumbed.
These red velvet cupcakes are no exception to this tradition, boasting an incredibly tender and plush crumb. The inclusion of vegetable oil in the recipe is a secret weapon for achieving super moist cupcakes, preventing them from drying out and ensuring that melt-in-your-mouth experience that true red velvet lovers crave. It’s this combination of subtle flavor, delicate texture, and visual appeal that makes red velvet a truly special and enduring classic in the world of desserts.
The Iconic Hue: All About Red Food Coloring in Red Velvet Cupcakes
Achieving that signature vibrant red color is undeniably a defining feature of authentic red velvet cake and cupcakes. The intense crimson hue is what makes this dessert so visually appealing and instantly recognizable. To get the rich, deep red that these red velvet cupcakes are known for, this recipe calls for a full 1-ounce bottle of liquid red food coloring, which is approximately 3 tablespoons. This amount ensures a truly striking and consistent color throughout the batter.
If you prefer using gel food coloring, which is more concentrated, you’ll need approximately 2 teaspoons to achieve a similar vibrant shade. Gel food coloring often yields a deeper, more saturated color with less volume. It’s important to remember that the color is not just for aesthetics; it’s part of the red velvet identity, making the dessert as delightful to the eyes as it is to the palate.
For those who are interested in creating naturally-dyed red velvet cake or prefer to avoid artificial food colorings, a simple Google search for naturally-dyed red velvet cake will provide a wealth of innovative solutions. Common natural alternatives include using beet powder or pureed cooked beets, which can impart a lovely reddish tint along with a subtle earthy sweetness. Another method involves utilizing the natural reddish-brown hue that some non-Dutched cocoa powders produce when they react with acidic ingredients like vinegar or buttermilk, though this often results in a more subdued, rustic red. Experimenting with these natural options can still yield beautiful and delicious red velvet cupcakes, allowing you to customize them to your preference while maintaining the classic charm.
Mastering the Art: How to Bake These Perfect Red Velvet Cupcakes
Creating these delightful red velvet cupcakes is a remarkably simple process that yields impressively delicious results. This recipe is pretty basic and straightforward, making it accessible for bakers of all experience levels. You can accomplish the entire baking and frosting process in well under an hour, meaning fresh, homemade red velvet cupcakes are always within reach!
- Preheat Oven and Prepare Pan: Begin by preheating your oven to 350° F (175°C). Line a standard 12-cup muffin or cupcake pan with paper cupcake liners. Alternatively, if you don’t have liners, you can lightly grease the muffin cavities with butter or a non-stick cooking spray. This initial step ensures your oven is at the correct temperature and your pan is ready to go, preventing any delays.
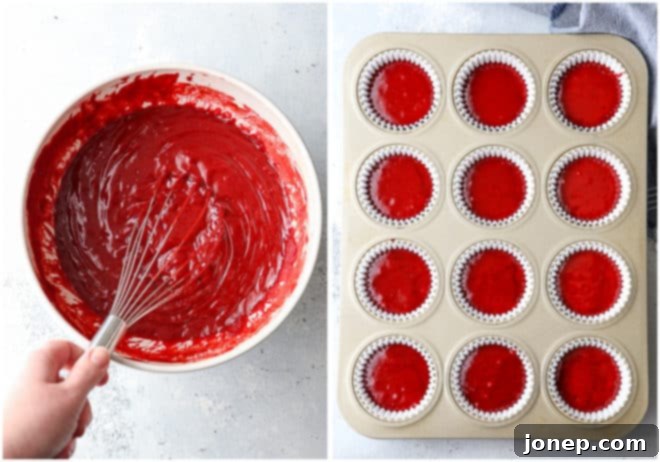
- Combine Wet Ingredients: In a separate, medium-sized mixing bowl, whisk together all the liquid ingredients. This includes the vegetable oil, buttermilk (ensure it’s well-shaken!), the large egg, the extra egg yolk, the vibrant red food coloring, and the vanilla extract. Whisk until all these components are thoroughly combined and the color is uniform throughout. The buttermilk contributes both moisture and a subtle tang crucial to the red velvet flavor.
- Sift Together Dry Ingredients: In a larger mixing bowl, sift together the dry ingredients: all-purpose flour, granulated sugar, unsweetened cocoa powder, salt, baking powder, and baking soda. Sifting is an important step as it helps to aerate the flour mixture, remove any lumps, and ensures a lighter, fluffier cupcake texture. This step also ensures even distribution of the leavening agents.
- Gently Mix Wet and Dry: Carefully pour the whisked wet ingredients into the bowl containing the sifted dry ingredients. Using either an electric mixer on a low setting or a sturdy whisk and a good amount of “elbow grease,” mix until the ingredients are just combined and the batter is smooth. It’s crucial not to overmix the batter, as this can develop the gluten in the flour too much, leading to tough and dense cupcakes. A few small lumps are perfectly acceptable and often indicate a tender final product.
- Portion into Pans: Using a measuring scoop or a large spoon, neatly portion equal amounts of the beautiful red batter into each prepared cupcake liner. It’s important to fill each liner no more than two-thirds full. This allows ample room for the cupcakes to rise properly during baking without overflowing and creating flat tops. Consistent portioning also ensures even baking for all your cupcakes.
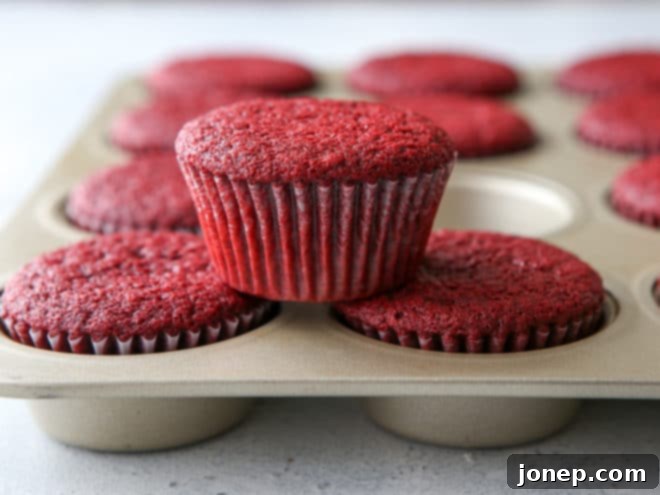
- Bake Until Done: Transfer the filled cupcake pan to your preheated oven. Bake for approximately 18-20 minutes. You’ll know they’re done when the tops are domed and spring back lightly to the touch, or when a toothpick inserted into the center of a cupcake comes out clean, indicating no wet batter remains.
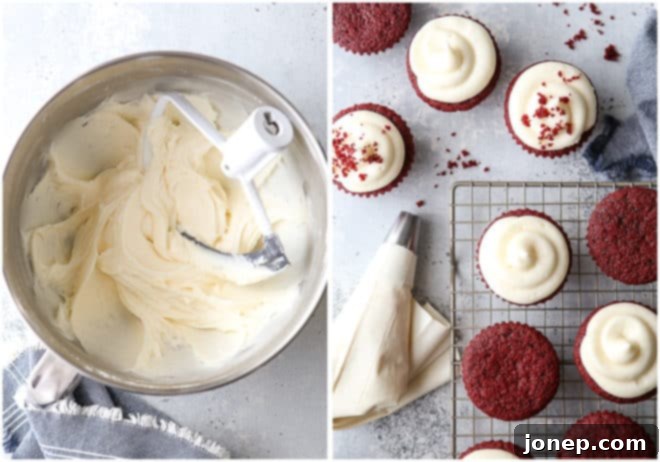
- Prepare Cream Cheese Frosting: While the cupcakes are in the oven and then cooling, take this time to prepare the luscious cream cheese buttercream frosting. This way, your frosting will be perfectly ready to crown your cooled cupcakes. Ensure your butter and cream cheese are at room temperature for the smoothest frosting.
- Frost as Desired: Once the cupcakes have cooled completely on a wire rack – which is vital for the frosting to adhere properly and not melt – it’s time to add the finishing touch. You can frost them simply and elegantly with a knife or offset spatula, or for a more decorative look, use a piping tip and a pastry bag to create beautiful swirls and peaks.
Achieving Bakery-Quality Results: Essential Tips for Cupcake Success
Baking perfect, tender, and moist red velvet cupcakes is entirely achievable with a few key techniques and careful attention to detail. These tips will help you avoid common pitfalls and ensure your cupcakes turn out beautifully every single time, rivaling those from your favorite bakery:
- Use a Measuring Scoop for Even Portions: To guarantee that all your cupcakes bake uniformly and have a consistent, professional appearance, invest in a good quality measuring scoop. Using it to portion equal amounts of batter into each cupcake cup is crucial. This not only ensures even baking times but also results in a beautifully uniform batch. (This is the one I use and find indispensable.)
- Never Overfill Liners: This is a golden rule for cupcakes. Do not fill your cupcake liners more than 2/3 full. Cupcakes rely on the structural integrity of the cupcake liners or muffin pan walls to help them rise properly and form their domed tops. If you overfill the liners, there’s too much batter, and it won’t have enough space to climb, causing it to spill over the sides and result in flat, potentially misshapen cupcakes.
- Resist the Urge to Peek: During the baking process, especially in the first 10-12 minutes, it can be incredibly tempting to open the oven door and peek. However, small cupcakes are very sensitive to sudden temperature drops, which can cause them to sink in the middle. Trust your oven and the timing; use your oven light to observe their progress.
- Know When They’re Perfectly Done: Your red velvet cupcakes are ready when they are beautifully domed and appear set. For a definitive test, gently open the oven door and lightly touch the top of a cupcake. If it springs back immediately, they’re done. If your finger leaves an indentation, give them a few more minutes. A toothpick inserted into the center should also come out clean.
- Cooling is Crucial: Once baked, it’s vital to transfer the cupcakes from the hot pan promptly. Leave them in the pan for only about 5 minutes, or until they are cool enough to handle without falling apart. Then, carefully transfer them to a wire cooling rack to cool completely. Leaving them in the hot pan for too long will cause the residual heat to continue cooking them, leading to dry and over-baked cupcakes. Proper cooling ensures moisture retention and a tender crumb.
- Ensure Room Temperature Ingredients: For the best results, especially with the cream cheese frosting, make sure your butter, cream cheese, and even eggs for the cupcakes are at proper room temperature. This allows them to cream together smoothly, prevents lumps in the frosting, and contributes to a more uniform and tender cupcake batter.
- Avoid Overmixing the Batter: When combining the wet and dry ingredients for your red velvet cupcakes, mix only until they are just combined and smooth. Overmixing develops the gluten in the flour, which can lead to a tough, chewy texture instead of the desired tender, velvety crumb. A few small lumps in the batter are perfectly fine and often result in a more delicate cake.
- Measure Precisely: Baking is a science, and precision is key. Use a kitchen scale for dry ingredients like flour and sugar whenever possible, as volumetric measurements can vary. Accurate measurements contribute significantly to the consistency and success of your recipe.
The Perfect Partner: Creating Decadent Cream Cheese Frosting
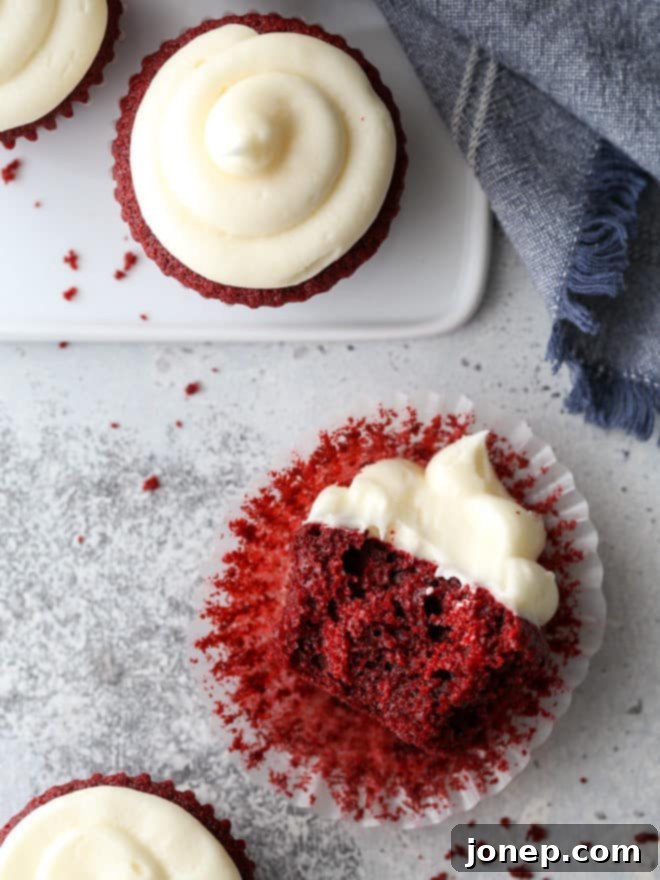
No red velvet cupcake is truly complete without its iconic and indispensable companion: the rich, tangy, and utterly irresistible cream cheese frosting. This frosting isn’t just a delightful topping; it’s an integral part of the red velvet experience, providing a crucial textural and flavor contrast that perfectly balances the subtle sweetness of the cupcake. Here’s what makes it so special and how to perfect it:
- The Essential Tang: The unique tanginess of cream cheese is what sets this frosting apart. It cuts through the sweetness of the powdered sugar, creating a balanced and complex flavor profile that elevates the entire red velvet cupcake. Without this tang, red velvet wouldn’t be the same beloved dessert.
- Smooth and Velvety Texture: The key to achieving a perfectly smooth, lump-free, and velvety cream cheese frosting lies in using ingredients at the correct temperature. Ensure both your cream cheese and butter are at proper room temperature. This allows them to cream together effortlessly in your mixer, preventing any undesirable lumps and creating a light, airy base for your frosting.
- Sifted Powdered Sugar is a Must: Always sift your powdered sugar before adding it to the creamed butter and cream cheese mixture. This step is crucial for eliminating any small clumps of sugar, ensuring your frosting is wonderfully silky-smooth and free from gritty textures.
- Adjusting Consistency for Perfection: The addition of heavy whipping cream is vital for achieving the ideal piping or spreading consistency. Start with one tablespoon and gradually add more, up to two tablespoons, until your frosting reaches a light, fluffy, and easily manageable texture. Be careful not to add too much, as it can make the frosting too runny.
- Flavor Enhancement with Vanilla: A good quality vanilla extract is essential here. It not only amplifies the creamy sweetness of the frosting but also complements the tang of the cream cheese, adding another layer of deliciousness to this iconic topping.
Once you’ve mastered this simple yet decadent cream cheese frosting, you’ll find yourself looking for excuses to make it for other desserts too. It’s versatile enough for carrot cakes, pumpkin cakes, or even as a delightful dip for fruit!
Storage and Serving Suggestions for Your Perfect Red Velvet Cupcakes
To ensure your homemade red velvet cupcakes remain as fresh, moist, and delicious as possible, proper storage is absolutely essential. Given the cream cheese frosting, these cupcakes require a little extra care:
- Refrigeration for Frosted Cupcakes: Due to the dairy content in the cream cheese frosting, frosted red velvet cupcakes are best stored in an airtight container in the refrigerator. They will maintain their quality for up to 3-4 days. For the best flavor and texture, allow them to come to room temperature for about 15-30 minutes before serving. This softens the cake and allows the frosting to become beautifully creamy again.
- Storing Unfrosted Cupcakes: If you’re planning to bake ahead, unfrosted cupcakes offer more flexibility. They can be stored in an airtight container at room temperature for up to 2 days. For longer storage, unfrosted cupcakes freeze exceptionally well for up to 3 months. When ready to enjoy, thaw them overnight in the refrigerator before bringing them to room temperature and frosting.
- Freezing Frosted Cupcakes (with care): While it is possible to freeze frosted cupcakes, freezing can sometimes alter the texture of the cream cheese frosting slightly. If you choose this method, first place the frosted cupcakes on a baking sheet in the freezer until the frosting is firm (about an hour). Then, wrap each cupcake individually in plastic wrap and place them in an airtight freezer-safe container. Thaw them in the refrigerator before serving.
- Elegant Serving Suggestions: For an extra touch of elegance and visual appeal, consider garnishing your red velvet cupcakes. A light dusting of unsweetened cocoa powder or confectioners’ sugar adds a sophisticated finish. You could also sprinkle them with a few festive red sprinkles or, for a fresh contrast, top each with a single fresh raspberry or a small chocolate curl. These moist red velvet cupcakes are perfect on their own, but they also pair wonderfully with a cup of freshly brewed coffee, a glass of milk, or a soothing cup of tea.
Watch How to Make These Classic Red Velvet Cupcakes
Shop Essential Tools for this Red Velvet Cupcake Recipe
Having the right tools can make all the difference in your baking experience. Here are some highly recommended items to help you create these perfect red velvet cupcakes:
Note: This recipe was originally published in May 2011. It has since been thoroughly updated and refined over the years to provide the most precise instructions and ensure the absolute best, most perfect red velvet cupcakes every time.
Instructions
-
Preheat oven to 350° F (175°C). Line a cupcake pan with cupcake liners or grease with butter or cooking spray.
-
In a medium bowl, sift flour, sugar, cocoa, salt, baking powder, and baking soda together.
-
In another bowl whisk together the oil, buttermilk, eggs, red food coloring, and vanilla.
-
Pour wet ingredients into the bowl with the dry ingredients and whisk until combined and smooth. Be careful not to overmix.
-
Fill cupcake liners ⅔ full and bake until a toothpick inserted into the center comes out clean, about 18-20 minutes. Let cool in the muffin pan for 5 minutes, then turn out onto a wire rack to cool completely.
-
To make the frosting, beat together cream cheese, butter, powdered sugar, vanilla, and heavy cream on high speed until light and fluffy, about 2-3 minutes. Ensure all ingredients are at room temperature for the best results. Frost cooled cupcakes as desired.
