Indulge in Perfection: Soft Chocolate Sugar Cookies with Whipped Vanilla Buttercream
There’s an undeniable magic in the delightful combination of tender, rich chocolate sugar cookies crowned with fluffy, whipped vanilla buttercream frosting. This classic pairing creates a symphony of textures and flavors that is truly irresistible, making these cookies a perennial favorite for any occasion or simply as a comforting treat.

While some holidays like Valentine’s Day often bring out the sweet tooth in us, these exquisite chocolate sugar cookies aren’t just for special occasions. They are a year-round delight, perfect for celebrations, gifting, or simply satisfying that craving for something wonderfully sweet and utterly chocolatey. From festive Christmas gatherings to casual weeknight desserts, their versatility and universally loved flavor profile make them a baking project you’ll want to revisit again and again.
I stumbled upon this incredible chocolate sugar cookie recipe a few years ago, and it quickly ascended to the top of my baking rotation. What sets these cookies apart is their exceptional softness, deep chocolate flavor, and a melt-in-your-mouth texture that is simply divine. While they are undoubtedly magnificent on their own, the experience is elevated to new heights when paired with our incredibly smooth and whipped vanilla buttercream frosting. This recipe isn’t just about baking; it’s a creative and delicious endeavor that brings joy to both the baker and everyone who gets to enjoy these delectable treats.
Table of Contents
- Ingredients You’ll Need
- How to Make These Chocolate Sugar Cookies
- How to Decorate Sugar Cookies
- Essential Sugar Cookie Decorating Tools
- FAQs for This Chocolate Sugar Cookie Recipe
- Expert Tips for the Best Chocolate Sugar Cookies
- More Sugar Cookie Recipes to Explore
- Get the Full Recipe
Gather Your Ingredients for Chocolate Sugar Cookies
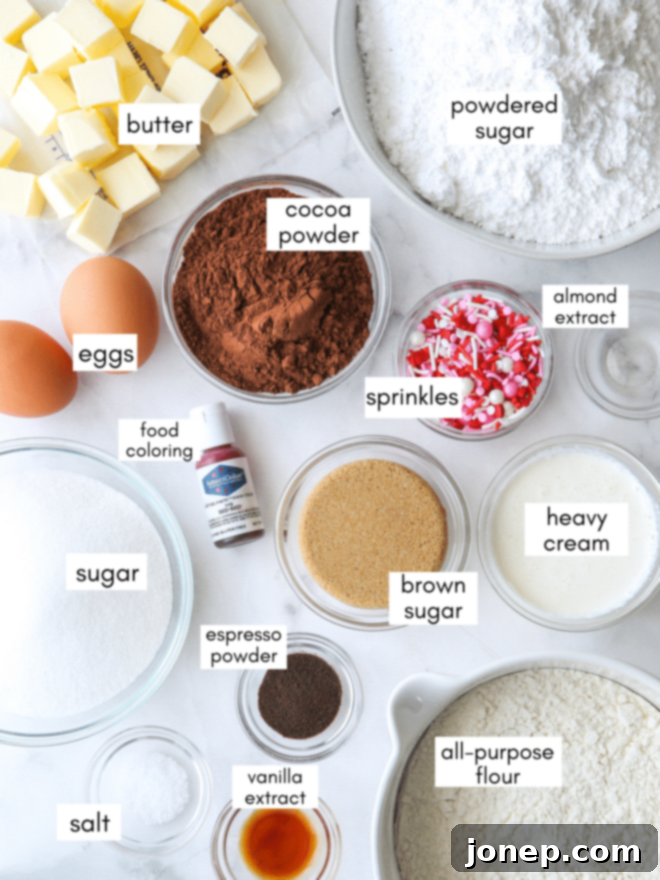
Crafting perfect chocolate sugar cookies begins with the right ingredients. For the cookies, you’ll need pantry staples like unsalted butter, granulated sugar, brown sugar, large eggs, and vanilla extract. The deep chocolate flavor comes from high-quality unsweetened cocoa powder, perfectly balanced with all-purpose flour and a touch of salt. An optional but highly recommended addition is espresso powder, which subtly enhances the chocolate notes without adding a coffee taste. For the luscious vanilla buttercream, you’ll need powdered sugar, more unsalted butter, heavy whipping cream, vanilla extract, and a hint of almond extract for depth. Food coloring and sprinkles are optional for decoration but add a fun, festive touch.
Mastering the Art of Chocolate Sugar Cookies: A Step-by-Step Guide
Making these chocolate sugar cookies is a rewarding process, and following these steps carefully will ensure you achieve perfectly soft, flavorful results every time.
- Prepare the Cookie Dough using the Creaming Method.
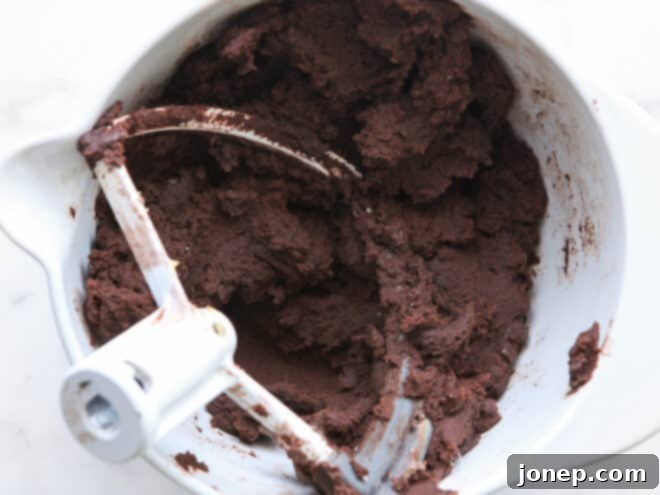
This recipe begins with the fundamental “creaming method,” a crucial step for achieving light and tender cookies. You’ll beat together room-temperature butter and sugars until they are light, pale, and fluffy. This process incorporates air into the mixture, which is essential for the cookies’ soft texture. Next, eggs and vanilla extract are added, followed by the dry ingredients (flour, cocoa powder, espresso powder, and salt) which are gently mixed in until just combined. Overmixing at this stage can lead to tough cookies, so be careful not to develop too much gluten.

- Chill the Dough for Optimal Texture and Handling.
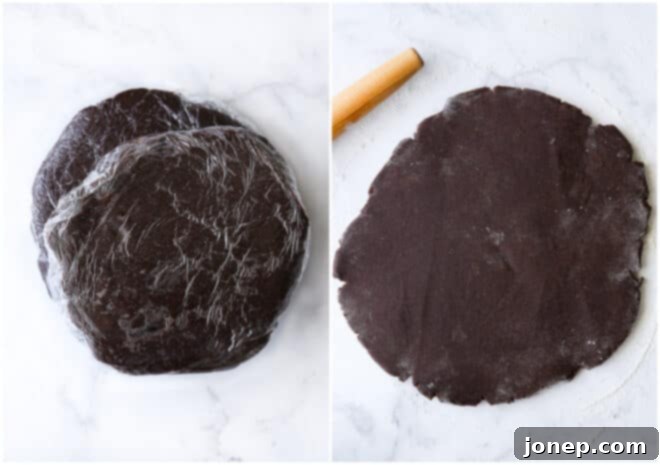
After mixing, the dough will be quite soft and sticky. Chilling the sugar cookie dough in the fridge serves two important purposes: firstly, it firms up the butter, making the dough much easier to handle, roll out, and cut without sticking. Secondly, chilling allows the flour to fully hydrate and the gluten to relax. This results in cookies that hold their shape beautifully during baking, have softer centers, and develop a more nuanced flavor profile. Aim for at least an hour, or up to a few days for convenience. -

Roll, Cut, and Chill Again for Perfectly Shaped Cookies.
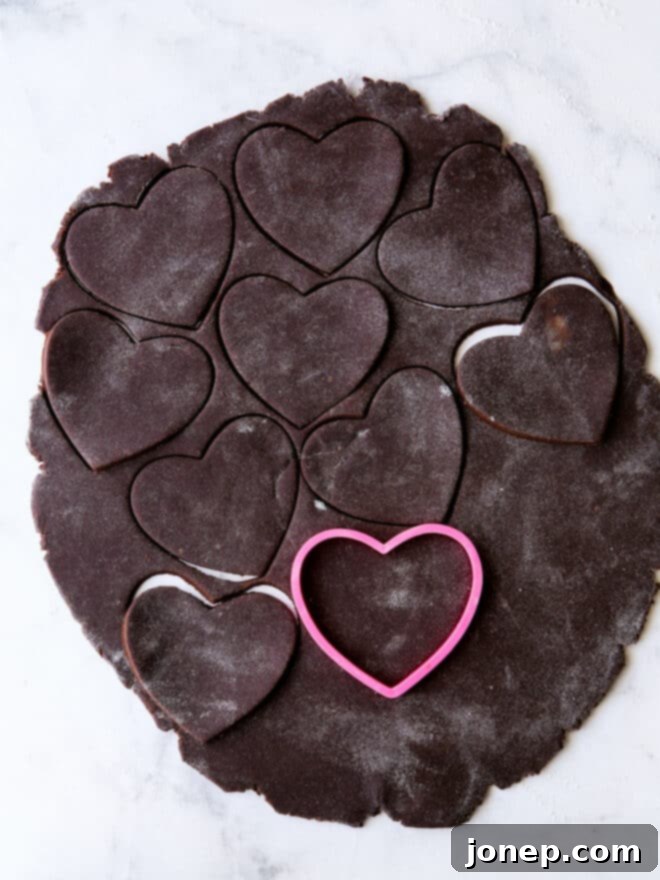
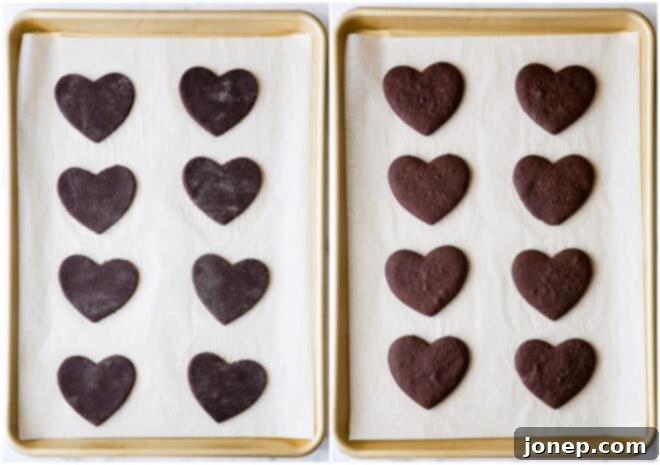
Divide your chilled dough and roll it out on a lightly floured surface. You have the flexibility to choose your cookie thickness: roll it ¼ inch thick for slightly crispier edges and a classic sugar cookie feel, or ½ inch thick for an extra soft, almost brownie-like chewiness. Use your favorite cookie cutters to create any shapes you desire. After cutting, transfer the shapes to a parchment-lined baking sheet and place them in the freezer for a quick 15-minute chill. This final chill ensures the cookies maintain their intricate shapes and prevents spreading during baking.

- Bake to Perfection (But Don’t Overbake!).
Once chilled, transfer your baking sheets directly from the freezer to a preheated 350°F oven. The baking time will vary based on the thickness and size of your cookies, typically ranging from 10-15 minutes. For dark chocolate cookies, visual cues can be tricky. Look for cookies whose centers appear set and the edges are firm. It’s crucial not to overbake, as this is the secret to maintaining their soft, tender texture. If in doubt, bake a small test batch first to pinpoint the ideal baking time for your oven and preferred cookie thickness. - Frost and Enjoy Your Masterpiece.
While your cookies cool completely on a wire rack, prepare your luscious vanilla buttercream frosting. Once the cookies are entirely cool, it’s time for the most fun part – decorating! Frost them as generously as you like, add sprinkles, and let your creativity shine. Then, gather your loved ones and savor every bite of your homemade chocolate sugar cookie creations!
Creative Cookie Decorating: Bringing Your Chocolate Sugar Cookies to Life
While the rich flavor of these chocolate sugar cookies makes them perfectly delightful on their own, the real fun often begins with decoration! Frosting and sprinkles transform them into edible works of art, perfect for any holiday or theme. You have two main options for frosting: royal icing for a smooth, crisp, and polished finish that hardens completely, or buttercream frosting for a soft, fluffy, and generously thick layer that melts delightfully in your mouth. Personally, I find the creamy, rich texture of a generous dollop of buttercream frosting to be the ideal complement to these soft chocolate cookies, offering a higher frosting-to-cookie ratio that truly enhances the indulgence.
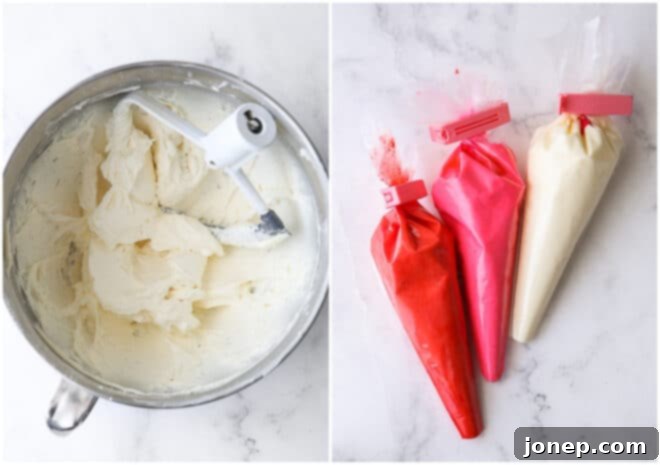
To apply the frosting, you can use a simple knife or an offset spatula for a rustic, hand-spread look. For more intricate designs, a piping bag fitted with various tips allows for precise lines, borders, and decorative elements. If you wish to add a splash of color to your frosting, divide it into separate bowls and mix in gel food coloring. Gel colors are highly concentrated and produce vibrant hues without significantly altering the frosting’s consistency, making them superior to liquid colorings for most applications. Don’t forget the sprinkles – they add instant festivity and a delightful textural crunch!
Essential Sugar Cookie Decorating Tools
Having the right tools can make your cookie decorating experience even more enjoyable and professional-looking. Here are some of my go-to items:
- Disposable piping bags or reusable piping bags: For precise and clean frosting application.
- Piping tips: A variety of tips allows for different designs, from simple outlines to elaborate swirls.
- Gel food coloring (Americolor is my favorite brand): For vibrant, rich colors without thinning your frosting.
- Sprinkles: From classic nonpareils to elaborate shapes, sprinkles add that final magical touch.

Frequently Asked Questions for Perfect Chocolate Sugar Cookies
Let’s address some common questions to help you bake these chocolate sugar cookies like a pro.
While some recipes are very particular about the type of cocoa powder used (you can learn more in my detailed guide Natural Unsweetened vs. Dutch-Processed Cocoa Powder), this chocolate sugar cookie recipe is quite forgiving and allows for either. Natural cocoa powder will yield a lighter colored cookie with a slightly fruitier, more acidic chocolate flavor. Dutch-processed cocoa powder, on the other hand, is treated with an alkali to neutralize its acidity, resulting in a darker, richer, and smoother chocolate flavor. For the intensely dark and decadent cookies pictured here, I used Hershey’s Special Dark cocoa powder, which is a Dutch-processed variety. Feel free to experiment with both to discover your preference!
Chilling the dough is a critical step for several reasons, directly impacting the quality of your sugar cookies. Firstly, it makes the dough significantly easier to work with, preventing it from sticking to your rolling pin, counter, or cookie cutters. Cold butter in the dough helps it maintain its structure. Secondly, and perhaps more importantly, chilling allows the dough to “rest and relax.” During this period, the moisture in the dough distributes itself evenly, fully hydrating the flour and allowing the gluten strands (formed during mixing) to relax. This relaxation prevents the cookies from shrinking or spreading excessively during baking, ensuring they hold their cut-out shapes perfectly. It also contributes to a wonderfully soft center and slightly crisp edges, a hallmark of a great sugar cookie.
The ultimate key to soft sugar cookies is to avoid overbaking them at all costs! This can be particularly challenging with dark chocolate cookies, as their color makes it difficult to see traditional browning cues. For cookies rolled ¼-inch thick, they are typically done when the tops appear dry and set, but the centers still look slightly soft. If you opt for thicker, ½-inch cookies, they might require an additional 1-2 minutes of baking time. Baking times can vary considerably based on the exact size and shape of your cookie cutters and the calibration of your oven. To ensure perfect results, I highly recommend baking a small test batch of 2-3 cookies first. This will help you pinpoint the precise baking duration for your specific conditions and desired softness.
Proper storage ensures your delicious creations stay fresh and ready to enjoy. The prepared cookie dough can be kept in the fridge, tightly wrapped in plastic, for 3-5 days. For longer storage, it freezes beautifully: double-wrap the dough in plastic wrap and then foil, and it will keep well in the freezer for a month or more. When it comes to baked sugar cookies, store them in an airtight container at room temperature for up to a week; however, they are definitely at their peak freshness within the first few days. You can also freeze baked, unfrosted sugar cookies in a heavy-duty ziplock bag or airtight container (separated by parchment paper) for up to a month. To serve, simply let them thaw at room temperature for a few hours. While you can freeze frosted sugar cookies, I generally prefer to frost them fresh once thawed for the best texture and appearance.
Absolutely! This recipe is fantastic for make-ahead baking. As mentioned in the storage tips, you can prepare the dough up to 3-5 days in advance and keep it in the refrigerator. This allows you to spread out your baking process, making it less daunting for parties or busy periods. Just remember to let the chilled dough sit at room temperature for about 10-15 minutes before rolling if it’s too firm, making it easier to work with.
Cookie spreading is a common issue and usually points to a few culprits. The most frequent reason is butter that’s too warm or even slightly melted when you start creaming. Room temperature butter should still be cool to the touch and hold its shape. Another factor can be not chilling the dough sufficiently, or if your kitchen is very warm, the dough might warm up too much during rolling and cutting. Lastly, too much flour (incorrectly measured) or too little flour can also affect spread. Ensure you’re spooning and leveling your flour for accuracy.
Expert Tips for the Best Chocolate Sugar Cookies
Achieving bakery-quality chocolate sugar cookies is easy with these insider tips:
- Ensure Butter is at the Perfect Room Temperature: This is crucial for the creaming method. Room temperature butter should be soft enough to indent with your finger but not at all greasy, oily, or shiny looking. If your butter is too warm, the cookie dough will likely spread more in the oven, resulting in flatter cookies.
- Measure Flour Accurately: Precision in baking is key! Always measure flour correctly using the spoon and level method (spoon flour into your measuring cup and level off the top with a straight edge). Scooping directly from the bag can compact the flour, leading to too much flour and dry, crumbly cookies.
- Don’t Skip the Espresso Powder (Optional, but Recommended): The small amount of espresso powder in this recipe doesn’t make the cookies taste like coffee. Instead, it acts as a flavor enhancer, deepening and intensifying the rich chocolate notes, making them even more decadent.
- Utilize Pre-Cut Parchment Sheets: For ultimate convenience and easy cleanup, these pre-cut parchment sheets are a game-changer for cookie baking. They prevent sticking and make transferring cookies a breeze.
- Embrace Cookie Cutter Versatility: The beauty of sugar cookies is their adaptability! Feel free to use whatever cookie cutters you like. These chocolate sugar cookies are fantastic for any holiday or theme – from festive hearts for Valentine’s Day, spooky ghosts for Halloween, classic stars for Christmas, or lucky shamrocks for St. Patrick’s Day.
- Explore Different Food Dyes: While gel food coloring is recommended for its vibrancy, powdered food dyes and even natural dyes can also be used to color your buttercream frosting. Always follow the specific package instructions for best results.
- Understand Buttercream’s Crust: This particular buttercream recipe forms a slight crust after about 20 minutes of exposure to air. This is a beneficial quality as it allows you to gently stack frosted cookies without smudging the decoration, though it will not harden completely like royal icing.
- Avoid Overcrowding Your Baking Sheets: Give your cookies enough space (about ½ inch apart) on the baking sheet to allow for even heat circulation. Overcrowding can lead to uneven baking and cookies that stick together.
- Rotate Baking Sheets Mid-Bake: For exceptionally even baking, especially if your oven has hot spots, rotate your baking sheets halfway through the baking time. This ensures all cookies brown consistently.
- Cool Cookies Completely Before Frosting: Patience is a virtue in baking! Frosting warm cookies will cause your buttercream to melt and slide off, creating a messy situation. Always ensure cookies are fully cooled to room temperature before applying any frosting.
- Bring Eggs to Room Temperature: Just like butter, room temperature eggs emulsify better with the fat and sugar, creating a smoother, more uniform dough consistency.
More Sugar Cookie Recipes to Explore
If you’ve fallen in love with these chocolate sugar cookies, here are a few other sugar cookie variations to try for different occasions and preferences:
- Easy No-Roll Sugar Cookies: Perfect for when you want delicious sugar cookies without the fuss of rolling and cutting.
- Sugar Cookie Bars: A delightful, crowd-pleasing option that’s quick to make and easy to share.
- Frosted Sugar Cookie Cut Outs: The classic sugar cookie experience, ideal for elaborate decorating.
Get the Full Recipe for Chocolate Sugar Cookies
Ready to bake these irresistible treats? Below you’ll find the complete, detailed recipe for both the soft chocolate sugar cookies and the luscious whipped vanilla buttercream. Follow these instructions closely for the best results, and get ready to impress with your homemade baking skills!

Chocolate Sugar Cookies with Vanilla Buttercream
Pin Recipe
Leave a Review
Ingredients
Chocolate cookies:
- 1 cup (227 grams) unsalted butter , at room temperature
- 1 cup (200 grams) granulated sugar
- ½ cup (115 grams) packed light or dark brown sugar
- 3 large eggs
- 1 teaspoon vanilla extract
- 3 cups (375 grams) all-purpose flour
- ⅔ cup (60 grams) unsweetened cocoa powder
- 1 teaspoons espresso powder , optional
- ½ teaspoon salt
Vanilla buttercream:
- 4 cups (455 grams) powdered sugar , sifted
- 1 cup (227 grams) unsalted butter , at room temperature
- ¼ cup (65 ml) heavy whipping cream
- 1 tablespoon vanilla extract
- ¼ teaspoon almond extract
- Food coloring , optional
- Sprinkles , optional
Instructions
To make the cookies:
-
In the bowl of a stand mixer fitted with a paddle attachment or in a bowl with a hand mixer, beat the butter and sugars on high until pale and creamy, about 4 minutes.
-
Add the eggs one at a time, mixing after each. Add the vanilla extract and mix until combined.
-
In a separate bowl, sift together the cocoa powder, flour, espresso powder (if using) and salt. Add to the mixer bowl in 2 additions and mix on low until just combined.
-
Divide dough in half and place on a sheet of plastic wrap. Use the plastic wrap to help shape the dough into a disk (dough will be sticky). Cover completely with the plastic wrap. Chill dough for 1 hour and up to a few days.
-
When ready to bake, preheat oven to 350°F and line 2 sheet pans with parchment paper.
-
Working with one disk of dough at a time, roll out on a lightly floured surface to about 1/4 inch thick. Cut shapes as desired. Place on the prepared sheet pans 1/2 inch apart. Chill in the freezer for 15 minutes.
-
Bake cookies just until the edges are firm, 10-12 minutes depending on the size of your cookies. Do not over bake. Since the cookies are dark in color it may be difficult to see when they are done, so you may wish to bake a few test cookies to be sure you get the timing right.
-
Let the cookies cool completely before frosting.
-
Store cookies in an airtight container at room temperature for several days. Unfrosted cookies may be frozen for up to one month, stacked between layers of wax paper.
To make the frosting:
-
In the bowl of a stand mixer fitted with a paddle attachment or in a bowl with a hand mixer, beat the powdered sugar, butter, whipping cream, vanilla and almond extracts on low speed a few minutes until the mixture comes together in a thick frosting.
-
Increase speed to high and whip for several minutes until light and airy, scraping the bowl down periodically. Add food coloring and mix until smooth, if desired.
-
Frost cooled cookies as desired. Frosting can be made up to 2 days in advance. Store in an airtight container at room temperature.
Video
Notes
This recipe was originally published in February 2013, and has been updated with fresh insights, tips, and improved formatting to bring you the best chocolate sugar cookies possible.

