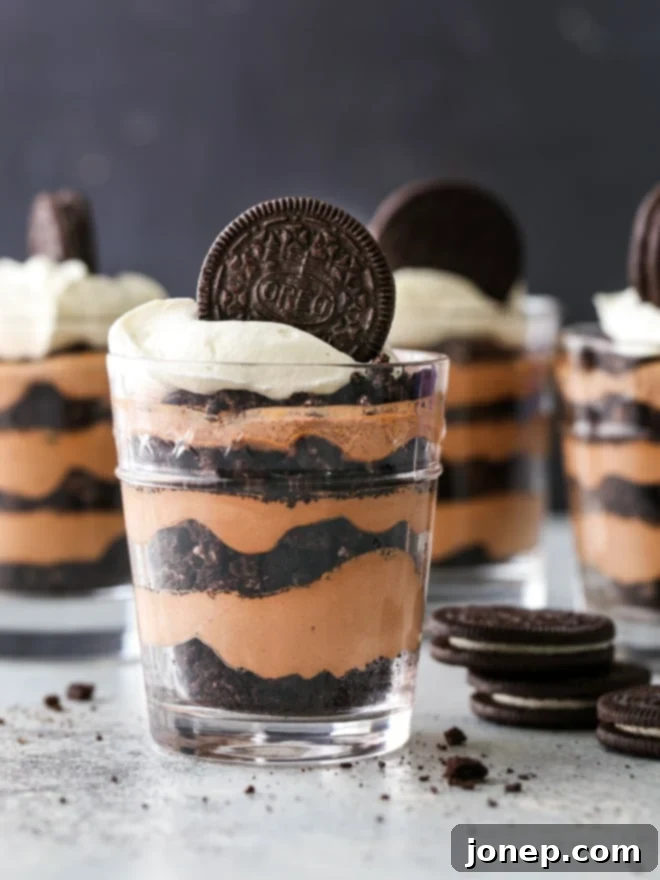
Decadent 3-Ingredient Chocolate Oreo Parfaits: Your Easiest No-Bake Dessert!
Prepare to be amazed by these incredibly simple yet utterly decadent Chocolate Oreo Parfaits! Crafted with just three essential ingredients, this no-bake dessert is a true game-changer for anyone craving a rich, satisfying treat without the fuss. Imagine layers of velvety, chocolate-infused whipped cream perfectly contrasted with the delightful crunch of crushed Oreo cookies, all coming together in elegant individual servings. It’s a dessert that tastes like you spent hours in the kitchen, but only takes minutes to assemble!
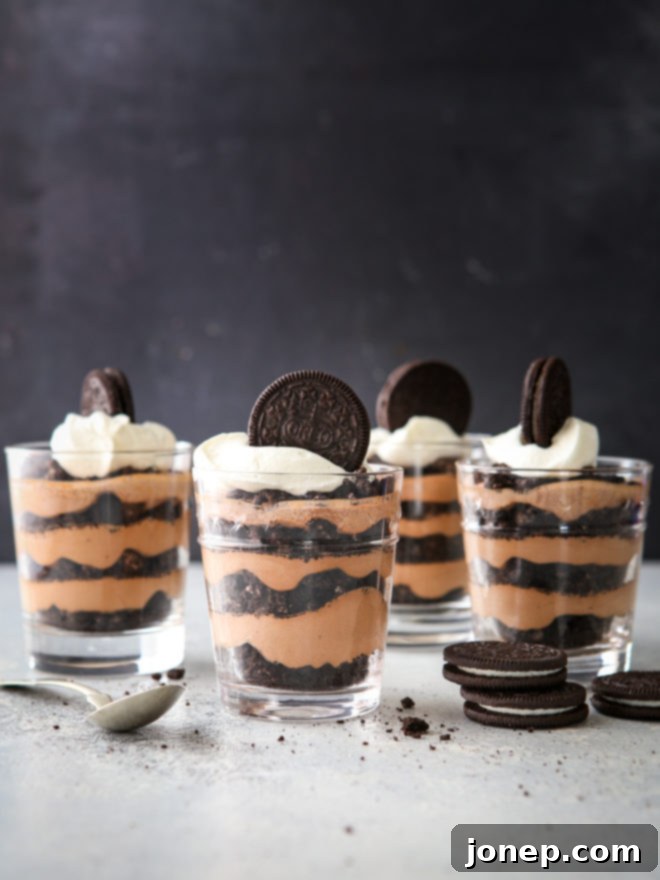
The origin story of these delightful parfaits is actually quite serendipitous. The first time I whipped them up, I was on a mission to create a complex, classic chocolate mousse. However, sometimes the best culinary discoveries happen by accident! What emerged instead was this brilliant combination of lush chocolate whipped cream and generously crushed Oreos, layered beautifully into glasses. It was, without a doubt, a deliciously happy accident, and one I immediately knew I had to share.
That initial, more intricate recipe idea was promptly set aside. Why complicate things when pure perfection can be achieved with such simplicity? This recipe is incredibly basic, astonishingly easy to execute, and SO unbelievably delicious! The harmonious blend of the light, mousse-like chocolate whipped cream with the familiar, satisfying crunch of the cookies creates a textural and flavor experience that’s truly addictive. This fun dessert is guaranteed to bring smiles to both children and adults, making it a fantastic choice for family gatherings, dinner parties, or just a spontaneous weeknight treat.
Whether you’re a seasoned baker or a complete novice in the kitchen, these Chocolate Oreo Parfaits offer a foolproof path to dessert bliss. Forget about turning on the oven, measuring a dozen ingredients, or waiting for hours. In just 15 minutes, you can have a gourmet-looking dessert that’s ready to devour. Let’s dive into how you can make this magic happen in your own kitchen!
Table of Contents
- Chocolate Oreo Parfaits: The Ultimate Easy Treat
- Why You Absolutely Need to Make These Parfaits Now
- The Magic of Just 3 Simple Ingredients
- How to Create Your Easy Chocolate Oreo Parfaits: Step-by-Step
- Tips for Parfait Perfection
- Creative Variations and Customizations
- Frequently Asked Questions About Oreo Parfaits
- More Irresistible Oreo Desserts
- Get the Recipe
Chocolate Oreo Parfaits: The Ultimate Easy Treat
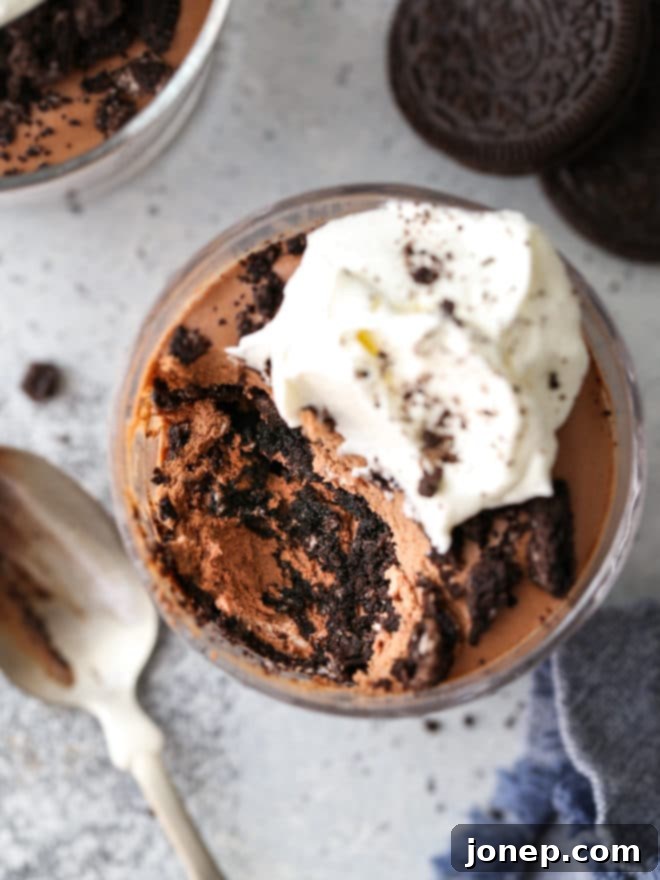
Get ready, because these chocolate Oreo parfaits are about to become your new favorite go-to dessert! They embody everything you love in a sweet treat: rich flavor, satisfying texture, and incredible ease of preparation. Whether you’re hosting a last-minute dinner party or simply craving something sweet after a long day, these parfaits deliver on all fronts.
Why You Absolutely Need to Make These Parfaits Now:
Beyond their incredible taste, there are numerous reasons why these easy chocolate Oreo parfaits should be next on your dessert agenda:
- Deceptively Decadent: They taste and look incredibly fancy, giving the impression of an elaborate dessert, yet the ingredients and instructions are anything but complicated. You’ll impress everyone with minimal effort!
- Minimal Time & Ingredients: You literally need just 15 minutes from start to finish and a mere 3 ingredients. This makes them perfect for busy schedules or when unexpected cravings strike.
- Instant Gratification: Unlike many desserts that require hours of chilling, these parfaits are ready to be enjoyed right away! No need to plan far in advance – simply assemble and serve for immediate delight.
- No Baking Required: Keep your kitchen cool! This is a completely no-bake recipe, ideal for warm weather or when you just don’t feel like turning on the oven.
- Kid-Friendly & Crowd-Pleasing: The combination of chocolate and Oreos is universally loved. Kids will adore helping to crush the cookies and layer the parfaits, and adults will appreciate the sophisticated yet comforting flavors.
The Magic of Just 3 Simple Ingredients!
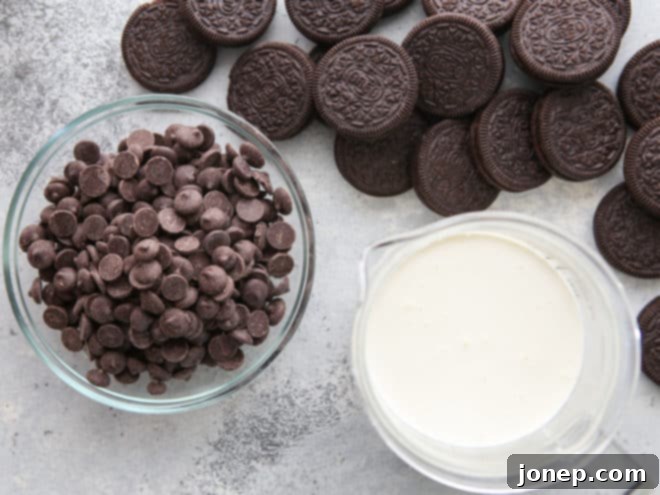
It sounds almost too good to be true, but the secret to these luscious parfaits truly lies in the quality and synergy of just three readily available items. Don’t underestimate their power!
- Oreos (Chocolate Sandwich Cookies): The star of the crunch! Approximately 20 cookies are perfect for this recipe. You can use classic Oreos, or experiment with double-stuffed for extra creaminess, or even flavored varieties like mint or peanut butter for a twist. We’ll be crushing these into delightful crumbs, which provide a fantastic textural contrast to the smooth chocolate cream.
- Heavy Whipping Cream: This is the base for our luxurious, mousse-like chocolate layer. You’ll need 1 ½ cups, divided. Ensure your cream is very cold before whipping – this helps it achieve those beautiful soft peaks quickly. The cream will be transformed into a light, airy component that gives these parfaits their signature melt-in-your-mouth quality.
- Semi-Sweet or Bittersweet Chocolate: The heart of the chocolate flavor. Approximately 4 ounces (113 grams) of roughly chopped chocolate will do the trick. While any kind of chocolate will work, using a good quality semi-sweet or bittersweet chocolate will elevate the flavor profile of your parfaits significantly. The better the chocolate, the richer and more profound the taste.
A Note on Chocolate Quality: While this recipe is incredibly forgiving, you’ll achieve the most luxurious and delicious results by opting for good quality chocolate. High-quality chocolate melts smoother and offers a more complex, satisfying flavor. However, don’t hesitate to use whatever you have on hand – it will still be fantastic!
How to Create Your Easy Chocolate Oreo Parfaits: Step-by-Step
Follow these straightforward steps, and you’ll have beautiful, delicious parfaits ready in no time!
- Prepare the Oreo Crumbs: First things first, get those cookies ready! You have two excellent options for crushing your Oreos:
- For fine, uniform crumbs: Use a food processor. Pulse the cookies until they resemble coarse sand. This creates a more consistent texture throughout your parfait layers.
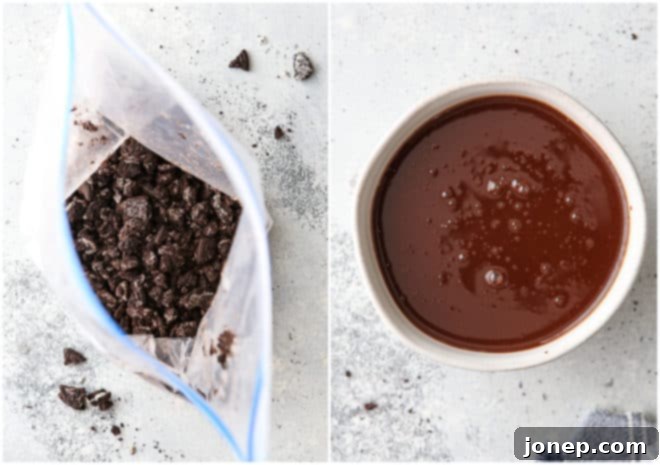
- For larger, satisfying chunks: Place the cookies in a large ziplock bag, seal it, and use a rolling pin to crush them. This method is great if you prefer a more pronounced crunch and visible pieces of cookie in your dessert. Both methods yield fantastic results, so choose your preference!
Set the crushed Oreos aside.
- Melt the Chocolate: In a heatproof bowl, combine your roughly chopped semi-sweet or bittersweet chocolate with ¼ cup of heavy cream. Place this bowl over a pot of simmering water (ensuring the bottom of the bowl doesn’t touch the water – this creates a gentle double boiler effect). Alternatively, if you have a dedicated double boiler, use that. Stir often until the chocolate is completely melted and smooth, with no lumps. Remove from heat and set aside to cool. It’s crucial that the chocolate is no longer warm when you mix it with the whipped cream, otherwise, it will deflate your cream. Aim for room temperature.
- Whip the Remaining Heavy Cream: In a separate, clean bowl, pour the remaining 1 ¼ cups of cold heavy cream. Using an electric mixer (either hand-held or stand mixer with a whisk attachment), beat the cream on medium-high speed until it forms medium peaks. This means when you lift the beaters, the cream forms soft, distinct peaks that hold their shape but still have a slight curl at the tip. Be careful not to over-whip, as it can turn grainy.
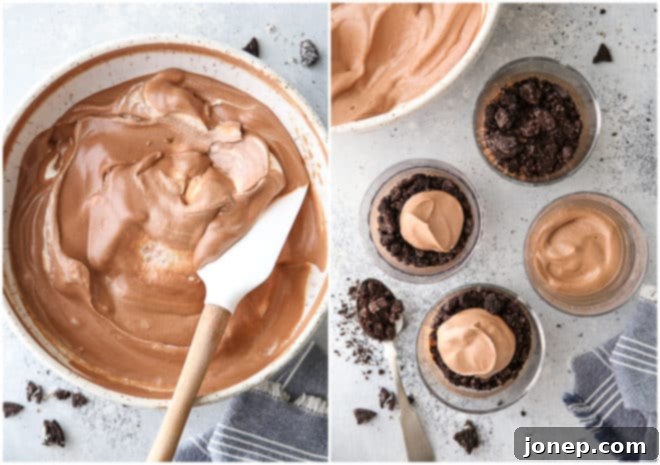
- Gently Fold Them Together: Once your melted chocolate has cooled to room temperature, it’s time to combine the two key elements. Add about a third of the whipped cream to the cooled melted chocolate. Gently fold the whipped cream into the chocolate using a spatula. Continue adding the remaining whipped cream in 1-2 more additions, folding very gently until no streaks of chocolate remain and the mixture is uniformly light and airy. The goal is to incorporate the chocolate without deflating the air you’ve just whipped into the cream. (If you’re new to this technique, here’s a helpful little video on how to “fold” ingredients.)
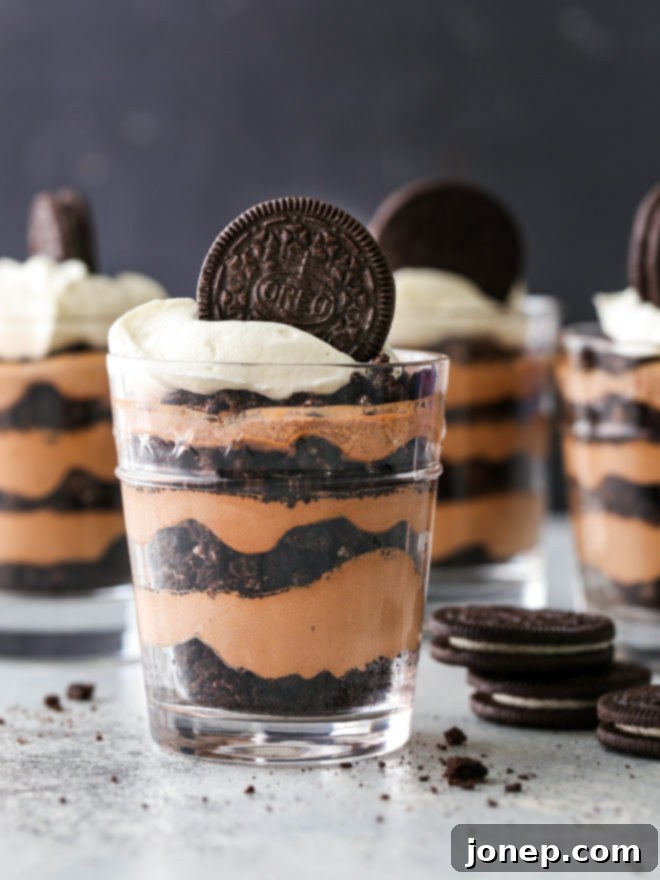
- Assemble Your Parfaits: Now for the fun part – assembly! Grab your individual serving glasses (8 oz glasses work wonderfully, yielding approximately 3 layers of each component). Start with a layer of crushed Oreos at the bottom, then add a layer of the chocolate whipped cream. Repeat this process, creating alternating layers of cookies and cream, usually achieving 3 layers of each. Top with an extra sprinkle of Oreo crumbs or a whole cookie for garnish, if desired.
Note: While individual servings look elegant, you can absolutely assemble this delightful dessert into one large serving bowl or a pan if you prefer a family-style presentation. It will be just as delicious!
Tips for Parfait Perfection
- Chill Your Equipment: For best results when whipping cream, place your mixing bowl and whisk attachment (or electric mixer beaters) in the freezer for 10-15 minutes before you start. Cold equipment helps the cream whip up faster and hold its peaks better.
- Don’t Over-Whip: Be careful not to over-whip your heavy cream. As soon as you reach medium peaks, stop. Over-whipped cream can become grainy or separate.
- Cool the Chocolate Completely: This is critical! If your melted chocolate is even slightly warm when you fold it into the whipped cream, it will melt the cream and cause the mixture to deflate, resulting in a runny rather than airy parfait.
- Gentle Folding is Key: When combining the chocolate and whipped cream, use a light hand and a folding motion. This preserves the air in the whipped cream, giving your parfaits their wonderfully light, mousse-like texture.
- Texture Preference for Oreos: Decide if you prefer a fine, sandy crumb or larger, chunky pieces of Oreos. Both are delicious, but choose the method that suits your desired crunch level.
- Presentation Matters: Use clear glasses or jars to showcase the beautiful layers of your parfaits. This makes them even more appealing!
Creative Variations and Customizations
While these Chocolate Oreo Parfaits are perfect as is, feel free to get creative and personalize them with a few simple additions:
- Flavor Boost: Add ½ teaspoon of vanilla extract or a pinch of instant espresso powder to your heavy cream before whipping for an enhanced flavor profile.
- Minty Fresh: Use mint-flavored Oreos for a refreshing twist. A drop of peppermint extract in the whipped cream would also be delightful.
- Peanut Butter Love: Substitute regular Oreos with peanut butter Oreos, or drizzle a little melted peanut butter between layers for a rich, nutty flavor.
- Berry Delight: A few fresh raspberries or sliced strawberries layered in between the chocolate and cookie layers can add a burst of freshness and color.
- Nutty Crunch: Add a sprinkle of chopped toasted nuts (like pecans or walnuts) to the Oreo layers for an extra layer of texture.
- Extra Indulgence: Top your parfaits with chocolate shavings, a drizzle of chocolate sauce, or a dollop of extra whipped cream before serving.
Storage Instructions
These parfaits are best enjoyed fresh, within a few hours of assembly, when the Oreos still retain a good crunch. However, you can store them in an airtight container in the refrigerator for up to 24 hours. The Oreo crumbs will soften slightly over time, but the flavor will still be fantastic.
Frequently Asked Questions About Oreo Parfaits
- Can I make these parfaits ahead of time? Yes, you can assemble them up to 24 hours in advance and store them in the refrigerator. For the best texture, serve within a few hours to keep the cookie crumbs from getting too soft.
- Can I use milk chocolate instead of semi-sweet? Absolutely! If you prefer a sweeter, milder chocolate flavor, milk chocolate will work. Just be aware that it might result in a slightly less intense chocolate taste in the cream.
- Are there any dairy-free alternatives? Yes! You can use a dairy-free heavy whipping cream alternative (like full-fat coconut cream, chilled overnight, with the thick cream scooped off) and dairy-free chocolate sandwich cookies (some brands offer these). Ensure your chocolate is also dairy-free.
- How many servings does this recipe make? This recipe is designed to make 4 generous servings in standard 8oz glasses. You can easily double or triple the recipe to serve a larger crowd.
- Do I need to add sugar to the whipped cream? For this recipe, the sweetness from the Oreos and the chocolate is usually sufficient. However, if you prefer a sweeter whipped cream, you can add 1-2 tablespoons of powdered sugar to the heavy cream before whipping.
More Irresistible Oreo Desserts
Can’t get enough of that delightful chocolate sandwich cookie goodness? If these easy parfaits have sparked an Oreo craving, you’re in luck! Here are a few more fantastic recipes to satisfy your sweet tooth:
- Oreo “Dirt” Layer Cake
- Neapolitan Ice Cream Pops
- Peppermint Cookies and Cream Ice Cream
Get the Recipe

Chocolate Oreo Parfaits
4
servings
15 minutes
0 minutes
15 minutes
Pin Recipe
Leave a Review
Ingredients
-
Approximately 20 chocolate sandwich cookies -
4 ounces
semi-sweet chocolate
, roughly chopped (113 grams) -
1 ½ cup
heavy cream
(375 ml), divided -
Whipped cream
, for serving (optional)
Instructions
-
With a food processor or in a large zip-topped bag with a rolling pin, crush the chocolate sandwich cookies to crumbs.
-
Place the chocolate and ¼ cup heavy cream in a bowl. Set over pot of simmering water and melt until smooth, stirring often. (This can also be done in a double boilder.) Set aside to cool to room temperature.
-
Beat remaining heavy cream to soft peaks. Gently fold the whipped cream into the chocolate in 2-3 additions, gently folding each addition in until no streaks of chocolate remain.
-
Layer the Oreo crumbs and chocolate into 4 glasses. Top with more whipped cream and a cookie, if desired.
-
Serve immediately or store in the fridge for up to 24 hours.
American
Dessert
Annalise Sandberg
Have you tried this recipe?
I’d love to hear about it! Leave a rating and review below, or take a photo and tag it on Instagram @completelydelicious with #completelydelicious.
This recipe was originally published April 2015 and has been updated and expanded for clarity and enhanced instructions.
