The Ultimate Chocolate Fudge Layer Cake: A Decadent Recipe for Moist, Rich Perfection
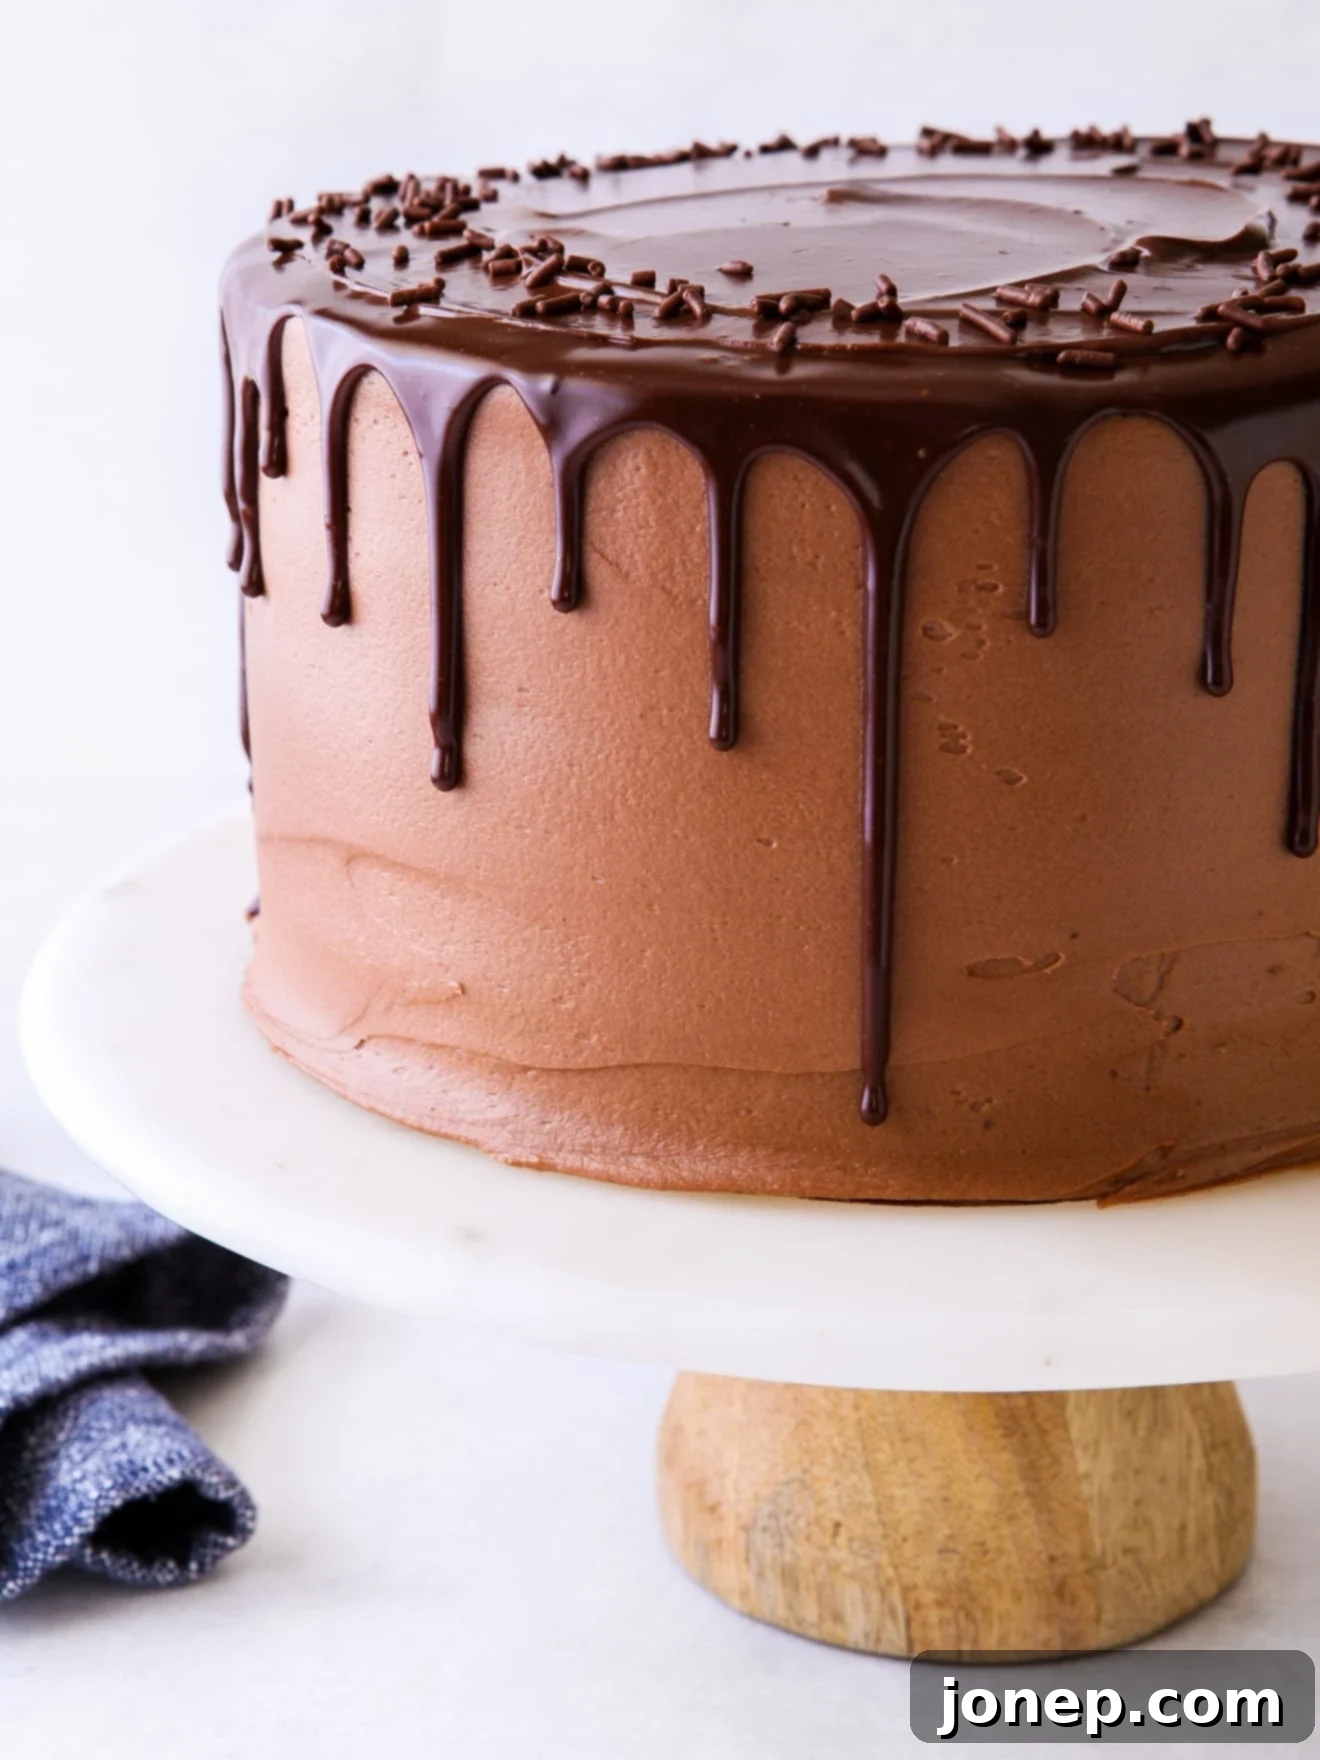
Prepare yourself for the ultimate chocolate experience! This isn’t just any chocolate cake; it’s a meticulously crafted masterpiece designed to satisfy every chocolate craving. Featuring luscious dark chocolate cake layers, a smooth, intense chocolate ganache, and a velvety fudge buttercream frosting, this dessert truly has it all. It’s the kind of cake that makes special occasions even more memorable, yet is approachable enough for any home baker to create.
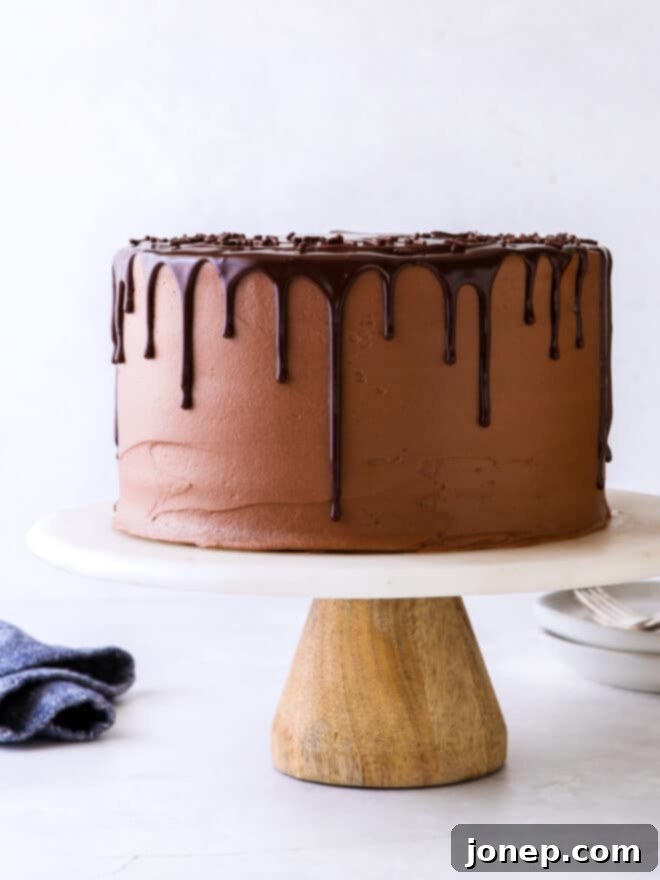
For true chocolate lovers, this recipe is a dream come true. It combines the best elements from some of my most cherished dessert creations: my incredibly moist and tender chocolate sour cream cake layers (often hailed as the best chocolate cake ever), my super simple and rich easy fudge buttercream frosting, and a classic, glossy chocolate ganache that elevates the entire cake to an irresistible new level. Each component plays a vital role in creating a harmonious blend of textures and intense chocolate flavor.
This chocolate fudge cake is renowned for its deeply moist crumb, its incredibly rich flavor profile, and its undeniably indulgent nature. Despite its luxurious appearance and gourmet taste, it’s surprisingly straightforward to make, requiring no overly complicated techniques or fussy steps. It’s truly the perfect dessert for any occasion, from an intimate family gathering to a grand celebration, promising to impress everyone who takes a bite.
Table of Contents
- Three Layers of Chocolate Perfection in This Cake!
- How to Make This Ultimate Chocolate Fudge Layer Cake
- Bake the Fluffy Dark Chocolate Cake Layers
- Craft the Silky Chocolate Ganache
- Whip Up the Easy Fudge Buttercream Frosting
- Choosing Your Ideal Number of Cake Layers
- How to Assemble Your Stunning Chocolate Fudge Cake
- Essential Cake Baking Tips for Success
- More Decadent Chocolate Cakes to Explore
- Get the Full Chocolate Fudge Cake Recipe
Three Layers of Chocolate Perfection in This Cake!
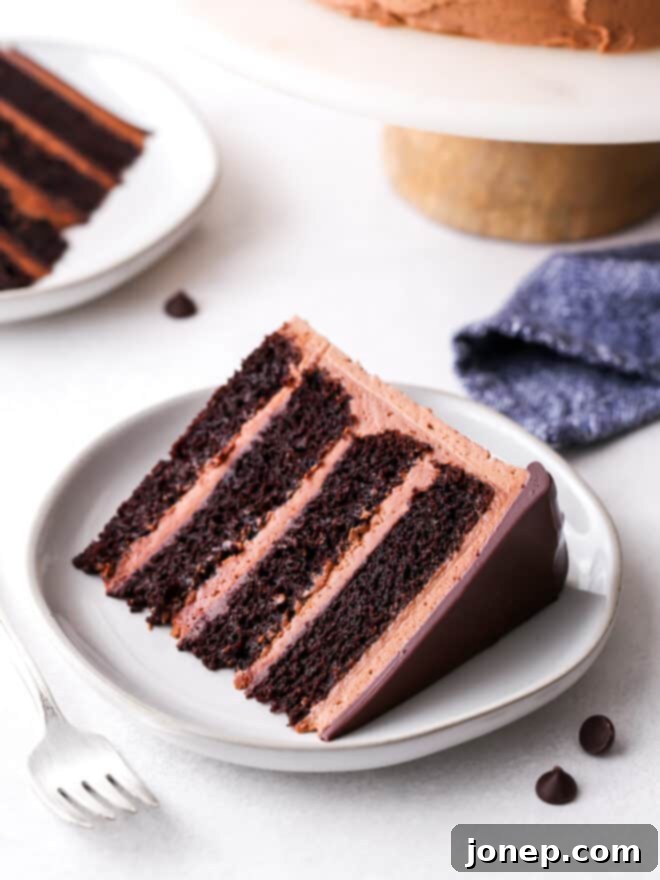
What makes this chocolate fudge cake truly “ultimate”? It’s the strategic layering of three distinct yet complementary chocolate components, each contributing to an unforgettable flavor and texture experience. These layers work in harmony to create a dessert that is both sophisticated and deeply satisfying:
- Dark Chocolate Cake Layers: The foundation of our cake, providing a tender, moist, and intensely chocolatey base.
- Chocolate Ganache: A smooth, rich, and glossy filling and topping that adds a decadent burst of concentrated chocolate flavor.
- Fudge Buttercream Frosting: A dense, creamy, and undeniably fudgy frosting that binds the layers and encases the entire cake in a cloud of sweet, chocolatey goodness.
Crafting a layer cake is indeed a labor of love, requiring a bit of time and commitment. While this recipe is far from the most complicated dessert you’ll encounter on a baking blog, it does ask for your patience and attention. However, like all truly beautiful and delicious culinary creations, the effort you invest will be immensely rewarded with a show-stopping cake that tastes even better than it looks. So, gather your ingredients and let’s embark on this delicious baking adventure together!
How to Make This Ultimate Chocolate Fudge Layer Cake
Creating this magnificent chocolate fudge layer cake is a process that unfolds in several manageable steps. By preparing each component carefully, you’ll ensure a stunning and delicious result.
Bake the Fluffy Dark Chocolate Cake Layers
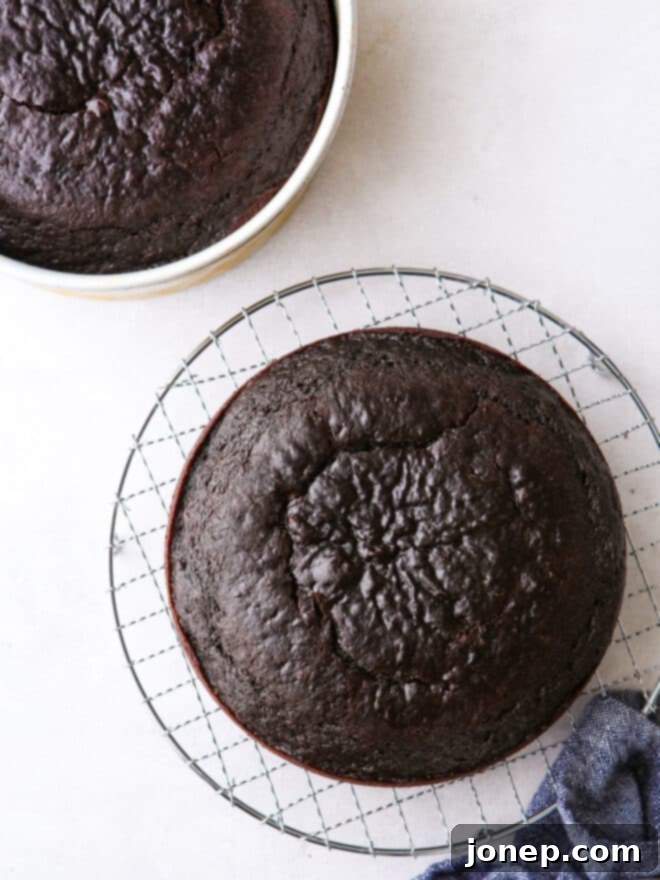
Our journey to the ultimate chocolate fudge cake begins with the foundation: the cake layers themselves. Using my highly acclaimed chocolate sour cream cake recipe ensures a tender, moist texture and an unbelievably rich flavor. Sour cream is a secret ingredient for moisture and richness, creating a beautifully tender crumb that stands up perfectly to the generous layers of frosting and ganache.
For the cocoa powder, I recommend using natural unsweetened cocoa powder, not Dutch-processed, as it reacts with the baking soda to give the cake its lift and characteristic flavor. For an even deeper, more intense chocolate flavor, I particularly love using Hershey’s Special Dark cocoa powder. Despite its name, it’s a blend of natural and Dutch-processed cocoa, making it versatile and effective in this recipe without compromising the leavening process.
A crucial ingredient in this batter is coffee. Don’t worry, your cake won’t taste like coffee! Instead, the coffee acts as a flavor enhancer, dramatically deepening and intensifying the natural chocolate notes, making the cake taste even more chocolatey. If you’re not a regular coffee drinker, it’s a great idea to keep a jar of instant espresso or coffee granules in your pantry specifically for baking recipes like this. Simply dissolve them in hot water for a quick coffee solution.
The cake batter itself is refreshingly simple to prepare, almost a one-bowl wonder, and remarkably, it doesn’t require an electric mixer. You simply combine all the dry ingredients in one large bowl and all the liquid ingredients in another. Then, gently whisk them together until just combined, being careful not to overmix, which can lead to a tough cake. Once your decadent chocolate cake layers are baked to perfection, allow them to cool completely. This cooling period is essential and provides the perfect window to prepare your luscious ganache and creamy buttercream.
Craft the Silky Chocolate Ganache
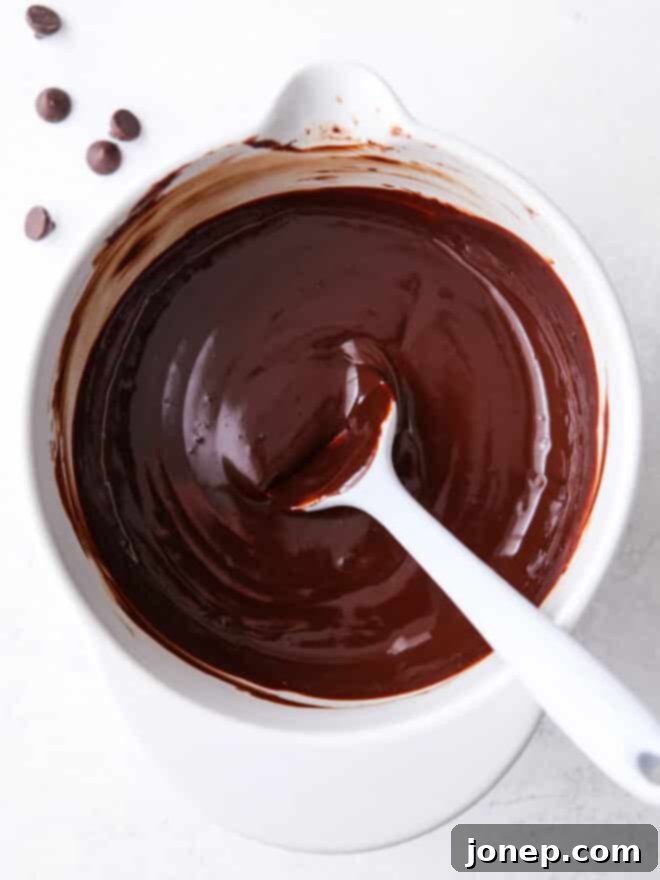
Chocolate ganache is the epitome of effortless elegance, and it’s arguably the easiest way to instantly elevate any cake, transforming it from delicious to utterly divine. This luxurious component requires just two simple ingredients and a mere five minutes of your time to create. The process is straightforward: finely chop your chosen chocolate (this ensures even melting) and place it in a heat-proof bowl. Then, heat heavy cream until it’s steaming but not boiling, and pour it directly over the chocolate pieces. Let the mixture sit undisturbed for several minutes – this allows the hot cream to melt the chocolate thoroughly. After waiting, gently stir the mixture from the center outwards until it transforms into a smooth, glossy, and homogeneous ganache. If you find a few stubborn chocolate lumps remaining, a quick microwave burst of 15 seconds, followed by stirring, should resolve it.
For the best results, I typically opt for dark or bittersweet chocolate for my ganache, as it provides a deep, intense chocolate flavor that beautifully complements the cake and buttercream. However, semi-sweet chocolate will also yield a fantastic result. Whether you use a high-quality chopped chocolate bar or chocolate chips, remember that the better the quality of chocolate, the silkier, richer, and more delicious your ganache will be. This simple, two-ingredient wonder adds an incredible depth of flavor and a beautiful sheen to your finished chocolate fudge cake.
Whip Up the Easy Fudge Buttercream Frosting
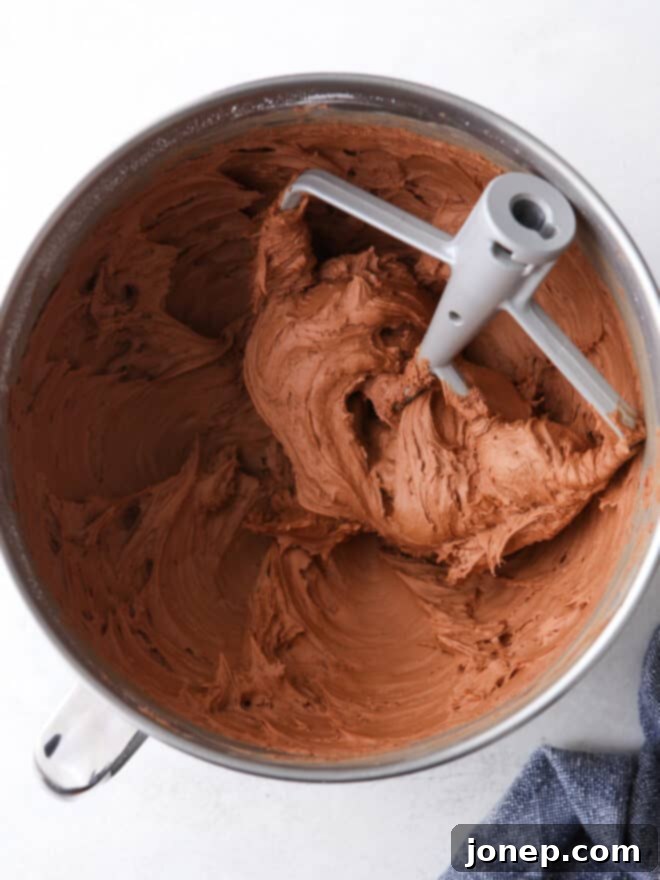
My easy fudge buttercream has been my trusted, go-to chocolate frosting for countless years, and for good reason! Its unique “fudgy” quality, distinct from traditional airy buttercreams, comes from a clever technique: it’s made entirely in the food processor. This method rapidly blends all the frosting ingredients together in a matter of seconds, without incorporating much air. The result is a wonderfully dense, intensely chocolatey, yet incredibly soft and creamy buttercream that spreads like a dream and perfectly complements the rich cake layers.
While the food processor is recommended for that signature fudgy texture, it is absolutely possible to make this frosting using an electric mixer. If you opt for an electric mixer, be aware that it will take several minutes longer to achieve the desired consistency, and the resulting buttercream will likely have a slightly fluffier texture and a lighter color due due to more air being incorporated. Whichever method you choose, ensure your butter is at room temperature to guarantee a smooth, lump-free frosting.
Choosing Your Ideal Number of Cake Layers
One of the most enjoyable aspects of baking a layer cake like this is its inherent “choose-your-own-adventure” quality. You have the freedom to tailor the cake to your preferences and available equipment. This decision hinges on several factors: the number of layers you desire, the overall height you envision for your cake, your preferred ratio of cake to frosting, and the size of the cake pans you own.
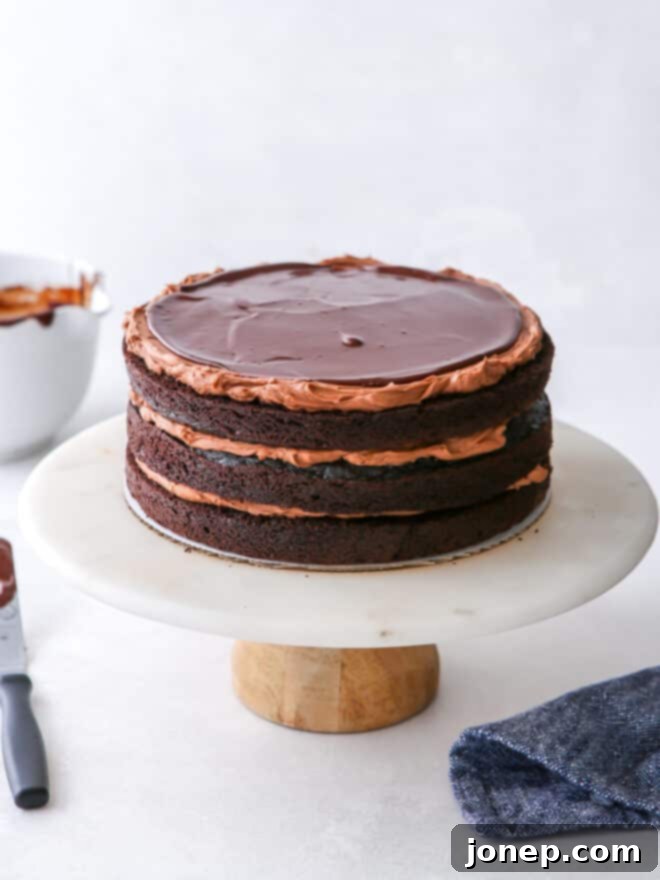
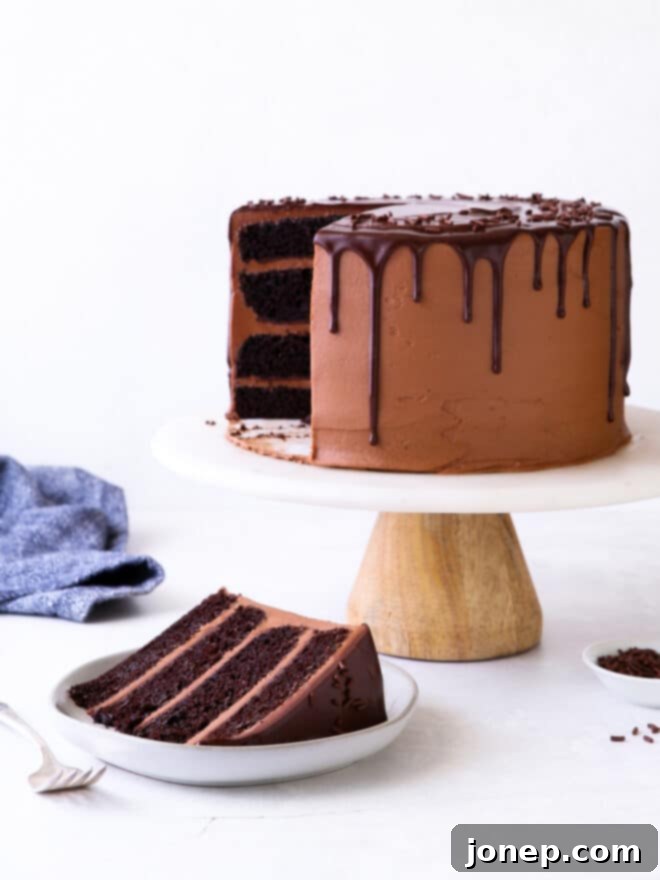
For this particular chocolate fudge cake, I baked the batter in two 8×3-inch round cake pans. Once cooled, I then meticulously cut each of those layers in half horizontally, yielding a total of four beautiful, thinner layers. I personally adore the balance created by these approximately 1-inch thick cake layers interspersed with generous dollops of frosting and ganache. However, your cake will be equally delicious and visually appealing with two or three layers—there’s no single “right” way to build it!
Here are a few essential tips to consider when deciding on your cake layer configuration:
- Pan Size Matters: Using 8-inch cake pans will generally result in a taller, narrower cake, offering more height for dramatic presentation. Conversely, 9-inch cake pans will yield a wider, slightly shorter cake, providing larger slices. Both sizes work wonderfully, it just depends on your aesthetic preference.
- Layer Count Flexibility: This rich chocolate fudge cake will be absolutely delicious and beautiful whether you opt for 2, 3, or 4 layers. Don’t feel pressured to create 4 layers just because that’s what you see in the photos; choose what feels most comfortable and achievable for you.
- Prevent Overflow: A crucial rule of thumb in cake baking is to never fill your cake pans more than two-thirds full. Overfilling can lead to the batter overflowing in the oven, creating a messy situation and potentially unevenly baked cakes. If your 8-inch cake pans are not 3 inches deep, you may need to use three 8-inch pans or adjust to 9-inch pans to avoid overfilling.
- Achieve Even Layers: For perfectly uniform cake layers, which are key for a stable and beautiful finished cake, I highly recommend using a digital kitchen scale. By adding equal amounts of batter (measured by weight) to each prepared pan, you ensure that all your cake layers bake evenly and are the same size.
- Splitting Layers: If you’re keen on creating thinner layers from thicker cakes, as I did, be sure to check out my comprehensive tutorial on how to split a single cake layer into two even sections. It’s a simple technique that can elevate your cake’s presentation.
How to Assemble Your Stunning Chocolate Fudge Cake
Once your exquisite chocolate cake layers are perfectly baked and fully cooled, and your creamy fudge buttercream and silky chocolate ganache are ready, it’s time for the most exciting part: assembling your magnificent chocolate fudge cake! This is where all your hard work comes together to create a truly impressive dessert.
Follow these steps to build your beautiful layer cake:
- First Layer Down: Carefully place your first cooled cake layer onto your chosen serving plate or cake stand. A dab of frosting on the plate before placing the cake can help secure it.
- First Frosting Layer: Dollop about 1 cup of the rich fudge buttercream frosting onto the first cake layer. Using an offset spatula, spread it evenly across the surface, extending just to the edges.
- Ganache Goodness: Drizzle approximately 1/2 cup of the prepared chocolate ganache over the frosting layer, spreading it gently. (Note: These filling amounts are suggested for a 4-layer cake. If you’re opting for fewer layers, feel free to be more generous with both the frosting and ganache per layer!)
- Repeat the Layers: Carefully place the next cake layer on top, pressing down gently to ensure it’s level. Repeat steps 2 and 3 with the remaining cake layers and fillings until all layers are stacked and topped with the final cake layer.
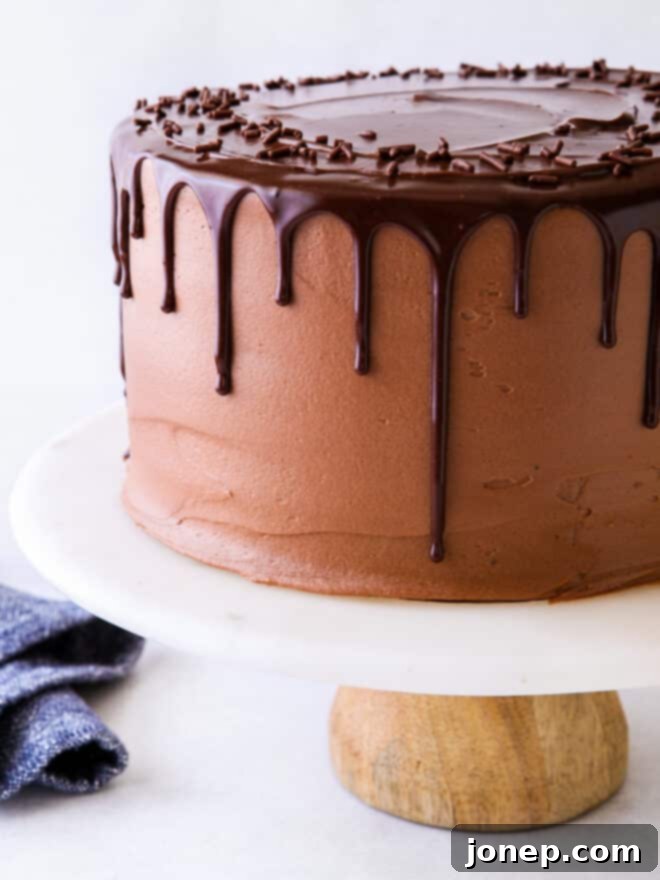
- Crumb Coat & Final Frosting: Apply a thin layer of the remaining fudge buttercream all over the entire cake – this is known as a “crumb coat” and traps any loose crumbs. Chill the cake in the refrigerator for about 15-20 minutes to set the crumb coat. Then, apply a generous, smooth final layer of the remaining fudge buttercream to the top and sides of the cake. Use an offset spatula or bench scraper for a professional finish.
- The Signature Ganache Drip: For that irresistible, glossy chocolate drip effect you see in the photos, ensure your remaining ganache is at the right consistency. You may need to rewarm it slightly (if it’s too firm) or add 1 tablespoon of heavy cream (if it’s too thick) to thin it out to a drizzly consistency. Using a spoon or a piping bag with a small round tip, gently encourage drips over the edge of the top of the cake. A fantastic visual guide for this technique can be found in this video tutorial!
If you’re new to the art of baking layer cakes or simply desire a little extra guidance, I highly recommend consulting my complete guide on how to build a layer cake. It’s packed with all the essential tips and tricks you’ll need to create a stable, beautiful, and utterly delicious masterpiece!
Essential Cake Baking Tips for Success
To ensure your chocolate fudge cake turns out absolutely perfect every single time, keep these invaluable baking tips in mind:
- Room Temperature Ingredients are Key: For the absolute best results in your cake layers, make sure your sour cream and eggs are at room temperature before you begin mixing the batter. This seemingly small detail significantly helps the ingredients emulsify and combine more thoroughly, leading to a smoother batter, a more consistent rise, and a wonderfully tender and uniform cake texture.
- Prevent Sticking: Does your cake sometimes stick to the inside of the pan, making removal a challenge? Avoid this common frustration by properly preparing your cake pans. Refer to my detailed guide on how I prepare my cake pans. With these methods, your cakes will come out clean and intact, every single time.
- Frosting Like a Pro: Achieving a smooth, professional-looking frosted cake can seem daunting, but it’s entirely achievable with a few simple techniques. If you need a little help frosting your cake like a (semi) professional, be sure to see my full tutorial which breaks down the process step-by-step.
- Chilling for Clean Slices: For perfectly clean, sharp slices that hold their shape beautifully, I strongly recommend chilling the assembled cake in the refrigerator for at least 30 to 60 minutes before serving. This brief chill time allows the frosting to firm up and the cake layers to settle, making for a much neater cutting experience.
- Smart Storage Solutions: The beauty of this recipe is that components can be made ahead. Unassembled cake layers store exceptionally well. Once completely cooled, wrap each cake layer individually and tightly in plastic wrap. They can be stored in the fridge for up to 3 days or double-wrapped and frozen for several months. Thaw them overnight in the refrigerator before you’re ready to assemble. For the freshest taste and best texture, I generally prefer to make the frosting and ganache, and then assemble the cake on the day I plan to serve it. This strategy allows for maximum flexibility and ensures your cake is at its peak deliciousness.
More Decadent Chocolate Cakes to Explore
If you’re a devoted chocolate enthusiast, your culinary adventure doesn’t have to end here! Explore more of my favorite chocolate cake recipes that are sure to delight your taste buds:
- Classic Chocolate Sheet Cake
- Moist Chocolate Sour Cream Cake
- Elegant Flourless Chocolate Almond Cake
- Rich Chocolate Stout Bundt Cake
Get the Full Chocolate Fudge Cake Recipe
Chocolate Fudge Layer Cake
Pin Recipe
Leave a Review
Ingredients
For the chocolate cake:
- 2 ½ cup all-purpose flour (300 grams)
- 1 cup unsweetened cocoa powder (110 grams)
- 2 ½ teaspoon baking soda
- 1 teaspoon salt
- 2 cups granulated sugar (400 grams)
- 3 large eggs
- 1 ¼ cups sour cream (280 grams)
- 1 cup vegetable oil (198 grams)
- 1 ¼ cup coffee (284 grams)
For the fudge frosting:
- 6 oz unsweetened or dark chocolate , melted and cooled (170 grams)
- 4 ½ cups powdered sugar (563 grams)
- 1 ½ cups unsalted butter , at room temperature (340 grams)
- 6 tablespoons whole milk or half and half (85 grams)
- 1 tablespoon vanilla extract
For the ganache:
- 6 oz dark, bittersweet or semi-sweet chocolate (170 grams)
- ¾ cup heavy cream (170 grams)
Instructions
To make the chocolate cake layers:
-
To make the cake, preheat oven to 350°F. Butter and flour two or three 8-inch or 9-inch cake pans (see Notes) and line bottoms with parchment paper.
-
In a large bowl, sift together the flour, sugar, cocoa powder, salt, and baking soda.
-
In another bowl, whisk together eggs, sour cream, and vegetable oil. Add coffee and whisk until smooth.
-
Add wet ingredients all at once to the dry ingredients and whisk until no streaks of dry ingredients remain. Do not overmix.
-
Divide the batter evenly between the prepared cake pans and bake until a toothpick inserted into the center comes out clean, about 25-35 minutes (see Notes). Let cool in the pan for 10 minutes, then remove and place on a wire rack to cool completely.
To make the chocolate ganache:
-
Add chocolate to a microwave-safe bowl. Heat heavy cream until steaming and then pour over the chocolate. Let it sit for 5 minutes, then stir until smooth.
-
If a few lumps of chocolate remain, heat in the microwave in 15-second bursts, stirring in between to see if ganache is smooth.
-
Let ganache cool to room temperature while you make the frosting.
To make the fudge buttercream frosting:
-
Place all ingredients in a food processor and pulse to incorporate. Process for a few seconds until smooth. If needed, scrape down any stray bits from the side of the bowl and pulse again for a few seconds.
To assemble the cake:
-
Place one cooled cake layer onto a plate or cake stand. Spread about 1 cup fudge buttercream frosting on top, and cover with about ½ cup of the ganache. Repeat with remaining cake layers and filling. (Filling amounts are for a 4-layer cake. If you are doing only 2 or 3 layers, you can be more generous with the frosting and ganache.)
-
Cover entire cake with remaining fudge frosting. Top with remaining ganache, letting it drip down the sides as desired. Chill in fridge for at least 1 hour to firm up. Let cool to room temperature 30 minutes before serving.
Notes
NOTES
- Coffee helps enhance the chocolate flavor of the cake. The cake will not have a coffee taste. You can brew coffee for this recipe, or combine 1¼ cup hot water with 2 teaspoons instant espresso.
- I used Hershey’s Special Dark cocoa for this cake.
- Which size cake pan and how many you choose to use is up to you and the look you want. 8-inch pans will yield a taller, narrower cake than 9-inch pans. Do not fill cake pans more than 2/3 full or they may overflow in the oven.
- Bake time will vary based on pan size and how much batter is in the pan. Time listed in this recipe is for cakes baked in 2 8×3-inch pans. Cakes baked in 9-inch pans or more than 2 8-inch pans will bake faster. Start checking at 20 minutes. When they appear dry on top, open the oven and gently press with your finger. Cakes are done when they feel firm but bounce back, and a toothpick inserted comes out with moist crumbs.
This recipe was originally published April 2015, and has been updated for clarity and expanded tips.
