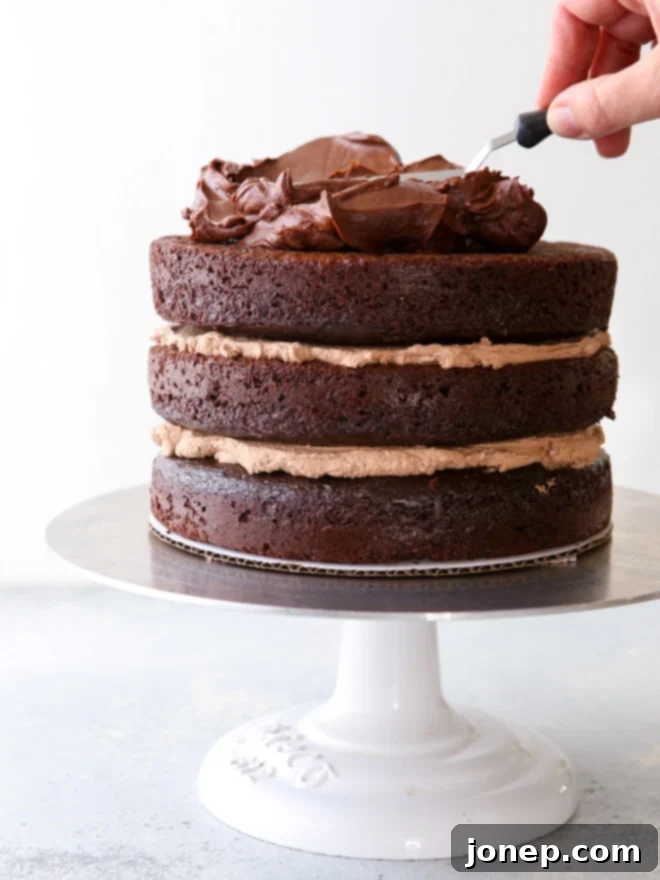
The Ultimate Guide to Building a Beautiful Layer Cake: From Prep to Frosting Perfection
Embarking on the journey of baking a layer cake can seem daunting, but it’s a truly rewarding experience. From meticulously preparing your cake pans to gracefully applying the final touches of frosting, this comprehensive guide will walk you through every essential step required to construct a visually stunning and delicious layer cake. Whether you’re a novice baker eager to learn the ropes or an experienced home baker looking to refine your techniques, these time-tested methods, refined through years of practice and shared wisdom, will empower you to create confectionery masterpieces with unwavering confidence.
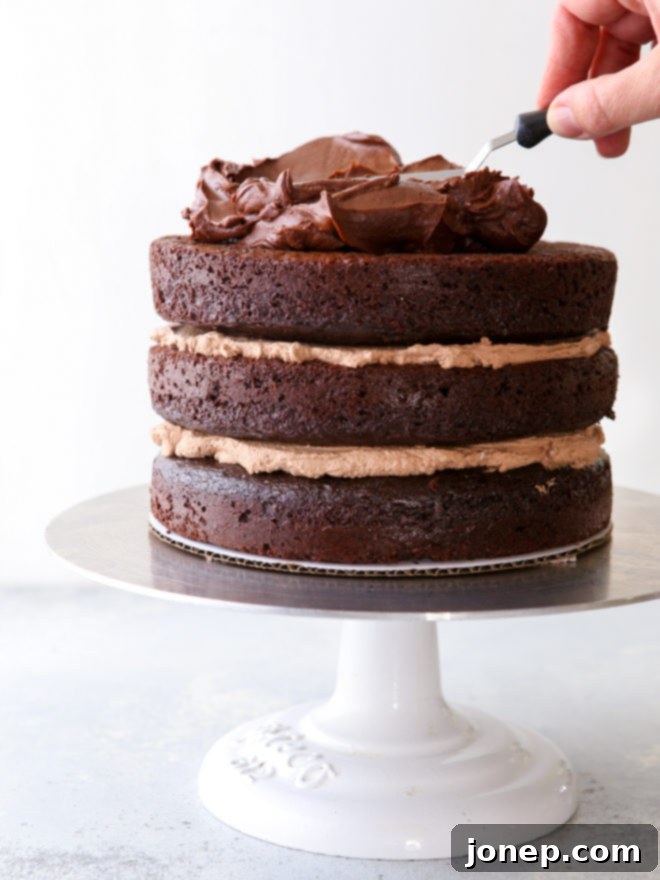
Let me confess, I haven’t always known what I was doing, or even what I was supposed to be doing, when it came to crafting a layer cake. Oh no, my early days in the kitchen were marked by my fair share of cake disasters! Layers that stuck, crumbled, or refused to stand straight were common occurrences. However, through persistent practice, countless experiments, and invaluable insights gathered from fellow bakers and food bloggers, I’ve honed the skills necessary to consistently produce exquisite layer cakes. Today, I feel confident in my ability to “build” a layer cake – a term I prefer because it truly encapsulates the architectural process involved, extending far beyond mere baking and frosting. It’s about creating a stable, beautiful, and delicious dessert from the ground up, ensuring every component contributes to the final perfect bite. In this guide, I’m thrilled to share my personal, tried-and-true approach, a method that has proven incredibly successful for me. While there are many paths to a perfect cake, this guide outlines my trusted way, from start to magnificent finish.
Table of Contents
- Prep Your Cake Pans for Flawless Release
- Bake Flat, Even Cake Layers Every Time
- Prep and Store Cake Layers in Advance for Ease
- Assemble Your Layer Cake with Stability and Structure
- Master the Art of Frosting a Layer Cake
- Storing and Transporting Your Beautiful Cake
- Enjoy Your Homemade Masterpiece!
This detailed tutorial has been a cornerstone of my blog since its inception in 2011. Over the years, I’ve continuously refined and expanded each piece of advice, breaking down what was once an unbearably long-winded post into more focused, manageable sections. What was once a single, extensive article is now a series of interconnected, in-depth guides, designed to empower you at every stage of the cake-building process. Don’t worry, I’ll provide convenient links to these supplementary tutorials, ensuring you have access to every detail without missing a beat. Are you ready to transform your baking skills and create truly memorable layer cakes? Let’s dive in and unlock the secrets to perfect homemade layer cakes!
(Disclosure: This post contains affiliate links, which means I may earn a small commission if you make a purchase through these links, at no extra cost to you. Your support helps keep this blog running and allows me to continue sharing valuable baking insights!)
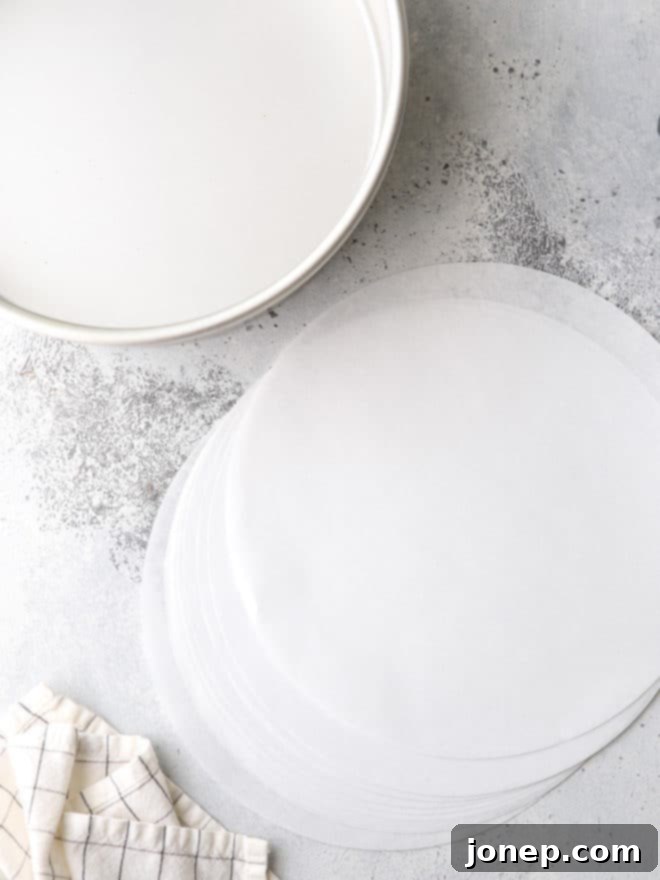
Prep Your Cake Pans for Flawless Release
The foundation of any successful layer cake lies in how meticulously you prepare your baking pans. Nothing is more disheartening for a baker than spending precious time mixing batter, patiently waiting for it to bake, only to have your beautifully risen layers stick or tear apart when you try to remove them from the pan. Proper pan preparation is your first and most crucial line of defense against such disappointments, guaranteeing that your cake layers release cleanly, intact, and ready for assembly every single time. Here are two critical steps to ensure impeccable results and banish sticky situations for good:
1) Use Parchment Paper: Your Non-Stick Secret Weapon
Without a doubt, the single most important preparation you can make when baking a cake is to line the bottom of your pan(s) with parchment paper. This creates an absolutely foolproof barrier between your delicate cake batter and the base of the pan, making sticking virtually impossible. It ensures that the entire bottom of your cake layer will lift out in one perfect, unmarred piece, preserving its structural integrity and smooth surface. I genuinely consider baking a cake without parchment paper a risky endeavor – it’s a non-negotiable step in my kitchen! You have a couple of convenient options for incorporating this magic paper: you can manually trace and cut full sheets of parchment paper to precisely fit the base of your cake pans, or for ultimate ease and efficiency, you can purchase pre-cut parchment paper rounds specifically designed for common cake pan sizes, saving you time and effort.
2) Grease with Butter + Flour OR Nonstick Baking Spray: Creating a Second Layer of Defense
While parchment paper adeptly handles the bottom of your cake layers, the sides of your cake pan also require careful attention. Creating an additional non-stick barrier around the perimeter of your pans ensures a complete, effortless release from all surfaces. You have two highly effective methods for achieving this crucial second layer of defense:
- The Classic Butter and Flour Method: After lining the bottom with parchment paper, generously coat the inside sides of the cake pan with a thin, even layer of softened unsalted butter (or margarine or shortening). Ensure you get into any seams or crevices. Once thoroughly buttered, lightly dust the entire buttered surface with all-purpose flour. Tilt and rotate the pan to ensure the flour coats all buttered areas evenly, then gently tap out any excess flour. This traditional method creates a subtle, almost invisible crust that guarantees your cake sides won’t cling.
- The Convenient Nonstick Baking Spray: For a quick and easy alternative, a good quality nonstick baking spray is incredibly effective. Products like Baker’s Joy, readily available at most grocery stores, ingeniously combine oil and flour in a single spray, creating an excellent and reliable non-stick surface. For more professional-grade results, consider heavy-duty baking sprays often found at restaurant supply stores or conveniently available online. When using spray, apply an even, moderate coat without over-saturating, which can sometimes lead to a slightly gummy texture on the cake’s exterior.
By diligently following these two straightforward steps, you’ll set yourself up for unparalleled success, ensuring your cake layers emerge from their pans perfectly shaped, beautifully golden, and ready for effortless assembly. This small attention to detail at the very beginning saves a significant amount of headaches and potential heartbreak later in the baking process.
Looking for more in-depth guidance, common pan preparation mistakes to avoid, and step-by-step photos? Explore my complete guide on how to keep cake from sticking to the pan for even more insights.
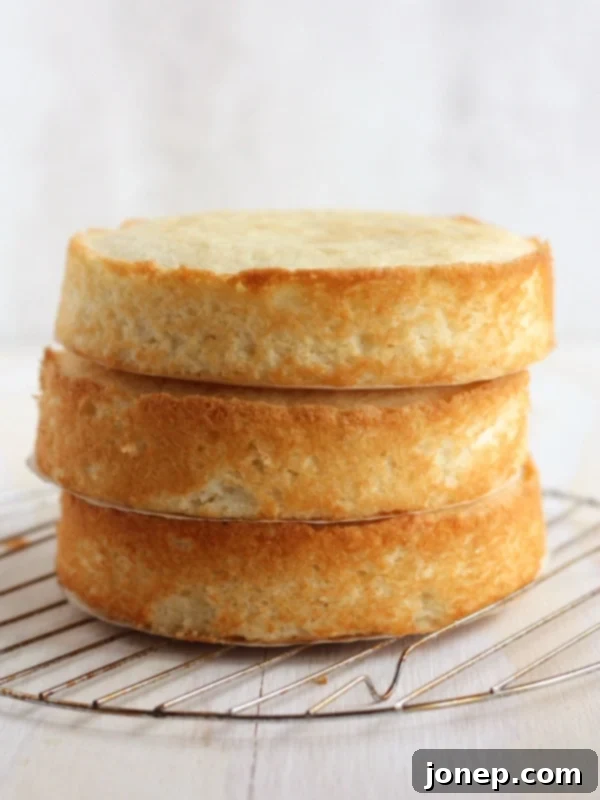
Bake Flat, Even Cake Layers Every Time
Once your pans are meticulously prepped and your delicious cake batter is carefully mixed, the next critical phase is baking. Achieving consistently flat and evenly sized cake layers is absolutely paramount for constructing a professional-looking finished cake. Flat layers not only create a stunning visual appeal but also make the subsequent assembly and frosting processes significantly easier, more stable, and ultimately, more enjoyable. While simply pouring batter into pans might seem sufficient, these two simple yet powerful tricks will elevate your baking game, ensuring perfect layers without frustrating domes, cracks, or unevenness.
1) Use a Digital Scale to Measure and Distribute Your Cake Batter Precisely
Accuracy is the golden rule in baking, and this principle applies directly to portioning your cake batter. Eyeballing the amount of batter in each pan, even for experienced bakers, often leads to subtle variations in layer thickness. These variations can result in uneven baking, where some layers might be undercooked or overbaked, and ultimately contribute to an unstable and lopsided cake structure. The foolproof solution? A reliable digital kitchen scale. By first weighing your empty, prepped cake pans, then adding batter to reach a specific, identical weight for each, you guarantee that every single layer will be precisely the same size and thickness. This not only promotes perfectly even baking but also ensures a level, sturdy foundation for stacking, which is crucial for a truly elegant and symmetrical final presentation.
2) Reduce Baking Temperature to Prevent Doming
Cake domes are a common affliction that frustrates many home bakers. They occur when the outside edges of the cake bake and set faster than the center, forcing the uncooked batter upwards as it continues to rise, creating a distinct domed top. While there are several methods to combat this (like using cake strips, which are effective but require extra tools), my favorite technique requires no special equipment and is incredibly effective: simply reduce your oven’s baking temperature and slightly increase the baking time. This gentle approach slows down the “oven spring” – the rapid initial rise of the cake – allowing the entire layer to bake more uniformly from edge to center, thus preventing that characteristic dome from forming. Here’s the straightforward adjustment to implement:
- Original Recipe Example: If your cake recipe calls for baking at 350°F (175°C) for 30 minutes.
- Adjusted Method: Reduce the temperature by 25°F, baking at 325°F (160°C). Then, increase the baking time by approximately one-half of the original time. So, for a 30-minute bake, you would add 15 minutes, making the total baking time approximately 45 minutes.
It’s always wise to start checking for doneness a bit before the adjusted baking time is complete, and then every 5-10 minutes thereafter, by inserting a wooden skewer or toothpick into the center of the cake until it comes out clean. This adjustment is usually quite accurate, but remember that ovens can vary, so visual cues and the toothpick test are still important. This method not only yields beautifully flat layers but can also contribute to a moister cake by preventing overbaking at higher temperatures, resulting in a tender crumb throughout.
Looking for more expert tips, a deeper dive into the science of doming, and helpful step-by-step photos on this technique? Dive into my complete guide on how to bake flat cake layers for comprehensive advice.
Prep and Store Cake Layers in Advance for Ease
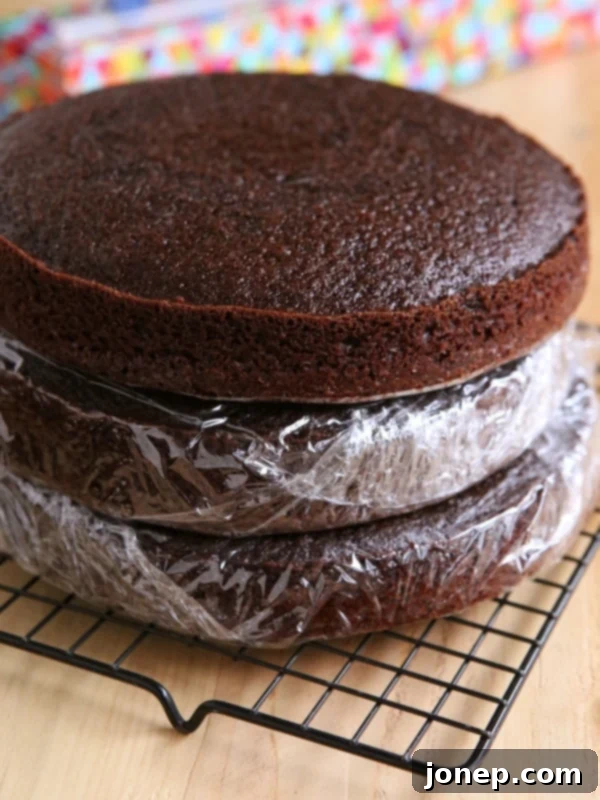
Baking a show-stopping layer cake doesn’t have to be a rushed, single-day marathon. In fact, to achieve the best results, reduce stress, and allow flavors to fully develop, I often treat it as a two-day process. Baking the cake layers one day and letting them chill or firm up overnight in the fridge is an absolute game-changer. Cold, firm cake layers are significantly easier to handle – they’re less prone to cracking, crumbling, or shifting during the crucial assembly and frosting stages, making for a much smoother and more enjoyable experience. Need to plan even further ahead? No problem! Here are two highly effective ways to store your cake layers in advance, ensuring their freshness and providing ultimate convenience:
1) Short-Term Storage in the Fridge: Up to 3-5 Days
The refrigerator provides an excellent environment for storing individual cake layers for a few days without compromising their quality. Once your cake layers have cooled completely to room temperature (this is critical to prevent condensation and sogginess), carefully wrap each layer tightly in plastic wrap. Ensure the plastic wrap forms a snug, airtight seal around the entire layer, which is essential to prevent moisture loss and absorb any unwanted odors from other foods in the fridge. Store these well-wrapped layers in the refrigerator for up to 3 to 5 days. This chilling period not only makes them firmer and easier to work with but also allows the cake’s flavors to meld and deepen slightly, often resulting in a richer, more satisfying taste profile when served.
2) Long-Term Storage in the Freezer: Up to 1 Month (or More!)
For those times when you need to bake much further in advance, or simply wish to have a stash of cake layers on hand for spontaneous baking or last-minute celebrations, the freezer is your best friend. Cake layers freeze exceptionally well, preserving their freshness, texture, and flavor beautifully for an extended period. To freeze, ensure each cooled layer is first wrapped tightly with a layer of plastic wrap, then an additional layer of heavy-duty aluminum foil. This dual protection is crucial for guarding against freezer burn, which can dry out your cake, and protects against external freezer odors. Label each wrapped layer with the date and type of cake, then place them flat in the freezer for up to 1 month, or potentially even longer if wrapped meticulously and stored properly.
When you’re ready to use your frozen layers, simply transfer them from the freezer to your countertop. Let them thaw at room temperature, still in their wrappings, for several hours or even overnight. It’s best to thaw them side-by-side (not stacked) to ensure even thawing. The condensation will form on the wrapping, keeping the cake moist as it thaws. Once completely thawed, they’ll be firm, fresh, and perfectly ready for assembly, tasting just as delicious as if they were baked that very day.
Looking for more detailed instructions on proper wrapping techniques, tips for different cake types, and step-by-step photos? Consult my comprehensive guide on how to store and freeze cake layers for all the insights you need.
Assemble Your Layer Cake with Stability and Structure
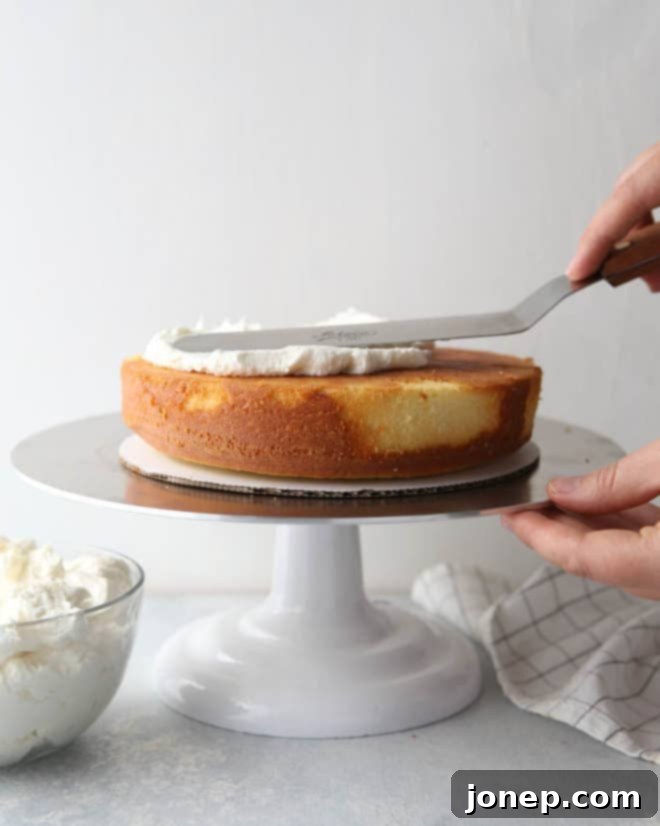
Assembling a layer cake is where the magic truly begins – bringing all your perfectly baked components together to form a cohesive and beautiful dessert. While not strictly necessary for every cake, investing in a few key tools can dramatically simplify the process and significantly elevate your results, making it both more enjoyable and efficient. I highly recommend using a revolving cake turntable and sturdy cardboard cake rounds. The turntable allows for smooth, effortless rotation, which is invaluable for even frosting application, while cardboard rounds provide a stable base, making it incredibly easy to transfer your cake to and from the fridge for chilling, and ultimately to your final serving stand. Here’s how to build your beautiful creation layer by layer:
1) Starting Your Stack: The Foundation
To begin assembly, first ensure your cake layers are completely cooled, or ideally, chilled from the refrigerator. Place your first cake layer top-side down onto a cardboard round (if using) or directly onto your chosen cake stand or serving plate. Starting with the top-side down provides a wonderfully smooth, flat surface as your base, ensuring a stable and perfectly level foundation for your entire cake. If your layers baked with a slight dome despite your best efforts, you might consider leveling them beforehand. Use a long serrated knife or a specialized cake leveler to carefully trim off the domed tops, creating a perfectly flat surface for each layer before stacking. This small step makes a huge difference in the final appearance and stability of your cake.
2) Adding Frosting or Filling: The Heart of the Cake
With your first sturdy layer in place, it’s time to add the delicious frosting or filling that will bind your cake together and deliver delightful flavor. For an 8 or 9-inch cake, approximately 1 cup of frosting or filling per layer is a good starting point, but feel free to adjust this based on your desired thickness and filling-to-cake ratio. Spread it evenly across the cake layer using an offset spatula, ensuring coverage right to the edges. If you’re working with a softer, more fluid filling, such as lemon curd, fruit preserves, or a lighter mousse, a crucial additional step is to create a “dam” of frosting around the perimeter of your cake layer. This sturdy border, piped about half an inch from the edge of the cake, acts as an effective barrier, preventing the softer filling from oozing out under the weight of subsequent layers. You can achieve this dam effect neatly using a piping bag fitted with a round tip, or simply and effectively with a small spatula, ensuring a clean, contained filling and a neat exterior.
3) Repeating and Splitting Layers for Height and Flavor
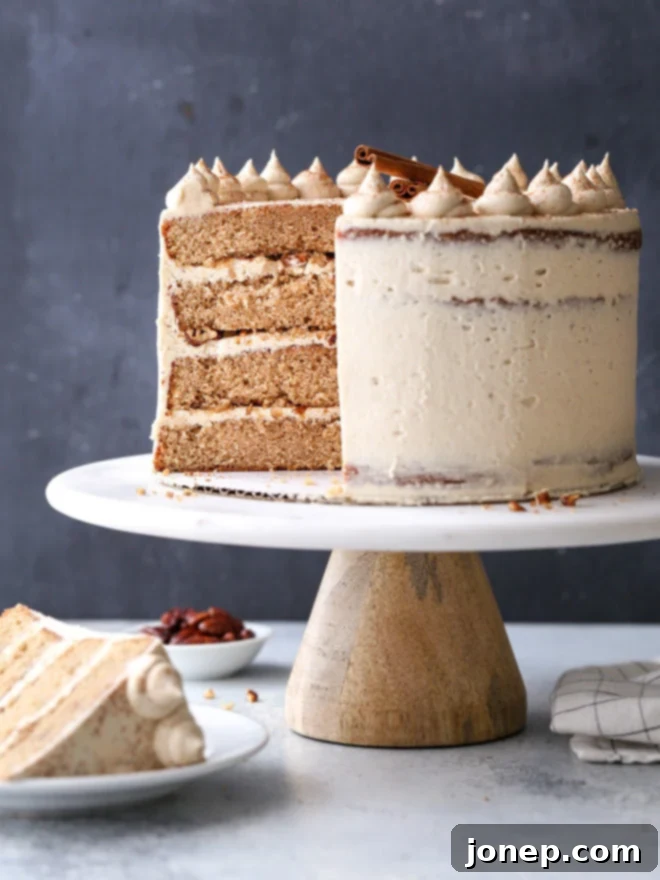
Continue this process for your remaining layers: gently place the next cake layer (top-side down for smoothness, or leveled if needed), add your frosting/filling, and repeat until all layers are stacked. For an even more impressive cake with additional layers of cake and filling – which can create a more dramatic presentation and enhance flavor distribution – you might wish to split thicker cake layers horizontally. To do this, use a sharp, thin knife (a paring knife works well) to first score the cake layer all the way around its circumference, creating a precise guide line. Then, carefully use a large serrated knife, like a bread knife, to cut the layer in half, following your scored line to ensure an even split. This technique effectively doubles your layers, creating a taller cake with more delicious filling ratios. Ensure your cake layers are well-chilled before attempting to split them, as this makes them firmer, easier to handle, and significantly less prone to tearing or crumbling.
For more detailed assistance with leveling and splitting cake layers, including common pitfalls to avoid and helpful step-by-step photos, refer to my complete guide on how to cut a cake into even cake layers.
Master the Art of Frosting a Layer Cake
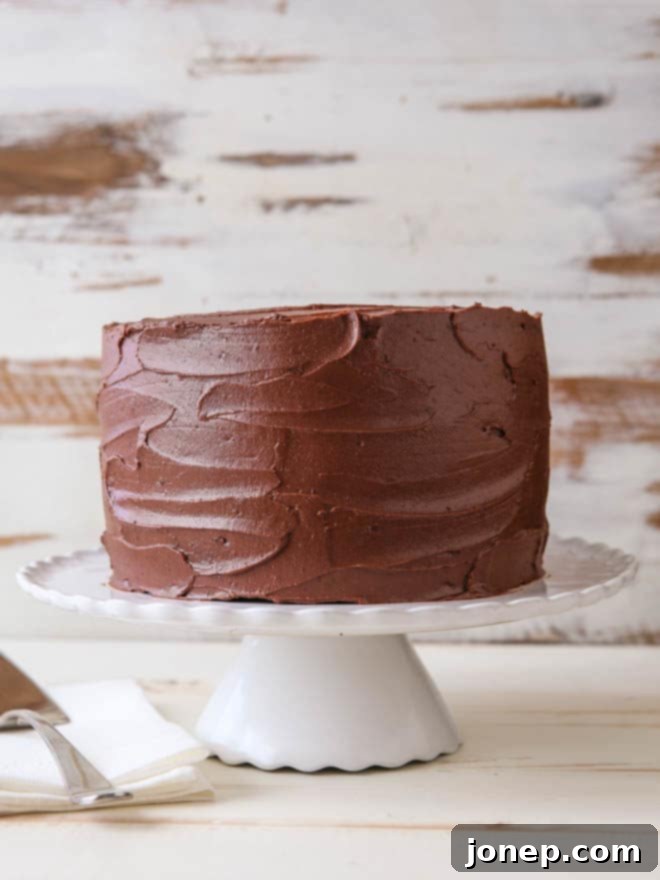
Frosting is often considered the most artistic and visually impactful part of cake building, and it’s where many bakers aim for perfection. The secret to achieving a truly professional, smooth, and crumb-free finish that truly elevates your layer cake is mastering the crumb coat. A crumb coat is a thin, initial layer of frosting meticulously spread over the entire assembled cake. Its primary purpose is twofold: first, to effectively seal in any loose crumbs from the cake, preventing them from mixing with your final, pristine frosting layer; and second, to smooth out the cake’s overall shape, filling minor gaps and creating a level, even canvas for your decorative finish. Don’t worry if your crumb coat looks a little messy or imperfect – it’s meant to be functional, not final! In fact, the popular “naked cake” aesthetic often uses a beautifully executed crumb coat as its intentional final look, subtly showcasing the cake layers themselves.
1) Applying the Essential Crumb Coat: Your First Layer of Perfection
To apply the crumb coat, begin by placing a small dollop of frosting (about ½ to ¾ cup) on top of your assembled cake. Using a small offset spatula, spread it evenly across the top, working your way outwards to the edges. Then, gently bring the frosting down the sides of the cake, applying a very thin, almost translucent layer. The goal here isn’t thickness, but complete coverage. Ensure you fill in any visible gaps between the cake layers and smooth out any minor uneven surfaces as best you can. If your chosen frosting is particularly stiff, you might find it helpful to thin it slightly with a tablespoon or two of milk, cream, or a neutral liquid (depending on your frosting type) to achieve a more spreadable and workable consistency. Once the entire cake is thinly coated, transfer it to the refrigerator and chill for at least 30 minutes, or until the frosting is firm to the touch. This crucial chilling time allows the crumb coat to set, effectively trapping all those pesky crumbs and creating a stable, clean foundation for your final, flawless coat.
2) Applying the Final Coat: Achieving a Flawless Finish
After your crumb coat has thoroughly chilled and set, it’s time for the final, more generous layer of frosting. Begin again by placing a substantial amount of frosting (usually 2-3 cups) on top of the cake, spreading it outwards to the edges to create a slightly mounded top. Then, gradually bring the frosting down the sides, ensuring an even and opaque layer all around. For the smoothest possible finish, two tools are invaluable: an offset spatula for applying and initial leveling, and a bench scraper (or a long, straight icing spatula) for meticulously smoothing the sides. Using your revolving turntable, hold the bench scraper steadily against the side of the cake at a slight angle and slowly rotate the turntable, allowing the scraper to evenly level and smooth the frosting in long, continuous strokes. Repeat this process for the top, dragging any excess frosting from the edge towards the center with your offset spatula, then smoothing it out. Don’t be afraid to add more frosting to fill any small divots. Once you’re completely satisfied with the finish, chill the cake in the fridge for at least another 30 minutes (or longer) to allow the final frosting layer to set beautifully, creating a firm, polished, and ready-to-decorate exterior.
Ready to truly elevate your frosting skills, learn advanced smoothing techniques, and discover tips for different frosting types? Discover my complete guide on how to frost a layer cake with detailed techniques and visuals for a truly professional look.
Storing and Transporting Your Beautiful Cake
You’ve poured your heart, skill, and precious time into building a magnificent layer cake – now it’s absolutely essential to ensure it stays fresh, beautiful, and safe, whether it’s awaiting its grand reveal at home or traveling to its destination. Proper storage and careful transportation are the final, crucial steps to guaranteeing your masterpiece arrives intact and tastes as incredible as it looks, preserving all your hard work.
Optimal Storage for Freshness
For fully frosted cakes, I highly recommend storing them in the refrigerator. The cool environment helps the frosting set firmly, maintains the cake’s delicate structure, and protects it from accidental bumps, dust, or curious fingers. Depending on the type of cake and frosting (e.g., buttercream, cream cheese frosting, ganache), a frosted cake will typically keep beautifully in the fridge for up to 3 to 5 days. For butter-based cakes and frostings, always allow the cake to come closer to room temperature for about 30-60 minutes before serving. This crucial step ensures that both the cake crumb and the frosting are at their ideal, tender, and most flavorful consistency. Once your cake is cut, the exposed surfaces can quickly dry out and become stale. To combat this, gently press plastic wrap directly onto the cut edges of the cake or, ideally, cover the entire remaining portion of the cake with a sturdy cake dome or an airtight container to maintain its moisture, freshness, and soft texture.
Mastering Cake Transportation
Transporting a delicate layer cake can be a source of anxiety for many bakers, but with a few smart precautions, it can be a stress-free process. The key is solidity. After assembly and the final frosting, chill your cake for at least 1-2 hours (or even longer) in the refrigerator. This allows the frosting to firm up completely, making the cake much more stable and significantly more resistant to jostling or minor bumps during transit. Only remove the cake from the fridge just before you depart.
- Secure Protection: Always place your cake in a secure cake carrier or a sturdy box that is appropriately sized for your cake. A dedicated cake keeper offers excellent protection against impacts and provides some insulation. If using a simple cardboard box, ensure the cake fits snugly to prevent it from sliding around, and consider adding non-slip matting or a few dabs of extra frosting under the cardboard cake round to prevent movement.
- Temperature Control: If you are traveling in warm weather, on a particularly hot day, or for an extended period, consider placing the boxed cake in a cooler with ice packs. Ensure the ice packs do not directly touch the cake or its box to avoid condensation, which can damage the frosting.
- Internal Stabilization for Larger Cakes: For very tall, multi-tiered, or particularly large cakes (generally those larger than 10 inches in diameter or with three or more layers), additional internal support is highly recommended. Inserting food-safe dowels (plastic or wooden) or thick straws into the cake layers provides crucial structural integrity. These supports help distribute the weight evenly, preventing the layers from shifting, sinking, or collapsing during transport. Position the dowels carefully, extending through all but the top layer, and trim them flush with the cake surface. This technique is absolutely vital for stacked cakes where multiple cakes are placed one on top of the other.
- Smart Driving Tips: When driving, place the cake on a flat, stable surface in your vehicle – the passenger floorboard or a level area in the trunk is often much better and more secure than a car seat. Drive smoothly, avoid sudden stops, sharp turns, or excessive speed.
By diligently following these guidelines, your beautifully crafted layer cake will arrive at its destination looking and tasting as magnificent as it did when it left your kitchen, ready to impress and delight.
Enjoy Your Homemade Masterpiece!
Congratulations! You’ve successfully navigated the intricate yet immensely satisfying process of building a perfect layer cake, from the initial meticulous pan preparation to the final, elegant frosting. I sincerely hope this detailed tutorial has provided you with the comprehensive knowledge, unwavering confidence, and abundant inspiration to create stunning and delicious cakes for any occasion, big or small. Each step, though seemingly small in isolation, contributes significantly to the overall success, stability, and undeniable beauty of your finished product. Remember that practice makes perfect, and every cake you bake is a valuable step closer to mastering this wonderful and rewarding craft.
Baking is a journey of continuous learning and joyful discovery, and I always value shared wisdom and community insights. If you have any personal tips, clever tricks, or favorite techniques that have consistently helped you in your own layer cake adventures, please don’t hesitate to share them in the comments section below. Your insights and experiences could be incredibly helpful and inspiring to fellow bakers in our growing community! Happy baking, and enjoy every glorious slice of your homemade masterpiece!
This comprehensive post was originally published in February 2011 and has since been extensively updated with enhanced content, additional practical tips, improved clarity, refreshed photos, and a more user-friendly structure to provide the most current and helpful information for all aspiring and experienced layer cake bakers.
