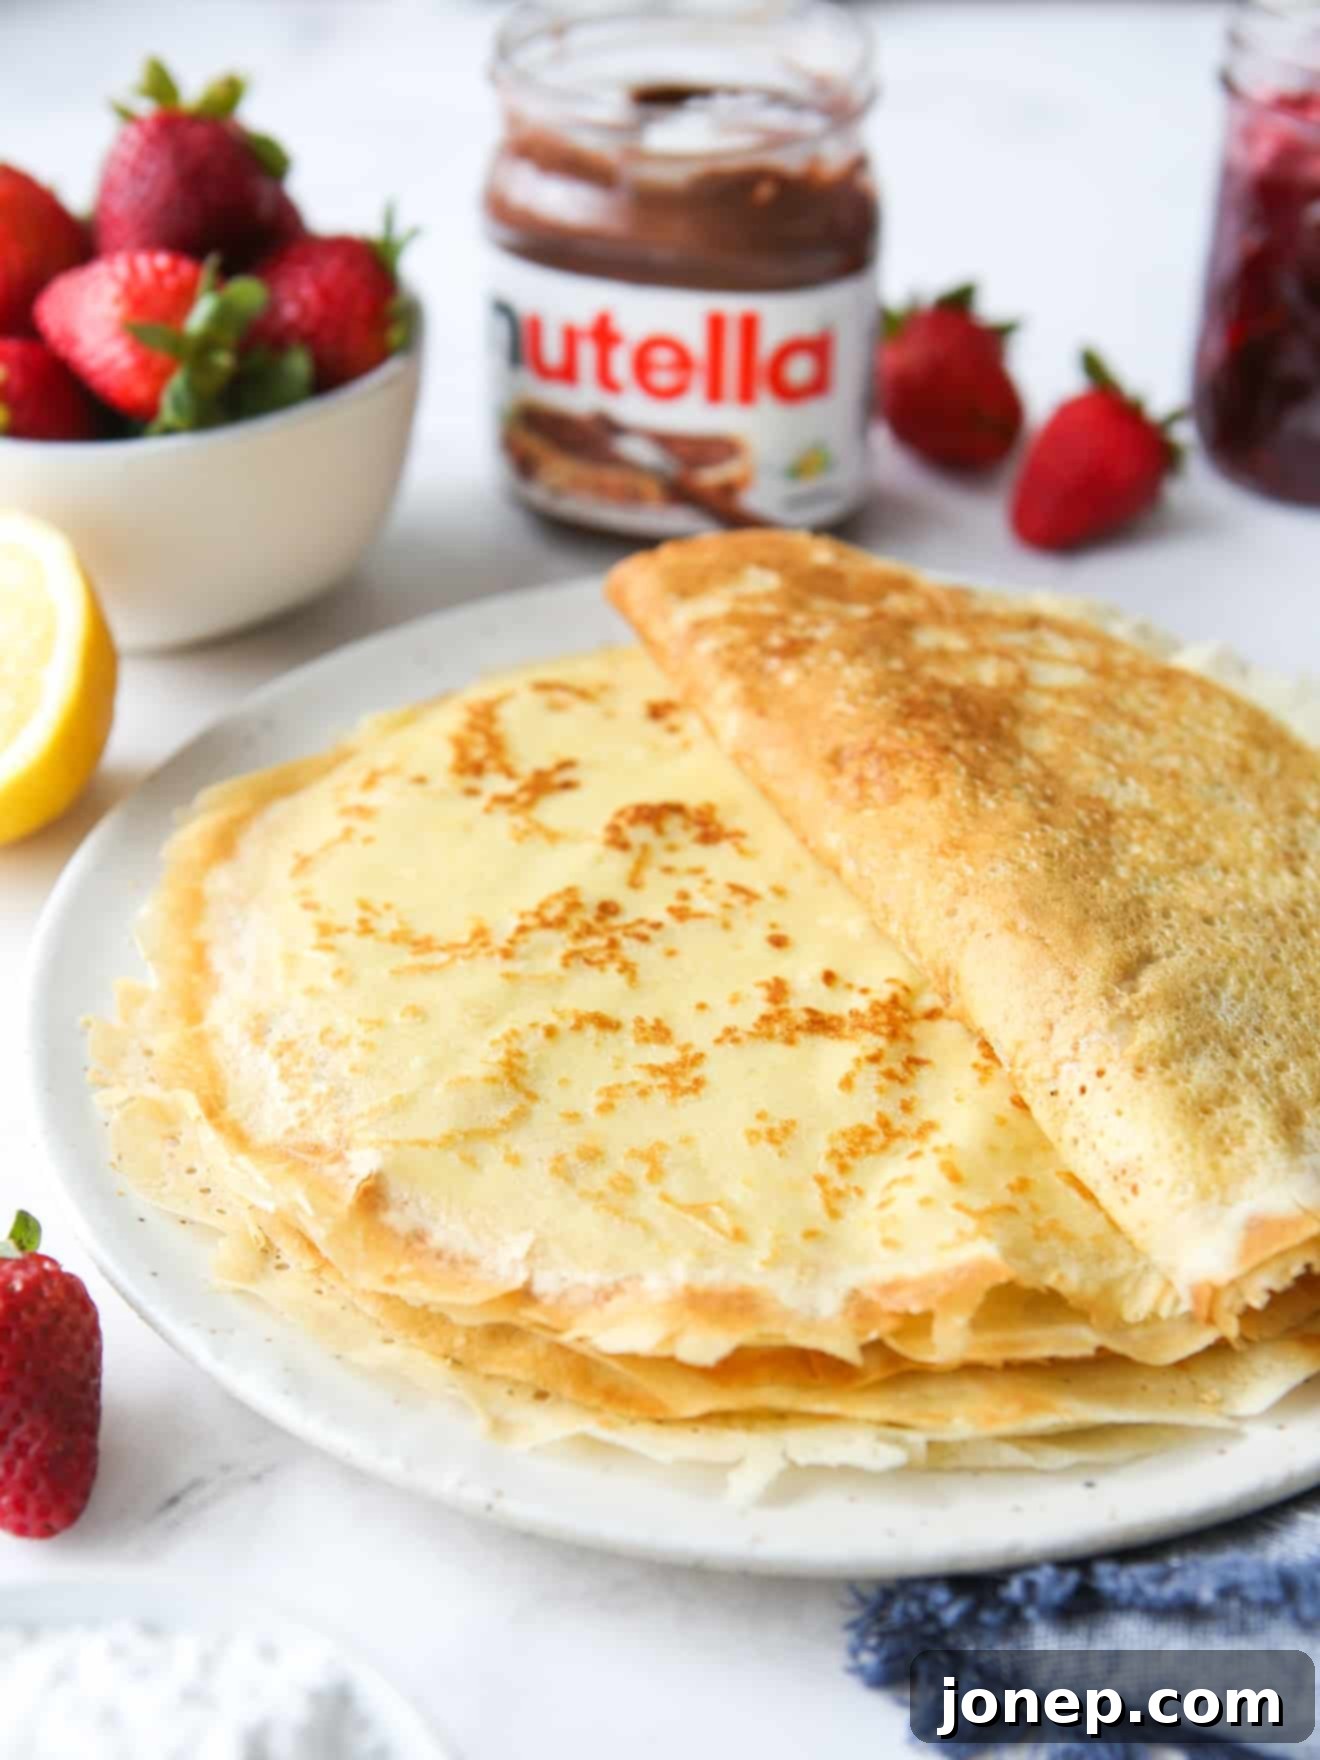
Effortless Homemade Crepes: Your Ultimate Guide to Light, Delicious Pancakes
Imagine thin, airy, and exquisitely delicate pancakes infused with a hint of vanilla, ready to be filled with your favorite sweet or savory delights. That’s the magic of homemade crepes, and I’m thrilled to show you just how easy they are to master! Forget the myth that crepes are only for fancy brunch spots; with this foolproof recipe, you’ll be whipping up perfect crepes in your own kitchen in no time. Whether you prefer them with creamy Nutella, sweet berry jam, fresh fruit, or a sprinkle of powdered sugar, these crepes are designed to be a versatile canvas for any craving.
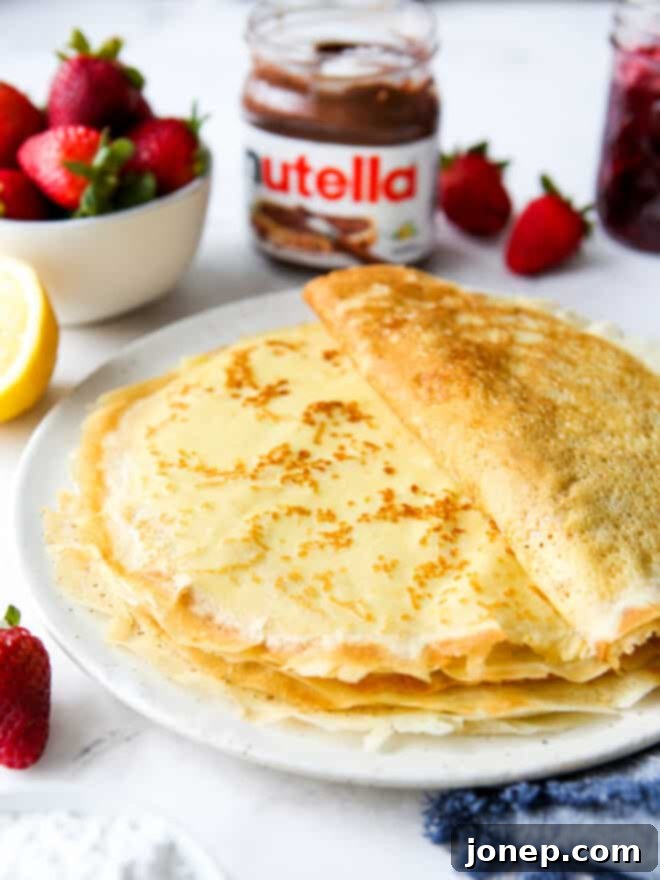
Homemade crepes have become a cherished staple in our household. My children are absolutely smitten with them, especially when slathered with rich Nutella, a dollop of homemade jam, or adorned with thinly sliced strawberries. Their regular requests for breakfast have transformed crepes from an occasional treat into a frequent and much-anticipated meal.
For a long time, crepes were reserved for special occasions or holiday breakfasts – a delicious but seemingly elaborate endeavor. However, everything changed when I developed this incredibly simple crepe recipe that comes together in mere seconds in a blender. The real secret? Letting the batter rest overnight in the fridge. This simple step transforms the texture and flavor, making our crepes so consistently delicious and easy that we now enjoy them all the time! This recipe truly makes homemade crepes perfect not just for holidays or lazy weekend mornings, but even for those busy weekday breakfasts when you need something quick yet special to kickstart your day.
Table of Contents
- Ingredients You’ll Need for Perfect Crepes
- No Special Equipment Needed! (Just a Skillet)
- How to Make Homemade Crepes: A Step-by-Step Guide
- Expert Tips for Making Crepes at Home
- Delicious Crepe Toppings and Fillings
- Get the Full Homemade Crepes Recipe
Ingredients You’ll Need for Perfect Crepes
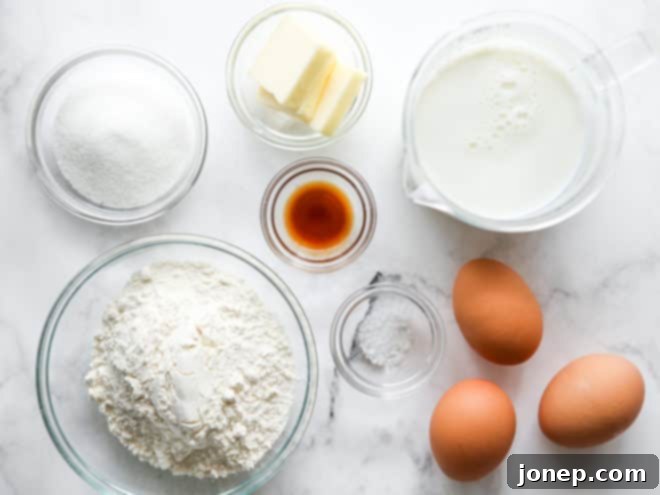
Crafting these delectable crepes requires just a handful of common kitchen staples. The beauty of this recipe lies in its simplicity, using ingredients you likely already have on hand. Here’s a detailed look at everything you’ll need to make these light and flavorful crepes at home (with the full recipe card available below):
- Milk: Whole milk is highly recommended as it contributes a richer flavor and a more tender texture to your crepes. The higher fat content results in a more luxurious feel. However, if you only have 2% milk on hand, it will work perfectly fine, yielding slightly lighter crepes.
- Eggs: Essential for structure and binding the batter, eggs also add richness and a beautiful golden color to the crepes. They help create that characteristic delicate and pliable texture.
- Granulated Sugar: Just enough to provide a subtle sweetness that complements both sweet and savory fillings. It also aids in achieving that lovely golden-brown hue as the crepes cook.
- All-Purpose Flour: The foundation of our crepe batter, providing the necessary structure. Using all-purpose flour helps create thin, strong crepes that won’t easily tear.
- Salt: A crucial ingredient that balances the sweetness and enhances all the other flavors in the batter. Don’t skip this pinch!
- Vanilla Extract: This is where a lot of the delicious, aromatic flavor comes from. High-quality vanilla extract elevates the taste, giving your crepes that classic, inviting aroma. You can also experiment with other extracts like almond for a different twist.
- Butter: Melted butter is incorporated directly into the batter for a rich, nuanced flavor, and a tender crumb. It also helps prevent sticking and ensures a smooth cooking process.
- Desired Toppings: While not part of the batter, having your favorite toppings like Nutella, jams, fresh fruit, or whipped cream ready makes the serving process seamless and enjoyable!
No Special Equipment Needed! (Just a Skillet)
One of the best things about this homemade crepe recipe is that you don’t need any specialized kitchen gadgets. While there are dedicated crepe pans and tools available on the market, they are absolutely not necessary for making fantastic crepes, and I personally prefer to avoid single-use kitchen items that just clutter my cabinets.
For outstanding results, I simply use a standard 9-inch stainless steel skillet. The key is to have a pan with a flat bottom and relatively low sides to make flipping easier. A 9-inch nonstick skillet is also an excellent choice, especially if you’re new to making crepes, as it provides extra assurance against sticking and makes the initial learning curve even smoother. The nonstick surface ensures your delicate crepes release beautifully every time.
However, if you are a frequent crepe maker or simply enjoy investing in tools that make cooking even more of a joy, you might consider a shallow nonstick pan with a wooden spreader. This type of pan is designed with very low, sloped sides, making it incredibly easy to slide your spatula under the crepe and achieve that perfect flip. The wooden spreader, often included, helps distribute the batter thinly and evenly, though you can achieve similar results with a simple tilt-and-swirl method.
How to Make Homemade Crepes: A Step-by-Step Guide
Making homemade crepes might seem intimidating, but with this simple method, you’ll be a crepe master in no time. Follow these steps for consistently perfect, delicate crepes:
- Melt Butter in the Skillet: Begin by melting the specified amount of butter directly in the 9-inch skillet you plan to cook the crepes in, over medium-low heat. This not only prepares the pan but also infuses the butter with a slightly nutty flavor before it’s added to the batter. Once melted, carefully pour the butter into your blender, leaving a very thin film to coat the pan.
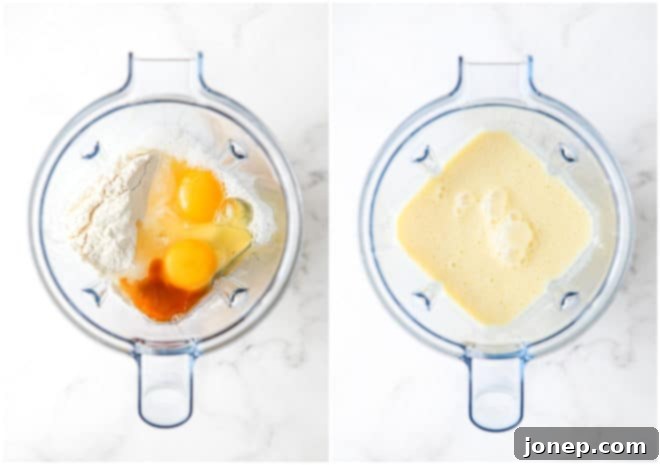
- Combine Ingredients in a Blender: This is the ultimate shortcut to a perfectly smooth, lump-free crepe batter! Skip the hassle of sifting flour and whisking by hand. Simply add the melted butter, milk, eggs, granulated sugar, all-purpose flour, salt, and vanilla extract into your blender. Blend for approximately 20-30 seconds, or until all ingredients are thoroughly combined and the batter is completely smooth with no visible lumps.
- Chill the Batter (Optional, but Recommended): While you can certainly cook the crepes immediately after blending, I highly recommend letting the batter rest. Chilling the batter in the fridge for at least 30 minutes, or ideally overnight, allows the gluten to relax. This results in incredibly tender, more flavorful crepes that are less likely to tear during cooking. It also gives any air bubbles time to dissipate, ensuring a smoother surface.
- Add Batter to Pan and Swirl: Heat your lightly buttered (or ungreased, if nonstick) 9-inch skillet over medium heat. Once hot, quickly add about ¼ cup of crepe batter to the center of the pan. Immediately, tilt and swirl the pan in a circular motion to spread the batter evenly across the entire bottom surface in a thin layer. This step is crucial for achieving that characteristic thinness. This video beautifully demonstrates the swirling technique.
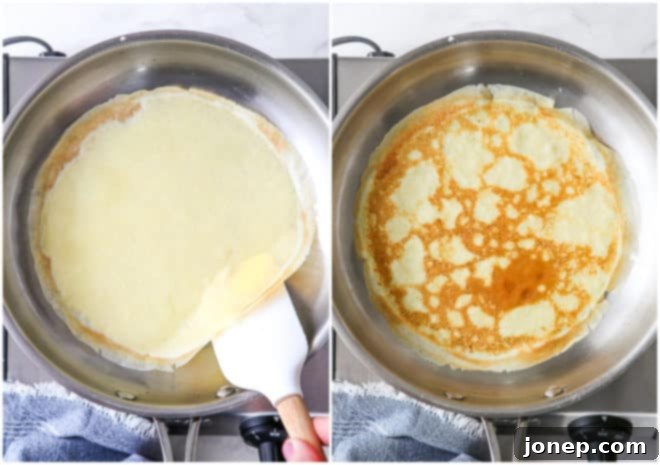
- Cook Until Golden and Edges Loosen: Allow the crepe to cook on the first side for approximately 1-2 minutes. You’ll notice the edges just beginning to crisp and turn a light golden color, and the surface will start to look dry. Gently use a thin spatula to loosen the edges all around the crepe.
- Flip with Confidence: Once the edges are loosened and the crepe slides freely in the pan, carefully work your spatula about halfway under the crepe. With a swift, confident motion, flip the crepe over to the other side. Don’t worry if your first few aren’t perfect – practice makes perfect! Once flipped, cook on the second side for about 30 seconds to 1 minute, until it achieves a light golden color.
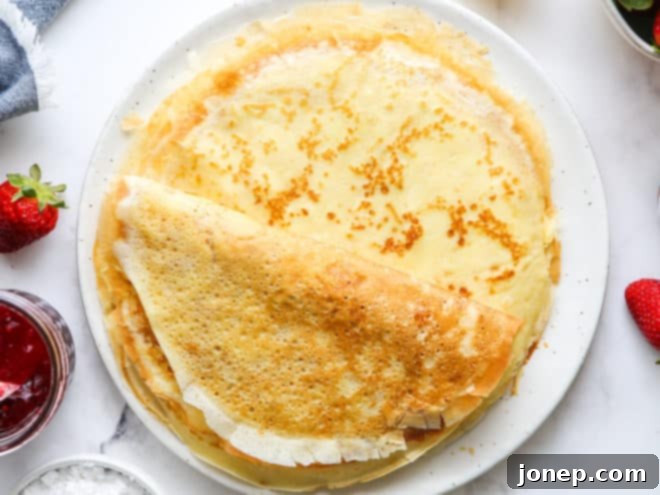
- Stack and Repeat: As each crepe finishes cooking, gently slide it out of the pan onto a plate. Continue with the remaining batter, stacking the cooked crepes on top of each other. Stacking helps keep them warm and soft, and the residual heat from one crepe helps to gently steam the one above it, maintaining their pliable texture.
- Enjoy Warm or at Room Temperature: Once all your crepes are cooked, it’s time to enjoy! Add your favorite toppings and/or fillings (find plenty of suggestions below) and serve them warm directly from the pan, or let them cool to room temperature. They are delicious either way!
Expert Tips for Making Crepes at Home
Making crepes is a skill that improves with practice, but these tips will help you achieve perfect results and build your confidence in the kitchen:
- Practice Makes Perfect (Don’t Get Discouraged!): The very first crepe you make, often called the “test crepe,” may not turn out perfectly. It might be too thick, tear when you flip it, or brown unevenly. This is completely normal! It helps you gauge your pan’s temperature and the right amount of batter. Keep going; you’ll quickly get the hang of it. The wonderful thing about making a batch of crepes is that even if a few don’t work out, there’s always plenty of batter remaining for many more delicious ones.
- Master the Swirl with a Visual Guide: The swirling motion is key to achieving uniformly thin crepes. This short video is incredibly helpful. It clearly demonstrates how to slowly add the batter to the pan while simultaneously tilting and swirling it around to create an even, paper-thin layer. Watching it once or twice can make a significant difference in your technique.
- Use the Right Amount of Batter: For a standard 9-inch skillet, do not add more than approximately ¼ cup of batter. Using too much batter will result in a crepe that is too thick, making it harder to cook through, less delicate, and much more difficult to handle and flip without tearing. Precision here ensures thinness.
- Embrace or Refine Lacey Edges: You might notice some of your crepes developing slightly lacey edges, as visible in my photos. This happens when the batter spreads super thin at the very edge of the pan. Personally, I love these charming, slightly crispy edges and don’t mind them at all. They often soften beautifully as the cooked crepes stack on top of each other. If you prefer a cleaner, more uniform edge, try being a little less vigorous in your pan twirling, or immediately after adding and swirling the batter, gently push any excess batter from the very edges towards the center with your spatula.
- Remember, Taste is King! Perhaps the most important tip: how your crepes look matters less than how they taste. Even if they aren’t perfectly round or have a few imperfections, if you follow this recipe, your crepes will taste absolutely amazing. Don’t let minor aesthetic flaws detract from the joy of creating delicious homemade food.
- The Magic of Chilling the Batter: While not strictly required, chilling the batter for at least 30 minutes (or ideally overnight) significantly improves the end result. Resting allows the flour to fully hydrate and the gluten to relax, which leads to more tender, flexible crepes that are less prone to tearing. It also deepens the flavor profile. Preparing the batter the night before you plan to make crepes is a fantastic time-saver for busy mornings. For best results, prepared crepe batter should be used within about 24 hours.
- Make-Ahead and Storage: Crepes are excellent for meal prep! Cooked crepes can be made several days in advance and stored in the fridge. Simply layer them between sheets of parchment paper or wax paper, wrap them tightly in plastic wrap, and place them in an airtight container. They can be gently reheated in a microwave or a warm skillet. You can also freeze cooked crepes for up to a month, thawing them in the fridge before reheating.
- Manage Your Heat: Consistent medium heat is crucial. If the pan is too hot, the crepes will brown too quickly on the outside before cooking through, and might burn. If it’s too cool, they’ll take too long to cook, become tough, and won’t get that nice golden color. Adjust the heat as needed throughout the cooking process.
Delicious Crepe Toppings and Fillings
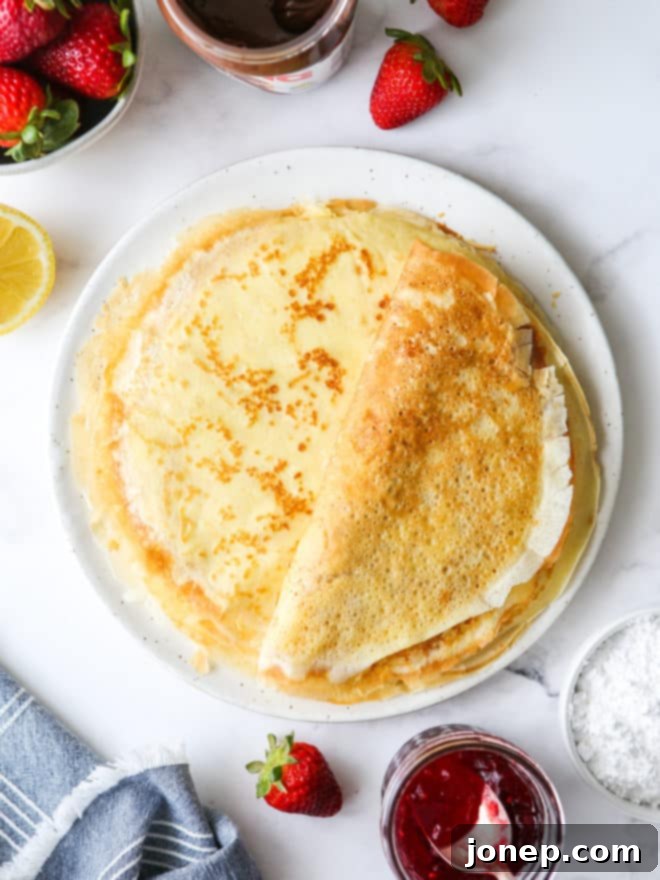
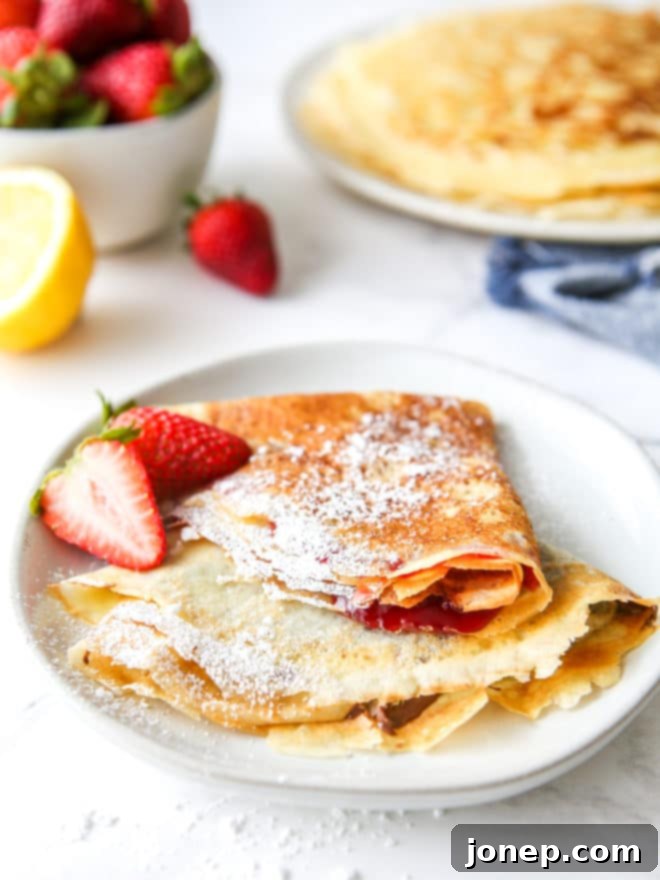
The versatility of crepes truly shines when it comes to customizing them with toppings and fillings. You can literally add almost anything you like, catering to both sweet tooth cravings and savory appetites. Here are some of our favorite ideas to inspire you:
- Fresh Sliced Fruit: Classic choices like sliced strawberries, bananas, raspberries, blueberries, or peaches add natural sweetness and a refreshing texture.
- Nutella: The ultimate indulgence! A generous spread of hazelnut cocoa spread is a perennial favorite, especially with kids.
- Jams and Preserves: Any fruit jam works wonderfully. Try classic strawberry jam, apricot, raspberry, or a tart cherry preserve for a burst of flavor.
- Lemon & Sugar: A timeless combination. A simple squeeze of fresh lemon juice followed by a dusting of powdered sugar offers a delightful tangy-sweet balance.
- Creamy Delights: A dollop of light and fluffy whipped cream or a rich chantilly cream frosting adds an element of luxury.
- Chocolate Sauce or Caramel: Drizzle with homemade or store-bought chocolate syrup or a luscious salted caramel sauce for a decadent dessert crepe.
- Fruit Compotes: Warm berry compotes or apple cinnamon compotes are fantastic, especially during colder months.
- Maple Syrup or Honey: A simple drizzle of pure maple syrup or golden honey is always a welcome addition.
- Peanut Butter: For a protein-packed breakfast, spread with peanut butter and add sliced bananas.
- Savory Options: Don’t forget crepes aren’t just for sweets! Fill them with ham and Swiss cheese, sautéed mushrooms and spinach, smoked salmon with cream cheese and dill, or even a chicken and béchamel sauce for a delightful lunch or dinner.
Get the Full Homemade Crepes Recipe
Ready to make these incredible crepes? Below you’ll find the complete, printable recipe card with all the detailed measurements and instructions to guide you to crepe perfection. Enjoy!

Homemade Crepes
Pin Recipe
Leave a Review
Ingredients
For the crepes:
- 4 tablespoons unsalted butter (¼ cup, 56 grams)
- 1 ½ cups whole milk (375 ml)
- 3 large eggs
- ¾ cup all-purpose flour (90 grams)
- ¼ cup granulated sugar (50 grams)
- ½ teaspoon vanilla extract
- Pinch of salt
Suggested toppings:
- Sliced strawberries or other fresh fruit
- Your favorite jam or preserves
- Nutella or other chocolate hazelnut spread
- Freshly whipped cream
- A refreshing squeeze of lemon juice
- Dusting of powdered sugar
Instructions
To make the crepes:
-
Melt the butter in a 9-inch stainless or nonstick skillet over medium-low heat. Once melted, pour it into the blender for the batter, leaving a thin film of butter in the pan.
-
In a blender, combine the melted butter, milk, eggs, flour, sugar, vanilla extract, and salt. Blend for about 20-30 seconds until the mixture is completely smooth and lump-free. For best results, chill the batter for at least 30 minutes, or ideally overnight, to allow the gluten to relax.
-
Heat the lightly buttered skillet over medium heat. Add approximately 1/4 cup of crepe batter to the hot pan. Immediately tilt and swirl the pan to coat the bottom evenly with a thin layer of batter. Cook for about 1-2 minutes, until the edges just start to turn golden brown and the surface looks dry. Gently loosen the edges and center with a spatula as it cooks.
-
Carefully flip the crepe using your spatula and cook on the other side for an additional 30 seconds to 1 minute, until lightly golden.
-
Slide the cooked crepe out onto a plate and continue with the remaining batter, stacking the crepes on top of each other to keep them warm and soft.
-
Serve with your desired toppings and fillings. Crepes can be enjoyed warm directly from the pan or at room temperature.
Notes
- The crepe batter can be made up to 24 hours in advance and stored in an airtight container in the fridge. This makes morning crepe-making incredibly easy and efficient.
- For the richest flavor and most tender crepes, whole milk is preferred, but 2% milk will also yield delicious results.
- For a visual guide on how to properly tilt and swirl the pan when adding batter, watch this helpful video.
- Cooked crepes can be stored in the refrigerator for up to 3 days, layered between parchment paper and wrapped tightly. They can also be frozen for up to one month.
- Don’t overcrowd the pan. Use just enough batter (approximately 1/4 cup for a 9-inch pan) to create a thin, delicate crepe.
- Maintain a consistent medium heat; too high and they burn, too low and they become tough.
