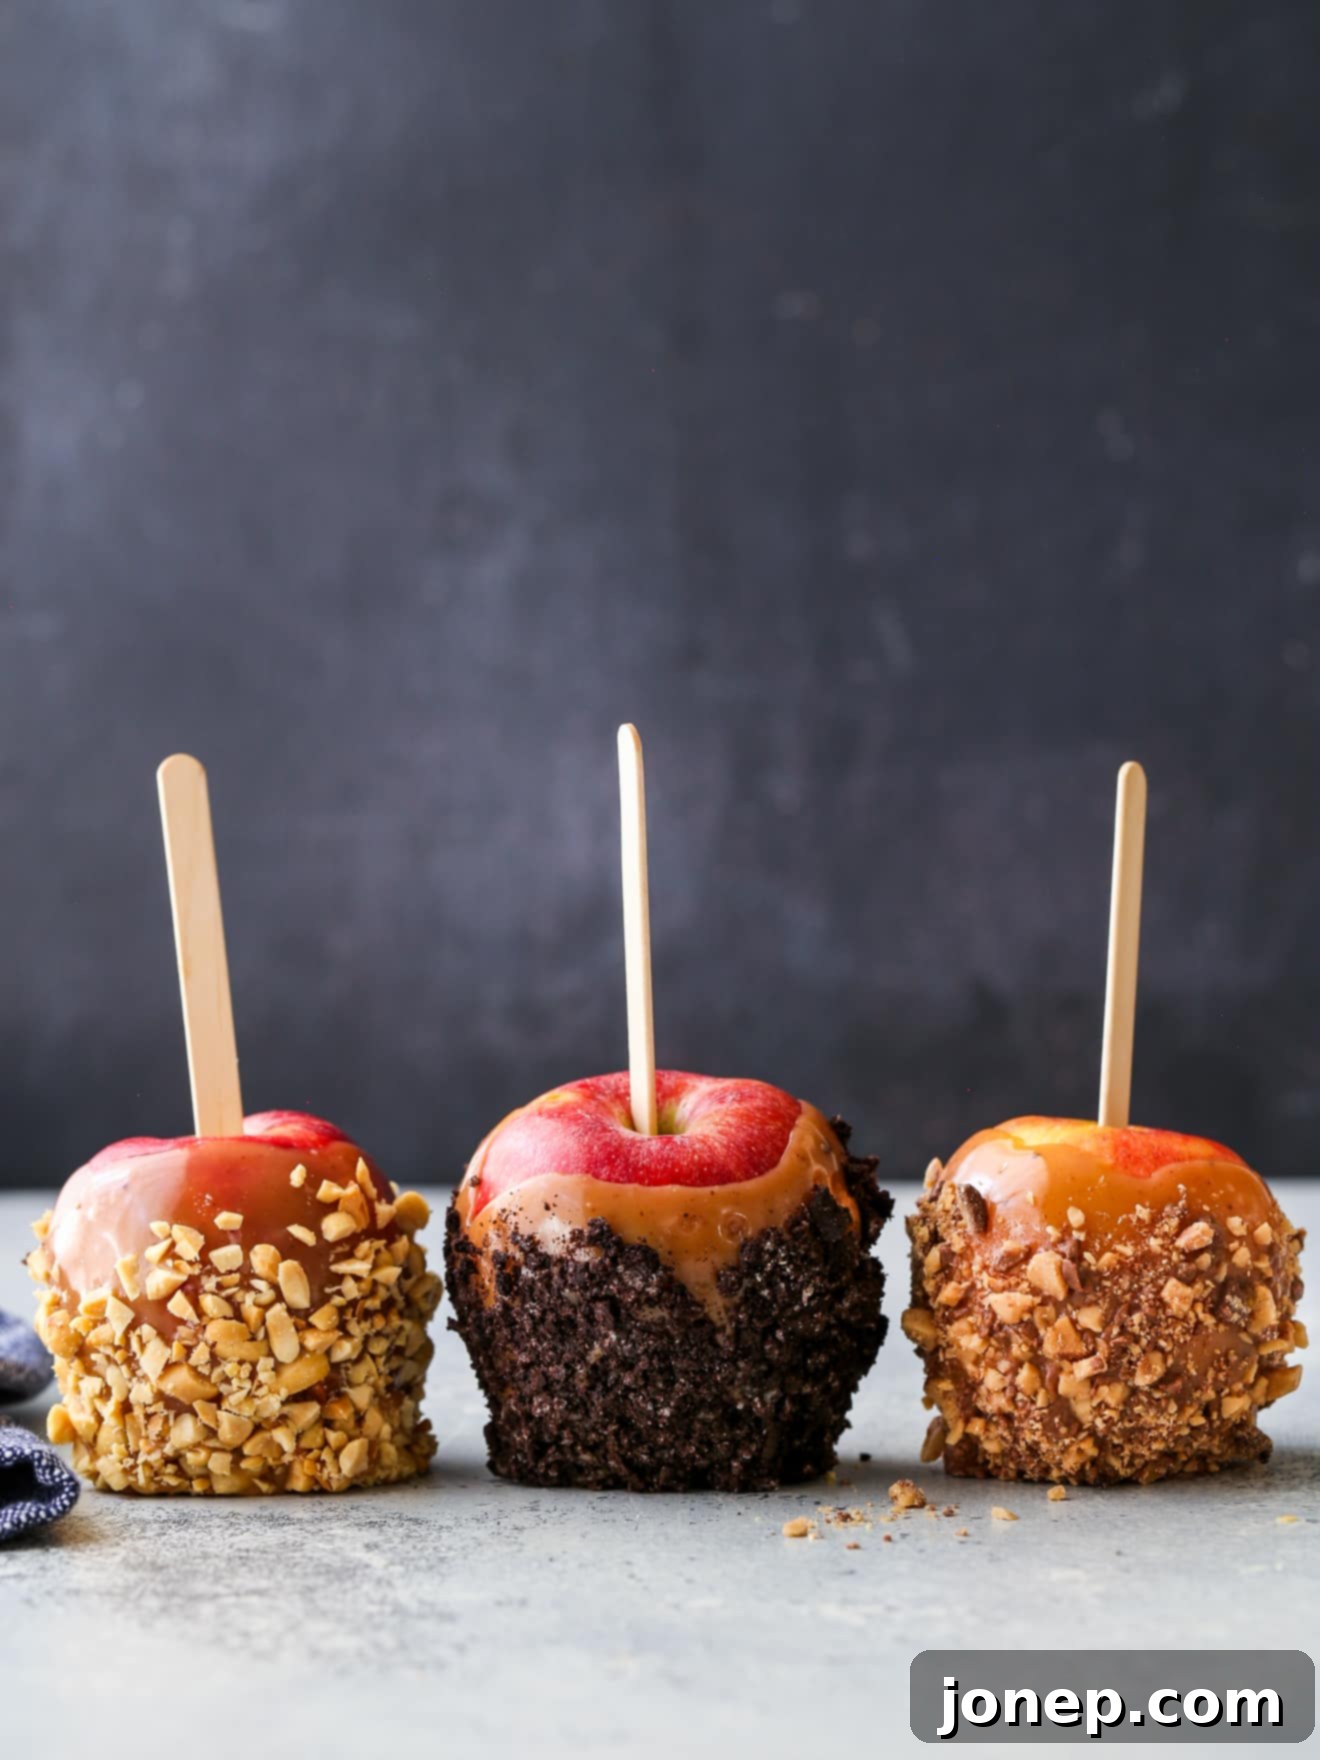
How to Make Perfect Homemade Caramel Apples: Recipe, Tips & Toppings
There’s something truly magical about the crisp crunch of a fresh apple combined with the rich, buttery sweetness of homemade caramel. Caramel apples aren’t just a treat; they’re a quintessential fall experience, perfect for cozy evenings, festive gatherings, or simply enjoying with loved ones. While store-bought versions are fine, nothing compares to the incredible flavor and texture of caramel apples made from scratch.
If your past attempts at caramel apples involved melting down pre-packaged caramels, prepare for a revelation! Making homemade caramel for your apples is surprisingly easy and yields a vastly superior result—a silky, perfectly chewy coating that elevates this classic dessert to new heights. In this complete guide, we’ll walk you through every step, from selecting the best apples to crafting the ideal caramel sauce, along with plenty of expert tips and FAQs to ensure your success.

Why Homemade Caramel Apples Are Simply the Best
Beyond the undeniable flavor, there are many reasons to embrace the homemade caramel apple tradition. It’s a wonderful activity to share with family and friends, especially during the autumn months. The process itself is part of the fun, a delightful blend of simple ingredients transforming into a gourmet confection. Homemade caramel allows for a depth of flavor and a perfect chewiness that pre-made options just can’t match. Plus, customizing your caramel apples with a variety of toppings makes them uniquely yours, transforming them into impressive gifts or memorable party favors – as we even did for our wedding!
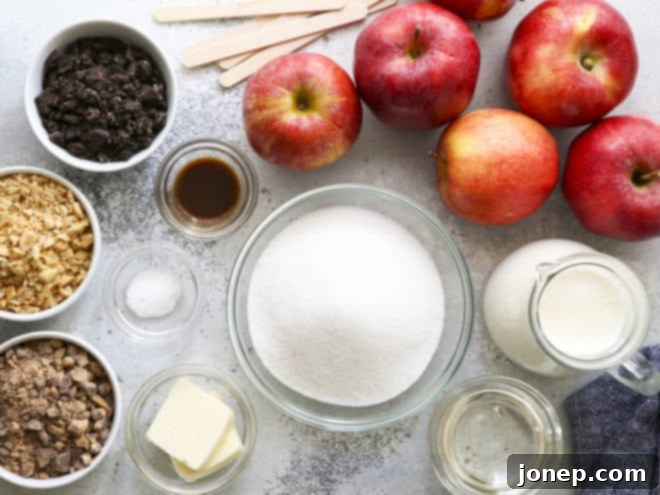
Essential Ingredients for Perfect Caramel Apples
Creating the perfect homemade caramel apple starts with quality ingredients. Here’s what you’ll need, along with a few notes on why each component is crucial:
- Apples: The foundation of our treat! Choose firm, fresh apples. We’ll discuss varieties and preparation in detail below.
- Heavy Cream: This is key for creating a rich, luscious, and creamy caramel. Do not substitute with lighter creams, as the fat content is essential for the caramel’s texture and flavor.
- Granulated Sugar: The sweet base of our caramel. While other sugars can be used in some caramel recipes, granulated sugar is ideal for achieving the classic, clear caramel flavor and color.
- Unsalted Butter: Adds a wonderful depth of flavor and contributes to the smooth, melt-in-your-mouth texture of the caramel. Using unsalted butter allows you to control the salt content precisely.
- Light Corn Syrup: This often-misunderstood ingredient is vital! Corn syrup helps prevent the sugar from crystallizing, ensuring your caramel remains smooth and pliable, not grainy or rock-hard. Don’t skip it!
- Vanilla Extract: A splash of vanilla enhances all the other flavors, adding a warm, aromatic finish to your caramel. Add it at the end to preserve its delicate flavor.
- Salt: A pinch of salt balances the sweetness of the caramel and brightens all the flavors. A touch of sea salt can also add a subtle complexity.
- Craft Sticks: Essential for holding your apples. Wooden craft sticks or skewers work perfectly.
- Toppings as Desired: Get creative! From nuts to candies, toppings add extra flavor and visual appeal.
Choosing and Preparing Your Apples
The type of apple you choose can significantly impact your caramel apple experience. While any firm apple will technically work, tart varieties create a delightful contrast with the sweet caramel. Favorites include:
- Granny Smith: Their crisp texture and tangy flavor are a classic pairing with sweet caramel.
- Pink Lady: Offers a good balance of sweet and tart, with a firm crunch.
- Gala: A sweeter option, but still firm enough to hold up to the caramel.
Crucial Prep Tip: For the caramel to adhere properly, your apples must be clean and wax-free. Many commercially grown apples have a thin wax coating. If your apples look shiny, you can easily remove the wax: soak them in a sink filled with about 4 inches of warm water, 1 tablespoon of lemon juice, and 1 tablespoon of baking soda. Scrub each apple thoroughly, rinse, and dry completely before inserting your craft sticks. This simple step ensures a perfectly coated apple every time.
Irresistible Topping Ideas
While a plain homemade caramel apple is a thing of beauty, adding toppings takes them to a whole new level of fun and deliciousness! Here are some beloved suggestions, but feel free to let your imagination run wild:
- Chopped Nuts: Pecans, walnuts, peanuts, or almonds add a satisfying crunch and nutty flavor.
- Chopped Candy Bars: Think Heath bars (toffee!), Butterfinger, Snickers, or Reese’s Peanut Butter Cups for an extra decadent touch.
- Mini M&Ms: Colorful and chocolatey, a hit with kids and adults alike.
- Toasted Coconut Flakes: Adds a tropical twist and lovely texture.
- Crushed Oreo Cookies: For a cookies-and-cream vibe that’s always a crowd-pleaser.
- Sprinkles: A simple way to add festive color and a touch of whimsy.
- Melted Chocolate Drizzle: After the caramel has set, drizzle with dark, milk, or white chocolate for an elegant finish.
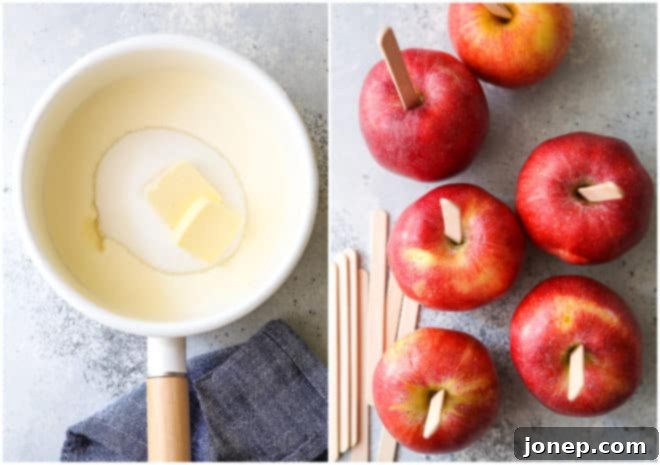
Step-by-Step Guide: How to Make Homemade Caramel Apples
Follow these detailed instructions to create stunning caramel apples. For the best results, we highly recommend reading through all the tips below before you begin.
1. Prepare Your Workspace and Apples
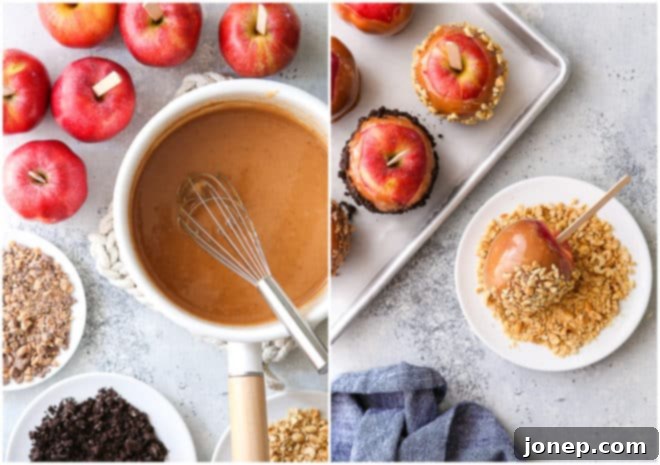
Thoroughly wash and dry your apples, removing any stems. Insert a craft stick firmly into the stem end of each apple, pushing it about halfway down. Have a sheet of wax paper or parchment paper ready on your counter where the dipped apples can cool. If you’re using toppings, chop them and arrange them in shallow bowls or plates next to your cooling station so they are ready for quick application.
2. Crafting the Silky Smooth Caramel Sauce
In a heavy-bottomed saucepan (this is important for even heat distribution), combine the heavy cream (1 cup portion), granulated sugar, light corn syrup, and butter. Place the saucepan over medium heat, stirring occasionally. Allow the mixture to melt and come to a gentle boil, ensuring all sugar crystals dissolve. The mixture should be smooth.
3. Achieving the Perfect Caramel Consistency
Once boiling, insert a reliable candy thermometer into the mixture, ensuring it doesn’t touch the bottom of the pan. Continue to cook the caramel over medium heat, stirring occasionally to prevent burning and ensure even cooking. Your goal is to reach the “hard ball stage,” which is precisely 248°F (120°C). As it cooks, the caramel will transform from a pale cream color to a beautiful, rich golden brown. Be vigilant and adjust the heat if it starts to cook too quickly or threatens to burn.
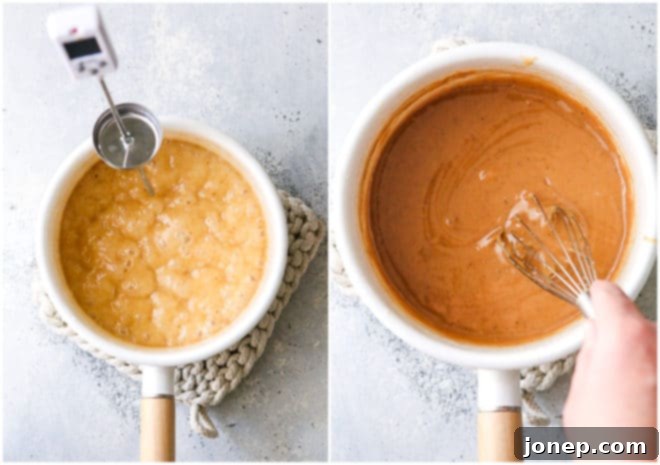
4. Finishing the Caramel
The moment your caramel reaches 248°F, immediately remove the pan from the heat. Whisk in the remaining 1 tablespoon of heavy cream, vanilla extract, and salt. The mixture may bubble vigorously at this point, but continue whisking until the caramel is smooth and thoroughly combined. This final cream addition helps achieve the perfect consistency and adds an extra layer of richness.
5. Dipping and Decorating Your Apples
Work quickly! Caramel sets up fast. Dip each apple into the warm caramel sauce, rotating and tilting the pan as needed to ensure the apple is fully coated. Lift the apple, allowing any excess caramel to drip back into the pan. For an even coating, you can gently scrape the bottom of the apple against the rim of the pan. If you’re adding toppings, immediately roll the caramel-coated apple in your prepared toppings until desired coverage is achieved.
6. Setting and Serving
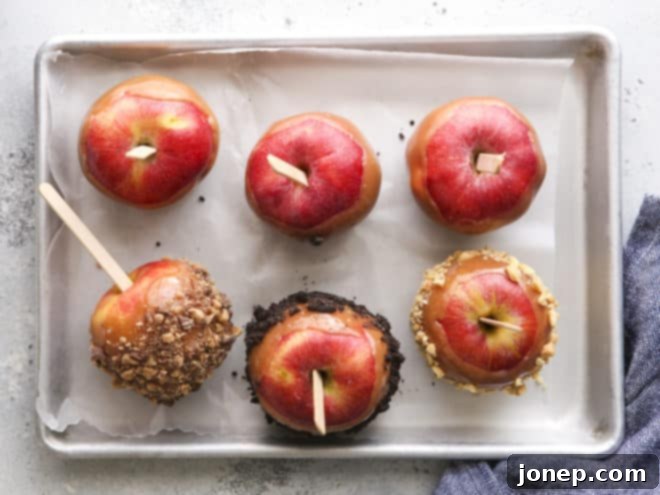
Place each dipped and topped caramel apple onto your prepared wax or parchment paper. Allow them to sit at room temperature for 30-60 minutes to set completely. If you’re in a hurry, you can transfer them to the refrigerator for faster setting, but they taste best when served at room temperature or slightly chilled. Enjoy your homemade masterpiece!
Expert Tips for Flawless Homemade Caramel Apples
Achieving caramel apple perfection is easier with a few insider tricks. Read these tips carefully before you start to ensure a smooth and successful experience:
- Planning is Key: Caramel making is a precise art that requires your full attention and quick action. Read the entire recipe and all tips before you even think about turning on the stove. Have all your ingredients measured and ready (“mise en place”), your apples prepped, and your toppings laid out. This preparation prevents last-minute scrambling and ensures you can work efficiently when the caramel is ready.
- Apple Selection & Preparation is Critical: As mentioned, wax-free apples are essential for caramel adhesion. If your apples are waxy, remember the baking soda and lemon juice bath trick! Also, choose firm apples that can withstand the heat of the caramel and the handling. Tart varieties provide a wonderful flavor contrast.
- The Indispensable Candy Thermometer: This is non-negotiable for consistent results. Guessing the temperature will lead to caramel that’s either too runny (didn’t cook long enough) or too hard and brittle (cooked too long). A reliable candy thermometer ensures your caramel reaches the perfect 248°F (hard ball stage) every time, guaranteeing that ideal chewy texture. Consider a programmable one like this, which beeps when the target temperature is reached.
- Teamwork Makes Topping Easier: If you’re planning on adding multiple toppings, consider recruiting a helper! One person can dip the apples into the caramel, while the other quickly rolls them in the toppings. This two-person assembly line speeds up the process, ensuring all apples are topped before the caramel cools and hardens too much.
- Reviving Hardened Caramel: Did your caramel start to harden before you finished dipping all your apples? Don’t panic! Place the saucepan back over very low heat and whisk gently for a few minutes until it softens. If it’s still too thick, you can add a teaspoon or two of heavy cream, stirring until smooth. Be sparing with the cream; too much will result in a softer caramel than intended.
- Keeping Caramel Warm for Parties: If you’re making caramel apples as a party activity or in a large batch, you can keep your prepared caramel warm and pliable in a slow cooker set to its lowest setting. Ensure the slow cooker is preheated before adding the caramel. Stir occasionally to maintain its smooth consistency.
- Storage for Freshness: Homemade caramel apples are truly at their best on the day they are made. The caramel is freshest and the apple is crispest. However, they will keep well at room temperature for several days (up to 2-3 days), stored individually wrapped in wax paper to prevent sticking. For longer storage, you can refrigerate them, but allow them to come closer to room temperature before serving for the best texture.
- Creative Caramel Variations: Don’t limit yourself to plain caramel! Consider adding a touch of sea salt to your caramel for a salted caramel apple. A pinch of cinnamon or apple pie spice could also be incorporated into the caramel for a warmer, fall-inspired flavor.
Common Caramel Apple FAQs & Troubleshooting
Even with the best instructions, questions can arise. Here are answers to some frequently asked questions and common troubleshooting tips:
- Can I substitute other ingredients for heavy cream or corn syrup? Most likely, no. Caramel making is a precise chemical process. Altering ingredients like heavy cream (fat content) or corn syrup (crystallization prevention) can significantly impact the final texture and stability of the caramel, leading to inconsistent results. It’s best to stick to the recipe as written for optimal success.
- Why is the caramel sliding off the apples or forming a puddle at the bottom? This is a classic sign that your caramel was not cooked to the proper temperature. If it didn’t reach 248°F, it’s too soft and won’t adhere properly. Ensure your candy thermometer is accurate and that you cook the caramel to the exact temperature.
- Why is the caramel hard, brittle, and cracking when I bite into it? Conversely, if your caramel is hard and shatters, it means it was overcooked, reaching a temperature significantly higher than 248°F. Again, the candy thermometer is your best friend here. Always remove it from the heat immediately when it hits the target temperature.
- My caramel is full of tiny bubbles. What went wrong? Excessive stirring during the cooking process can incorporate too much air into the caramel, resulting in a bubbly texture. Stir only occasionally, just enough to prevent sticking and ensure even cooking, rather than vigorously.
- Help! The caramel hardened in the pot before I could dip all the apples! This indicates you worked too slowly, or the caramel cooled too much. Refer to the “Reviving Hardened Caramel” tip above to loosen it up. For future batches, ensure all your prep work is done beforehand, and consider having a helper to speed up the dipping and topping process.
- My apples don’t feel secure on the sticks. What can I do? Ensure you’re using sturdy craft sticks and inserting them firmly into the core of the apple, without pushing through the bottom. If using very large apples, you might need slightly longer or thicker sticks.
Explore More Caramel Delights
If you’ve fallen in love with the lusciousness of homemade caramel, why stop at apples? Discover more ways to enjoy this incredible treat with these other delightful caramel recipes:
- How to Make Homemade Caramel Sauce (Two Ways)
- Apple Cider Caramel Sauce
- Soft Caramel Popcorn
- Chocolate Covered Caramels

Shop Essential Tools for This Recipe
Having the right tools can make all the difference in your caramel-making adventure. Here are some recommended items:
This recipe was originally published in October 2013 and has been updated for clarity and comprehensiveness.

Homemade Caramel Apples
6 caramel apples
5 mins
20 mins
30 mins
55 mins
Pin Recipe
Leave a Review
Ingredients
- 1 cup + 1 tablespoon heavy cream (240 grams)
- 1 cup granulated sugar (200 grams)
- 2 tablespoons unsalted butter (28 grams)
- ¼ cup light corn syrup (85 ml)
- ½ teaspoon salt
- 1 teaspoon vanilla extract
- 6 small apples, washed thoroughly
- 6 wooden skewers or craft sticks
Toppings (optional)
- Chopped nuts
- Chopped candy bars
- Crushed Oreos
- Mini M&Ms
- Toasted coconut
Instructions
- Insert craft sticks into the tops of the apples and keep them nearby. Lay out a sheet of parchment/wax paper. Have toppings (if using) ready to go.
- In a heavy-bottomed saucepan, combine 1 cup of cream, sugar, butter, and corn syrup over medium heat. Stir occasionally until melted and smooth, and the mixture begins to boil.
- Insert a candy thermometer and let the mixture cook to 248°F (firm-ball stage), continuing to stir occasionally. The mixture will caramelize and turn golden brown as it cooks. Watch it carefully to make sure it doesn’t burn.
- As soon as it reaches 248°F, immediately remove the pan from the heat and whisk in the 1 tablespoon cream, salt, and vanilla extract. The mixture will bubble violently at first. Stir until smooth.
- Working quickly, immediately begin dipping the apples, letting the excess caramel drip back into the pan. Roll the apples in the toppings, if using. Set the dipped apples on the parchment or wax paper and let sit for 30-60 minutes.
- The caramel apples will keep stored at room temperature for 2 days, but are best the day they are made.
Carbohydrates: 60g,
Protein: 1g,
Fat: 19g,
Saturated Fat: 12g,
Cholesterol: 64mg,
Sodium: 212mg,
Potassium: 224mg,
Fiber: 4g,
Sugar: 52g,
Vitamin A: 798IU,
Vitamin C: 9mg,
Calcium: 37mg,
Iron: 1mg
I’d love to hear about it! Leave a rating and review below, or take a photo and tag it on Instagram @completelydelicious with #completelydelicious.
