Decadent Chocolate Mint Thumbprint Cookies with Peppermint White Chocolate Ganache: Your Ultimate Holiday Treat
There’s something truly magical about the combination of rich chocolate and refreshing peppermint, especially when nestled in a perfect, bite-sized cookie. These Dark Chocolate Mint Thumbprint Cookies, featuring a luscious peppermint white chocolate ganache center, are an absolute showstopper. They are not just cookies; they are a delightful experience, offering a symphony of flavors and textures that make them ideal for the holidays, festive gatherings, or simply whenever you crave a comforting, indulgent treat.

Are you searching for that one-of-a-kind, festive cookie to elevate your Christmas cookie swap, holiday party, or family dessert spread? Look no further! These chocolate mint thumbprint cookies offer a delightful twist on a classic, ensuring they stand out while still capturing the heartwarming essence of the season. They strike a perfect balance between familiar comfort and exciting innovation, making them an instant favorite for anyone who tries them.
The secret to their irresistible charm lies in the masterful combination of flavors and textures. Each cookie starts with a deeply rich, super chocolaty thumbprint base, crafted using both melted dark chocolate and high-quality cocoa powder for an intense, complex chocolate flavor. This robust cookie then cradles a smooth, creamy, and wonderfully refreshing peppermint white chocolate ganache. The slight crunch from the cookie’s exterior, the tender interior, and the velvety ganache create an unparalleled sensory delight. We promise you’ll find these thumbprints as utterly delicious and addictive as we do!
Table of Contents
- Ingredients You’ll Need for These Mint Chocolate Delights
- How to Craft Perfect Chocolate Mint Thumbprint Cookies
- Expert Tips for Baking Your Best Batch
- More Peppermint Cookie Recipes to Love
- Get the Full Recipe Here!
Ingredients You’ll Need for These Mint Chocolate Delights
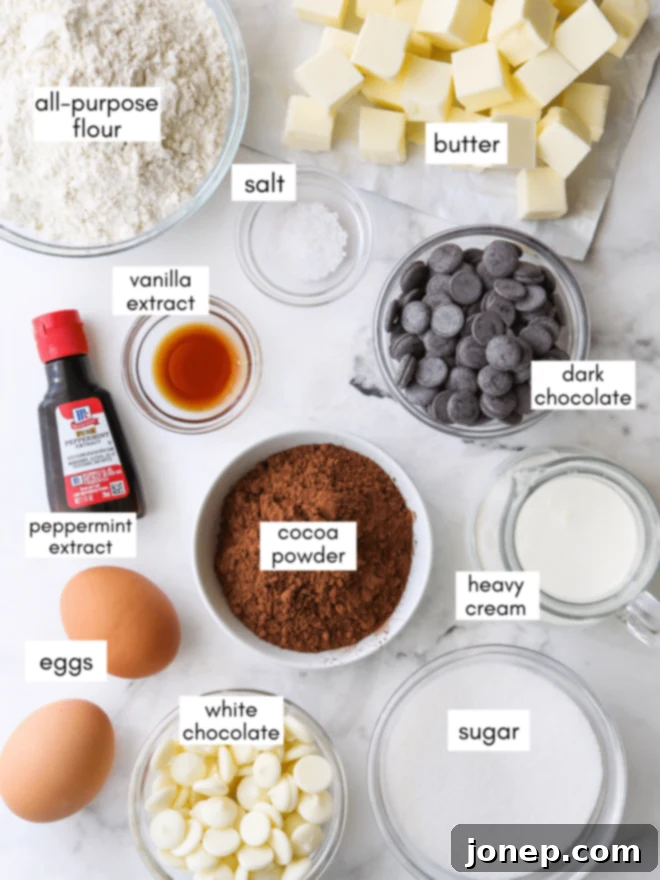
To embark on your journey to create these exquisite chocolate mint thumbprint cookies, you’ll need a selection of quality ingredients that ensure the best flavor and texture. Choosing good quality ingredients, especially your chocolates and extracts, will make a significant difference in the final product. Here’s a comprehensive look at everything required, with the full, detailed recipe available at the bottom of this article:
For the Rich Dark Chocolate Cookies:
- Dark Chocolate (Chopped): This is the foundation of our intensely chocolatey cookie base. Using a good quality dark chocolate (around 60-70% cacao) will yield a deep, sophisticated flavor that balances beautifully with the peppermint.
- All-Purpose Flour: The structural component of our cookies, ensuring they hold their shape while remaining tender.
- Cocoa Powder: Alongside the melted dark chocolate, cocoa powder amplifies the chocolate intensity, giving the cookies a rich, dark hue and robust flavor.
- Salt: A crucial ingredient that enhances all other flavors, especially the chocolate, and balances the sweetness.
- Unsalted Butter (Room Temperature): Creamy, softened butter is essential for achieving a light and fluffy cookie dough through the creaming method. Room temperature butter incorporates air more effectively, resulting in a tender cookie.
- Granulated Sugar & Packed Light or Dark Brown Sugar: A blend of sugars contributes to both sweetness and texture. Granulated sugar provides crispness, while brown sugar adds moisture, chewiness, and a subtle caramel note.
- Large Egg Yolks: Egg yolks add richness, moisture, and help bind the dough without making the cookies too firm, contributing to a wonderfully tender crumb.
- Vanilla Extract: A classic flavor enhancer that complements chocolate beautifully.
- Peppermint Extract: A small amount in the cookie dough ensures a subtle hint of mint throughout, preparing your palate for the ganache.
- Coarse Sugar (for rolling): Adds a delightful sparkle and a pleasant textural crunch to the exterior of the cookies.
For the Silky Peppermint White Chocolate Ganache Filling:
- White Chocolate (Chopped): For the best ganache, opt for high-quality white chocolate that explicitly lists “cocoa butter” as an ingredient, rather than vegetable oils. This ensures a smoother, richer, and more stable ganache.
- Heavy Cream: The essential liquid that transforms chopped white chocolate into a smooth, pourable ganache. The fat content in heavy cream is key to a stable emulsion.
- Peppermint Extract: This gives the white chocolate ganache its vibrant, refreshing mint flavor, perfectly complementing the dark chocolate cookie.

How to Craft Perfect Chocolate Mint Thumbprint Cookies
Creating these delightful chocolate mint thumbprint cookies is a rewarding process, and with these detailed steps, you’ll achieve perfection every time. The recipe utilizes the classic creaming method for the cookie dough, ensuring a light and tender texture.
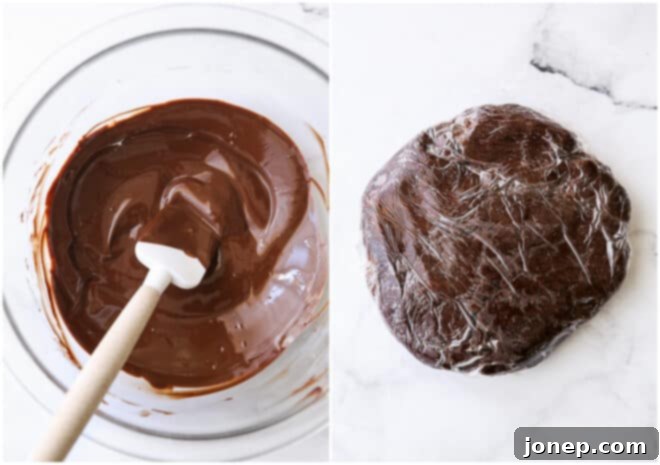
- Melt the Dark Chocolate: Begin by melting your chopped dark chocolate. You can achieve this using a double boiler, which gently melts the chocolate without burning, or by carefully microwaving it in short bursts (30-second intervals), stirring after each. The key is to melt it until only a few small lumps remain, then remove it from the heat and stir until completely smooth and glossy. Allow it to cool slightly before incorporating it into the dough.
- Prepare the Cookie Dough: This recipe employs the creaming method, which is straightforward with the help of a stand mixer fitted with a paddle attachment, or a hand-held electric mixer.
- First, in a separate bowl, whisk together your dry ingredients: all-purpose flour, cocoa powder, and salt. Sifting them together ensures a lump-free and evenly combined mixture.
- In your mixer bowl, cream together the softened unsalted butter with both granulated sugar and brown sugar on medium-high speed until the mixture is light, fluffy, and pale in color. This process incorporates air, crucial for a tender cookie.
- Beat in the egg yolks one at a time, ensuring each is fully incorporated before adding the next. This helps create a stable emulsion. Follow this by mixing in the vanilla extract and peppermint extract.
- Gently fold in the slightly cooled melted dark chocolate until just combined.
- Finally, add the dry flour mixture all at once to the wet ingredients. Mix on low speed until the flour is just incorporated, being careful not to overmix, as this can lead to tough cookies. The dough will be rich and pliable.

- Chill the Dough: Form the prepared cookie dough into a flat disk, wrap it tightly in plastic wrap, and refrigerate for at least 30 to 60 minutes. This chilling step is vital! It allows the butter to firm up, preventing the cookies from spreading excessively during baking and ensuring they hold their beautiful thumbprint shape. It also makes the dough easier to handle.
- Roll Dough Balls and Create Thumbprints: Once chilled, preheat your oven to 350°F (175°C) and line a baking sheet with parchment paper. Scoop rounded tablespoons of dough and roll them into smooth balls. For an extra touch of sparkle and crunch, roll each cookie dough ball in coarse or sanding sugar to coat evenly. Place these sugar-coated balls onto your prepared baking sheet.
Baking Tip: Making Perfect Thumbprints
While your thumb works perfectly fine, for more uniform and pristine indents, we recommend using the rounded end of a wooden spoon or a large dowel. This keeps your fingers clean and ensures consistent wells. Press a slight indent into the center of each cookie dough ball, going about halfway down. Don’t press so hard that the cookie cracks wide open, but a few small, natural cracks around the edges are perfectly acceptable and add to their rustic charm.

- Bake the Cookies: Bake the thumbprint cookies in your preheated oven at 350°F (175°C) for approximately 12 minutes total. About halfway through the baking time (around 6-7 minutes), gently remove the baking sheet from the oven and use your thumb or dowel to reinforce the indent in each cookie. This is important because the cookies tend to puff up slightly, and this step ensures a deep, perfect well for your ganache. Return them to the oven to finish baking. Once baked, remove them from the oven and immediately reinforce the indents one last time. This final press guarantees a beautifully defined well. Let the cookies cool completely on a wire rack before filling.
- Make the Peppermint White Chocolate Ganache: While the cookies cool, prepare your delightful filling. In a microwave-safe bowl, heat the heavy cream until it’s steaming and just barely boiling (about 30 seconds to 1 minute, depending on your microwave). Pour the hot cream over the chopped white chocolate in a separate heatproof bowl. Let it sit undisturbed for 2-3 minutes; this allows the residual heat from the cream to melt the chocolate. Then, gently stir the mixture from the center outwards until it’s completely smooth, shiny, and fully emulsified into a luscious ganache. Stir in the peppermint extract until well combined.
- Fill the Thumbprints: Allow the peppermint white chocolate ganache to cool slightly at room temperature, stirring occasionally, until it thickens to a spoonable consistency. This usually takes about 10-15 minutes. Once thickened, carefully spoon the ganache into the center of each cooled dark chocolate thumbprint cookie, filling the wells evenly. For the ganache to set properly and prevent it from running, let the filled cookies rest for at least 15 minutes before serving. If you’re short on time, a quick chill in the fridge for 5-10 minutes can speed up the setting process.


Expert Tips for Baking Your Best Batch
To ensure your chocolate mint thumbprint cookies are nothing short of spectacular, here are some additional tips and tricks:
- Quality Chocolate Matters: For the most exquisite flavor, always recommend using higher quality chocolate chips or finely chopped bar chocolate for both the dark chocolate in the cookie dough and the white chocolate for the ganache. For white chocolate, specifically look for brands that list “cocoa butter” as an ingredient rather than substitutes like “palm oil,” as this significantly affects the ganache’s texture and taste.
- Gentle Indentation: When making the initial indent in the cookie dough balls, aim to press about halfway down. While a few small, natural cracks around the edges are normal and add character, avoid pressing so hard that the cookie ball splits wide open.
- Ganache Consistency: The white chocolate ganache may appear slightly yellowish when it’s first melted and liquid. Don’t worry, this is normal! As it cools and thickens, it will become more opaque and turn a beautiful, creamy white. If you desire a thicker ganache for a more pronounced puddle, allow it to cool for about 15-20 minutes at room temperature, stirring frequently, before spooning it into the cookies. For a quicker set, you can pop it in the fridge for 5-minute intervals, stirring in between.
- Flavor Variations: While the peppermint white chocolate ganache is truly delightful, these intensely chocolatey cookies are incredibly versatile. They would also be absolutely delicious filled with a classic dark chocolate ganache instead of white. Simply follow the ganache recipe, swapping out the white chocolate for an equal amount of good quality dark chocolate. You could also experiment with other extracts in the ganache, such as almond or raspberry for different flavor profiles.
- Festive Toppings: To add an extra touch of holiday cheer and visual appeal, consider topping the freshly filled ganache with a sprinkle of finely crushed candy cane pieces. The red and white flecks provide a beautiful contrast and an extra burst of peppermint flavor and crunch.
- Freezing for Future Enjoyment: The baked chocolate cookies (without the ganache filling) freeze exceptionally well. Once completely cooled, store them in a single layer in an airtight container or a freezer bag for up to one month. When you’re ready to serve, simply let them thaw at room temperature for an hour or two, then prepare and add the fresh ganache filling. This is a fantastic way to get ahead on your holiday baking!
- Don’t Overbake: Overbaking will result in dry, crumbly cookies. Bake just until the edges are set and the centers still look slightly soft. They will continue to set as they cool on the baking sheet.

More Peppermint Cookie Recipes to Love
If you’ve fallen in love with the classic combination of chocolate and peppermint in these thumbprint cookies, then you’re in for a treat! We have even more delightful peppermint-infused cookie recipes that are sure to become new favorites. Explore these tempting options for more festive baking inspiration:
- Peppermint White Chocolate Chip Cookies
- Chocolate Candy Cane Sandwich Cookies
- Chocolate Mint Chip Cookies
Get the Full Recipe Here!

Chocolate Mint Thumbprint Cookies
Pin Recipe
Leave a Review
Ingredients
For the chocolate cookies:
- 4 ounces dark chocolate , chopped (110 grams)
- 1 ½ cup all-purpose flour (190 grams)
- ½ cup cocoa powder (40 grams)
- ¾ teaspoon salt
- 1 cup unsalted butter , at room temperature (226 grams)
- ⅓ cup granulated sugar (65 grams)
- 2 tablespoons packed light or dark brown sugar
- 2 large egg yolks
- 1 teaspoon vanilla extract
- ½ teaspoon peppermint extract
- Coarse sugar , for rolling
For the filling:
- 3 ounces white chocolate , chopped (85 grams)
- 3 tablespoons heavy cream
- ½ teaspoon peppermint extract
Instructions
To make the cookies:
-
In a double boiler or heat proof bowl set over a pan of simmering water, melt the dark chocolate. Stir gently until smooth, then remove from heat and allow to cool slightly while you prepare the rest of the dough.
-
In a medium bowl, sift together the all-purpose flour, cocoa powder, and salt; set aside. In the bowl of a stand mixer fitted with a paddle attachment (or using a hand mixer), beat the softened unsalted butter with the granulated sugar and brown sugar on medium-high speed until the mixture is light, pale, and fluffy (about 2-3 minutes). Scrape down the sides of the bowl as needed. Add the two large egg yolks one at a time, mixing well after each addition. Stir in the vanilla extract and ½ teaspoon peppermint extract until fully combined.
-
Pour the slightly cooled melted dark chocolate into the butter mixture and mix on low speed until just combined. Gradually add the sifted flour mixture all at once, mixing on low speed until the dough comes together and is just combined. Be careful not to overmix. Form the dough into a disk, wrap tightly in plastic wrap, and chill in the fridge for at least 30 minutes (or up to 1 hour) until firm enough to handle.
-
Preheat oven to 350°F (175°C). Line a baking sheet pan with parchment paper.
-
Remove the chilled dough from the fridge. Roll the dough into rounded tablespoons (about 1-inch balls) and then roll each ball in coarse sugar to coat evenly. Place the sugared dough balls on the prepared baking sheet, spacing them about 2 inches apart. Use your thumb or the rounded end of a wooden spoon/dowel to create a well (indent) in the center of each cookie, pressing about halfway down.
-
Bake for 10 minutes. Carefully remove the baking sheet from the oven and immediately use your thumb or dowel to reinforce the indents, as the cookies will have puffed up slightly. Return to the oven and bake for an additional 4-5 minutes, just until the edges are set and very light cracks begin to form, but the centers still look soft. Do not overbake. Remove from oven and, one final time, reinforce the indents while the cookies are still warm. Transfer the cookies to a wire rack to cool completely before filling.
To make the filling:
-
In a microwave-safe bowl, heat the heavy cream for about 30-45 seconds, or until it is steaming and just begins to boil. Pour the hot cream over the chopped white chocolate in a heatproof bowl. Let it sit undisturbed for 2 minutes to allow the chocolate to soften. Then, stir gently from the center until the mixture is completely smooth, glossy, and emulsified into a ganache. Stir in the remaining ½ teaspoon of peppermint extract.
-
Allow the ganache filling to cool at room temperature for 10-15 minutes, stirring occasionally, until it thickens to a spoonable consistency. Spoon the thickened ganache into the cooled chocolate thumbprint cookies, filling each well. Let the filled cookies rest at room temperature (or briefly in the fridge for a quicker set) for at least 15 minutes before serving to allow the ganache to firm up. Store leftover cookies at room temperature in an airtight container for up to 3-4 days.
Notes
Recipe adapted from Baked Explorations.
Originally published in December 2013, this beloved recipe has been updated and enhanced to bring you the very best version of these incredible chocolate mint thumbprint cookies. We hope you enjoy making and sharing them as much as we do!


