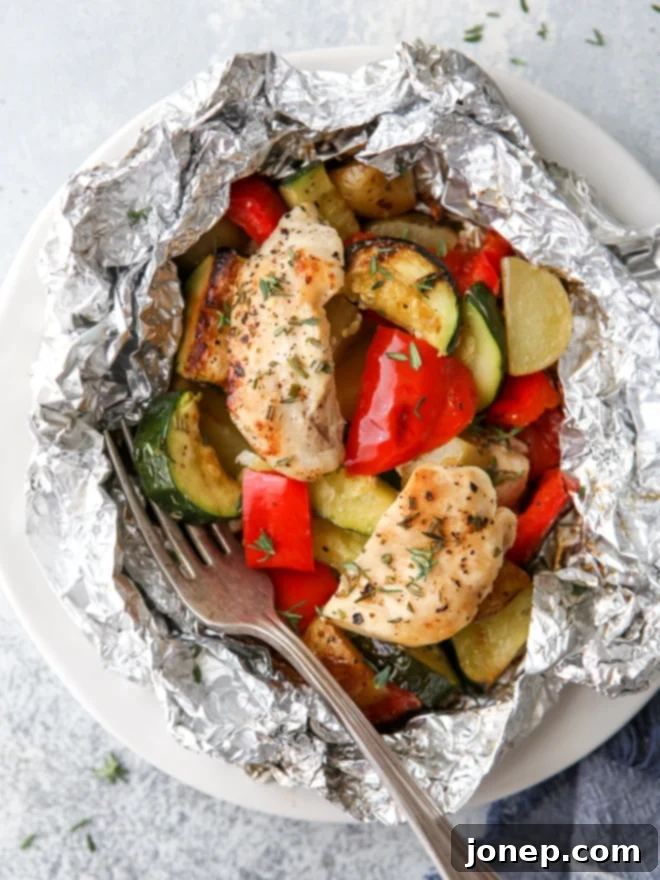
Easy Chicken and Veggie Tin Foil Dinners: Perfect for Campfire, Grill, or Oven
Imagine a delicious, complete meal that’s cooked with minimal effort and leaves you with almost no dishes to wash. That’s exactly what you get with these incredible **chicken and veggie tin foil dinners**! They are the ultimate solution for convenient and flavorful eating, whether you’re gathered around a **campfire**, firing up the **grill** in your backyard, or simply seeking a quick and healthy option to bake in your **oven** on a busy weeknight. This recipe is designed to make your cooking experience enjoyable and stress-free, proving that hearty and delicious meals can also be incredibly simple.
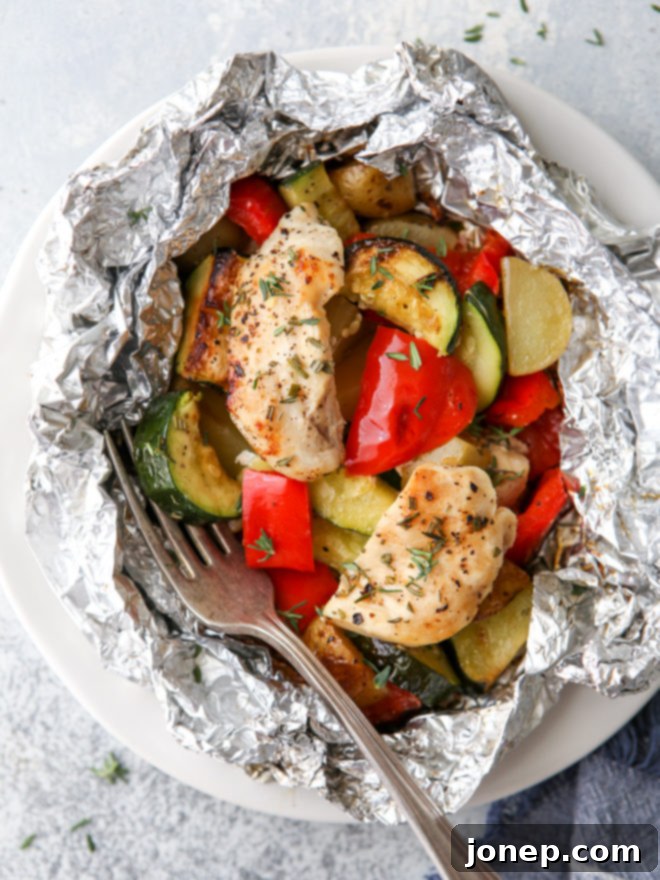
This recipe is proudly sponsored by Challenge Dairy.
Why Tin Foil Dinners Are a Summer Essential
As the sun shines brighter and the days stretch longer, there’s a natural pull towards outdoor living and cooking. For my family, this signals the season for **tin foil dinners**. These versatile packets are a true culinary gem, perfect for everything from rugged camping adventures to relaxed evening meals on the patio. The sheer convenience of wrapping all your ingredients in a single packet, then cooking it over a fire, on the grill, or even in the oven, is unparalleled. It’s an all-in-one meal solution that guarantees tender, juicy results with the added bonus of incredibly easy cleanup.
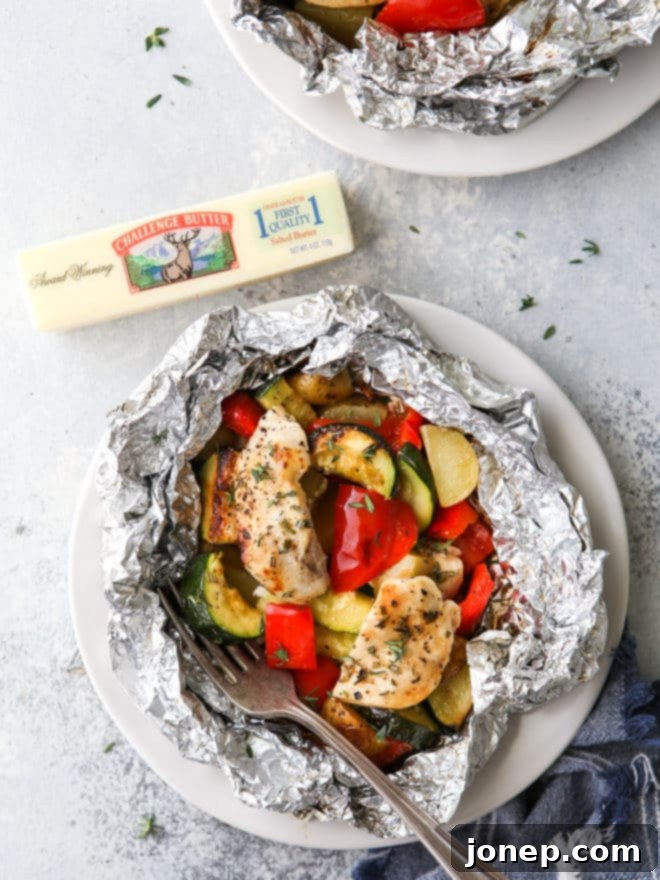
What makes this particular combination a family favorite? It’s the perfect harmony of tender chicken breast pieces, hearty gold potatoes, crisp red bell pepper, and fresh zucchini. Each ingredient contributes to a meal that feels wholesome, fresh, and perfectly suited for warm weather. But the real magic, the depth of flavor that sets these **foil packet meals** apart, comes from two key additions: generous cubes of rich, real butter and a fragrant blend of fresh herbs. These simple secrets infuse every bite with an unforgettable taste, turning a humble tin foil dinner into a truly delicious experience.
Watch the Recipe Video
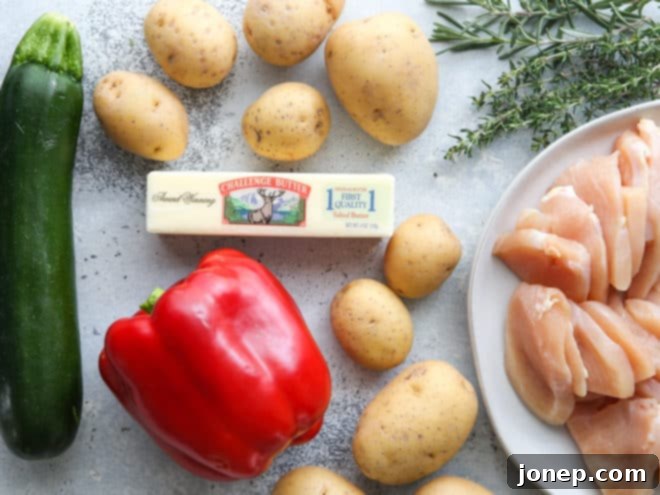
Key Ingredients for Your Flavorful Foil Dinners
Creating truly delicious **chicken and veggie tin foil dinners** hinges on selecting fresh, quality ingredients that will cook harmoniously within their foil packets. Here’s a breakdown of what you’ll need and why each component is vital for the best flavor and texture:
- Chicken Tenderloins or Sliced Chicken Breasts: The star protein! Tenderloins are naturally quick-cooking, but sliced boneless, skinless chicken breasts work just as well. Aim for uniform, bite-sized pieces to ensure they cook through at the same rate as the vegetables, staying moist and flavorful.
- Potatoes: Gold potatoes are my top choice. Their creamy texture and quick cooking time make them ideal for foil packets. Chop them into roughly 1-inch cubes. You could also use red potatoes for a slightly waxier texture or even sweet potatoes for a touch of sweetness and extra nutrients.
- Red Bell Pepper: This vibrant vegetable adds a beautiful color, a pleasant crunch (even after cooking), and a mild, sweet flavor. Dice it into pieces similar in size to your potatoes for consistent cooking. Feel free to use other colors like yellow or orange bell peppers, or even a mix.
- Zucchini: A quintessential summer squash that adds lightness and freshness. Cut zucchini into slightly larger chunks (around 1.5 inches) than the potatoes, as it tends to soften faster. This ensures everything reaches perfect tenderness simultaneously.
- Fresh Herbs: The aromatic backbone of this dish. A combination of basil, thyme, and rosemary provides a classic, savory profile. Fresh herbs infuse the entire packet with their potent fragrance and flavor. If fresh herbs are unavailable, use about one-third the amount in dried form. Don’t hesitate to experiment with your favorites, such as oregano, parsley, or chives.
- Salted Butter: This is a non-negotiable ingredient for me! Butter provides essential moisture, richness, and helps to gently caramelize the vegetables, deepening their flavor. I always reach for **Challenge Salted Butter** for its superior quality and fresh taste.
- Salt and Pepper: The fundamental seasonings. Don’t be shy with them! A generous sprinkle ensures that every element in your foil packet is perfectly seasoned and delicious.
The Challenge Butter Advantage: Elevating Every Bite
In the world of cooking, subtle differences in ingredient quality can profoundly impact the final dish. When it comes to something as simple yet essential as butter in **tin foil dinners**, its quality truly shines through. Using a superior butter means a more flavorful, richer, and ultimately tastier meal. This is precisely why I steadfastly rely on Challenge Butter for this recipe and many others.
Challenge Butter’s commitment to excellence begins at its source: it’s made with the freshest cream from happy cows on family-owned dairies. This dedication translates into a product that is pure, free from hormones, additives, or fillers. What truly sets it apart is its remarkable freshness; the butter is churned and ready for shipment within just 24 hours of the cows being milked. This rapid process ensures that you’re using butter at its peak, with a creamy texture and rich, authentic flavor that truly enhances the chicken and vegetables in these foil packets. You won’t just taste the difference; you’ll experience a depth of flavor that makes these simple dinners truly extraordinary and memorable.
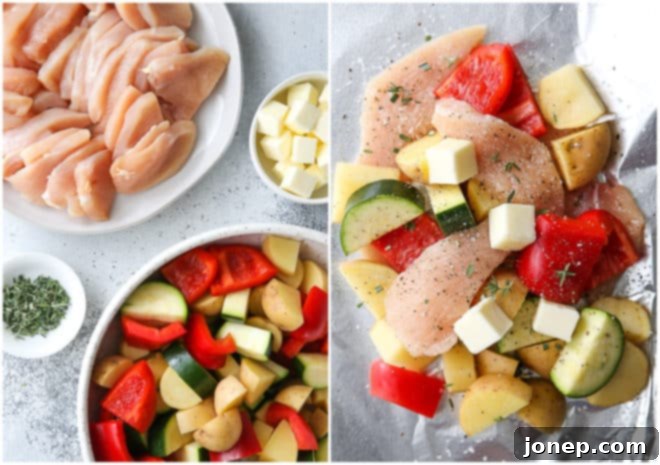
How to Master the Art of Assembling Tin Foil Dinners
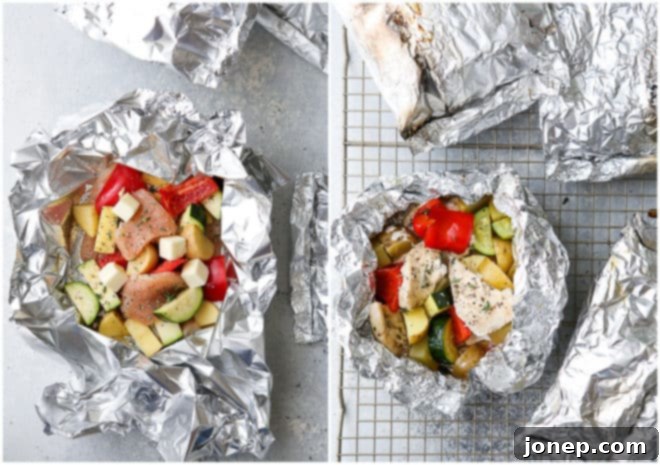
Assembling these **chicken and veggie foil dinners** is a straightforward process that’s perfect for home cooks of all skill levels, and even a fun activity for kids. The key is to create tightly sealed packets that lock in all the moisture and flavor. Here’s a detailed guide to ensure your dinners turn out perfectly every time:
- Prepare Your Foil Sheets: Start by rolling out heavy-duty aluminum foil. Measure and tear off four sheets, each approximately 18 inches long. For added durability and peace of mind, especially if you’re cooking over direct heat like a campfire or grill, consider using two layers of foil per packet. Lay these sheets flat on your countertop or workspace, making it easier to assemble all your dinners efficiently.
- Grease for Easy Release: Lightly spray the center of each foil sheet with a nonstick cooking spray. This crucial step prevents the ingredients, particularly the chicken and potatoes, from sticking to the foil as they cook, ensuring your meal slides out effortlessly once done.
- Distribute Ingredients Evenly: Divide your prepped chicken pieces and chopped vegetables (potatoes, red bell pepper, and zucchini) evenly among the four foil sheets. Mound them neatly in the center of each packet. Aim for roughly equal portions to ensure consistent cooking times across all dinners.
- Season for Maximum Flavor: Place a tablespoon of cubed Challenge Salted Butter on top of the ingredients in each packet. Then, generously sprinkle your fresh herbs, followed by a good amount of salt and freshly ground black pepper. A good rule of thumb is about ½ teaspoon of salt per packet, but adjust to your taste. This seasoning step is vital for a truly delicious result.
- Seal Tightly for Perfect Steaming: Bring the two long edges of the foil together over the ingredients. Crimp them tightly, rolling the seam over itself multiple times until it’s flat against the contents. This creates a secure, airtight seal, trapping steam and juices inside, which is essential for tender chicken and moist vegetables. Next, fold over and crimp both short sides in the same fashion, completing the sealed packet.
- Consider Double Wrapping (Fire & Grill): If your cooking method involves a campfire or a grill, I highly recommend double-wrapping your **tin foil dinners**. The extra layer of foil provides significant protection against accidental punctures from tongs or rough surfaces, preventing any delicious juices from escaping and ensuring your meal stays intact and perfectly cooked.
Meal Prep Made Easy: Making Dinners Ahead of Time
One of the fantastic advantages of **tin foil dinners** is their incredible flexibility for meal preparation. This feature makes them an ideal choice for busy households, camping enthusiasts, or anyone who appreciates having healthy, delicious meals ready to go with minimal fuss. Preparing these dinners in advance not only saves time but can also enhance their flavor as ingredients meld together.
- Refrigeration: You can absolutely assemble these foil dinners ahead of time and store them. Once wrapped securely, place them in your refrigerator or a cooler. For best quality and food safety, ensure they are kept properly chilled and plan to cook them within 2 to 3 days. This makes them perfect for prepping on a Sunday for weeknight meals or for packing into your cooler for an upcoming weekend trip.
- Freezing: For longer storage, **tin foil dinners** freeze beautifully! Assemble them as directed, then place the sealed packets directly into the freezer. They can be stored for up to several weeks, making them a fantastic freezer-friendly meal option. A clever hack for camping is to freeze the packets solid; they’ll act as excellent ice packs in your cooler, keeping other items cold while slowly thawing themselves. When you’re ready to cook, transfer the frozen packets to the refrigerator overnight to thaw completely, or allow them to thaw in a cooler for several hours before placing them on the heat. Ensure they are fully thawed for optimal and even cooking.
Choose Your Adventure: 3 Ways to Cook Tin Foil Dinners
The adaptability of **chicken and veggie tin foil dinners** is one of their most celebrated features. You’re never limited to just one cooking method, which means you can enjoy these tasty packets almost anywhere! While the rustic charm of campfire cooking holds a special place in my heart, each method offers unique benefits and produces equally delicious results.
- Over a Campfire: Embrace the Outdoors
For an authentic outdoor experience, cooking over a campfire is unbeatable. The key to success here is patience. Wait until your roaring fire has died down to a bed of glowing, hot coals. Direct flames are too intense and will likely burn the foil and your food. Gently spread the coals out to create a relatively flat surface, or arrange logs in a circle with a clear, flat space in the center for your packets. Carefully place your double-wrapped **tin foil dinners** directly onto the hot coals or on a grill grate placed over them. Cook for approximately 20 minutes, using long-handled tongs to flip and rotate the packets every 5-7 minutes. This ensures even cooking and prevents any single side from scorching. The goal is perfectly cooked chicken and fork-tender vegetables, infused with a subtle, smoky essence. Always open carefully as the steam will be extremely hot.
- On the Grill: Backyard Barbecue Perfection
If a campfire isn’t feasible, or if you simply prefer the controlled heat and convenience of your backyard grill, these **foil packet meals** are an excellent choice. Preheat your grill to a medium heat, aiming for a temperature around 400°F (200°C). Once the grill is hot, place the tin foil dinners directly onto the grill grates. Cook for approximately 20 minutes. Remember to flip the packets once halfway through the cooking time to ensure even heat distribution and thorough cooking. The consistent heat of the grill ensures tender chicken and perfectly cooked vegetables every time, with that lovely char from the indirect heat. Always check the internal temperature of the chicken (165°F or 74°C) before serving.
- In the Oven: The Easy Indoor Option
No outdoor cooking equipment? No problem! These **chicken and veggie tin foil dinners** are just as delightful when baked in your kitchen oven, making them a fantastic, mess-free option for any day of the week. Preheat your oven to 400°F (200°C). Place your assembled tin foil dinners on a sturdy baking sheet; this makes it easy to handle them and provides an extra layer of protection against any potential (though unlikely, if sealed well) leaks. Bake for about 20-25 minutes, or until the chicken is cooked through and the vegetables are tender. No flipping or rotating is needed for oven cooking, allowing for truly hands-off preparation. Once done, carefully open each packet and enjoy your perfectly cooked meal!
Regardless of the method you choose, remember to exercise caution when opening the cooked packets, as the trapped steam will be intensely hot. You can enjoy your meal directly from the foil for the easiest cleanup, or transfer the delicious contents to plates for a more traditional dining experience.
Shop Essential Tools for This Recipe
Equipping yourself with the right tools can significantly enhance your experience when preparing and cooking these effortless **tin foil dinners**. From sturdy foil to reliable tongs, these items will make your cooking process smoother and more enjoyable:
Chicken and Veggie Tin Foil Dinners
Pin Recipe
Leave a Review
Ingredients
- 1 lb chicken tenderloins or sliced chicken breasts
- 1 medium zucchini , chopped
- 1 red bell pepper , chopped
- 1 lb gold potatoes , chopped
- 1 tablespoon chopped fresh herbs , like basil, thyme, rosemary (or 1 teaspoon dried)
- 4 tablespoons Challenge Salted Butter , cubed
- Salt and pepper , as needed
Instructions
-
Measure 4 sheets of heavy duty aluminum foil to about 18 inches. Spray with nonstick cooking spray.
-
Layer chicken and veggies in a mound into the center of each sheet of foil, dividing ingredients evenly between all 4 sheets.
-
Top with cubes of butter (1 tablespoon for each sheet of foil) and fresh herbs.
-
Season heavily with salt and pepper, about 1/2 teaspoon of salt for each packet.
-
Fold edges of foil over and crimp tightly to seal. If cooking on grill or fire, consider double wrapping to prevent tears in foil.
-
To cook on fire:
Wait till fire has turned to coals and spread logs out to heat is as even as possible. Cook on logs for about 20 minutes, flipping and rotating as needed to promote even cooking, until meat is cooked through and veggies are soft.
-
To cook on grill:
Preheat grill to medium heat, about 400° and cook for 20 minutes, flipping halfway through, until meat is cooked through and veggies are soft.
-
To cook in oven:
Preheat oven to 400°F and cook for 20 minutes or until meat is cooked through and veggies are soft.
-
Carefully open up foil packets as the steam inside is very hot. You can eat straight out of the foil or dump contents onto a plate.
Notes
HELPFUL TIPS & VARIATIONS:
- Even Cooking is Key: To ensure all ingredients cook evenly and finish at the same time, it’s vital to cut your vegetables into roughly 1-inch pieces. For ingredients with different cooking times, I recommend cutting zucchini and peppers slightly larger, and potatoes a little smaller. This helps compensate for their inherent differences, ensuring everything is perfectly tender.
- Customize Your Packet: Feel free to experiment with other vegetables like broccoli florets, sliced carrots, cherry tomatoes, or onions. You can also swap chicken for sausage, shrimp, or firm tofu for different flavor profiles.
- Add a Splash of Flavor: A drizzle of olive oil, a squeeze of lemon juice, or a dash of your favorite hot sauce can be added before sealing for an extra layer of flavor.
- Make-Ahead & Storage: Prepare as directed and store sealed packets in the fridge for up to 2-3 days. For longer storage, foil dinners can also be frozen for up to 1 month. Thaw in the fridge overnight or in a cooler for several hours before cooking.
Disclosure: This recipe was created in partnership with Challenge Dairy, Inc. Thank you for supporting partnerships with brands I love and believe in, which make Completely Delicious possible. All opinions are always 100% my own. To learn more about Challenge Dairy, you can visit their website here. You can also find them on facebook, instagram, youtube, and pinterest.
