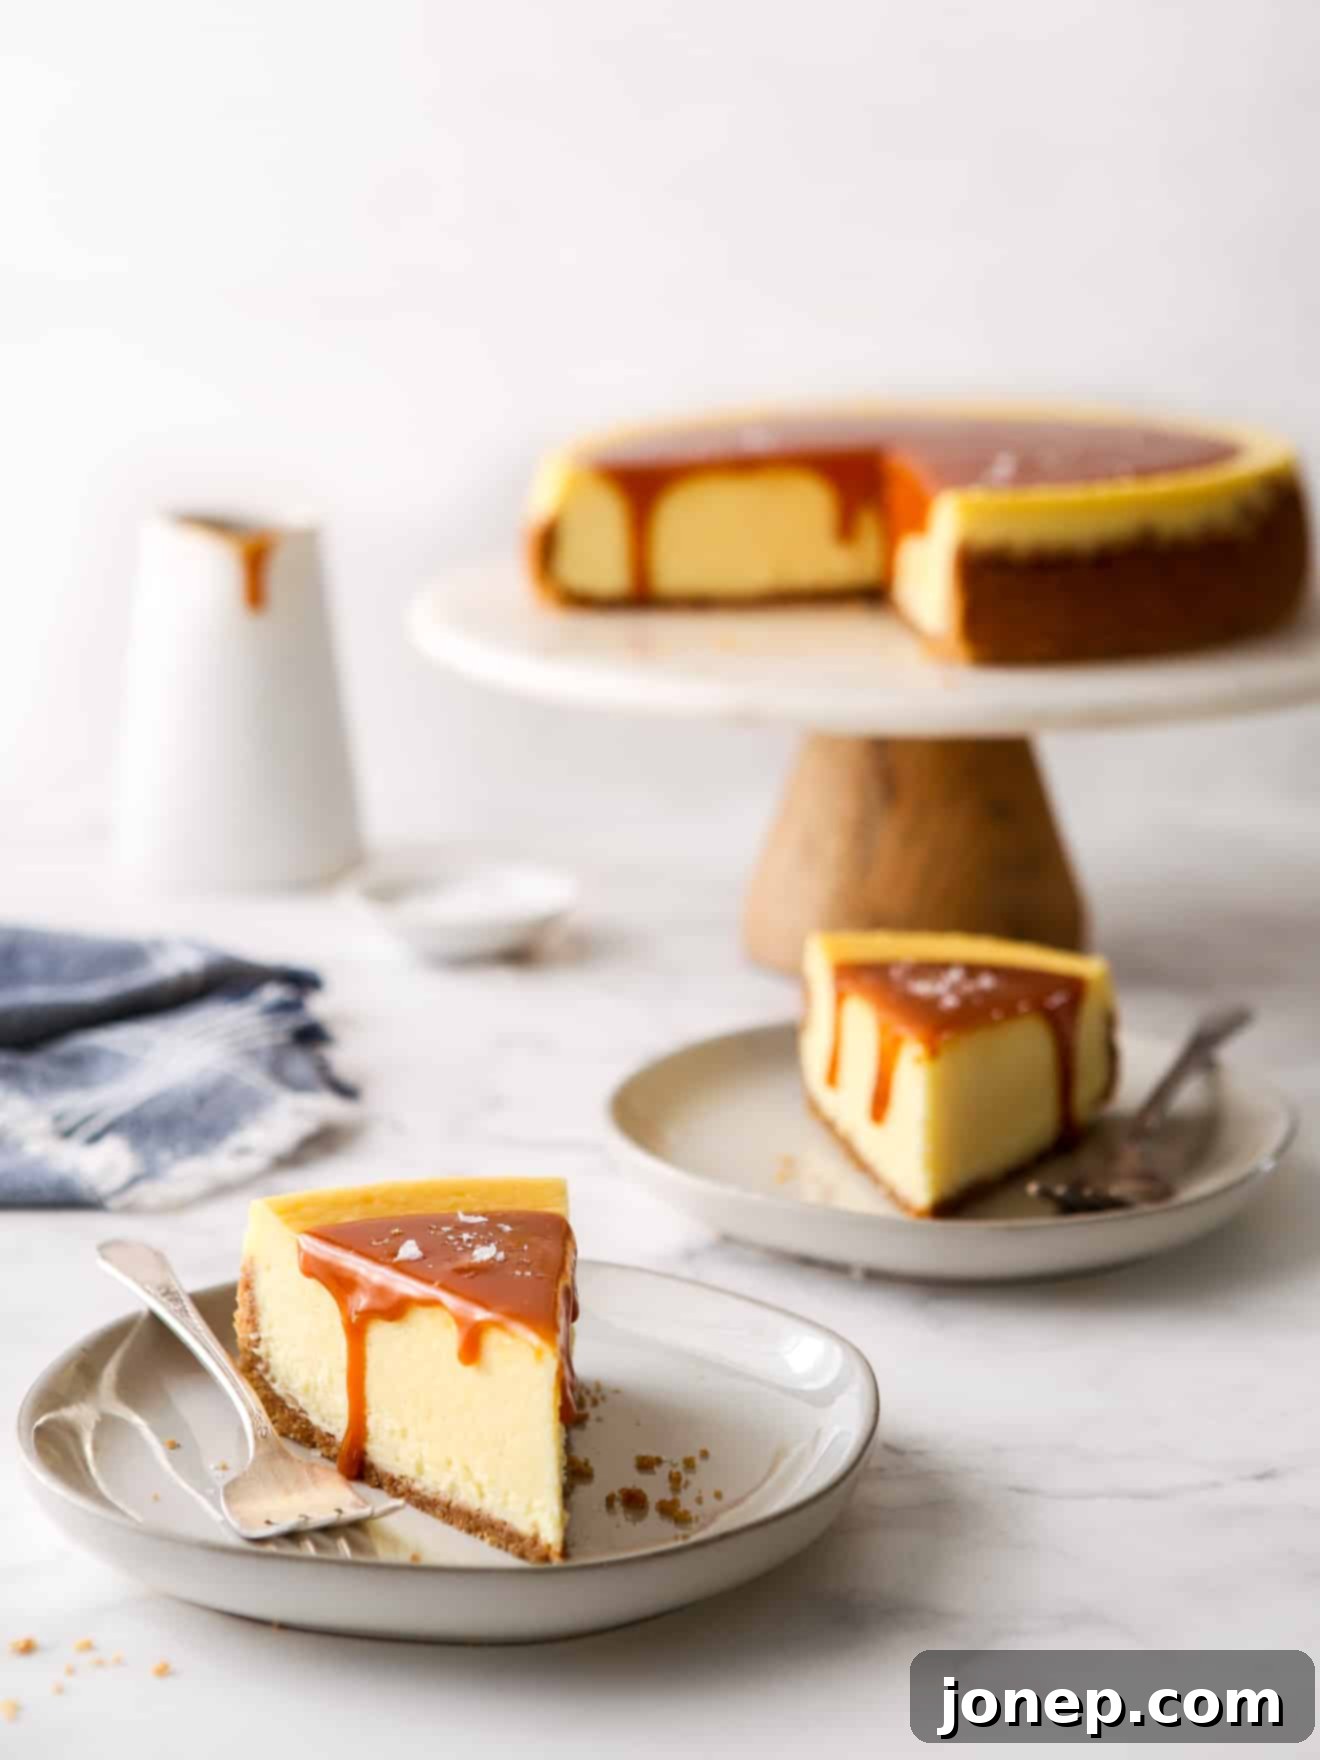
Indulge in the Ultimate Decadence: Homemade Salted Caramel Cheesecake Recipe
Prepare to tantalize your taste buds with a dessert that truly stands out: a luxurious salted caramel cheesecake. This isn’t just any cheesecake; it’s an experience. Imagine a silky-smooth, incredibly creamy cheesecake filling resting atop a perfectly buttery graham cracker crust, all generously bathed in a rich, luscious homemade salted caramel sauce. This masterpiece is the epitome of decadent desserts, offering a delightful harmony of sweet and salty flavors in every blissful bite.
This recipe is proudly sponsored by Go Bold with Butter.
While a classic cheesecake holds a special place in many hearts, this salted caramel rendition elevates the dessert to new heights. The addition of a decadent, velvety homemade caramel sauce introduces a captivating sweet and salty contrast that beautifully complements the smooth and airy texture of the cheesecake filling. A subtle hint of warm cinnamon infused into the crisp graham cracker crust adds an inviting depth of flavor, making each spoonful utterly irresistible. To crown this regal dessert, a generous sprinkle of flaky sea salt provides the perfect final touch, enhancing both its visual appeal and its complex flavor profile.
This salted caramel cheesecake, with its elegant presentation and gourmet flavors, is an ideal choice for special occasions, holiday gatherings, or simply when you want to impress. Despite its sophisticated appearance, it’s a remarkably achievable recipe for any home baker. With my comprehensive tips and step-by-step guidance, you’ll be able to create this show-stopping dessert with confidence and ease. Let’s dive into the details and unlock the secrets to baking your best cheesecake yet!
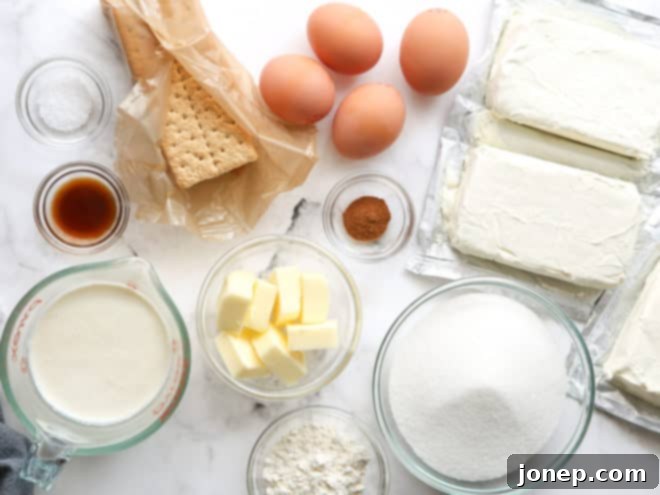
Essential Ingredients for Your Salted Caramel Cheesecake
Embarking on this baking adventure requires a selection of quality ingredients that will build the incredible flavors and textures of our salted caramel cheesecake. Here’s a comprehensive list of what you’ll need to create this truly special dessert. Remember, using fresh, high-quality ingredients is the first step to achieving an outstanding result. The full, detailed recipe with exact measurements is provided further below in the recipe card:
- **Butter:** Crucial for both the crust and the caramel sauce, providing richness and structure.
- **Graham Crackers:** The foundation for our perfectly crisp and flavorful crust.
- **Full-fat Cream Cheese:** The star of the cheesecake filling, ensuring a rich, dense, and creamy texture.
- **Granulated Sugar:** Sweetens both the cheesecake and is the base for our homemade caramel.
- **Heavy Cream:** Essential for the velvety cheesecake filling and the luscious salted caramel sauce.
- **Eggs:** Provide structure and richness to the cheesecake, contributing to its smooth consistency.
- **All-purpose Flour:** A small amount helps stabilize the cheesecake filling and prevents cracking.
- **Vanilla Extract or Vanilla Bean:** Adds a classic aromatic sweetness that enhances all other flavors.
- **Ground Cinnamon:** A touch in the crust adds a warm, inviting spice.
- **Salt:** Balances the sweetness in the crust and filling, and is paramount for the “salted” aspect of our caramel.
The Indispensable Role of Real Butter in This Recipe
While cream cheese often takes center stage in cheesecake discussions, it’s real dairy butter that truly acts as the unsung hero, playing a monumental role in both the exquisite flavor and the flawless structure of this salted caramel cheesecake. Without authentic butter, this dessert simply wouldn’t achieve its signature richness and textural perfection.
In the graham cracker crust, butter serves as the vital binding agent, transforming simple crumbs into a cohesive, flavorful base. It contributes significantly to that delightful slight crisp crunch that contrasts so beautifully with the velvety smooth cheesecake filling. More than just a binder, butter imparts a deep, rich flavor to the crust that complements the sweet and savory notes of the dessert.
Furthermore, butter is absolutely paramount for crafting an exceptional homemade caramel sauce. When introduced to the caramelized sugar and cream, it not only adds an incredible depth of flavor but also lends a luxurious, velvety thick texture that sets homemade caramel apart. The butter emulsifies with the other ingredients, creating a remarkably smooth and pourable sauce that clings perfectly to each slice of cheesecake.
A special note on butter selection: I highly recommend using salted butter in both the graham cracker crust and the caramel sauce. The added salt helps to accentuate the sweet notes, creating a more pronounced and satisfying sweet and salty flavor profile that defines this dessert. However, if you prefer unsalted butter, that works too! Just be sure to taste your caramel sauce and adjust the amount of added salt to your personal preference, ensuring that perfect balance of flavors.
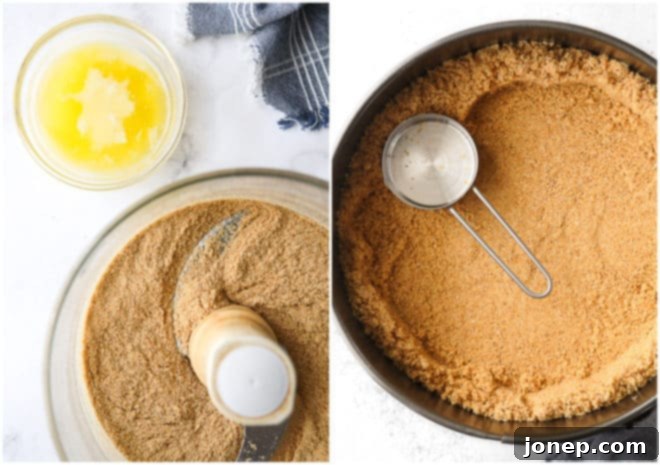
Crafting Your Salted Caramel Cheesecake: A Step-by-Step Overview
Bringing this magnificent salted caramel cheesecake to life is a rewarding process. While the detailed instructions are in the recipe card below, here’s a quick overview of the key steps involved in creating this showstopper:
- Prepare and Bake the Graham Cracker Crust: Begin by combining your crushed graham cracker crumbs with melted butter, sugar, salt, and cinnamon in a food processor until well mixed. Press this fragrant mixture firmly into the bottom and slightly up the sides of a greased 9-inch springform pan. A quick bake in the oven sets the crust, providing a sturdy and flavorful base. Once baked, let it cool completely.
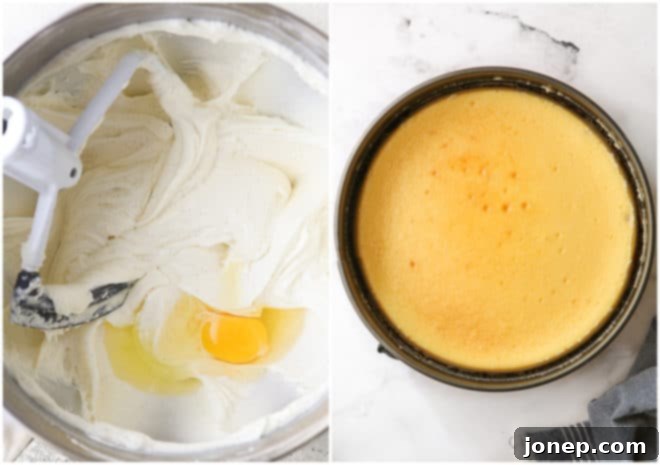
- Prepare the Silky Cheesecake Filling: Using an electric mixer, beat the softened cream cheese until smooth. Gradually incorporate the sugar, flour, salt, and vanilla. Finally, mix in the eggs one at a time, followed by the heavy cream. This careful mixing process ensures a smooth, lump-free batter. Pour this luscious filling into your cooled graham cracker crust.
- Bake in a Gentle Water Bath: Place your springform pan, carefully protected from water, into a larger roasting pan. Transfer it to the oven, then pour hot water into the roasting pan to create a water bath. This crucial step creates a moist, even cooking environment, which is key to preventing cracks and achieving that signature creamy cheesecake texture. Bake until the edges are set and only the very center shows a slight wobble.
- Gradual Cooling for Perfection: Once baked, resist the urge to pull the cheesecake out immediately. First, turn off the oven and prop the door open, allowing the cheesecake to gradually cool inside for about an hour. Then, transfer it to a wire rack on the counter for another hour or so. Finally, move it to the refrigerator to chill completely – a minimum of 4-8 hours, or ideally, overnight. This slow cooling process is vital for preventing cracks and allowing the cheesecake to fully set.
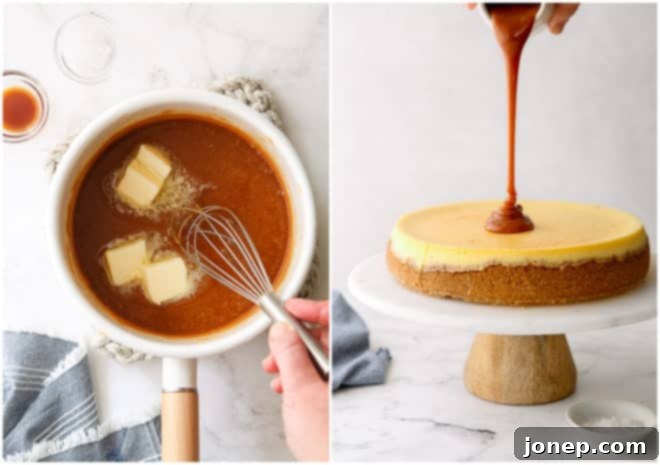
- Master Your Homemade Caramel Sauce: In a saucepan, gently melt granulated sugar until it transforms into a beautiful amber caramel. Carefully whisk in heavy cream, then remove from heat and stir in butter, vanilla extract, and a generous pinch of salt. Allow this irresistible salted caramel sauce to cool to room temperature until it thickens to a pourable consistency.
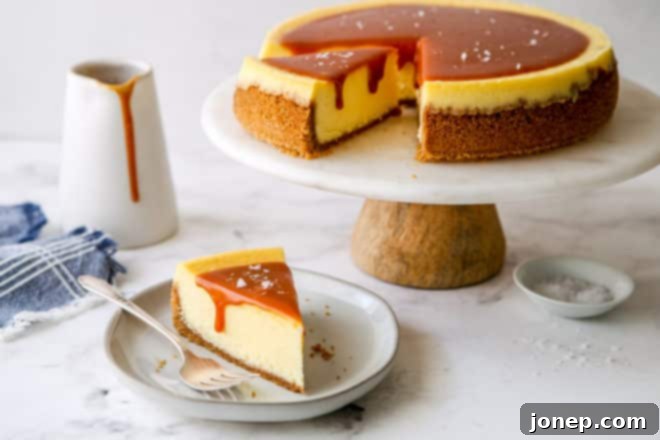
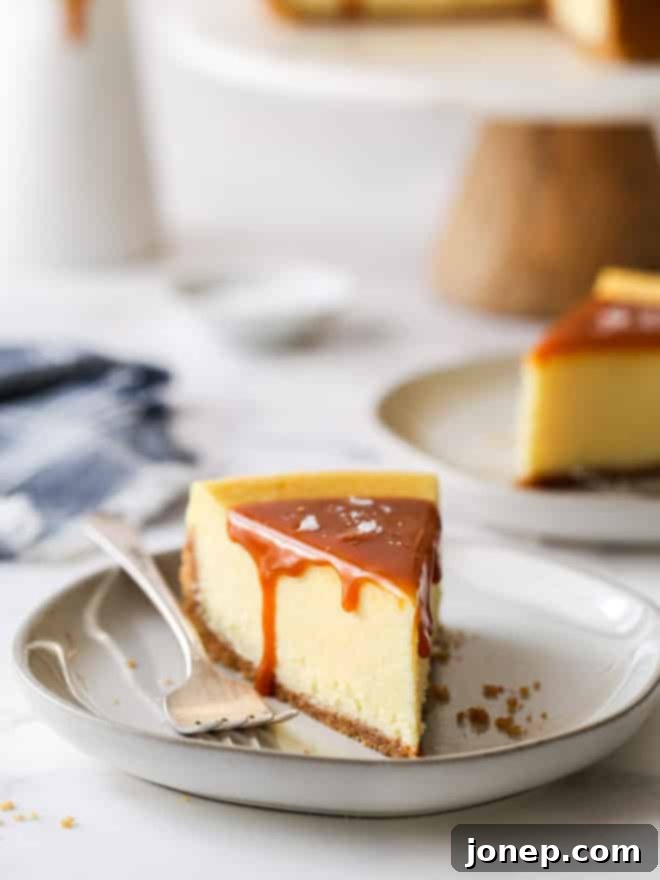
- Assemble and Serve: Once your cheesecake is thoroughly chilled, pour about ½ cup of the homemade salted caramel sauce evenly over the top, letting it spread to the edges. Sprinkle with additional flaky sea salt for a final flourish. Serve immediately for a decadent caramel that gently drips down the sides of each slice, or chill it for 30 minutes in the fridge if you prefer a firmer caramel topping. Don’t forget to drizzle extra caramel sauce over individual slices for an added touch of indulgence!
baking tip:The Art of the Water Bath for Cheesecake
A water bath, also known as a bain-marie, is an essential technique for baking cheesecakes. It might sound intimidating, but it’s remarkably simple and makes a significant difference in the final texture and appearance of your cheesecake. This method creates a moist, steamy environment in your oven, ensuring even, gentle cooking and preventing the cheesecake from cracking on top. Here’s how to set one up effectively:
- Prepare Crust and Filling: Follow the recipe directions to prepare your graham cracker crust and the cheesecake filling. Pour the filling into the prepared springform pan.
- Protect Your Pan from Water Leaks: This is a critical step! You have several options to ensure no water seeps into your cheesecake:
- Foil Wrap: Wrap your springform pan carefully with two layers of heavy-duty aluminum foil around the bottom and sides. Ensure a tight seal to prevent any water from seeping in.
- Slow Cooker Liner Bag: Place the springform pan inside a slow cooker plastic liner bag, rolling down the top edges so it doesn’t touch the cheesecake filling. This provides an excellent waterproof barrier.
- Larger Pan Method (My Preferred): For extra security, place your springform pan inside another slightly larger cake pan or pot. I often use a 10-inch cake pan for a 9-inch springform. This acts as a double barrier against leaks.
- Position in Roasting Pan: Carefully set the protected cheesecake pan into a large roasting pan.
- Transfer to the Oven: Place the roasting pan with the cheesecake into your preheated oven.
- Add Hot Water: Pour hot water (from a kettle or tap) into the roasting pan. The water level should come up approximately 1-2 inches around the sides of the springform pan. Be careful not to splash water onto the cheesecake surface.
For more detailed visual instructions and comprehensive information on this technique, you can refer to my full tutorial on how to make a water bath for cheesecake. Mastering this technique is a game-changer for achieving perfect cheesecakes every time!
Expert Tips for Making This Salted Caramel Cheesecake Irresistibly Perfect
Baking a show-stopping salted caramel cheesecake involves more than just following steps; it’s about understanding the nuances that transform good into great. Here are my best tips to ensure your cheesecake turns out beautifully smooth, creamy, and utterly delicious:
- Always Start with Room Temperature Dairy and Eggs: This tip cannot be emphasized enough. Cold cream cheese, when whipped, will remain lumpy and refuse to incorporate smoothly with other ingredients, resulting in a grainy, uneven cheesecake filling. Similarly, cold eggs won’t emulsify properly. Bringing your dairy products (cream cheese, heavy cream, butter for the filling) and eggs to room temperature allows them to blend seamlessly, creating a wonderfully smooth and homogenous batter. Ideally, pull these ingredients out of the refrigerator at least 1-2 hours before you plan to start baking. For cream cheese, if you’re short on time, you can cut it into cubes and let it sit for a quicker softening. See also my tips for how to quickly bring cream cheese and eggs to room temperature.
- Scrape Down the Bowl Often and Exercise Caution with Eggs: To achieve that coveted lump-free batter, make it a habit to stop your electric mixer frequently and scrape down the sides and bottom of the mixing bowl. This ensures all ingredients are thoroughly combined. However, once the eggs are added, mix only until they are just incorporated. This is not the moment to vigorously beat out any remaining lumps! Over-mixing the batter after adding eggs can incorporate too much air, which, while seeming beneficial at first, will cause the cheesecake to puff up in the oven and then tragically deflate and crack as it cools. Gentle mixing is key here.
- Embrace the Water Bath for a Flawless Finish: As discussed in detail above, baking your cheesecake in a water bath is a non-negotiable step for perfection. This technique surrounds the cheesecake with gentle, moist heat, ensuring a beautifully even bake. It prevents the edges from cooking too quickly and drying out, which is a common cause of cracks. The steam from the water bath also contributes to the cheesecake’s incredibly creamy, melt-in-your-mouth texture. If you’re new to water baths, please refer to my guide on how to make a water bath here.
- Prioritize Gradual Cooling to Prevent Cracks: Just as sudden heat can cause problems, so can abrupt temperature changes during cooling. Rapid cooling can shock the cheesecake, leading to unsightly cracks on its surface. To avoid this, allow your cheesecake to cool down in stages: first, turn off the oven and crack the door open, letting it rest inside the warm oven for about an hour. Then, transfer it to a wire rack on the counter for another hour or so to come closer to room temperature. Finally, move it to the refrigerator to chill completely for a minimum of 4-6 hours, but preferably overnight. This patient approach guarantees a perfectly set, crack-free cheesecake.
- Homemade Caramel Sauce is Worth Every Ounce of Effort: While store-bought caramel sauces offer convenience, they simply cannot compare to the depth of flavor, luxurious texture, and overall quality of homemade salted caramel. Making caramel from scratch might seem daunting to some, but it’s a straightforward process with incredible rewards. The rich, buttery, and perfectly balanced sweet-and-salty notes of homemade caramel truly elevate this cheesecake from delicious to unforgettable. If you’re feeling intimidated, don’t worry! My post on how to make caramel provides lots of step-by-step photos and helpful tips to guide you through the process confidently.
- Never Forget the Flaky Sea Salt: This isn’t just a garnish; it’s an integral component of the “salted caramel” experience! A sprinkle of flaky sea salt (like Maldon, my favorite brand, available at specialty food stores or online) over the finished cheesecake provides a delightful textural contrast and an extra layer of bright, briny flavor that cuts through the sweetness of the caramel and cream cheese. It makes the flavors pop and adds an elegant visual flair.
- Plan Ahead – This Cheesecake is Perfect for Making in Advance: One of the best aspects of this salted caramel cheesecake is that it can be made ahead of time, which is fantastic for entertaining! Both the cheesecake itself and the homemade caramel sauce are excellent candidates for advance preparation. The baked and chilled cheesecake will maintain its freshness and deliciousness for up to one week when stored properly in the refrigerator. The caramel sauce, kept in an airtight container, will last for a few weeks. You can choose to top the cheesecake with caramel just before serving, or up to a few days prior, allowing the flavors to meld beautifully.
Explore More Irresistible Cheesecake Recipes You’ll Love
If you’ve fallen in love with the art of cheesecake, or simply enjoy a rich, creamy dessert, you’ll be thrilled to discover more delightful recipes from my collection. Expand your baking repertoire with these fantastic cheesecake creations, perfect for any occasion:
- Classic Cheesecake: The timeless original, perfect in its simplicity and elegance.
- No-Bake Lime Cheesecake Bars: Refreshing, zesty, and effortlessly easy – ideal for warmer days.
- Mini Cheesecakes: Individual portions of creamy goodness, perfect for parties and portion control.
- No-Bake Strawberry Cheesecake Bars: A burst of fruity flavor in a convenient, no-bake format.
- Brownie Bottom Mini Cheesecakes: The best of both worlds – rich brownie meets creamy cheesecake in mini form.
Shop Essential Tools for This Recipe
To ensure your salted caramel cheesecake baking process is as smooth as the final product, having the right equipment makes all the difference. Here are some indispensable tools that will assist you in creating this decadent dessert:
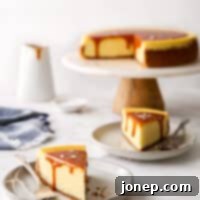
Salted Caramel Cheesecake
Pin Recipe
Leave a Review
Ingredients
Graham Cracker Crust:
- 2 cup graham cracker crumbs (215 grams, 14 full sheets crackers, almost 2 envelopes)
- 5 tablespoons butter (79 grams)
- 3 tablespoons granulated sugar (38 grams)
- ¼ teaspoon salt
- ½ teaspoon ground cinnamon
Cheesecake Filling:
- 24 ounces full-fat cream cheese , cubed and softened to room temperature (3 bricks, 680 grams)
- 1 ½ cup granulated sugar (300 grams)
- 3 tablespoons all-purpose flour (24 grams)
- ¼ teaspoon salt
- 1 vanilla bean , scraped (or 2 teaspoons vanilla extract)
- 4 large eggs , at room temperature
- ¾ cup heavy cream , at room temperature
Salted Caramel Sauce:
- 1 cup granulated sugar (200 grams)
- ½ cup heavy cream
- ¼ cup butter (56 grams, 4 tablespoons)
- 1 teaspoon vanilla extract
- ½ teaspoon flaky salt , plus more for sprinkling over cheesecake
Equipment
Instructions
To prepare the crust:
-
Preheat oven to 350°F (175°C) and generously grease a 9-inch springform pan with nonstick baking spray.
-
In a food processor, pulse the graham crackers until finely ground into crumbs (alternatively, place them in a ziplock bag and crush with a rolling pin). Add the melted butter, granulated sugar, salt, and ground cinnamon to the crumbs and pulse until well combined and moist.
-
Transfer the graham cracker mixture into the prepared springform pan. Use the underside of a measuring cup or your fingers to firmly press the crumbs into an even layer on the bottom and about 1 inch up the sides of the pan.
-
Bake the crust for 10 minutes. Remove from the oven and let it cool completely on a wire rack before adding the filling.
To prepare the filling:
-
Reduce the oven temperature to 325°F (160°C). Ensure your oven rack is positioned in the center of the oven.
-
In a large mixing bowl, using an electric mixer (hand-held or stand mixer with paddle attachment), beat the softened full-fat cream cheese until it is completely smooth and creamy, about 1-2 minutes. There should be no lumps.
-
Add the granulated sugar, all-purpose flour, salt, and the scraped seeds from the vanilla bean (or vanilla extract). Beat on medium speed until the mixture is light, fluffy, and perfectly smooth, approximately 2-3 minutes. Stop and scrape down the sides and bottom of the bowl at least twice during this process to ensure everything is well incorporated.
-
Add the large eggs one at a time, mixing only until each egg is just incorporated before adding the next. Over-mixing at this stage can incorporate too much air, which can lead to cracks. Finally, pour in the heavy cream and mix on low speed just until combined. Scrape down the bowl as needed throughout this process.
-
Pour the prepared cheesecake filling into the cooled graham cracker crust. Now, prepare your springform pan for its water bath (refer to the “How to make a water bath for cheesecake” section or “Notes” below for detailed instructions on protection methods).
-
Carefully set the protected springform pan inside a larger roasting pan. Place the roasting pan into the oven. Then, carefully pour hot water into the roasting pan so that it comes up 1-2 inches around the sides of the springform pan.
-
Bake for approximately 1 hour 45 minutes to 2 hours. The cheesecake is done when the edges are set and slightly firm, but the center 2-3 inches still wobble slightly when gently shaken. The top should appear light golden brown. If it starts to brown too quickly, you can loosely cover it with aluminum foil during the remainder of the baking time. An instant-read thermometer inserted into the center should read about 155°F (68°C). Be careful not to overbake, as this can lead to a dry texture and cracks!
-
Once baked, turn off the oven and prop the oven door open slightly (about 3-4 inches). Let the cheesecake cool gradually inside the oven for 1 hour. This slow cooling prevents sudden temperature changes that can cause cracks.
-
After 1 hour in the oven, carefully transfer the cheesecake (still in its springform and roasting pan) to a wire rack on the counter to cool for another hour. Then, remove the springform pan from the roasting pan, cover it loosely with plastic wrap, and transfer it to the fridge to chill completely for 4-8 hours, or preferably overnight, to allow it to fully set and for flavors to deepen.
To make caramel sauce:
-
Sprinkle the granulated sugar evenly on the bottom of a heavy-bottomed medium saucepan set over medium heat. Allow the sugar to melt and caramelize. Do NOT stir the sugar with a spoon initially; instead, gently swirl the pan occasionally to promote even melting and caramelization. This process will take about 10 minutes. Watch carefully, as caramel can burn quickly.
-
As soon as the caramel reaches a beautiful, dark amber color (the color of an old penny), immediately reduce the heat to low. Gradually and carefully pour in the heavy cream while whisking constantly. The mixture will bubble violently and may seize up into hard clumps; this is normal. Continue whisking.
-
Continue to stir the caramel sauce over low heat until any sugar clumps have completely dissolved and the mixture is smooth and fluid. Remove the saucepan from the heat. Stir in the butter until fully melted and incorporated, then stir in the vanilla extract and flaky salt. Pour the finished caramel sauce into a heatproof jar or bowl and let it cool completely to room temperature. It will thicken considerably as it cools.
-
Once the cheesecake is thoroughly chilled and set, unclip and remove the sides of the springform pan. Pour about ½ cup of the cooled caramel sauce evenly over the top of the cheesecake, gently tilting the pan to ensure it covers the surface to the edges. Let it set for a few minutes, then sprinkle with additional flaky sea salt for garnish.
-
Serve the cheesecake immediately if you prefer a caramel that will elegantly drip down the sides of each slice when cut. Alternatively, for a firmer caramel topping, chill the cheesecake in the fridge for an additional 30 minutes after adding the caramel. Drizzle more homemade caramel sauce over individual slices as desired for an extra touch of indulgence.
Notes
Helpful Notes and Storage Tips:
- Detailed Water Bath Preparation: To perfectly prepare your springform pan for the water bath, you have a few reliable options:
- Foil Wrapping: Cover the bottom and sides of your springform pan with two layers of heavy-duty aluminum foil. Ensure the foil goes up past the cheesecake filling level. It’s often easier to do this before pouring the filling into the crust.
- Alternative Liners: Instead of foil, you can set the springform pan inside a 10-inch baking pan (my preferred method for extra security) or use a slow cooker plastic liner bag. If using a liner bag, roll down the top edges so they are open and do not touch the cheesecake filling.
- Preventing Cracks: For a truly pristine, crack-free cheesecake, it is crucial to follow all instructions diligently, especially regarding room temperature ingredients, avoiding over-mixing, utilizing a water bath, and allowing for gradual cooling. For more in-depth advice on this common cheesecake challenge, refer to the tips section in my classic cheesecake recipe.
- Storage: Your delicious salted caramel cheesecake will stay fresh and flavorful in the refrigerator for up to 1 week. Ensure it is covered loosely with plastic wrap or foil to prevent it from absorbing refrigerator odors. The homemade caramel sauce can be stored separately in an airtight container in the refrigerator for several weeks. Reheat gently in the microwave or a small saucepan, stirring frequently, until pourable.
Disclosure: This recipe was created in partnership with Go Bold With Butter. Thank you for supporting partnerships with brands I love and believe in, which make Completely Delicious possible. All opinions are always 100% my own. To learn more about Go Bold With Butter, you can visit their website here. You can also find them on facebook, instagram, and pinterest.
