The Ultimate Homemade Berry Poke Cake: A Fresh & Flavorful Summer Dessert (From Scratch!)
Forget the boxed cake mixes and artificial Jello packets! This homemade berry poke cake is a true summer showstopper, crafted entirely from scratch for an unforgettable flavor and delightful texture. It’s the perfect dessert to brighten any summer gathering, potluck, or holiday celebration with its vibrant colors and bursting fresh berry taste.
I still fondly recall the excitement of July 4th celebrations, often highlighted by a slice of the classic red, white, and blue poke cake. That retro favorite, typically made with a yellow cake mix, colorful Jell-O, and a generous layer of cool whip, was undeniably fun and delicious in its own right. It left a lasting impression, a delightful memory of summer simplicity.
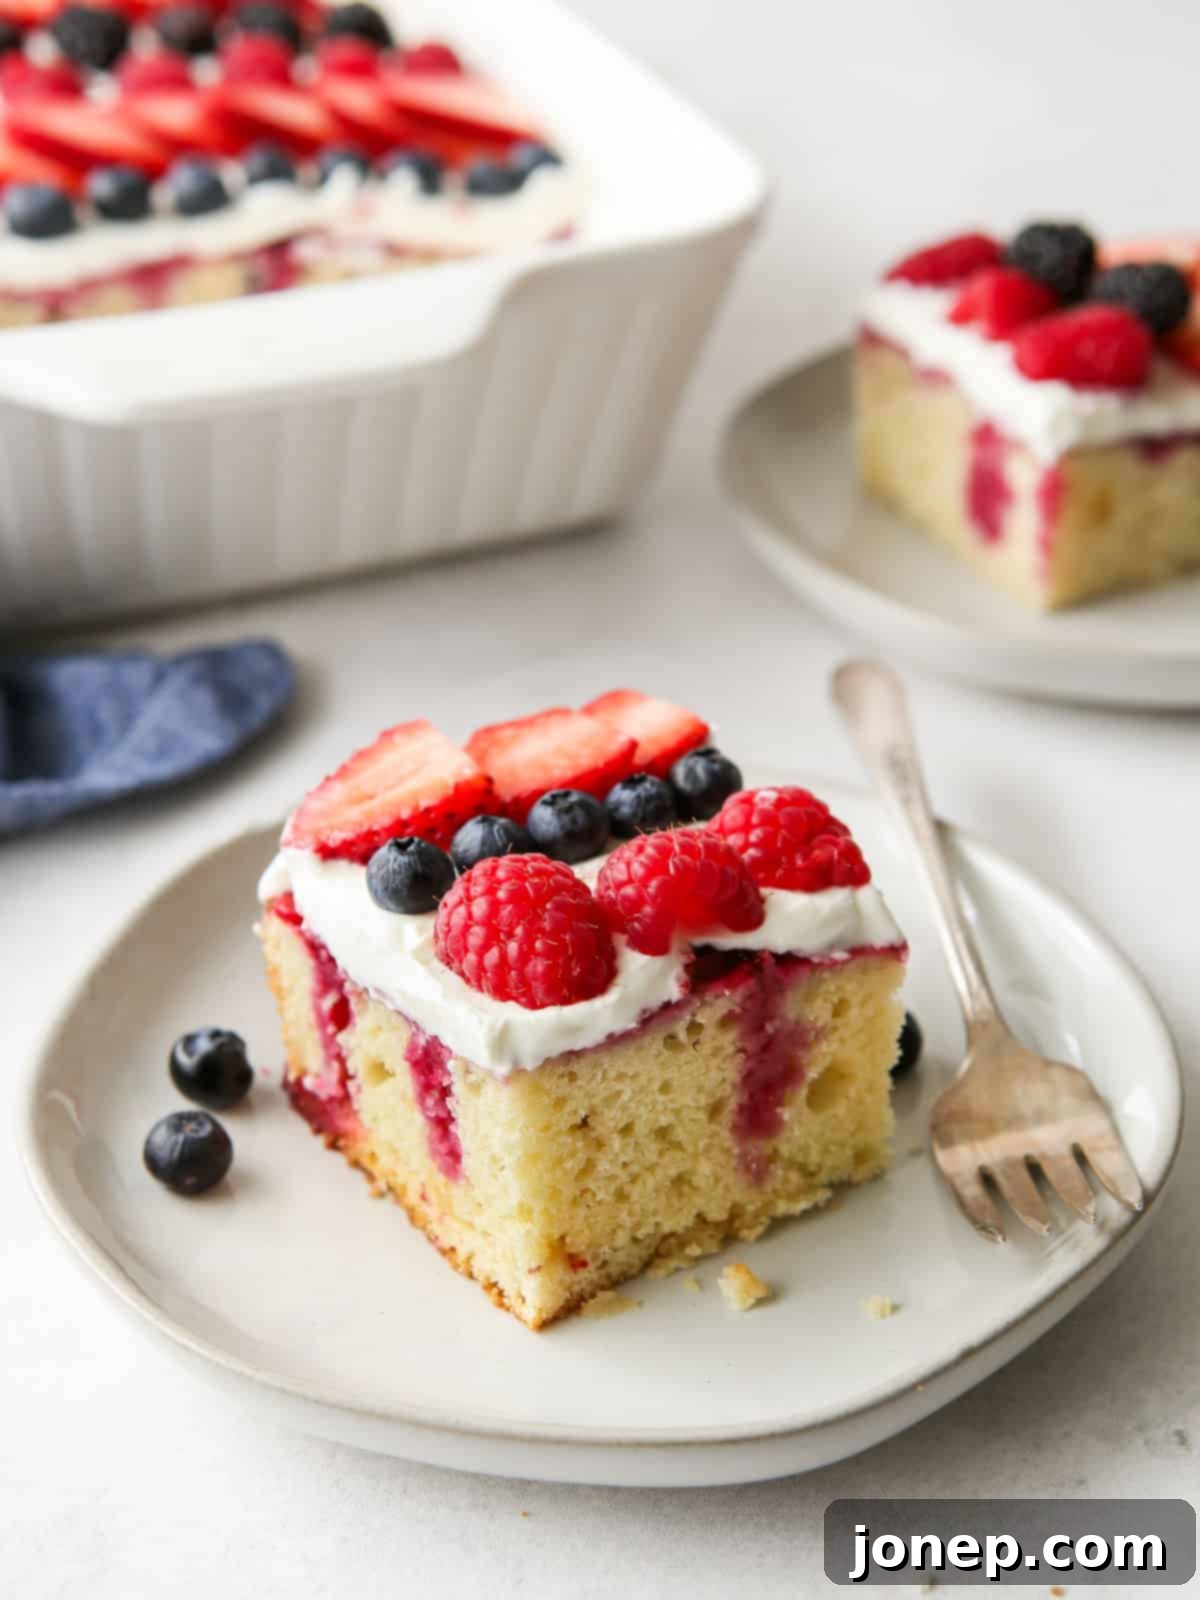
But what if you could capture that nostalgic charm with an elevated, entirely homemade touch? This recipe answers that call! We’re recreating that beloved experience with a sophisticated twist: a tender vanilla buttermilk sheet cake, generously infused with a luscious, jammy sauce made from fresh, seasonal berries, and crowned with a cloud of sweetened homemade whipped cream. The result is a dessert that not only satisfies that retro craving but also delivers unparalleled depth of flavor and a truly gourmet feel. It’s a guaranteed hit, ideal for any summer occasion, from casual family dinners to grand festivities.
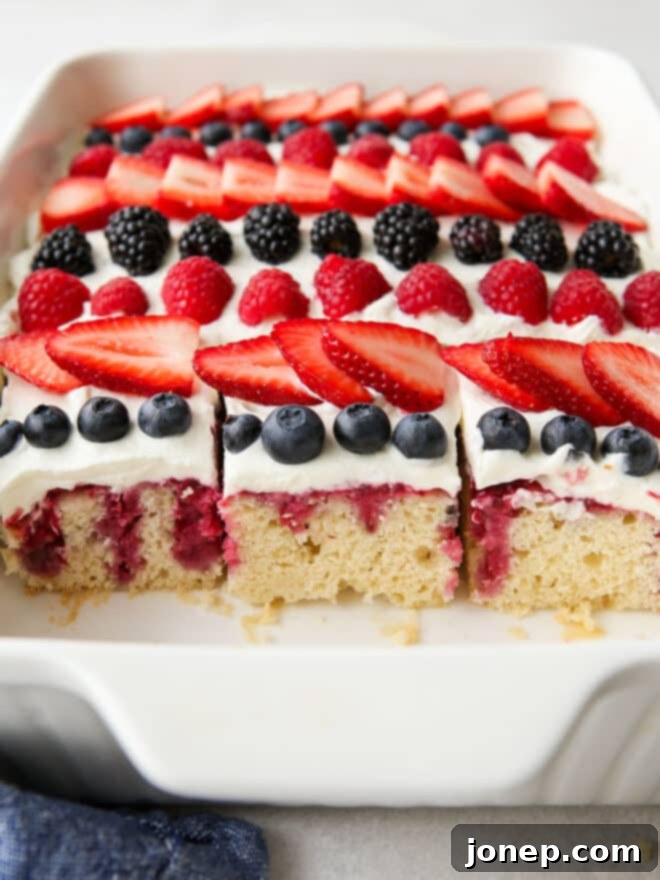
Table of Contents
- What is a poke cake?
- Ingredients you’ll need
- How to make berry poke cake
- Recipe tips for the perfect poke cake
- More berry desserts to love
- Get the full recipe
What is a Poke Cake? The Delicious Secret Behind the Holes
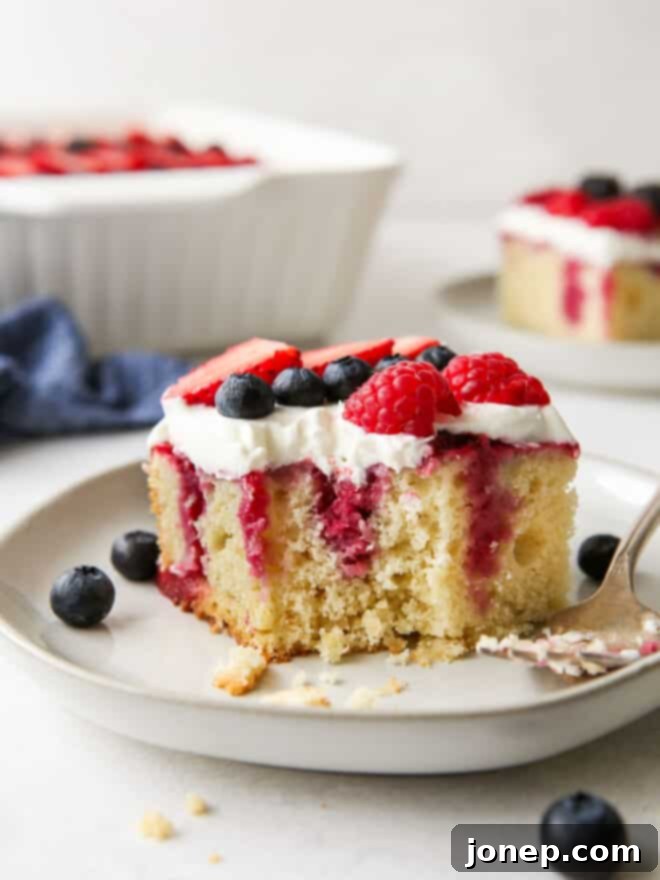
“Poke cake” is a wonderfully whimsical dessert, cleverly named for the unique technique used in its preparation. While the cake is still warm from the oven, a series of evenly spaced holes are poked across its surface, typically with the blunt end of a wooden dowel or spoon. These tunnels then become conduits for a flavorful sauce, syrup, or liquid, which is poured over the cake and absorbed as it cools. This method ensures that every slice reveals delightful pockets of filling and flavor, creating a moist, tender, and visually appealing dessert that’s truly fun to eat!
While the classic versions often rely on pre-made components, our from-scratch berry poke cake elevates the experience. Yes, it might take a little more time and effort to prepare, but I assure you, the difference in taste and quality is profoundly worth it! This homemade cake boasts a richness, depth, and vibrant freshness that simply cannot be replicated by a box mix. It’s a testament to the fact that sometimes, a little extra love in the kitchen yields extraordinary results, providing a truly superior dessert experience for you and your guests. The natural sweetness and tang of fresh berries, combined with a tender, buttery cake base, create a harmonious balance that will leave everyone asking for more.
Looking for a delicious fall variation? You simply must try my pumpkin caramel poke cake for a cozy, autumnal treat!
Essential Ingredients You’ll Need for This Homemade Delight
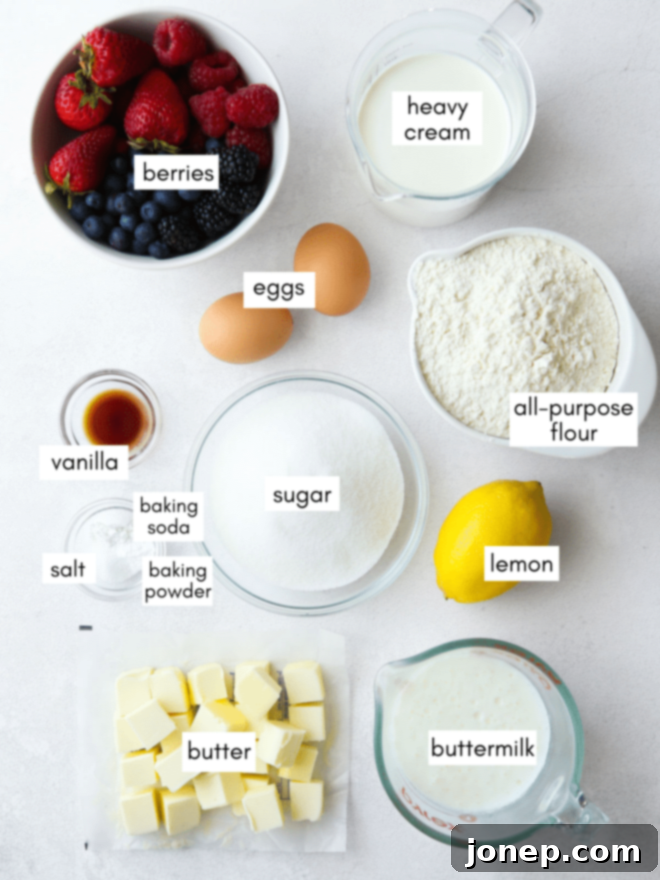
Crafting this incredible berry poke cake from scratch means using fresh, high-quality ingredients that truly shine. From the pantry staples for the tender buttermilk cake to the vibrant berries for the luscious filling and the rich cream for the topping, each component plays a vital role. Gather these key items, and you’ll be well on your way to baking a masterpiece that tastes as good as it looks!
How to Make the Perfect Homemade Berry Poke Cake: Step-by-Step Guide
Creating this stunning berry poke cake is a rewarding process that combines classic baking techniques with a fun, interactive step. Follow these simple steps to achieve a beautifully moist cake infused with berry goodness, topped with luscious whipped cream.
- Prepare cake batter and bake the cake: Begin by creating a rich and fluffy vanilla buttermilk cake batter. Pour this smooth batter evenly into a greased 9×13-inch baking pan. Bake until the edges are golden, and the center springs back lightly when gently pressed – typically around 30-35 minutes. This ensures a perfectly baked, tender base for our poke cake.

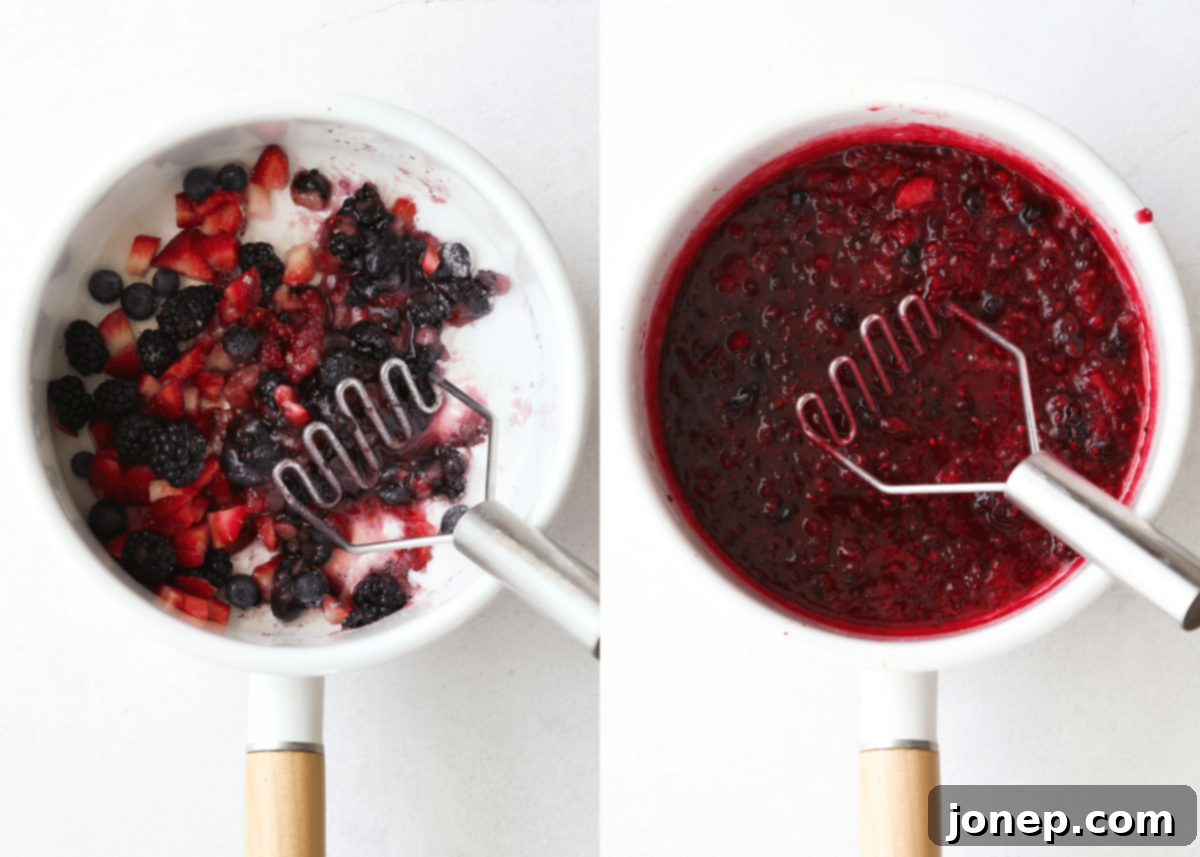
- Prepare the berry filling while the cake bakes: This is where the magic happens! While your cake is in the oven, mash your fresh berries with some granulated sugar in a saucepan. Allow them to sit for a few minutes to release their natural juices. Then, simmer this mixture with a touch of fresh lemon juice, lemon zest, and water until it thickens into a beautiful, jammy sauce. The aroma alone is heavenly!

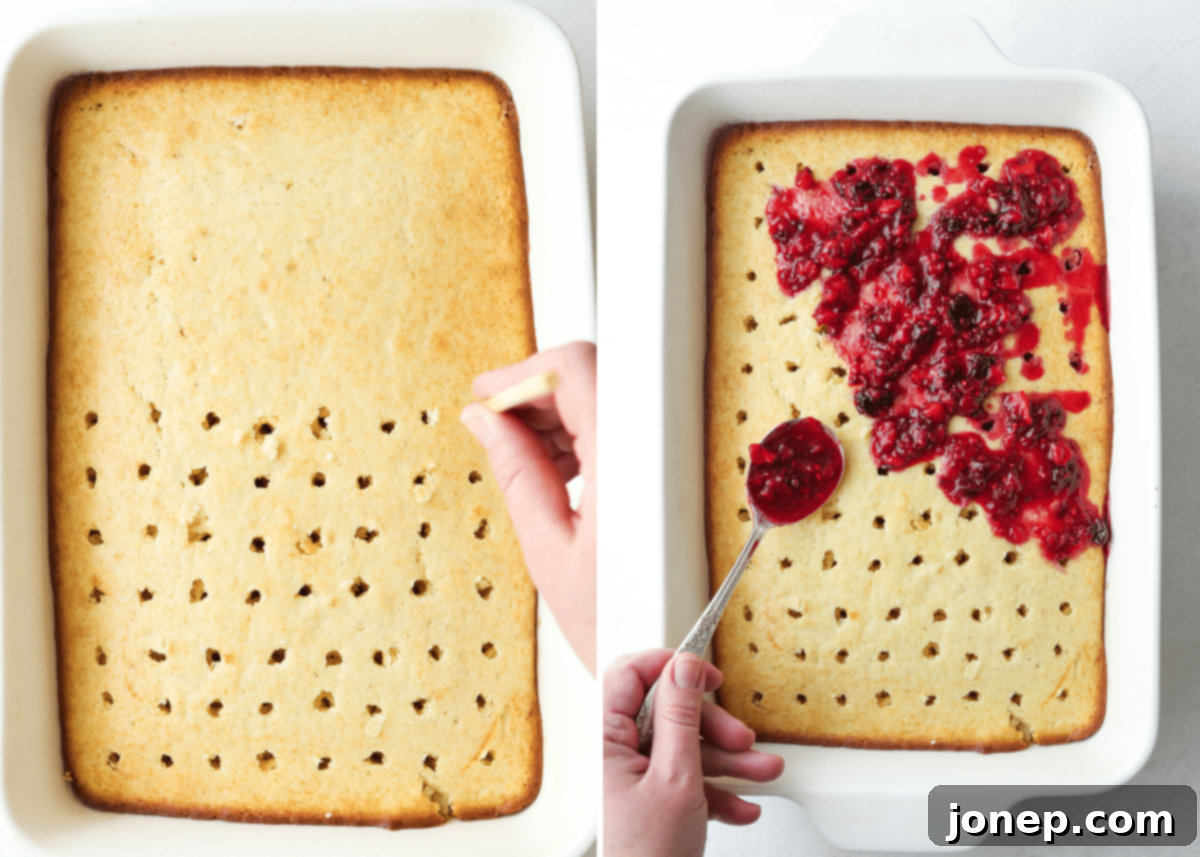
- Poke the cake and add the filling: Once the cake is out of the oven and still warm, it’s time for the signature “poke” step. Use a wooden dowel, the end of a narrow wooden spoon, or even a chopstick to poke evenly spaced holes across the entire cake surface, ensuring they reach almost to the bottom of the pan. Carefully pour the warm berry sauce over the top, gently encouraging the juices to seep down into the holes. Don’t worry if chunkier fruit pieces remain on top – they add wonderful texture and flavor!

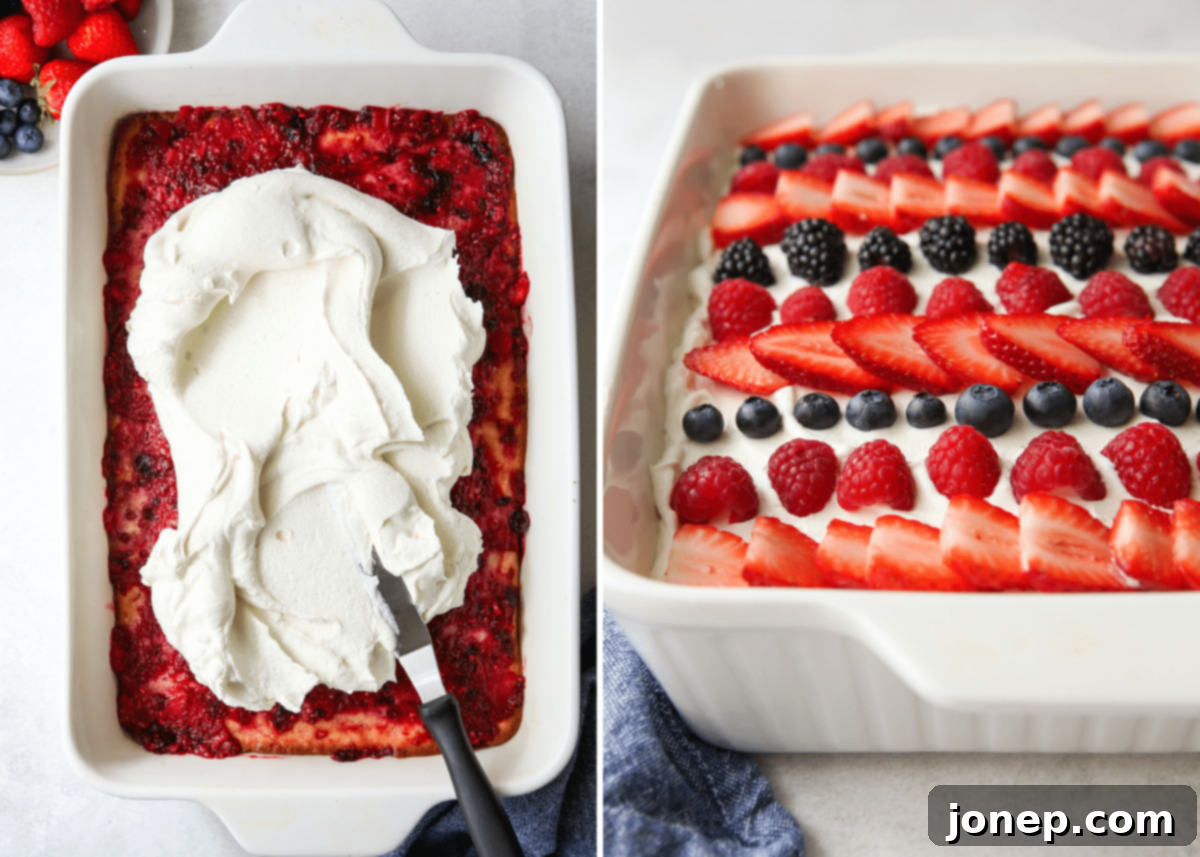
- Cool and top with whipped cream: Allow the cake to cool completely to room temperature, or for a quicker set, chill it in the fridge. Once cooled, generously top it with a freshly made, sweetened whipped cream. For an extra flourish and burst of color, scatter some fresh whole berries over the cream before serving.

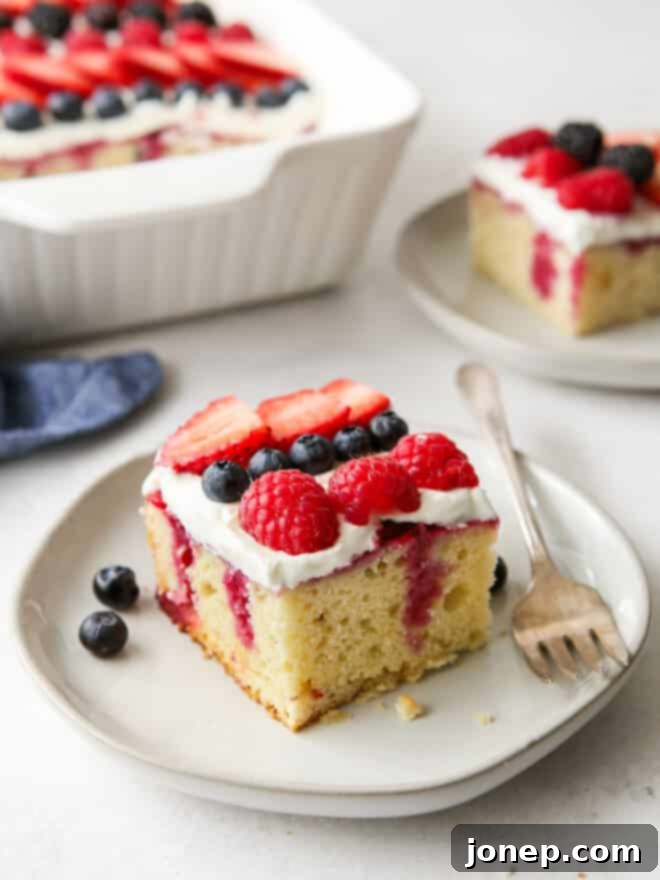
- Slice and enjoy: If you’re not serving the cake immediately, store it in the refrigerator to maintain its freshness and allow the flavors to meld beautifully. When ready to serve, use a sharp knife for clean slices that perfectly showcase those delightful berry-filled tunnels. Prepare for compliments – your guests are going to absolutely adore this homemade treat!
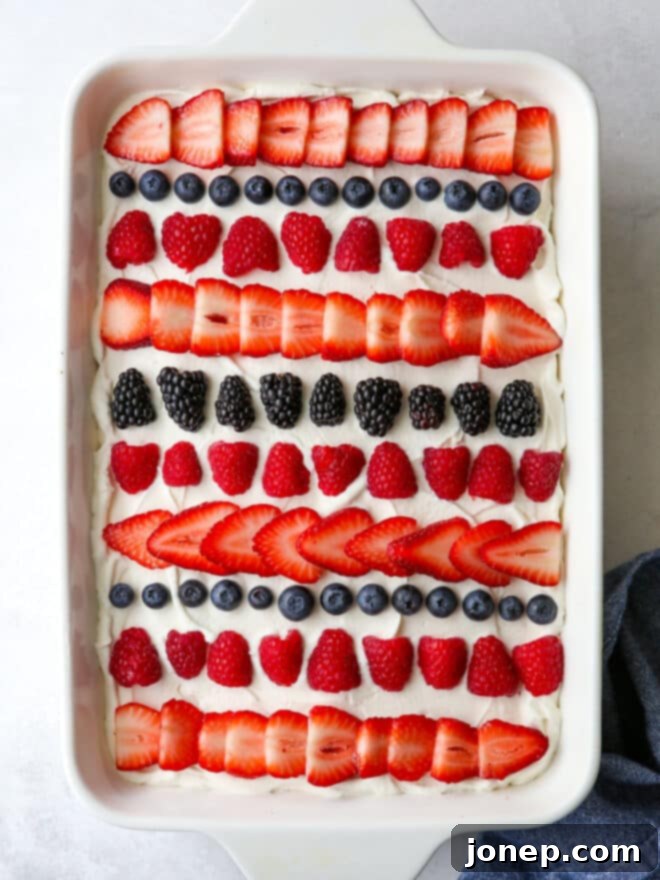
And just look at that vibrant, mouthwatering presentation! This cake is not only delicious but also visually stunning, making it an ideal centerpiece for any summer celebration. The combination of moist cake, tangy berry filling, and airy whipped cream creates a truly irresistible experience.
baking tip:Why alternate adding wet and dry ingredients?
Adding the liquid all at once could saturate the creamed butter and sugar mixture and cause the batter to separate. Adding all of the dry ingredients will cause the batter to be thick and likely result in over mixing, which will yield a tougher cake.
Instead, add them in two or three additions, beginning and ending with the dry ingredients. Stir ingredients after each addition, but only until just combined.
Expert Recipe Tips for the Perfect Berry Poke Cake Every Time
Achieving poke cake perfection is easier than you think with these expert tips. From ingredient choices to preparation techniques, these pointers will help ensure your homemade berry poke cake is moist, flavorful, and a true crowd-pleaser.
- Customize your berries: While our recipe features a delightful mix of strawberries, raspberries, blackberries, and blueberries, feel free to get creative! You can use just one type of berry, a combination of two, or any mix that totals two cups. This flexibility allows you to highlight seasonal favorites or simply use what you have on hand. Both fresh and frozen berries work beautifully for the filling; if using frozen, there’s no need to thaw them beforehand.
- Ensure room temperature dairy and eggs: This seemingly small detail makes a significant difference in your cake’s texture. Room temperature ingredients, such as butter, eggs, and buttermilk, emulsify more easily, creating a smoother, more uniform batter. This leads to a better rise and a more tender, even crumb in your finished cake, preventing a dense or rubbery texture.
- No buttermilk? No problem! If you don’t have buttermilk on hand, it’s incredibly simple to make a substitute. Just add 1 tablespoon of lemon juice (freshly squeezed or bottled) or white vinegar to a liquid measuring cup. Then, fill the rest of the cup with regular milk (whole or 2% works best) until it reaches the 1-cup mark. Let it sit for 5-10 minutes until it slightly curdles, then give it a quick stir before using.
- Timing and tools for poking: The key to effective poking is to do it while the cake is still warm, but not piping hot, and before its structure fully sets. This allows the holes to remain open and readily absorb the berry sauce. Use a wooden dowel, the handle of a narrow wooden spoon, a chopstick, or even the tines of a fork (for smaller holes). Ensure your holes go almost all the way to the bottom of the pan for maximum flavor distribution.
- Decorate with flair: Growing up, the berries on top were often arranged to resemble an American flag for patriotic holidays, a lovely tradition you might enjoy. However, feel free to get creative with your berry arrangement! You can simply scatter them, create a beautiful pattern, or even top individual slices with a small scoop of extra fresh berries just before serving for a gourmet touch.
- Excellent make-ahead dessert: This berry poke cake is a fantastic option if you need to prepare dessert in advance. You can bake and assemble the entire cake up to 24 hours before serving. Store it covered in the refrigerator. While it tastes best within 1-2 days, it will keep well for 3-4 days, making it perfect for busy entertaining schedules. The flavors actually deepen overnight!
- Achieve clean slices: For a picture-perfect presentation, use a sharp, thin-bladed knife to slice the cake. For the cleanest cuts, wipe the knife blade clean with a damp cloth between each slice. This prevents the layers from tearing and keeps your dessert looking pristine.
More Irresistible Berry Desserts You’ll Love
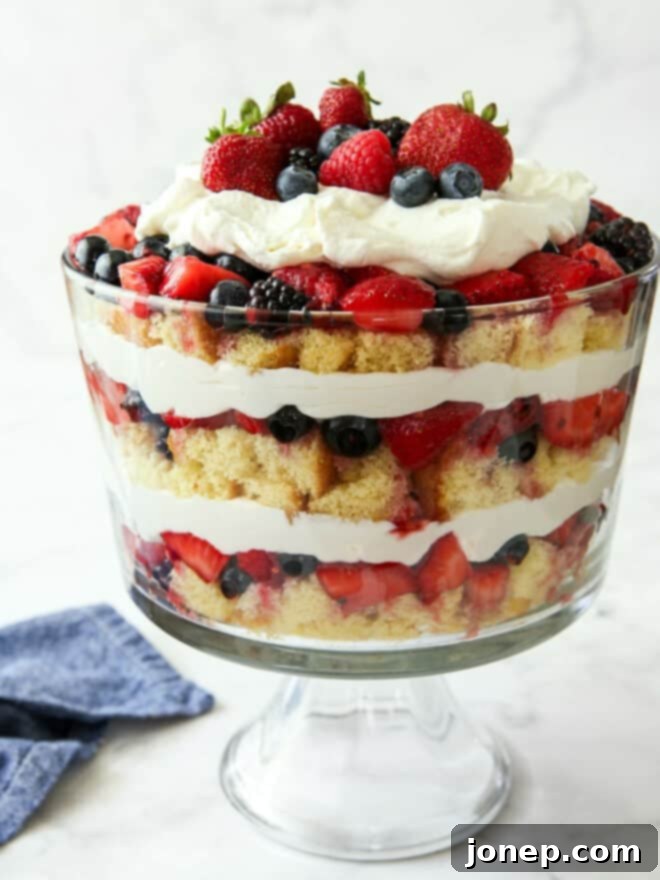
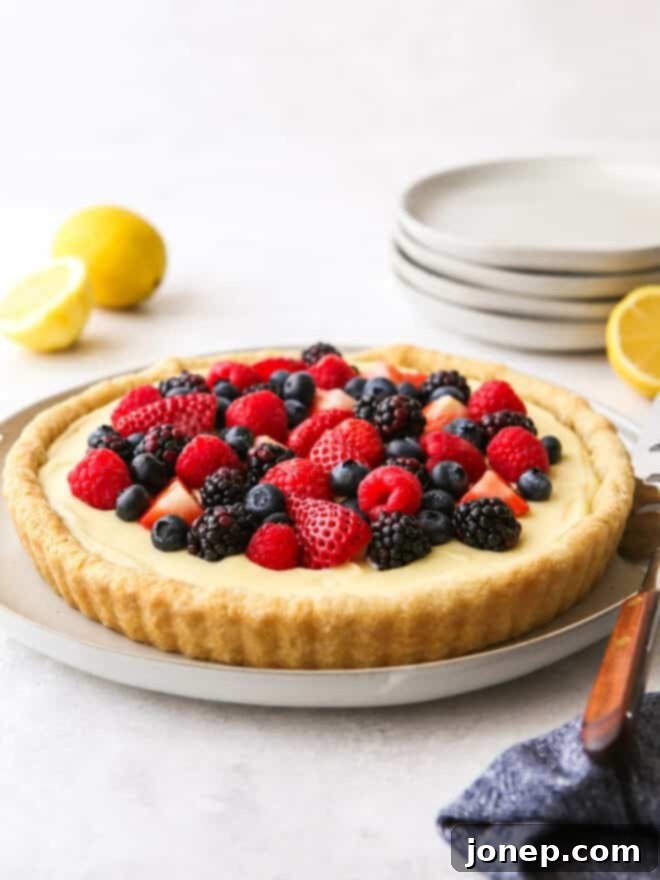
If you’re as much of a fan of fresh berries as we are, then you’ll definitely want to explore these other fantastic berry-focused dessert recipes. Perfect for any occasion, these treats highlight the natural sweetness and vibrant flavors of summer’s finest fruits.
Get the Full Homemade Berry Poke Cake Recipe Here

Berry Poke Cake
Pin Recipe
Leave a Review
Ingredients
Cake:
- 2 ¼ cup (270 grams) all-purpose flour
- 1 teaspoon baking powder
- ½ teaspoon baking soda
- ½ teaspoon salt
- ¾ cup (170 grams) unsalted butter , softened to room temperature
- 1 cup (200 grams) granulated sugar
- 2 large eggs room temperature
- 1 teaspoon vanilla extract
- ¾ cup (170 grams) buttermilk , room temperature
Berry filling:
- ½ cup (80 grams) finely chopped strawberries
- ½ cup (60 grams) raspberries
- ½ cup (75 grams) blueberries
- ½ (60 grams) blackberries
- ½ cup (100 grams) granulated sugar
- 1 lemon , zested and juiced
- ¼ cup (56 grams) water
- Pinch of salt
Whipped cream topping:
- 2 cups (454 grams) heavy whipping cream
- ¼ cup (50 grams) granulated sugar
- 1 teaspoon vanilla extract
- Additional berries , for decoration/serving
Equipment
Instructions
To make the cake:
-
Preheat oven to 350°F (175°C). Grease a 9×13-inch baking pan with nonstick baking spray or butter and flour.
-
In a medium bowl, whisk together the all-purpose flour, baking powder, baking soda, and salt. Set this dry mixture aside.
-
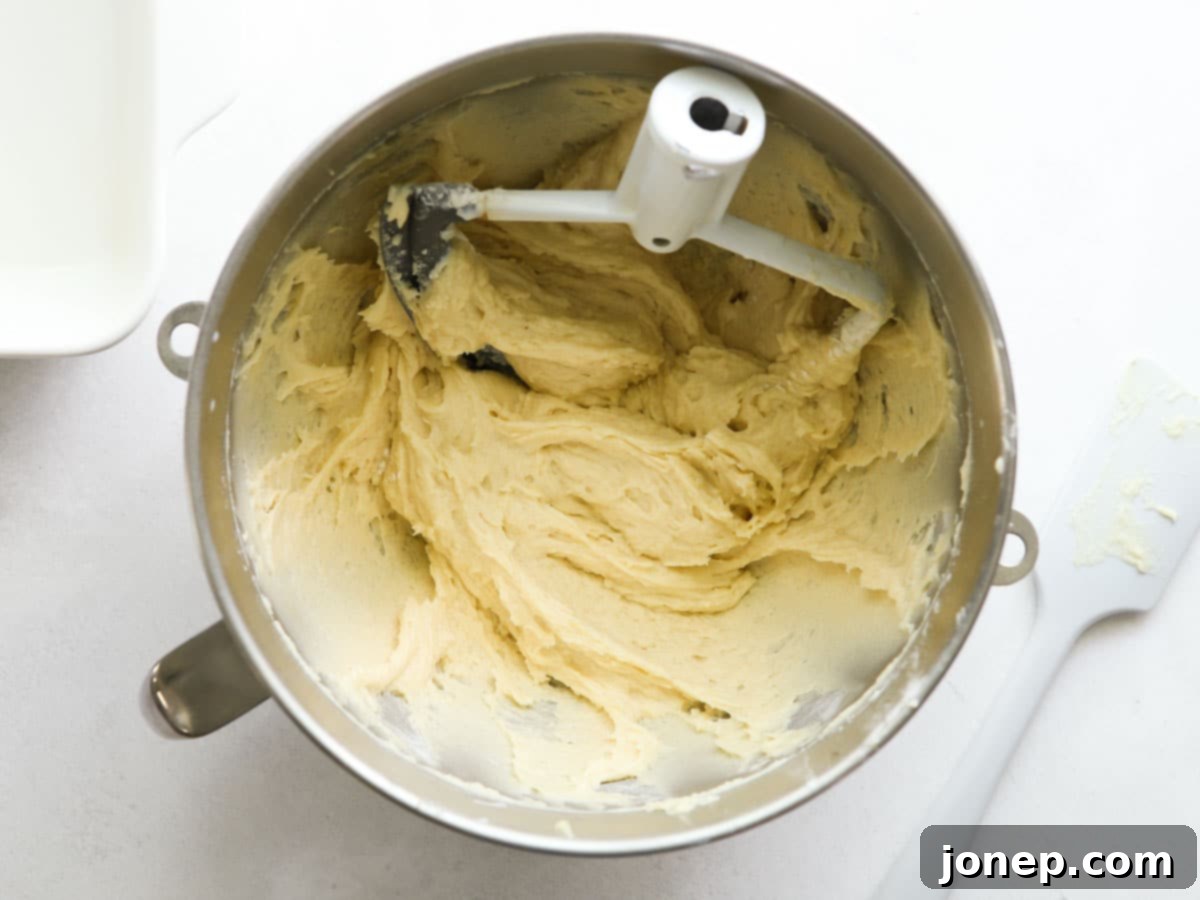
Using a stand mixer fitted with the paddle attachment (or a hand-held mixer), beat the softened butter and granulated sugar on high speed until the mixture is light, fluffy, and creamy, which should take about 3 minutes. Add the large eggs one at a time, beating well after each addition. Follow with the vanilla extract. Continue to beat for another 1-2 minutes until the mixture is truly fluffy. Remember to scrape down the sides and bottom of the bowl as needed to ensure everything is well combined.
-
Gradually add the flour mixture in 3 additions, alternating with the buttermilk. Begin and end with the dry ingredients. Mix on low speed after each addition, only until just combined. Be careful not to overmix, as this can lead to a tough cake.
-
Pour the prepared cake batter evenly into your greased baking pan. Bake in the preheated oven for 30-35 minutes, or until the edges are golden brown and a gentle press on the center causes it to spring back. A wooden skewer inserted into the center should come out clean.
To make the berry filling:
-
While the cake is baking and cooling slightly, prepare the luscious fruit filling. Add the mixed berries and granulated sugar to a small saucepan. Using a fork or a vegetable masher, gently smash the berries to break them up and combine them with the sugar. Let this mixture sit for approximately 20 minutes; this allows the berries to naturally release all of their flavorful juices, creating a richer sauce.
-
Add the lemon zest, fresh lemon juice, water, and a pinch of salt to the saucepan with the berry mixture. Bring the mixture to a boil over medium heat, then immediately reduce the heat to a simmer. Let it gently simmer for about 5-8 minutes, stirring occasionally, until the sauce has thickened slightly. Remove the saucepan from the heat once it reaches your desired consistency.
-
Once the cake is out of the oven and still warm (not hot, but not completely cooled either), grab a wooden dowel or the end of a narrow wooden spoon (about 1-2 cm wide). Poke holes evenly all over the cake surface, making sure they go all the way to the bottom of the pan. Spoon the warm berry filling over the cake, taking care to encourage the juices to flow down into the holes as much as possible. The chunkier fruit pieces will naturally sit on top, adding texture and visual appeal.
-
Once the berry filling has been added, cover the cake loosely with plastic wrap. Allow it to cool completely to room temperature, then transfer it to the fridge and chill for at least 1 hour. This chilling time allows the cake to fully absorb the berry juices and firm up, making it easier to slice.
To make the topping:
-
For the grand finale, prepare the fluffy whipped cream topping. Using a stand mixer fitted with the whisk attachment (or a hand-held mixer), beat the cold heavy whipping cream, granulated sugar, and vanilla extract until medium peaks form. The cream should be light, airy, and hold its shape. Spread this luscious whipped cream evenly over the top of the chilled cake. For an extra touch of beauty and flavor, adorn the cake with additional fresh berries as desired.
-
Serve your magnificent berry poke cake immediately for the freshest taste. Any leftovers should be stored in an airtight container in the refrigerator to maintain their quality. This cake can be made up to 1 day ahead and stored in the fridge, allowing the flavors to meld beautifully, making it an ideal make-ahead dessert for entertaining.
Video
Notes
- You need a total of 2 cups of mixed berries for this cake’s delicious filling. You can use any combination you prefer, such as strawberries, raspberries, blueberries, and blackberries, to reach the 2-cup measurement.
- Both fresh or frozen berries work wonderfully for the berry filling. If using frozen berries, there’s no need to thaw them before starting the recipe; they will break down beautifully during the simmering process.
This delightful berry poke cake recipe was originally published in June 2017 and has been updated to provide even more detailed instructions, helpful tips, and enhanced SEO for your baking pleasure.
