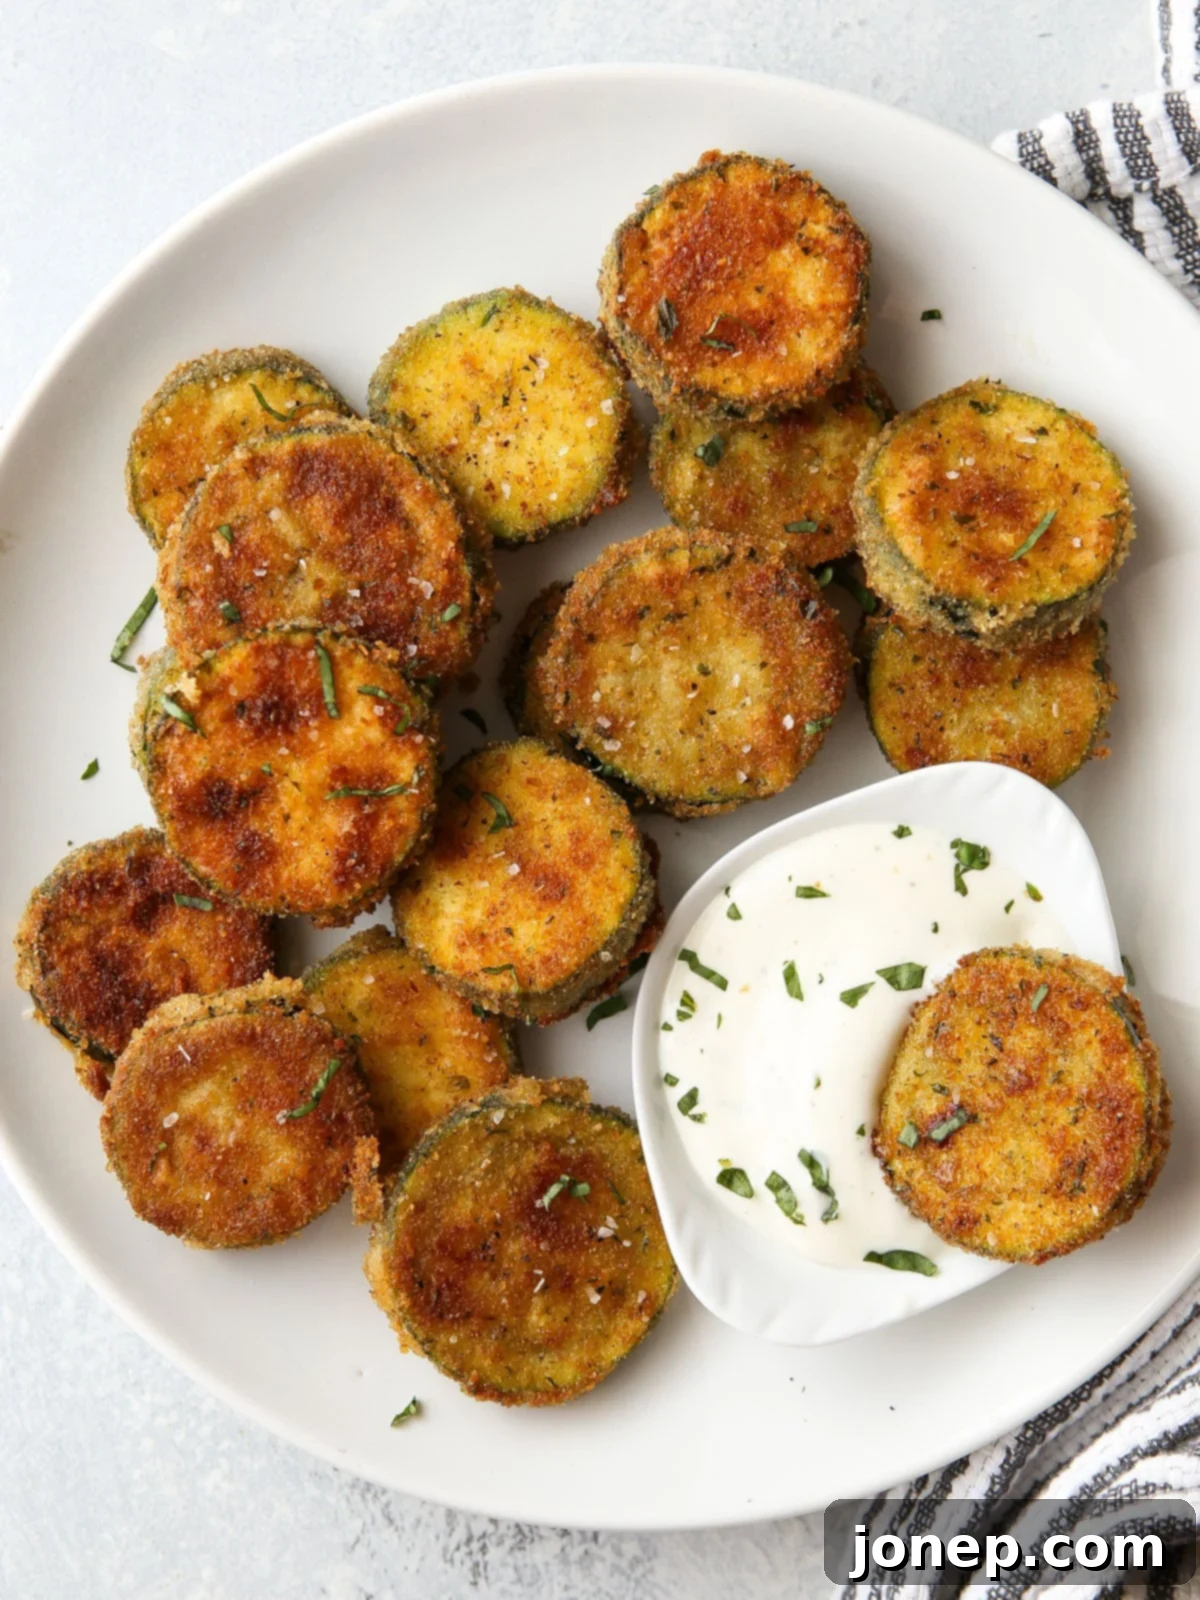
Crispy Pan-Fried Zucchini Chips: Your Ultimate Guide to Summer’s Best Snack
There’s nothing quite like the abundance of summer zucchini. If your garden is overflowing or you’ve simply picked up a bounty from your local farmer’s market, you’re in for a treat! These easy pan-fried zucchini chips are not just crispy and incredibly delicious; they’re also a fantastic and simple way to utilize that seasonal squash. Perfect as an appetizer, a delightful side dish, or a satisfying snack, they’re a versatile crowd-pleaser that you’ll want to make all year round, not just in the summertime.
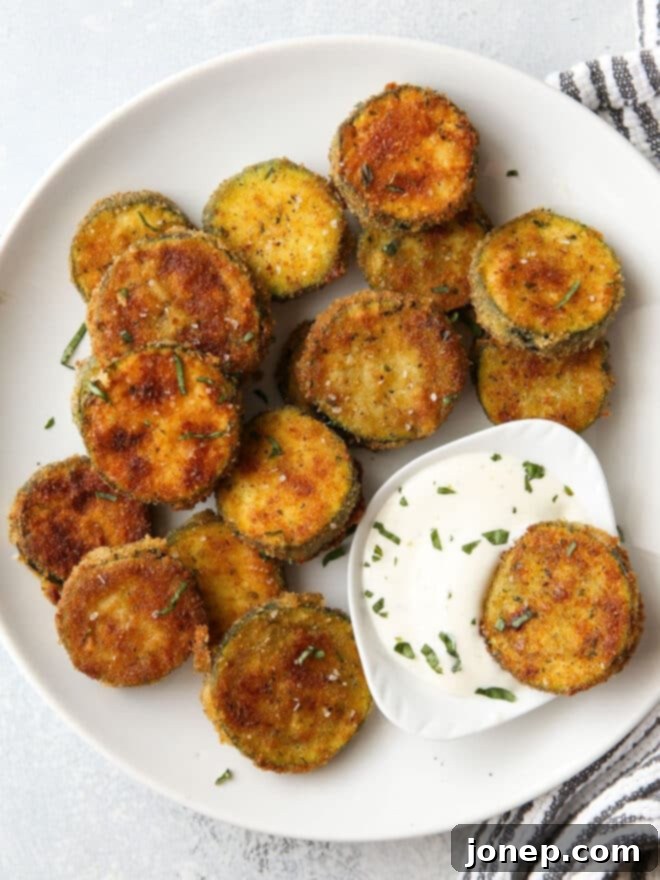
This beloved recipe holds a special place in my heart, coming straight from my mama’s kitchen. I have vivid memories of her preparing pan-fried zucchini during those peak summer months when our garden’s zucchini plants seemed to explode with produce. Now, I find myself following in her culinary footsteps, continuing a delicious tradition.
Whenever I find myself with an excess of zucchini, this is undoubtedly the first recipe I turn to. These crispy fried zucchini chips are remarkably easy to make, requiring only a few basic pantry staples in addition to the star ingredient – the zucchini itself. With just a few minutes of frying on the stovetop, you’ll achieve perfectly golden and irresistibly crunchy results. You’ll be amazed at how effortlessly they combine super crispiness with a delightfully fresh flavor!
“These were soooo good! I made so many from all our garden zucchini, but we ate them fast. Now, I’m impatiently waiting for more zucchini to make them again. I used panko breadcrumbs because that is what I had. ⭐⭐⭐⭐⭐” —from reader Marisa
Why These Crispy Zucchini Chips Are a Must-Make
Beyond being a family favorite, these pan-fried zucchini chips offer numerous reasons to become a staple in your kitchen:
- Simple & Quick: From prep to plate, these chips come together in under 30 minutes, making them ideal for a last-minute snack or a quick side dish.
- Budget-Friendly: Zucchini is often an inexpensive vegetable, especially when in season, making this a delicious and economical meal option.
- Versatile Serving: Enjoy them on their own, paired with your favorite dipping sauce, or as a light and crispy accompaniment to almost any meal.
- Kid-Approved: The crispy texture and mild flavor often make these a hit even with picky eaters, offering a fun way to get more vegetables into their diet.
- Perfect for Garden Overload: If your garden is producing more zucchini than you know what to do with, this recipe is a fantastic solution for using up that fresh harvest.
- Customizable Flavor: Easily adapt the seasoning to match your preferences, from savory herbs to a hint of spice.
Table of Contents
- Ingredients you’ll need
- How to make crispy fried zucchini chips
- Recipe tips & FAQs
- More zucchini recipes
- Get the recipe
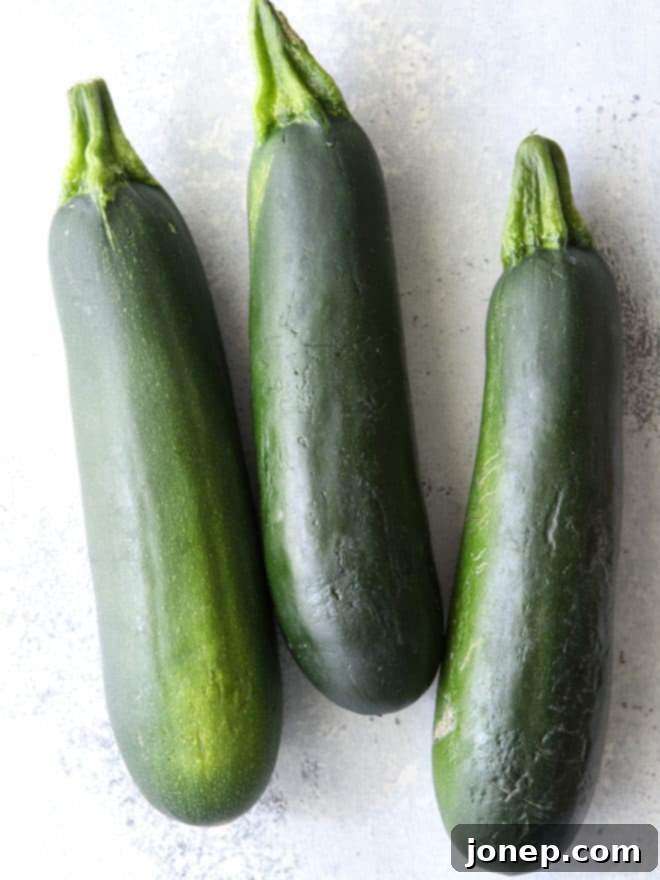
Essential Ingredients for Pan-Fried Zucchini Chips
This pan-fried zucchini recipe is wonderfully simple and truly serves more as a flexible guide than a rigid recipe. You’ll notice the ingredient list is quite accommodating, allowing for personal touches. Here’s a breakdown of what you’ll need:
- Zucchini: The star of the show! Choose medium-sized zucchini that are firm and free of blemishes. Slice them into even rounds, about ⅛ to ¼ inch thick, to ensure even cooking and maximum crispiness.
- All-purpose flour: This forms the initial dry layer, helping the egg adhere to the zucchini slices. You can use a gluten-free all-purpose flour blend if needed.
- Egg: Beaten egg acts as the crucial “glue” that allows the breadcrumbs to stick firmly to the zucchini, creating that perfect crunchy coating.
- Breadcrumbs: This is where you can get creative!
- Panko breadcrumbs: Deliver an extra-crispy, light, and airy texture.
- Traditional breadcrumbs: Work well and provide a classic crunch.
- Seasoned breadcrumbs: A great shortcut for adding flavor (just remember to adjust added salt accordingly).
- Gluten-free breadcrumbs: Easily substituted for a gluten-free option.
- Salt and pepper: Essential for seasoning the zucchini and the flour mixture, bringing out the best flavors. Coarse salt is especially good for drawing out moisture.
- Other seasonings or herbs: Entirely optional but highly recommended for boosting flavor. Consider fresh or dried basil, oregano, thyme, Italian seasoning, garlic powder, onion powder, or a pinch of paprika or cayenne for a subtle kick.
- Oil for frying: Choose an oil with a high smoke point to prevent burning and ensure even frying. Good options include vegetable oil, canola oil, grapeseed oil, or avocado oil.
- A dipping sauce for serving: While delicious on their own, a good dipping sauce elevates these chips! Popular choices include ranch dressing, a homemade aioli, marinara sauce, or even a spicy sriracha mayo.
Step-by-Step: Crafting Crispy Pan-Fried Zucchini Chips
Achieving perfectly crispy, pan-fried zucchini chips that don’t lose their breading can sometimes be a challenge. When I first started making them on my own, I often got frustrated when the coating would slip off the zucchini or stick stubbornly to the bottom of the pan. But with a few key techniques, you’ll get flawless, delicious results every single time. Follow these steps for crispy success!
- Prepare the Zucchini by Removing Excess Moisture: This is arguably the most crucial step for achieving truly crispy zucchini and ensuring the breading adheres properly. Zucchini has a very high water content, and breading struggles to stick to a slick, wet surface. To combat this, sprinkle your zucchini slices generously with coarse salt. Arrange them in a single layer on a paper towel-lined sheet pan, sprinkle with salt, and then cover them with more paper towels. Place something heavy on top, like another sheet pan or a cutting board, and let it sit for at least 15-20 minutes. The salt will draw out a significant amount of moisture, which the paper towels will absorb. Don’t skip this — it’s worth the small amount of extra time!
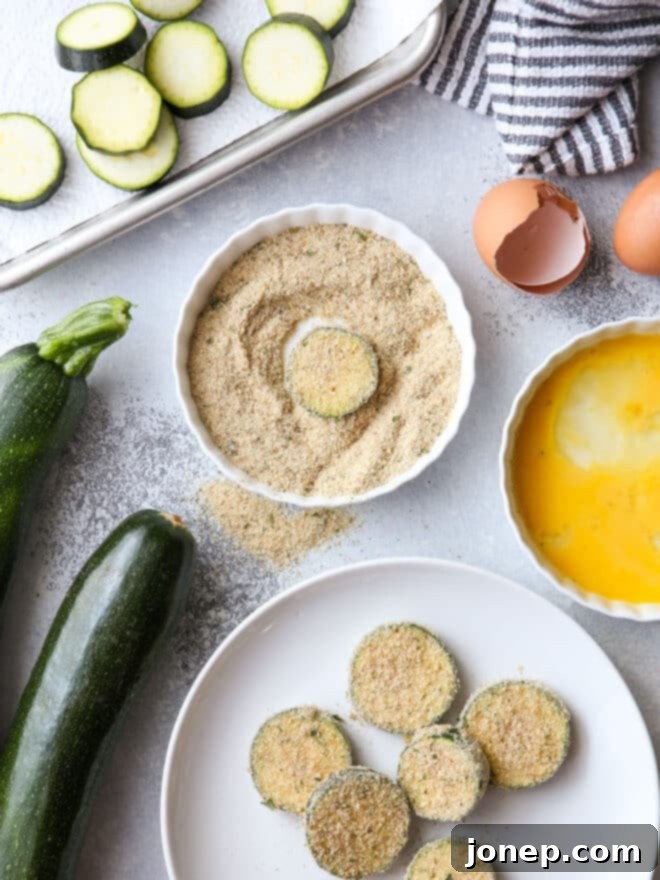
- Set Up an Efficient Assembly Line: For a smooth and mess-free breading process, organize your workspace like a professional chef. You’ll need three separate, shallow bowls or plates: one for the all-purpose flour, one for the whisked egg, and one for your chosen breadcrumbs. Arrange them in this order for easy dipping.
- Dredge Zucchini Rounds Evenly: Take each zucchini round and first dip it thoroughly in the flour, shaking off any excess. Next, dip it into the beaten eggs, allowing any extra egg to drip off. Finally, coat it completely in the seasoned breadcrumbs, gently pressing to ensure an even and firm coating. For a super helpful visual on how to keep your hands clean during this process, check out this video tutorial.
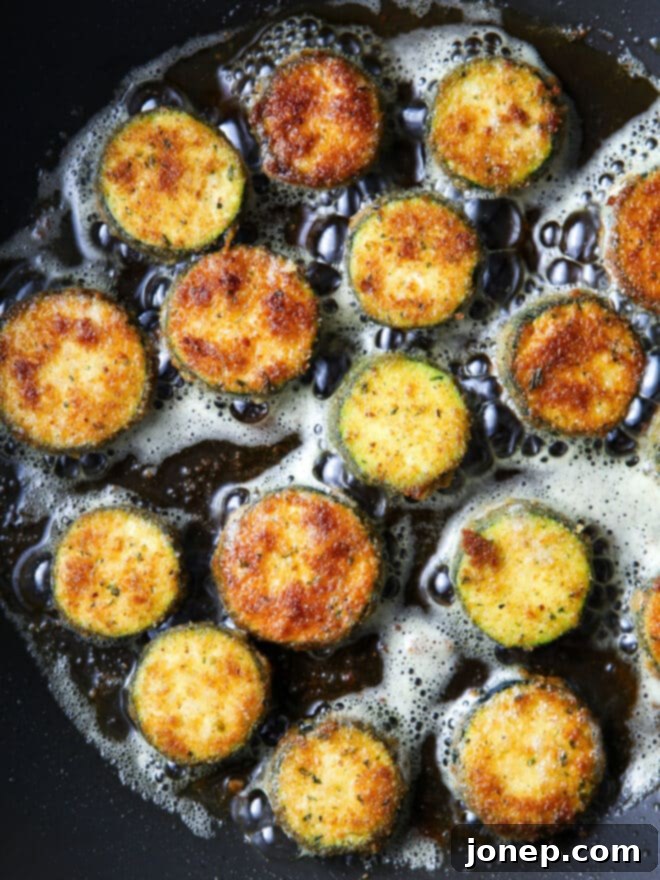
- Fry in Plenty of Hot Oil: Heat a wide skillet over medium-high heat with about ¼-inch deep of your chosen frying oil (like vegetable or canola oil). The oil should be hot enough to sizzle immediately when a breadcrumb is dropped in, but not smoking. Carefully add the breaded zucchini rounds to the hot oil in a single layer, ensuring not to overcrowd the pan. Fry each side for about 2-3 minutes, or until they turn a beautiful golden brown and are wonderfully crispy. Work in batches if necessary to maintain consistent oil temperature and achieve the best crispness.
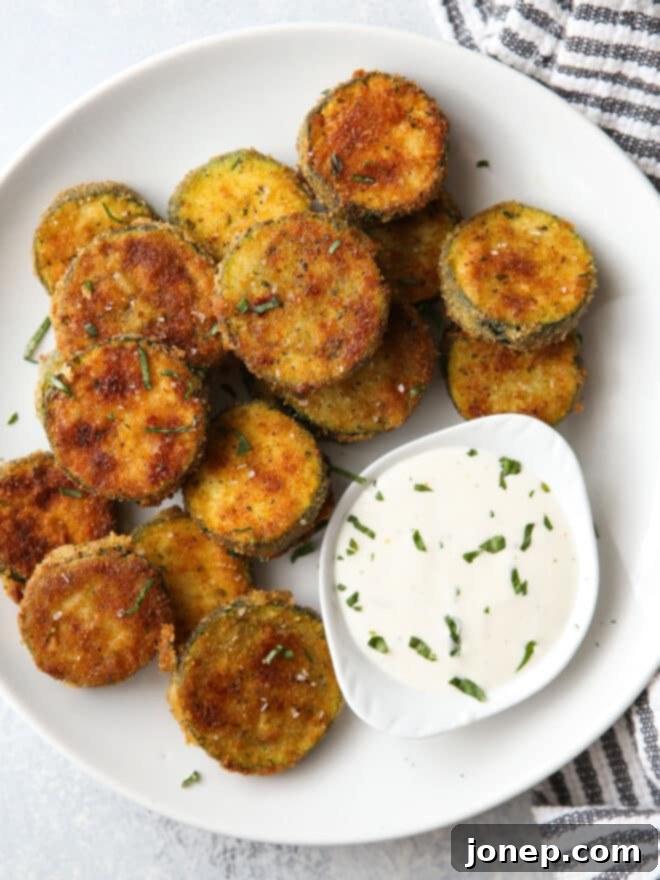
- Serve Immediately for Best Enjoyment: Once fried to golden perfection, transfer the crispy zucchini chips to a plate lined with fresh paper towels. This will briefly drain away any excess oil, preventing them from becoming greasy. Sprinkle with a little more coarse salt, if desired, and serve immediately with your favorite dipping sauce. The fresher they are off the pan, the crisper and more enjoyable they’ll be!
Recipe Tips & FAQs for Perfect Zucchini Chips
To help you master these crispy pan-fried zucchini chips and answer any questions you might have, here are some invaluable tips and frequently asked questions:
- Choosing Your Breadcrumbs: You truly can use whatever breadcrumbs you have on hand! I’ve had fantastic results with both traditional Italian breadcrumbs and Japanese panko breadcrumbs. Panko tends to give a slightly lighter, airier, and extra-crispy texture. If you opt for seasoned breadcrumbs, remember to reduce the amount of salt you add to the flour mixture to avoid over-salting. For a gluten-free version, simply use your preferred gluten-free breadcrumbs.
- Selecting the Right Oil for Frying: It’s crucial to use an oil with a high smoke point for frying. Vegetable oil, canola oil, grapeseed oil, and avocado oil are all excellent choices as they can withstand higher temperatures without breaking down or imparting undesirable flavors. Olive oil is generally not ideal for deep or pan-frying due to its lower smoke point, which can lead to burnt flavors and less desirable results.
- Ensuring the Breading Sticks to the Zucchini: The absolute key to breading that adheres perfectly and creates a delightfully crispy crust is to effectively draw out and remove the zucchini’s natural moisture. Do not skip the salting and pressing step! This small amount of extra time makes a monumental difference in the final texture and ensures your breading stays put.
- Can This Recipe Work in an Air Fryer? Yes, you can prepare these zucchini chips in an air fryer, though the results won’t be identical to pan-frying. Air-fried zucchini chips will be a bit drier and might not achieve quite the same rich, satisfying crispiness that pan-frying offers, which relies on direct contact with hot oil. To air fry: Once zucchini slices are fully coated in breadcrumbs, lightly spray both sides with nonstick cooking spray or brush with a thin layer of oil. Air fry at 370°F (185°C) for 10-13 minutes, flipping halfway through, until they are golden brown and crispy.
- Baking as an Alternative: If you prefer to avoid frying altogether, you can also bake these. After breading, arrange them in a single layer on a greased baking sheet. Bake at 400°F (200°C) for 15-20 minutes, flipping halfway, until golden and tender-crisp. Again, the texture will be slightly different from pan-fried, but still delicious!
- Storage and Reheating Leftovers: Leftover zucchini chips are best stored in an airtight container in the refrigerator for up to 2-3 days. For best results when reheating, avoid the microwave as it will make them soggy. Instead, reheat in a preheated oven at 375°F (190°C) for 5-10 minutes, or in an air fryer at 350°F (175°C) for 3-5 minutes, until heated through and re-crisped.
- Flavor Variations: Don’t be afraid to experiment with different flavor profiles! Add grated Parmesan cheese to your breadcrumbs for a cheesy twist, a pinch of red pepper flakes for heat, or a mix of dried herbs like oregano and thyme for an herby Mediterranean flair.
More Delicious Zucchini Recipes to Explore
Still trying to figure out what to do with all that glorious garden zucchini? Here are a few more delicious and creative ideas to help you make the most of your harvest, from savory meals to sweet treats:
- Chocolate Zucchini Bread: A wonderfully moist and decadent way to enjoy zucchini, with rich chocolate swirled throughout. You won’t even taste the vegetables!
- Turkey Zucchini Meatballs: A healthier twist on classic meatballs, where grated zucchini adds moisture and nutrients without overpowering the flavor.
- Sausage Stuffed Zucchini Boats: A hearty and flavorful meal where hollowed-out zucchini halves are filled with a savory mixture of sausage, cheese, and herbs.
- Zucchini Chocolate Chip Cookies: A surprisingly delicious and subtly healthy cookie that’s perfect for sneaking in some extra veggies. The zucchini keeps them incredibly moist!
Get the Full Recipe for Pan-Fried Zucchini Chips

Pan Fried Zucchini Chips
Pin Recipe
Leave a Review
Ingredients
- 1 medium zucchini , sliced into ⅛ to ¼ inch rounds
- Coarse salt
- Vegetable oil, avocado oil or grapeseed oil , for frying (about ¼-inch deep in skillet)
- About ½ cup all-purpose flour , as needed (can be gluten-free)
- 1 large egg , whisked
- About 1 cup breadcrumbs (panko, traditional, or seasoned – see Notes)
- Additional salt and pepper , to taste
- Additional seasonings or herbs , like Italian seasoning, garlic powder, onion powder, paprika, etc. (optional)
- Ranch dressing or aioli , for serving (optional)
Instructions
-
Prepare Zucchini & Remove Moisture: Line a sheet pan with several layers of paper towels and arrange the zucchini rounds on top in a single layer. Sprinkle generously with coarse salt (this helps draw out moisture). Cover with more paper towels and place another sheet pan or a cutting board on top, pressing down gently with something somewhat heavy (like a few cans or a book). Let sit for about 15-20 minutes. This crucial step removes excess moisture, which is key to crispy zucchini and ensures the breading sticks better.
-
Heat Oil: In a wide, heavy-bottomed skillet or cast-iron pan, pour enough frying oil (vegetable, canola, grapeseed, or avocado) to be about ¼-inch deep. Set the skillet over medium-high heat. Allow the oil to heat up thoroughly; it should shimmer slightly but not smoke.
-
Set Up Breading Station: Create an assembly line by setting up three separate shallow bowls or plates: one for the all-purpose flour, one for the whisked egg, and one for the breadcrumbs. To the flour, add a generous pinch of salt and pepper, along with any other desired seasonings (e.g., garlic powder, Italian seasoning). If using seasoned breadcrumbs, omit extra salt in the flour.
-
Dredge Zucchini: Dip each zucchini round first into the seasoned flour, ensuring it’s fully coated and shaking off any excess. Next, dip it into the whisked egg, letting any excess drip off. Finally, thoroughly coat it in the breadcrumbs, gently pressing the crumbs onto the zucchini to ensure they adhere well.
-
Fry Zucchini: Carefully add the breaded zucchini slices to the hot skillet, ensuring not to overcrowd the pan. Cook in batches if needed. Fry until golden brown and crispy, about 2-3 minutes per side. The exact time may vary based on your stove and oil temperature.
-
Drain & Serve: Once cooked, transfer the crispy zucchini chips to a paper towel-lined plate to drain away any excess oil. Immediately sprinkle with a little more coarse salt, if desired, to enhance flavor. Serve hot with ranch dressing, aioli, marinara, or your favorite dipping sauce. Enjoy!
Video
Notes
- The amount of breadcrumbs, flour, and egg needed will vary slightly based on the size and quantity of your zucchini. It’s always good to have a little extra on hand. I personally love using seasoned breadcrumbs for an added layer of flavor and convenience, but traditional or panko breadcrumbs work wonderfully too. For panko, you’ll achieve an even lighter and crispier result.
- Here’s a helpful tutorial for keeping your hands clean and preventing them from becoming “gummy” during the dredging process.
- To air fry: For a slightly lighter version, after coating zucchini slices in breadcrumbs, spray both sides generously with nonstick cooking spray or a light mist of oil. Air fry at 370°F (185°C) for 10-13 minutes, flipping them halfway through, until they are beautifully brown and crispy. Keep in mind, the texture will be a bit different from pan-frying.
- Reheating: For best crispness, reheat any leftovers in an oven at 375°F (190°C) for 5-10 minutes or in an air fryer at 350°F (175°C) for 3-5 minutes. Avoid microwaving, as it can make them soggy.
