Flaky & Festive: Homemade Spiced Cranberry Orange Danishes for the Perfect Holiday Morning
Imagine a chilly winter morning, the air filled with the comforting scent of cinnamon and bright orange zest. Now picture a plate of warm, buttery danishes, each one a delightful swirl of tender, flaky pastry, generously filled with a vibrant, tart cranberry sauce. This isn’t just a dream; it’s the reality of these irresistible spiced cranberry orange danishes, destined to become your new favorite wintertime treat. Perfect for a festive holiday brunch or simply an indulgent weekend breakfast, these danishes offer a luxurious experience that tastes truly special.

This recipe was proudly developed in partnership with Red Star Yeast, a brand known for helping home bakers achieve exceptional results.
The Quest for the Ultimate Christmas Morning Breakfast
Each year, the hunt begins for that ideal Christmas morning breakfast. It needs to be elegant, fitting the joyful occasion, yet practical enough to manage amidst the whirlwind of present-opening and family gatherings. That’s where make-ahead options shine! Yeast breads and pastries, like these danishes, are truly a fabulous choice. You can dedicate time the night before to prepare the dough and filling, allowing you to simply pop them in the oven on Christmas morning. By the time everyone has finished unwrapping gifts, the house will be filled with an incredible aroma, and hot, fresh danishes will be ready to enjoy – a truly magical start to the day.
These spiced cranberry orange danishes are my latest, and I daresay, greatest suggestion for your holiday menu. But don’t relegate them just to Christmas! Their warm, inviting flavors make them a delightful indulgence all winter long. Crafted 100% from scratch, every bite is infused with the harmonious blend of tart cranberries, bright orange, and cozy cinnamon, creating a pastry that feels both familiar and exquisitely gourmet.

Why Homemade Danishes are a Game-Changer
I often wonder why I don’t bake danishes more frequently. The perception exists that they are overly complex or time-consuming, but in reality, they require no more effort than many other yeast rolls or sweet buns. The reward, however, is immensely greater. Fresh from your own oven, these danishes are a million times more decadent and flavorful than anything you’ll find in most commercial bakeries or supermarkets. The tender, laminated dough, the richness of real butter, and the vibrant, homemade filling elevate them to a culinary masterpiece.
For this particular recipe, I adapted my beloved summer berry danish braid. I introduced a touch of warming cinnamon and fragrant orange zest directly into the dough, then carefully rolled it into individual portions. Each pastry receives a generous dollop of homemade cranberry sauce at its center – a brilliant way to utilize any leftover cranberry sauce from Thanksgiving, if you happen to have some! The result is a pastry that is not only visually stunning but also incredibly buttery, boasting a perfect balance of sweet and tart notes. Honestly, if I could have one of these for breakfast every weekend from now until spring, I would be one very happy baker.

Beyond the Holidays: A Delight for Any Occasion
Whether you’re meticulously planning an extravagant brunch to impress friends and family, or simply seeking an enjoyable baking project for a leisurely weekend afternoon, this danish recipe is your answer. It offers a rewarding experience in the kitchen and delivers a pastry that will undoubtedly earn rave reviews.
And just in case you’re still on the hunt for other festive morning recipe inspirations, consider these equally delightful options: rich chocolate hazelnut sweet rolls, indulgent baked french toast with streusel topping and cranberry maple syrup, a classic Christmas coffee cake, or a refreshing blueberry pancake bake. Each offers a unique way to celebrate and savor special mornings.

Baking Tip: Mastering Laminated Dough for Flaky Danishes
The secret to wonderfully airy, flaky pastries like danishes and croissants lies in a technique called “laminating dough.” This process involves repeatedly folding and rolling butter into dough, creating countless super-thin layers. When baked, these layers separate, resulting in that signature light and crisp texture we all adore. Don’t be intimidated; with a little patience, you can achieve professional-quality laminated dough right in your home kitchen. Here’s a simplified guide to the lamination process:
- On a generously floured surface, carefully roll your chilled dough out into a large, even rectangle. Aim for consistent thickness.
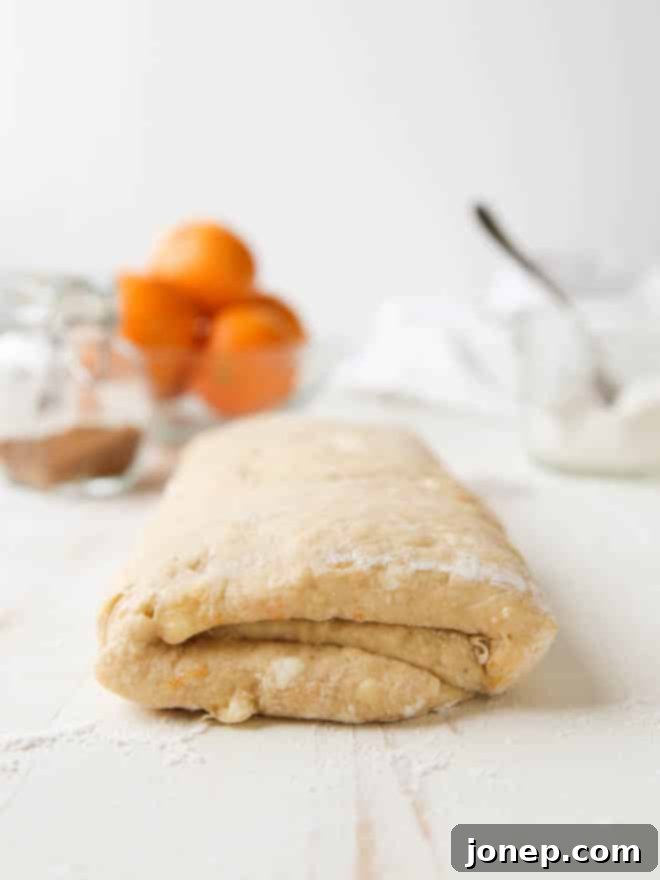
- Perform the first “turn”: Fold the dough lengthwise, much like you would a business letter. Bring the bottom third of the dough up and fold the top third of the dough down over it.
- Flip the folded dough over so that the seam side is now facing down, and the short end of the rectangle is facing towards you. This completes what is known as the “first turn.”
- Crucially, chill the dough in the refrigerator. This step is vital to relax the gluten that develops during rolling and, more importantly, to keep the butter within the layers cold and solid, preventing it from melting into the dough and losing its layering potential.
- Repeat the rolling, folding (turns), and chilling process as specified by your recipe. Many danish recipes will require several turns with chilling periods in between to build up those incredible layers.


Spiced Cranberry Orange Danishes
Pin Recipe
Leave a Review
Ingredients
Danish Dough:
- 1 cup warm whole milk (250 ml)
- 1 envelope Red Star Active Dry Yeast (2 ¼ teaspoons)
- 3 cups all-purpose flour (360 grams)
- 3 tablespoons granulated sugar
- 1 teaspoon salt
- ½ teaspoon ground cinnamon
- 1 tablespoon orange zest
- ½ cup cold unsalted butter , cubed (113 grams)
- 1 large egg
- 1 large egg yolk
- 1 large egg + 1 teaspoon water , for egg wash
Cranberry Filling:
- 2 cups cranberries , fresh or frozen (200 grams)
- ½ cup water
- ⅔ cup granulated sugar (132 grams)
- 1 teaspoon orange zest
- ¼ teaspoon ground cinnamon
Orange Icing:
- ½ cup powdered sugar , sifted (112 grams)
- 1 tablespoon freshly squeezed orange juice
- 1-2 tablespoons milk or cream
Instructions
To prepare dough:
-
Combine the warm milk and yeast in a bowl and stir gently to combine. Allow it to sit for 5-10 minutes until the yeast is foamy, indicating it’s active.
-
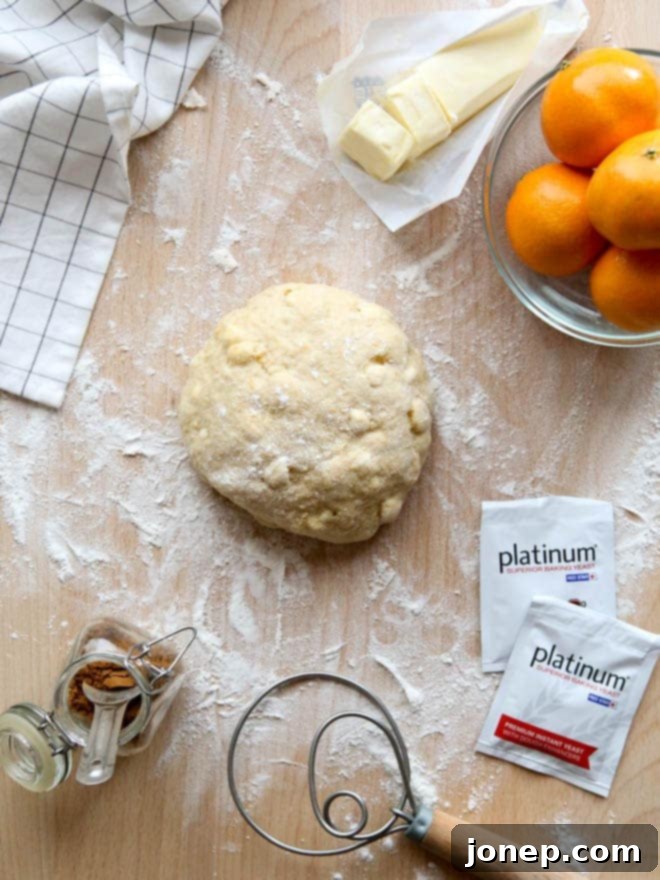
In a separate large bowl, whisk together the flour, granulated sugar, salt, ground cinnamon, and vibrant orange zest. Add the cold, cubed butter and use a pastry blender (or your fingertips) to cut the butter into the dry ingredients until it resembles small peas.
-
Whisk together the activated yeast mixture, the whole egg, and the egg yolk until well combined. Add this wet mixture all at once to the flour mixture. Stir with a sturdy wooden spoon just until a sticky, shaggy dough forms. Be careful not to overmix; kneading is not required at this stage.
-
Cover the bowl tightly with plastic wrap and transfer to the refrigerator. Chill for at least 2 hours, or for best results, overnight (up to 1 day). This chilling period is crucial for the dough’s texture and ease of handling.
-
Once adequately chilled, turn the sticky dough out onto a generously floured surface. Roll it into a large rectangle, approximately 15 inches wide. Ensure your surface and rolling pin are well-floured to prevent sticking.
-
Perform the first fold (turn): Fold the dough into thirds, similar to how you would fold a business letter. Bring the bottom third of the dough up and over the middle, then fold the top third down. Flip the dough over so the seam side is down and a short end is facing you. Add more flour as needed to prevent any sticking, especially during these folds.
-
Repeat the rolling and folding process (steps 4 and 5) for a total of 4 times. This consistent lamination creates the numerous flaky layers characteristic of delicious danishes. After the fourth fold, wrap the dough tightly in plastic wrap.
-
Chill the dough again for at least 30 minutes before shaping. Alternatively, you can store it in the refrigerator for up to 3 days or freeze it for up to 1 month. If freezing, double-wrap the dough securely. Remember to let it thaw completely before using.
To prepare cranberry filling:
-
Combine the cranberries (fresh or frozen), water, granulated sugar, orange zest, and ground cinnamon in a small saucepan. Bring the mixture to a boil over medium heat, stirring frequently to prevent sticking.
-
Reduce the heat to a simmer and continue cooking, stirring occasionally, until the cranberries burst and the mixture thickens into a jam-like consistency. This usually takes about 20-30 minutes. Remove from heat and allow the filling to cool completely to room temperature before using. (See Notes for storage).
To assemble the danishes:
-
On a generously floured surface, carefully cut the chilled danish dough in half. Wrap one half tightly in plastic wrap and store it for another use (refer to Notes for details).
-
Roll the remaining half of the dough into a rectangle approximately 10×12 inches. Using a sharp knife or pastry wheel, cut the dough lengthwise into 8 equal strips.
-
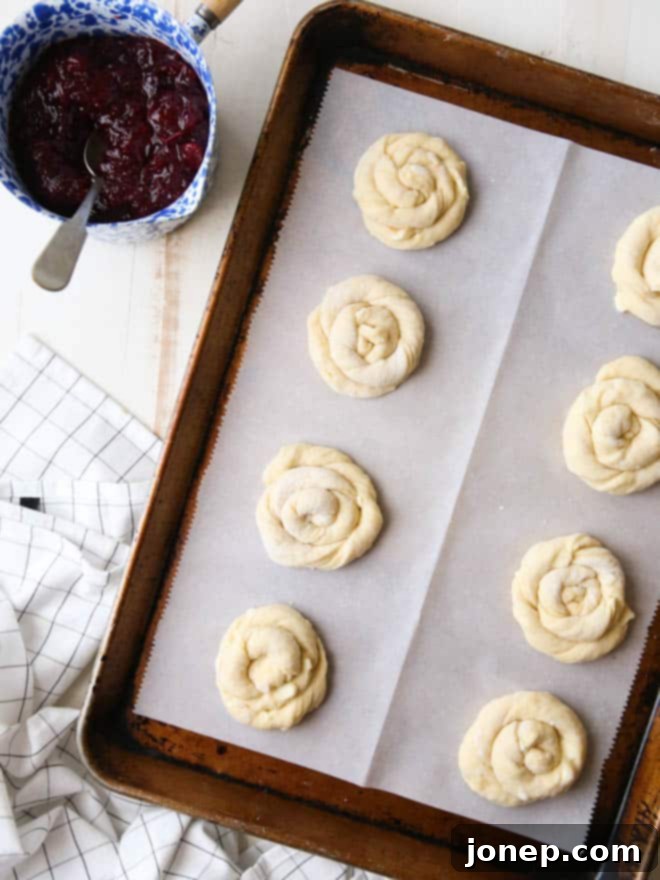
Take one strip of dough. Hold one end in one hand and, using your other hand, gently twist the strip several times along its length. Once twisted, coil the strip around itself on your work surface, forming a snail shell shape. Tuck the loose end underneath to secure it.
-
Carefully transfer the shaped danish to a parchment-lined sheet pan. Repeat this process with the remaining strips of dough, ensuring you leave about 3-4 inches of space between each danish to allow for rising.
-
Cover the danishes loosely with plastic wrap and let them rise in a warm spot for about 30 minutes, or until they appear noticeably puffed. While they are rising, preheat your oven to 350° F (175° C).
-
In a small bowl, whisk together the remaining large egg and 1 teaspoon of water to create an egg wash. Lightly brush this egg wash over the surface of each danish. Then, use your finger or the back of a spoon to gently press down the center of each danish, creating a well. Spoon a heaping tablespoon of the cooled cranberry filling into each well.
-
Bake in the preheated oven for 15-17 minutes, or until the danishes are beautifully golden brown and the pastry is cooked through. Allow them to cool on the baking pan for approximately 10-15 minutes before transferring them to a wire rack.
To make the icing:
-
In a small bowl, whisk together the sifted powdered sugar and freshly squeezed orange juice until smooth. Gradually add 1-2 tablespoons of milk or cream, a little at a time, until you achieve a thick but pourable glaze consistency.
-
Drizzle the orange icing generously over the still-warm (or completely cooled) danishes. Allow the glaze to set for a few minutes before serving immediately. These danishes are truly best enjoyed the day they are baked but can be stored in an airtight container at room temperature for up to 2 days.
Notes
HELPFUL TIPS:
- **Dough Yield:** This recipe conveniently yields enough danish dough for two batches, meaning you can make a total of 16 danishes. If you only wish to bake 8 danishes as instructed here, simply wrap the remaining half of the dough securely in plastic wrap and store it in the refrigerator for up to 3 days. For longer storage, double-wrap the dough and freeze it for up to 1 month. Always ensure frozen dough is fully thawed in the refrigerator before rolling and shaping.
- **Cranberry Filling Abundance:** You will likely have some leftover cranberry filling after making one batch of danishes. This delicious excess can be stored in an airtight container in the refrigerator for up to 1 month and makes a fantastic topping for toast, yogurt, or even ice cream!
- **Make-Ahead Brilliance:** To truly simplify your special mornings, prepare the danish dough the night before. Shape the dough into twisted rounds as per the instructions, then place them on a parchment-lined baking sheet, cover loosely with plastic wrap, and refrigerate overnight. The next morning, remove them from the fridge about 1 hour before baking to allow them to come closer to room temperature and puff up slightly. Proceed with the egg wash, filling, and baking as directed.
TOP TOOLS FOR THIS RECIPE
Disclosure: This recipe was developed in partnership with Red Star Yeast. Thank you for supporting partnerships with brands I love and believe in, which make Completely Delicious possible. All opinions are 100% my own, as always.
Keep in touch with Red Star Yeast on Twitter, Facebook, Pinterestand Google+. Be sure to also visit their websitewhere you can find recipes, excellent bread baking tips, and more!
