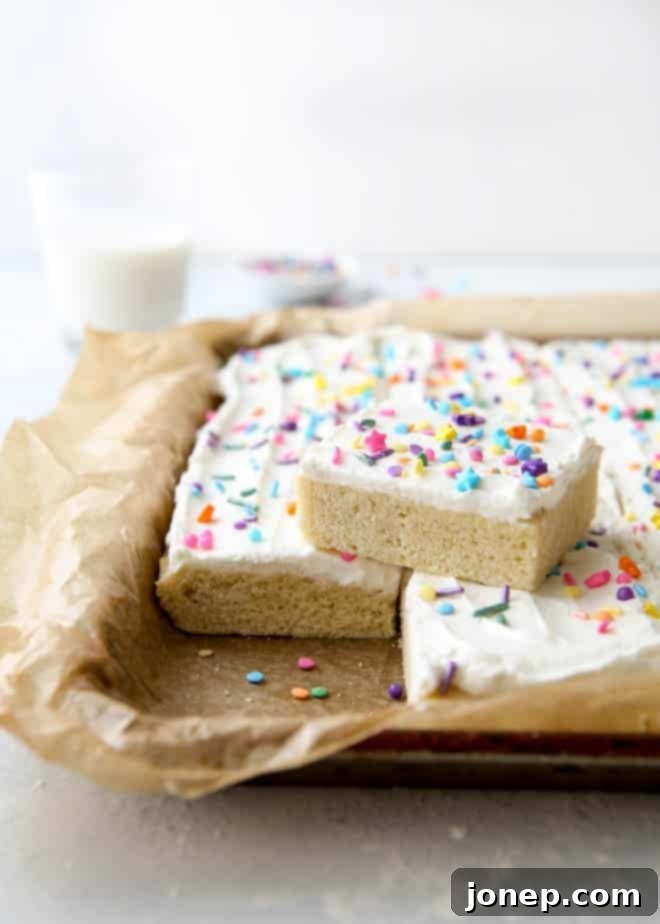
Easy Frosted Sugar Cookie Bars: The Ultimate Crowd-Pleasing Dessert
Soft, chewy sugar cookie bars crowned with a dreamy vanilla buttercream frosting are the absolute perfect treat for any occasion. Whether you’re feeding a large crowd, bringing a delicious dessert to a potluck, or simply craving an easy-to-make sweet, these bars are a game-changer. Forget the tedious chilling, rolling, and cutting associated with traditional sugar cookies – these bars offer all the beloved flavor with a fraction of the effort, making them incredibly convenient and every bit as delicious!
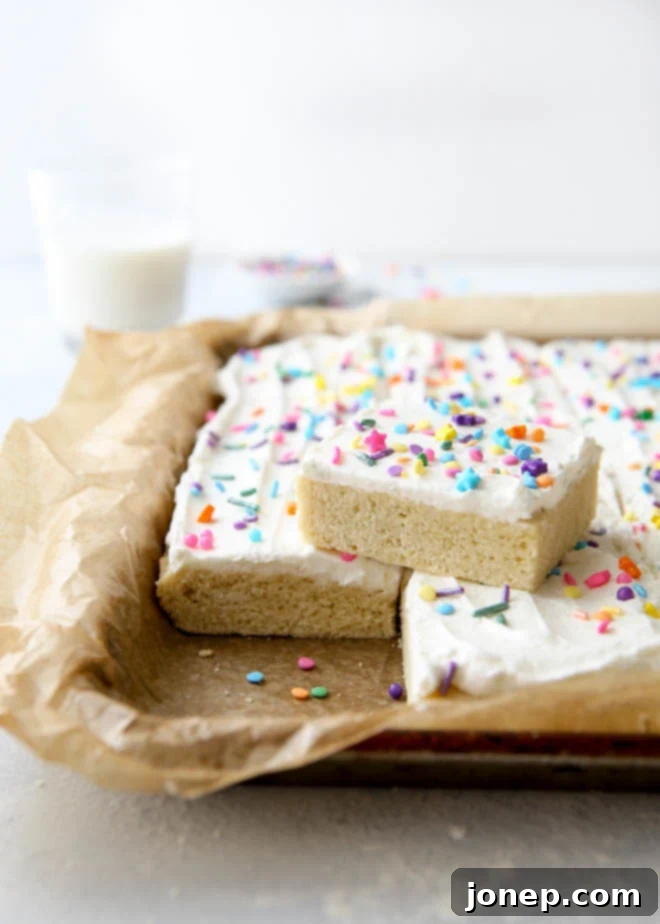
I distinctly remember frosted sugar cookie bars exploding onto the scene when food blogging was still in its nascent stages, around 2009. Suddenly, they were everywhere online, and as a budding baker, I knew I had to try them. The concept was revolutionary: sugar cookies that required no chilling, no intricate rolling, and no fiddly cutting out? Yes, please! It was a revelation for anyone who loved the classic taste but wanted a simpler, faster way to enjoy it.
This recipe is my meticulously perfected version, refined over countless batches baked throughout the years. These bars have become my steadfast, go-to dessert for large parties, holiday gatherings, and community potlucks because of their undeniable appeal. They are incredibly simple to prepare, making them accessible even for novice bakers. They travel exceptionally well, arriving at their destination in perfect condition, and without fail, everyone absolutely LOVES them! Seriously, I’ve seen these vanish from dessert tables faster than anything else – they’re always the undisputed hit of the party.
For more delightful sugar cookie creations, explore these recipes: Easy No-Chill Sugar Cookies, Frosted Sugar Cookie Cut Outs, and the impressive Sugar Cookie Layer Cake.
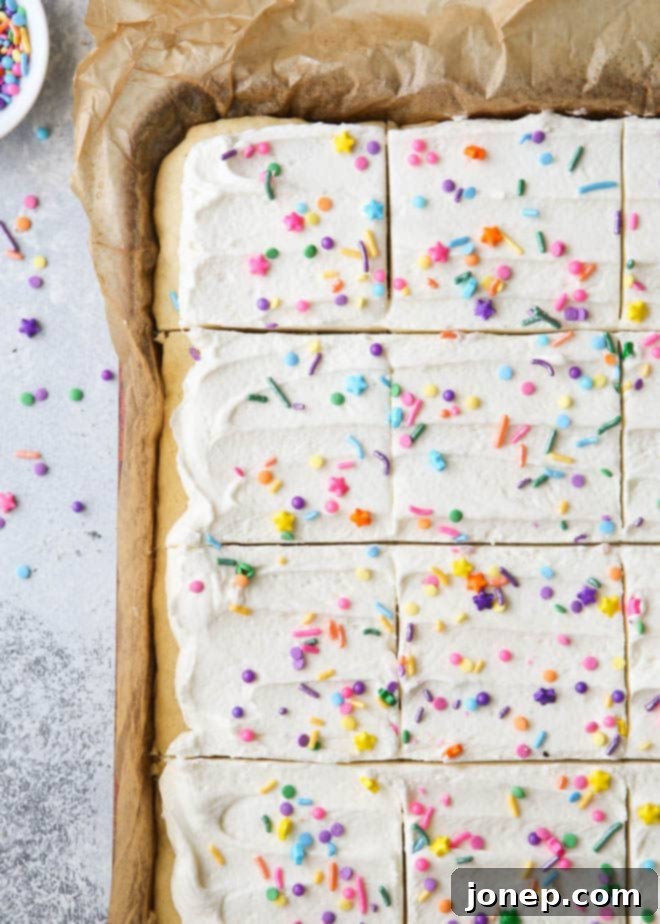
Table of Contents
- Ingredients you’ll need
- How to make easy sugar cookie bars
- Get creative with variations!
- Make-ahead and storage tips
- Get this recipe
- More cookie bars
Ingredients You’ll Need for Perfect Sugar Cookie Bars
Creating these delightful sugar cookie bars starts with a selection of common pantry staples. While the full, detailed ingredient list with precise measurements is provided in the recipe card below, here’s a quick overview and a few crucial tips to ensure your bars turn out perfectly soft, tender, and incredibly flavorful. Quality ingredients truly make a difference, so opt for fresh eggs and good quality butter.
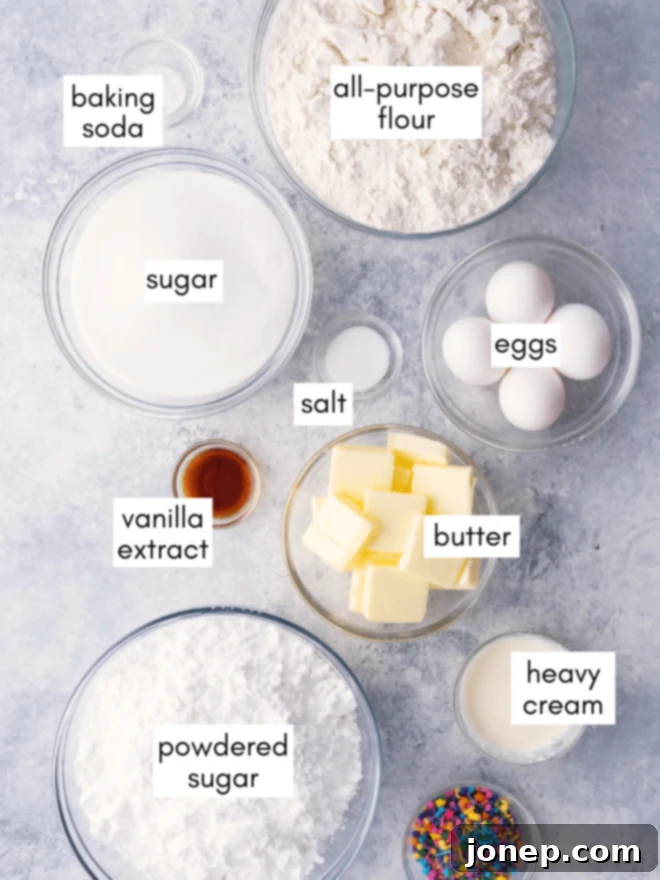
For the cookie bars, you’ll need all-purpose flour, granulated sugar, unsalted butter (at room temperature for optimal creaming), large eggs, pure vanilla extract, baking soda, and a pinch of salt. For the luscious buttercream frosting, gather confectioners’ sugar, more room temperature unsalted butter, vanilla extract, a splash of heavy whipping cream (for that irresistible creamy texture), and a tiny pinch of salt to balance the sweetness. Optional additions like gel food coloring and sprinkles allow for endless customization!
How to Make Easy Sugar Cookie Bars
The beauty of this recipe lies in its simplicity and efficiency. You’ll be amazed at how quickly these come together, especially when compared to cut-out cookies. Follow these straightforward steps to achieve perfectly baked, tender cookie bars with a dreamy frosting:
- Prepare the Cookie Dough: Begin by creaming together the softened butter and granulated sugar until the mixture becomes wonderfully pale and fluffy. This step is crucial as it incorporates air, contributing to the light texture of the bars. Next, incorporate the eggs, adding them one at a time and mixing thoroughly after each addition, ensuring everything is well combined and scraping down the sides of the bowl as needed. Finish by stirring in the vanilla extract for that classic flavor. In a separate bowl, whisk your dry ingredients (flour, salt, baking soda) together, then gradually add this mixture to the wet ingredients in two additions. The dough might initially appear quite dry and crumbly, but don’t fret! Keep mixing; it will eventually come together into a cohesive dough.
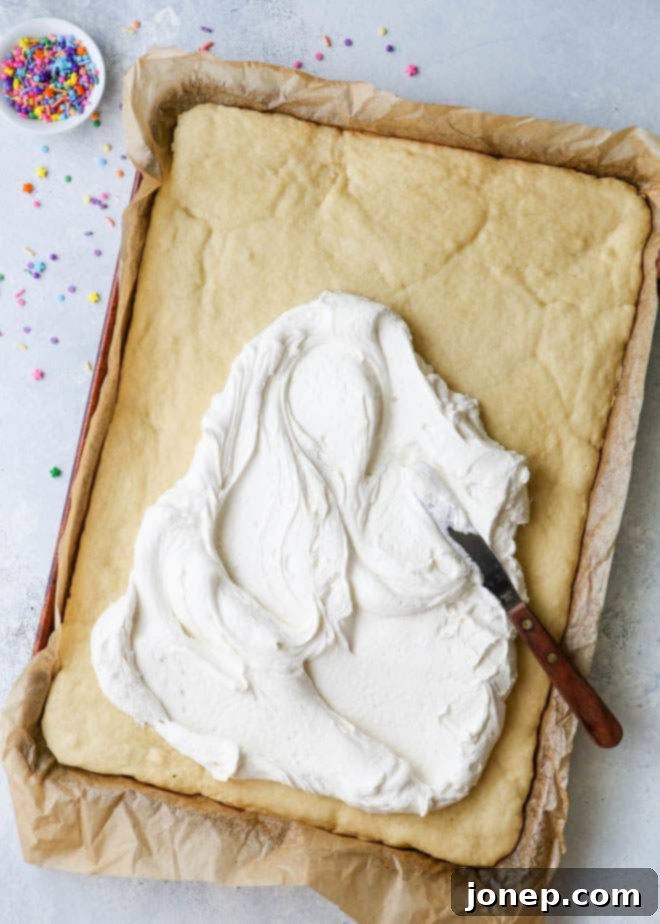
- Press into a Sheet Pan: This is where the “bar” part comes in handy! Instead of rolling out dough, simply scatter handfuls of your sugar cookie dough evenly over a 13×18-inch baking sheet pan. Make sure your pan is lined with parchment paper, ideally with a slight overhang on the sides – this will be your secret weapon for easy removal later. Then, use clean hands, or even better, the butter wrappers (the residual butter helps prevent sticking and makes the process incredibly smooth), to press the dough into an even, uniform layer across the entire pan. This method is much more efficient and less messy than trying to work a single large lump of dough from the center out to the corners.
- Bake to Golden Perfection: Transfer your prepared dough to a preheated 375°F (190°C) oven. Bake the bars until the center appears set and dry, and the edges have turned a beautiful, light golden brown. Be careful not to overbake, as this can lead to dry bars. Once baked, remove the pan from the oven and allow the cookie bars to cool completely on a wire rack. This is a vital step before frosting – attempting to frost warm bars will result in a melted, messy frosting.
- Frost with Creamy Buttercream: While the cookie bars are cooling, whip up the delectable vanilla buttercream frosting. In a large mixing bowl, combine the powdered sugar, softened butter, vanilla extract, heavy cream, and a pinch of salt. Start mixing on low speed until the ingredients begin to come together, then increase the speed to high and beat for several minutes until the frosting is incredibly light, fluffy, and smooth. If you’re feeling festive, now’s the time to add a few drops of food coloring to achieve your desired shade. Once the bars are completely cool, evenly spread the fluffy buttercream over the top and, if you wish, shower them with colorful sprinkles for an extra touch of cheer!
- Slice and Enjoy: With the frosting set, it’s time to slice and serve! I find that 2-inch squares are perfect for individual servings, but feel free to cut them larger (around 4-inch squares) if you prefer a more generous portion. Serve these delightful bars immediately to eager guests, or if you’re planning ahead, store them in an airtight container for later enjoyment. They are just as delicious on day two (or three!).
Baking Tip: The Parchment Paper Overhang Trick for Easy Removal
For breads, let them cool in the pan for just a few minutes before using the parchment sling to transfer them to a wire rack to cool completely. For delicate desserts like these sugar cookie bars, ensure they are completely cooled and firm before attempting to lift them out. This prevents them from buckling or breaking. Once on a cutting board, you can slice them into perfect squares or rectangles with ease. Say goodbye to messy, uneven slices and hello to beautifully presented treats every single time!
Get Creative with Variations! Endless Possibilities for Your Sugar Cookie Bars
This classic sugar cookie bar recipe is far more than just a standalone treat; it’s a fantastic foundation, a versatile jumping-off point for endless customization! By making a few simple tweaks, you can easily transform these delicious bars into the perfect EASY party treat for all kinds of celebrations, holidays, or simply to suit your personal cravings. Let your imagination run wild!
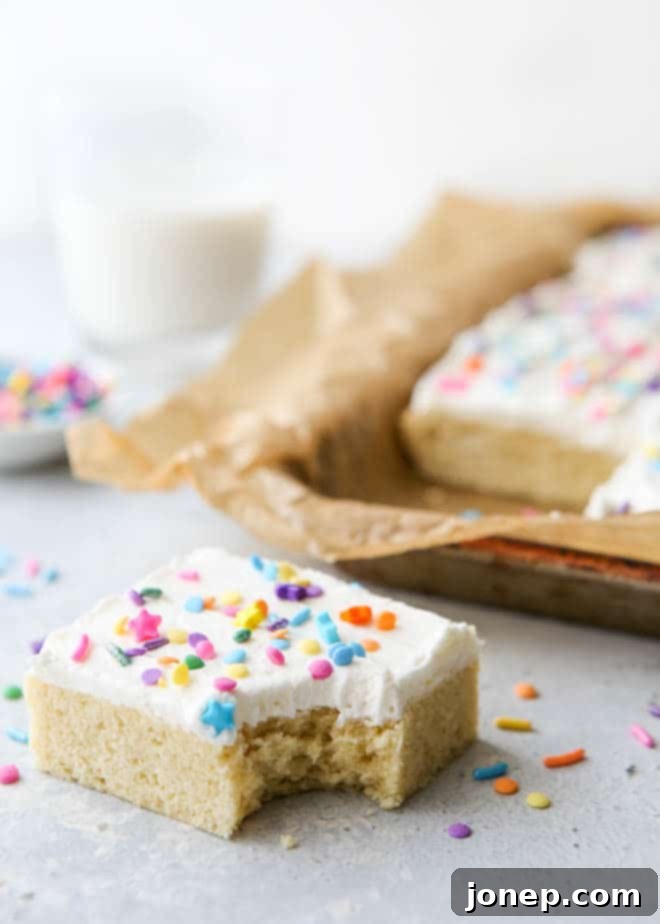
- Add Vibrant Food Coloring to the Frosting: Want to match a party theme, celebrate a holiday, or simply add a pop of fun color? Incorporate food coloring into your buttercream frosting! I highly recommend using gel food coloring over liquid drops, as gels provide much more vibrant, concentrated colors without altering the frosting’s consistency. A little goes a long way to achieve stunning hues like pastel pink for baby showers, bright green for St. Patrick’s Day, or a mix of primary colors for birthdays.
- Personalize with Sprinkles for Any Occasion: Sprinkles are your best friend for effortless customization. Choose sprinkles specific for different holidays (red and green for Christmas, pastels for Easter), birthdays (rainbow!), baby showers (blue or pink), or any other special celebration and occasion. The right sprinkles can instantly elevate the festive feel of your sugar cookie bars.
- Infuse Different Flavors and Mix-ins: This dough is incredibly forgiving and adaptable. You can easily turn these into lemon sugar cookie bars by simply adding the zest of one or two lemons to the dough. Craving chocolate? Stir in a cup of mini chocolate chips for delicious chocolate chip cookie bars. Or embrace pure funfetti joy by folding in rainbow sprinkles into the dough itself, not just on top. No other major changes to the base recipe are necessary for these simple additions, making it super easy to experiment!
- Experiment with Different Frostings: While classic vanilla buttercream is heavenly, don’t hesitate to swap it out for another favorite. My rich and decadent easy fudge buttercream would make these an irresistible chocolate lover’s dream, creating a delicious contrast. Or, for a tangy, creamy twist, my cream cheese buttercream adds a delightful depth of flavor that perfectly complements the sweet cookie base.
Make-Ahead and Storage Tips for Ultimate Convenience
Another compelling reason why these sugar cookie bars are a perennial favorite in my kitchen is their excellent keeping qualities. They’re incredibly resilient and hold up beautifully, meaning you can easily make them ahead of time for parties, bake sales, or simply to have a sweet treat on hand for a few days without any compromise on flavor or texture.
Store at room temperature for several days: Both frosted and unfrosted sugar cookie bars will maintain their deliciousness at room temperature. The key to preserving their freshness and preventing them from drying out is proper sealing. Ensure they are stored in a container that is completely airtight or tightly wrapped in plastic wrap. This will keep them wonderfully soft and moist for up to 5 days, making them perfect for grabbing a quick snack or packing in lunchboxes.
How to freeze for longer storage: If you’re looking to extend their shelf life even further, these bars freeze exceptionally well. For best results when freezing, I recommend doing so without the frosting. The unfrosted bars will keep beautifully in the freezer for at least 1 month. To prevent freezer burn and maintain their quality, double-wrap the entire slab of unfrosted cookie bars tightly in plastic wrap, then place them in an airtight freezer-safe bag or container. When you’re ready to enjoy them, simply thaw the bars at room temperature in their plastic wrap, then whip up a fresh batch of buttercream frosting and decorate as desired. You can also freeze frosted bars, but the texture of the frosting might change slightly upon thawing.
Pro Tip for Stacking and Transporting: If you’re planning to stack your sugar cookie bars, either on an elegant serving platter for presentation or in a container for storage or easy transportation, here’s a crucial step. After you’ve frosted them, allow the bars to sit uncovered at room temperature for at least 30 minutes, or even up to an hour. This waiting period gives the buttercream frosting time to form a slight “crust” on its surface. This firming-up process makes it significantly easier to stack the bars without any dreaded squishing, smudging, or sticking, ensuring your beautiful treats arrive and are served in perfect condition.
Get This Recipe: Your New Favorite Sugar Cookie Bars Await!
I’m thrilled for you to try this incredibly popular and satisfying recipe. It’s truly a testament to how simple ingredients and straightforward steps can yield outstanding results. This recipe was originally published in March 2010 and has since become a cherished staple. We’ve recently updated this article with brand new pictures, even better recipe instructions, and additional tips for success, ensuring you have all the guidance needed to bake the most perfect sugar cookie bars every single time. Get ready to bake a batch that will surely become a favorite in your household!
Sugar Cookie Bars
Pin Recipe
Leave a Review
Ingredients
For the bars:
- 1 cup (226 grams) butter , at room temperature
- 2 cups (400 grams) granulated sugar
- 4 large eggs
- 2 teaspoons vanilla extract
- 5 cups (625 grams) all-purpose flour
- 1 teaspoon salt
- ½ teaspoon baking soda
For the buttercream frosting:
- 1 cup (226) butter , at room temperature
- 4 cups (455) confectioners sugar
- 1 tablespoon vanilla extract
- ¼ cup (56 grams) heavy whipping cream
- Pinch of salt
- Gel food coloring and sprinkles , optional
Equipment
Instructions
To make the bars:
-
Preheat your oven to 375°F (190°C). Prepare a 13 x 18-inch baking sheet pan (often called a half sheet pan) by lightly greasing it, then lining it with parchment paper, leaving a slight overhang on the longer sides for easy removal.
-
Using an electric mixer (either a stand mixer with a paddle attachment or a hand-held mixer), beat together the softened butter and granulated sugar until the mixture is light, fluffy, and noticeably pale in color, which usually takes about 3 minutes on medium-high speed. Add the eggs one at a time, mixing well and scraping down the sides of the bowl after each addition to ensure everything is fully incorporated. Finally, stir in the vanilla extract.
-
In a separate medium-sized bowl, combine the all-purpose flour, salt, and baking soda; whisk them together until well mixed, then set aside. Gradually add this dry ingredient mixture to the wet ingredients in two additions, mixing on low speed until just combined after each addition. The dough will initially appear very dry and crumbly, but be patient and keep mixing until it fully comes together into a cohesive dough.
-
Evenly scatter chunks of the prepared dough over the parchment-lined sheet pan. Then, use your hands (I find using the butter wrappers to press it down works wonderfully, as the residual butter helps prevent sticking) to press the dough into an even, uniform layer across the entire pan, reaching all the way to the edges. This method is considerably easier than trying to spread one large lump of dough from the center.
-
Bake for 14-17 minutes, or until the edges are lightly golden brown and the center of the cookie bars appears set and dry. Avoid overbaking to keep the bars soft and tender. Once baked, remove from the oven and allow them to cool completely on a wire rack before proceeding to the frosting step.
To make the frosting:
-
In the bowl of a stand mixer fitted with a paddle attachment, or in a large bowl using a hand-held mixer, combine all of the buttercream ingredients: softened butter, confectioners’ sugar, vanilla extract, heavy whipping cream, and a pinch of salt. Mix on a low speed initially until the ingredients begin to come together and form a cohesive mixture. Increase the speed to high and beat for 4-5 minutes until the frosting is incredibly light, airy, and fluffy, pausing once or twice to scrape down the sides of the bowl to ensure everything is evenly mixed.
-
If you are using food coloring, add it now (gel colors work best for vibrant results) and mix until the color is completely uniform and streak-free.
-
Once the cookie bars are entirely cooled, spread the fluffy buttercream frosting evenly over the top using an offset spatula or knife. If desired, immediately decorate with your favorite sprinkles. Cut the frosted bars into squares or rectangles of your preferred size and serve promptly.
Video
Notes
- You can successfully use either salted or unsalted butter for this recipe. Personally, I find that using salted butter, particularly in the frosting, adds a wonderful little extra punch of flavor that beautifully balances the sweetness.
- Accurate measurement of flour is critical for the success of these bars. Too much flour will result in dense, dry, and cakey bars rather than the desired soft and tender texture. For best results, use a kitchen scale or the spoon-and-level method to measure your flour. Learn how to measure flour correctly for perfect baking.
- This recipe is designed to make a big batch of sugar cookie bars – perfect for parties and gatherings! If you’re baking for a smaller group or prefer a less massive dessert, you can easily cut the recipe in half. If halving, use the ½ scale option directly above the ingredients list and bake the reduced recipe in a standard 9×13-inch baking pan. Adjust baking time slightly if needed, keeping an eye on the edges for a light golden hue.
- Storage and make-ahead tips: Store these delicious sugar cookie bars at room temperature in an airtight container for up to 5 days. For longer preservation, you can freeze the unfrosted bars (this is preferred for best texture preservation) for up to 1 month. To do so, double wrap the cooled, unfrosted slab tightly in plastic wrap before freezing. Thaw them at room temperature while still in their plastic wrap, then remove, frost, and serve fresh.
More Irresistible Cookie Bar Recipes to Love
If you’ve fallen in love with the ease and deliciousness of these Frosted Sugar Cookie Bars, you’re in for a treat! Cookie bars are the ultimate solution for quick, satisfying desserts that are perfect for sharing. Their no-fuss nature means less time spent on individual cookies and more time enjoying. Here are some of my other favorite cookie bar recipes that are sure to become staples in your baking repertoire. Each offers a unique flavor profile but shares the same crowd-pleasing appeal and simple preparation method.
