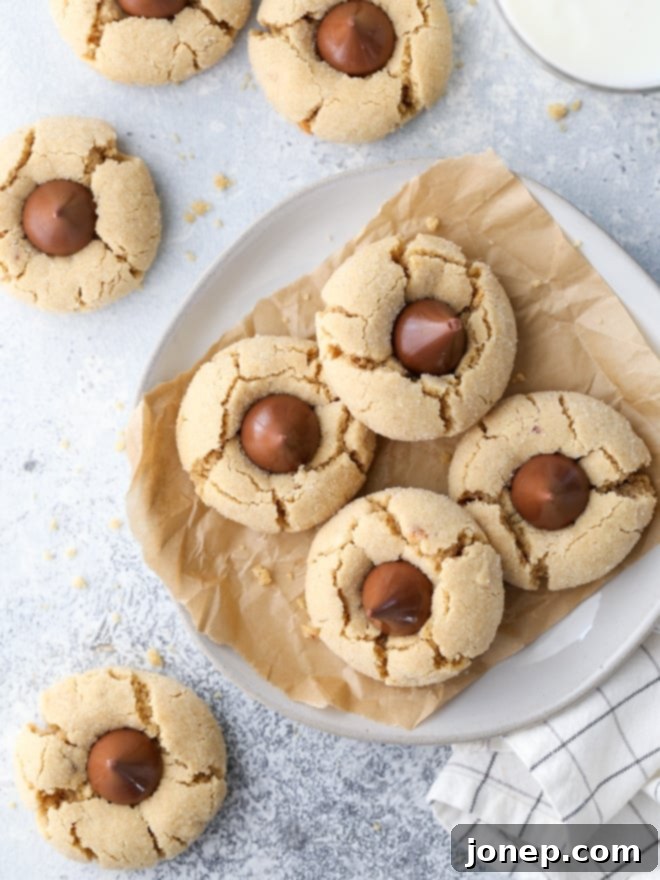
Classic Peanut Butter Blossom Cookies: The Ultimate Easy Recipe for a Nostalgic Treat
There are some desserts that just transport you back to childhood, and for many, the humble Peanut Butter Blossom cookie is at the top of that list. These soft, chewy peanut butter cookies, crowned with a perfectly melted Hershey’s chocolate kiss, are more than just a sweet treat; they’re a comforting hug in cookie form. This beloved classic holds a special place in countless hearts, evoking memories of holiday cookie exchanges, family gatherings, and simple, delicious moments.
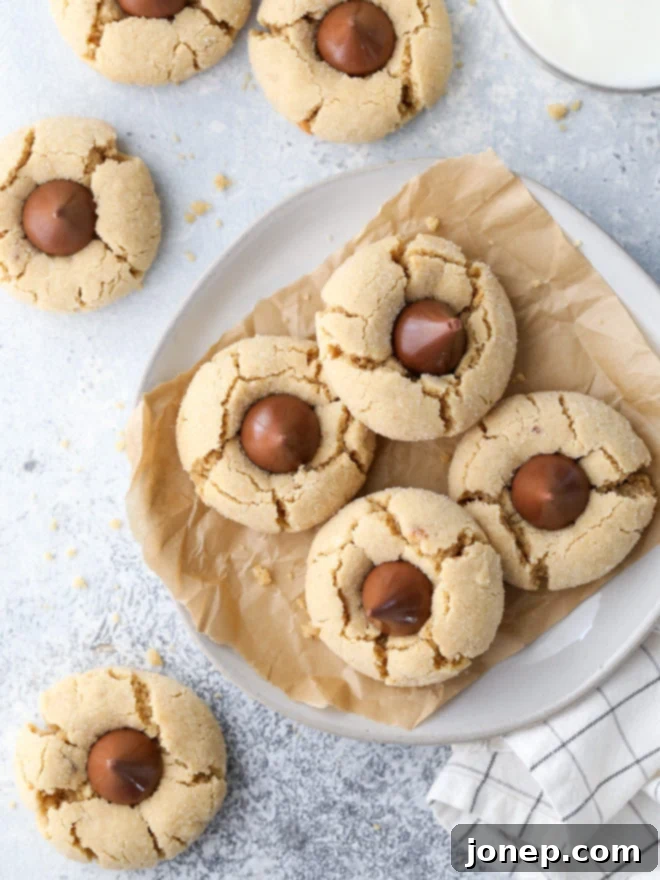
As a child, these delightful peanut butter blossom cookies were an absolute highlight of any occasion. They seemed to magically appear at every potluck, school bake sale, and, most importantly, on every festive holiday cookie platter. And I never had a single complaint! The simple, yet profound, combination of rich peanut butter and smooth, sweet chocolate was, and still is, utterly irresistible. It’s a flavor pairing that stands the test of time, a testament to its perfect balance and widespread appeal.
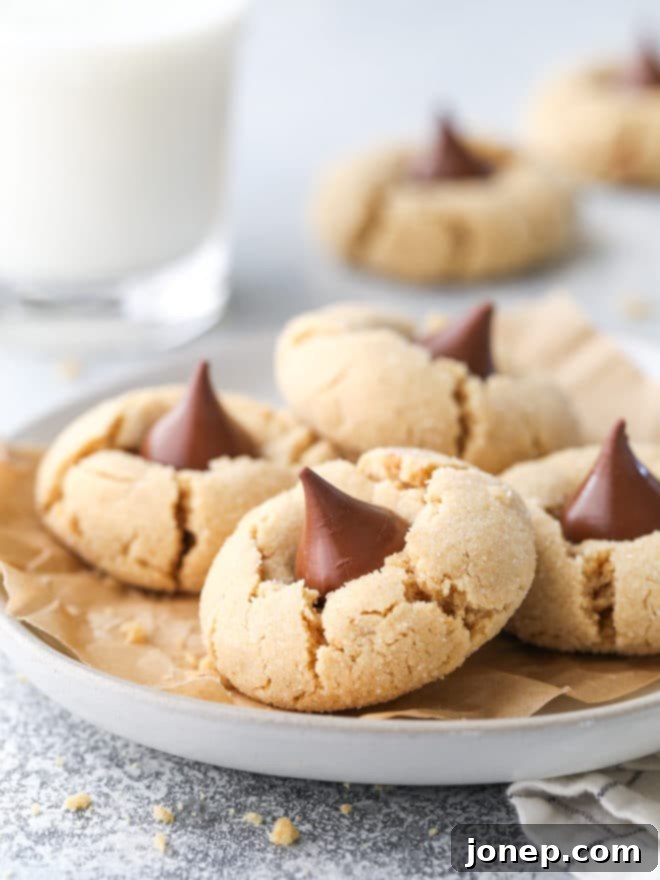
This particular recipe for peanut butter blossoms is a faithful adaptation of the iconic Hershey’s classic – a recipe that has guided generations of bakers to cookie perfection. While it might seem like a universally known method, I wholeheartedly believe it’s always worth sharing again. Consider this your gentle, yet firm, reminder to treat yourself and your loved ones to a fresh batch. Whether these cookies are an old favorite you haven’t baked in years or a delightful discovery you’re about to experience for the very first time, prepare to fall in love. Each bite offers a blissful harmony: a soft, tender peanut butter interior, a delightful, subtle crunch from its sugary coating, and that unmistakable, luscious chocolate kiss nestled right in the center, melting slightly into the warm cookie.
The Enduring Appeal of a Classic Recipe
There’s an undeniable charm in simplicity, and these peanut butter blossoms embody it perfectly. There’s nothing overly complicated or “fancy” about this recipe; it’s a straightforward, yet undeniably delicious, peanut butter cookie recipe with the quintessential Hershey’s Kiss candy nestled in its heart. Its enduring popularity stems from this very fact: it’s easy to make, uses readily available ingredients, and consistently delivers a deeply satisfying result. This is the kind of recipe that becomes a staple in any home baker’s repertoire, cherished for its reliability and its ability to bring smiles.
Essential Ingredients for Perfect Blossoms
To create these wonderful cookies, you’ll need a few basic pantry staples, all contributing to their incredible flavor and texture. High-quality ingredients are always recommended for the best results, though this recipe is quite forgiving. You’ll start with essential cookie components: unsalted butter, for richness and tender texture; a combination of granulated sugar and brown sugar, providing both sweetness and a subtle molasses note that keeps the cookies moist; a large egg, for binding and structure; and a splash of vanilla extract, enhancing all the other flavors. Of course, the star ingredient is the peanut butter itself – creamy or crunchy, depending on your preference. And, the crowning glory: plenty of Hershey’s Kisses, unwrapped and ready to be pressed into each warm cookie. A little baking soda and salt will also play their crucial roles in leavening and balancing the sweetness, ensuring your cookies are perfectly puffed and flavorful.
Can I Use Other Candy Instead of a Hershey’s Kiss? Get Creative with Your Blossoms!
Absolutely, and this is where you can truly make these classic cookies your own! While the Hershey’s Kiss is iconic, this recipe is incredibly versatile and works wonderfully with just about any small, bite-sized chocolate candy. Feel free to experiment and customize your peanut butter blossoms to suit your taste or the occasion. Some fantastic alternatives include:
- Rolos: For a delightful caramel surprise in the center.
- Reese’s Peanut Butter Cups (miniature): Double down on the peanut butter chocolate goodness.
- Dove Chocolates: Known for their smooth, rich texture, they melt beautifully.
- Hershey’s Kisses in Other Flavors: Think caramel, almond, dark chocolate, or even limited-edition holiday flavors for a festive twist.
- White Chocolate Kisses or Truffles: For a different aesthetic and flavor profile.
- Small Caramel Candies: If you love the peanut butter and caramel combination.
The key is to ensure the candy is small enough to fit neatly into the center of the cookie without overpowering it. When using alternative candies, simply follow the same method: press them gently into the freshly baked, warm cookies right after they come out of the oven. The residual heat will soften the chocolate, allowing it to meld perfectly with the cookie, creating a delicious and customized treat every time!
Mastering the Art of Peanut Butter Blossom Cookies: A Detailed Guide
Crafting these classic cookies is a joy, and with a few key steps and tips, you’ll achieve perfect results every time. Here’s a more in-depth look at how to make these irresistible peanut butter blossoms:
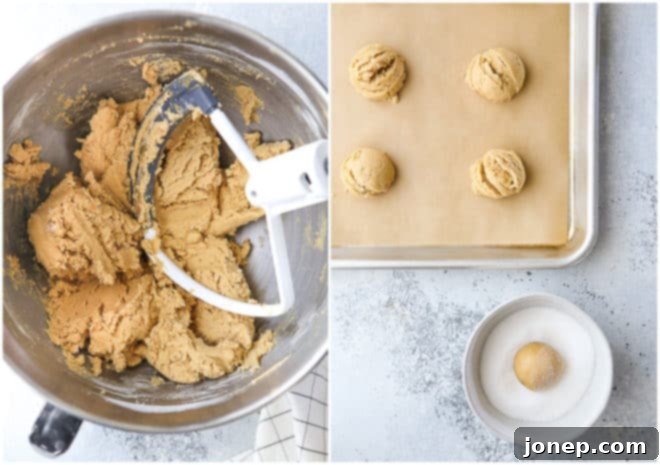
- **Prepare Your Dough with Precision:** The foundation of a great cookie is its dough. Start by ensuring your butter is at room temperature; this allows it to cream properly with the sugars, creating a light and airy base. Combine the butter, peanut butter, brown sugar, and granulated sugar in the bowl of a stand mixer. Beat them together on medium-high speed for about 4-5 minutes until the mixture is light, fluffy, and creamy, making sure to scrape down the sides of the bowl periodically to ensure even mixing. This creaming process incorporates air, which contributes to the cookies’ tender texture. Next, beat in the egg and vanilla extract until they are just combined.
- **Combine Dry Ingredients Gently:** In a separate bowl, whisk together your all-purpose flour, baking soda, and salt. Gradually add these dry ingredients to your wet mixture, mixing on low speed until just combined. Be careful not to overmix the dough, as this can lead to tough cookies. The dough should be soft but pliable.
- **Portion, Roll, and Coat:** Using a tablespoon or a small cookie scoop, portion the dough into even rounds. Roll each dough ball between your palms until it’s smooth and round. This is where the signature sugar coating comes in! Roll each ball generously in granulated sugar until it is completely coated. This sugar coating adds a wonderful sparkle, a delightful crunch, and helps prevent the cookies from spreading too much.
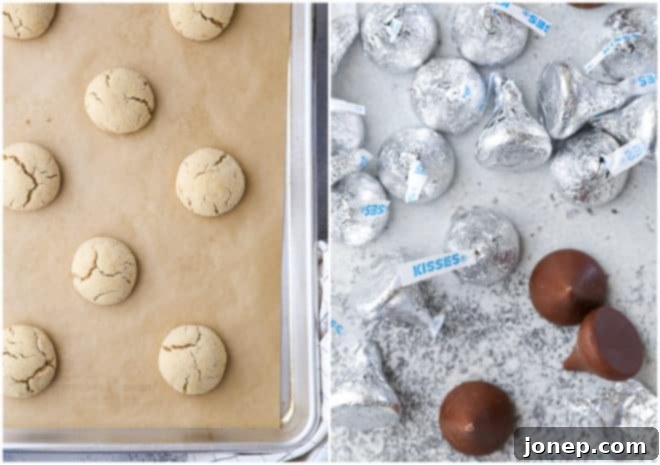
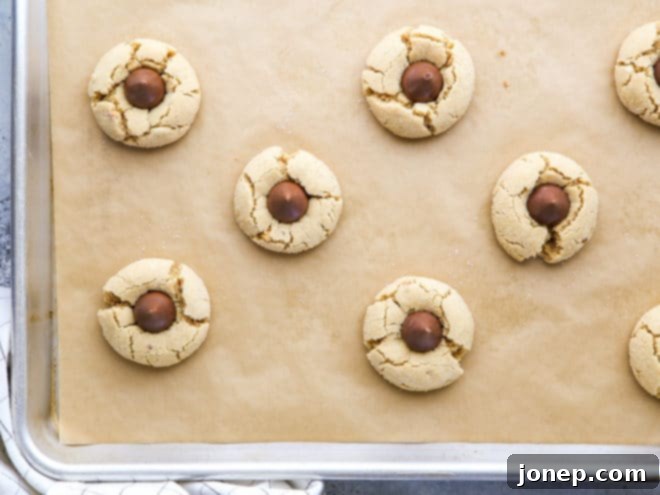
- **Bake to Perfection:** Place the sugar-coated dough balls on a prepared sheet pan, lined with parchment paper, about 2 inches apart to allow for slight spreading. Preheat your oven to 375°F (190°C). Bake the cookies for approximately 10 minutes, or until the edges are lightly golden, and the tops are puffed and have started to crack. The centers might still look a little soft, but they will set as they cool. Do not overbake, as this can result in dry cookies.
- **The Iconic Kiss:** This is the magic moment! As soon as the cookies come out of the oven, while they are still warm and pliable, immediately place a Hershey’s chocolate kiss (or your chosen candy alternative) in the center of each cookie. Press down gently but firmly. The residual heat from the cookie will soften the chocolate just enough to adhere and create that beautiful, classic blossom shape.
- **Cool and Serve:** Allow the cookies to sit on the hot baking sheet for a few minutes before carefully transferring them to a wire rack to cool completely. This helps them firm up and prevents them from breaking. Once cooled, the chocolate will have set, and your peanut butter blossoms will be ready to enjoy!
Tips for Success and Troubleshooting Common Issues
Even though this is an easy recipe, a few tips can elevate your peanut butter blossoms from good to absolutely fantastic:
- **Room Temperature Ingredients are Key:** Make sure your butter and egg are at room temperature. This allows them to emulsify better, leading to a smoother dough and a more consistent cookie texture.
- **Don’t Overmix the Flour:** Once you add the flour, mix only until just combined. Overmixing develops the gluten in the flour, resulting in tough, chewy cookies instead of soft ones.
- **Choose Your Peanut Butter Wisely:** For classic results, use a creamy, processed peanut butter (like Jif or Skippy). Natural peanut butter, with its varying oil content, can sometimes lead to drier or more crumbly cookies, though it can still be used with slight adjustments to liquid if needed.
- **Prevent Spreading:** If your cookies spread too much, ensure your butter isn’t too soft or melted. Also, gently rolling the dough balls in granulated sugar before baking helps create a barrier that minimizes spreading. Chilling the dough for 20-30 minutes before rolling can also help.
- **Timing the Kiss:** Pressing the Hershey’s Kiss immediately after the cookies come out of the oven is crucial. If you wait too long, the cookies will start to firm up, and the chocolate won’t adhere or melt as smoothly.
- **Proper Cooling:** Allow the cookies to cool completely on a wire rack. This not only allows the chocolate to set but also ensures the cookies achieve their perfect texture.
Storage and Make-Ahead Options
Peanut butter blossoms are wonderful for making ahead, especially during busy holiday seasons. Store baked cookies in an airtight container at room temperature for up to 3 days. They tend to stay fresh and soft for quite a while! For longer storage, you can freeze the baked cookies for up to 2-3 months. Just be sure to place them in a freezer-safe container, separating layers with parchment paper to prevent sticking.
You can also prepare the cookie dough ahead of time. Wrap the dough tightly in plastic wrap and refrigerate for up to 3 days, or freeze for up to 3 months. If freezing, let it thaw slightly in the refrigerator before rolling and baking.
More Peanut Butter and Chocolate Cookies to Try
If you’re a fan of the classic combination of peanut butter and chocolate, there are plenty of other delightful recipes waiting to be discovered. Expand your baking repertoire with these irresistible options:
- Chocolate Peanut Butter Cup Cookies
- Flourless Peanut Butter Chocolate Chip Cookies
- One Giant Peanut Butter Chocolate Chip Cookies
- Soft and Chewy Peanut Butter Chocolate Chip Cookies
Shop Tools for this Recipe
Having the right tools can make your baking experience even more enjoyable and efficient. Here are some essentials that will help you create perfect peanut butter blossom cookies:
This recipe was originally published January 2012.
Peanut Butter Blossoms
Pin Recipe
Leave a Review
Ingredients
- ½ cup unsalted butter , at room temperature (113 grams)
- ¾ cup peanut butter, crunchy or creamy (185 grams)
- ⅓ cup packed light or dark brown sugar (75 grams)
- ⅓ cup granulated sugar (80 grams)
- 1 large egg
- 1 teaspoon vanilla extract
- 2 cups all-purpose flour (250 grams)
- 1 teaspoon baking soda (2 grams)
- ½ teaspoon salt (2 grams)
- 24 Hershey’s chocolate kisses , unwrapped
- About ⅓ cup granulated sugar , for rolling cookies (75 grams)
Instructions
-
Preheat oven to 375°F. Line a sheet pan with parchment paper.
-
In the bowl of a stand mixer fitted with a paddle attachment, combine the butter, peanut butter, brown sugar, and sugar. Beat together on medium high speed until light and creamy, about 4-5 minutes, scraping down the bowl as necessary. Add the egg and vanilla and mix until combined.
-
Add the flour, baking soda, and salt and mix until just combined. Roll dough by the tablespoon into a ball and roll the ball in sugar until it is coated completely. Place on the prepared sheet pan about 2 inches apart.
-
Bake until cookies are beginning to crack on the surface and the bottoms just begin to brown, about 10 minutes. Immediately after removing cookies from the oven, place a Hershey’s kiss in the center of each cookie, pressing it down gently. Let sit on the pan for a few minutes before transferring to a wire rack to cool completely.
-
Store cookies in an air tight container at room temperature for up to 3 days.
Notes
Frequently Asked Questions About Peanut Butter Blossoms
Here are some common questions and answers to help you bake the best peanut butter blossom cookies:
- Can I use natural peanut butter for this recipe?
- While you technically can, it’s generally recommended to use creamy, processed peanut butter (like Jif or Skippy) for the classic texture and consistency of peanut butter blossoms. Natural peanut butter tends to be oilier and can lead to a drier, more crumbly cookie that may not hold its shape as well or spread differently.
- Can I make the cookie dough ahead of time?
- Yes, absolutely! You can prepare the cookie dough, wrap it tightly in plastic wrap, and refrigerate it for up to 3 days. If you plan to store it longer, you can freeze the dough for up to 3 months. Just remember to let the refrigerated dough come to room temperature or thaw frozen dough in the refrigerator before rolling and baking.
- Why are my peanut butter blossoms spreading too much?
- Several factors can cause cookies to spread excessively. Ensure your butter is at room temperature, but not melted. If your kitchen is very warm, the dough might be too soft; chilling the dough for 20-30 minutes before rolling can help. Also, accurately measure your ingredients, especially flour, as too little flour can lead to spreading. Lastly, ensure your baking soda is fresh and active.
- How long do these cookies stay fresh?
- When stored in an airtight container at room temperature, peanut butter blossom cookies will stay fresh and delicious for up to 3-5 days. The chocolate kiss helps to keep them moist.
- Can I use a different type of sugar for rolling the cookies?
- Granulated sugar is traditionally used for rolling peanut butter blossoms, giving them their characteristic sparkle and slight crunch. While you could experiment with other coarse sugars or even a blend with cinnamon sugar for a different flavor, granulated sugar provides the most authentic texture and appearance.
Conclusion: Bake a Batch of Happiness
Peanut Butter Blossom cookies are more than just a recipe; they are a timeless tradition, a symbol of warmth, and a perfect embodiment of the simple joy that baking can bring. Their irresistible combination of soft peanut butter cookie and melting chocolate kiss makes them a beloved treat for all ages and all seasons. Whether you’re making them for a holiday party, a casual get-together, or simply to satisfy a craving for something sweet and nostalgic, these cookies are guaranteed to be a hit. So, gather your ingredients, preheat your oven, and prepare to bake a batch of pure happiness. You won’t regret bringing this delightful classic into your kitchen!
