Irresistible Chocolate Candy Cane Sandwich Cookies: Your Ultimate Holiday Baking Guide
There’s an undeniable magic that happens when rich, deep chocolate meets the cool, invigorating burst of peppermint, especially during the holiday season. It’s a flavor combination that evokes warmth, nostalgia, and festive cheer. These Chocolate Candy Cane Sandwich Cookies are not just another treat; they are a celebration of this perfect pairing, offering both exquisite taste and delightful visual appeal that will instantly elevate any holiday gathering or cookie exchange.
Imagine biting into a soft, chewy chocolate cookie, perfectly balanced with a luxurious, fluffy peppermint buttercream. Now, imagine that buttercream isn’t just white; it’s artfully swirled with vibrant red, mimicking the iconic stripes of a candy cane. This isn’t just a dessert; it’s a handcrafted edible masterpiece that promises to be a memorable highlight of your holiday baking.

This recipe combines my beloved soft and chewy chocolate cookie base – a tried and true favorite – with a special peppermint variation of my go-to fluffy buttercream frosting. The real showstopper, however, is the dazzling red swirl, achieved with a simple yet ingenious technique using red gel food coloring. The result is an adorable, incredibly delicious, and surprisingly easy-to-make dessert that captures the very essence of holiday indulgence.
Whether you’re planning a festive holiday party, contributing to a lively cookie exchange, or simply looking to impress Santa on Christmas Eve (trust me, he’s a huge fan of these!), these chocolate peppermint sandwich cookies are guaranteed to be a show-stopper. Their festive appearance and irresistible flavor make them a perfect homemade gift or a cherished family tradition to create year after year.
The Magic Behind the Swirl: Achieving the Perfect Candy Cane Frosting
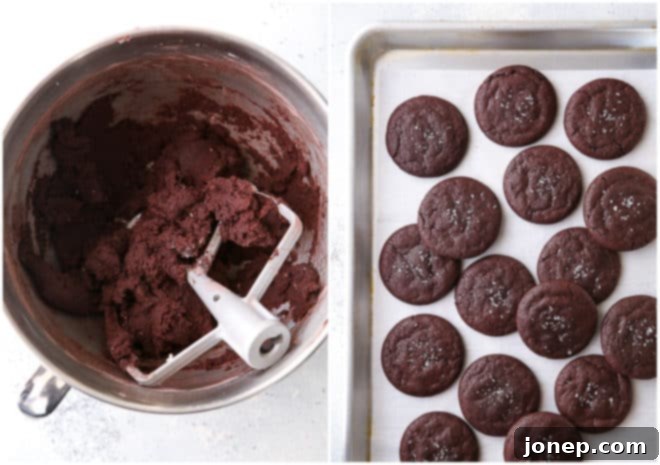
One of the most enchanting features of these cookies is the vibrant red and white candy cane swirl in the frosting. You might think such a decorative effect is complicated, but it’s surprisingly simple to achieve and adds an incredible “wow” factor to your cookies. The trick lies in how you prepare your piping bag.
Here’s how you can master this delightful technique: Before filling your piping bag with the luscious peppermint buttercream, grab a clean, food-safe paintbrush and some red gel food coloring. Gently paint several stripes of the gel food coloring along the inside walls of the piping bag, from the tip upwards. Don’t worry about perfection; rustic stripes work beautifully. As you then scoop the white peppermint frosting into the bag and begin to pipe it out, the gel coloring on the sides will naturally transfer to the frosting, creating beautiful, swirling red and white patterns that mimic a classic candy cane. Voila! You’ll have a batch of frosting that looks as festive as it tastes, ready to transform your chocolate cookies into holiday masterpieces.
Ready to bring this holiday magic to your kitchen? Let’s dive into the details of baking these delectable chocolate candy cane sandwich cookies!
Essential Ingredients for Your Festive Cookies
Crafting these delicious sandwich cookies requires a harmonious blend of common baking staples and a few special touches to achieve that distinct chocolate-peppermint flavor. Here’s a comprehensive list of what you’ll need, broken down for clarity:
For the Rich Chocolate Cookies:
- **Unsalted Butter:** At room temperature for perfect creaming. It provides richness and a tender crumb.
- **Granulated Sugar:** Sweetens the cookies and contributes to their soft texture.
- **Large Eggs:** Act as a binder and add moisture, ensuring a chewy cookie.
- **Vanilla Extract:** Enhances the overall flavor profile of the chocolate.
- **All-Purpose Flour:** The structural base for your cookies. Proper measurement is key!
- **Unsweetened Cocoa Powder:** Delivers that deep, intense chocolate flavor and color.
- **Baking Soda:** The leavening agent that helps the cookies rise and achieve their characteristic chewiness.
- **Salt:** Balances the sweetness and amplifies the chocolate flavor.
For the Fluffy Peppermint Buttercream Frosting:
- **Powdered Sugar (Confectioners’ Sugar):** Sifted for a smooth, lump-free frosting. This provides the bulk and sweetness.
- **Unsalted Butter:** At room temperature for a light and airy buttercream.
- **Pinch of Salt:** Cuts through the sweetness and enhances the other flavors.
- **Heavy Whipping Cream:** Adds richness and helps create that coveted fluffy texture.
- **Peppermint Extract:** The star of the frosting, delivering a refreshing minty kick.
- **Red Gel Food Coloring:** Crucial for achieving the iconic candy cane swirl effect. (Gel is important; liquid won’t work the same way!)
Crafting Your Chocolate Candy Cane Cookies: A Step-by-Step Guide
Making these festive sandwich cookies is a straightforward process that yields impressive results. Follow these detailed steps to ensure your holiday treats are perfectly baked and beautifully assembled.
Step 1: Preparing the Chocolate Cookie Dough
- **Preheat Oven and Prepare Pans:** Start by preheating your oven to 350°F (175°C). Line several baking sheets with parchment paper. This prevents sticking and ensures even baking.
- **Cream Butter and Sugar:** In a large mixing bowl (or the bowl of a stand mixer fitted with a paddle attachment), beat the softened unsalted butter and granulated sugar together on high speed. Continue beating until the mixture is light in color and fluffy, typically for 2-3 minutes. This process incorporates air, making your cookies tender.
- **Add Wet Ingredients:** Beat in the eggs one at a time, ensuring each is fully incorporated before adding the next. Follow with the vanilla extract, mixing until just combined.
- **Combine Dry Ingredients:** In a separate medium bowl, whisk together the all-purpose flour, unsweetened cocoa powder, baking soda, and salt. This ensures all the dry ingredients are evenly distributed.
- **Combine Wet and Dry Mixtures:** Gradually add the dry ingredient mixture to the wet ingredients, mixing on low speed until just combined. Be careful not to overmix, as this can lead to tough cookies.
Step 2: Baking the Perfect Chocolate Cookies
- **Portion and Bake:** Use a cookie scoop or two spoons to portion out rounded tablespoons of dough onto your prepared baking sheets, leaving about 2 inches between each cookie.
- **Bake Until Set:** Bake for approximately 9-11 minutes. You’ll know they’re ready when the edges are set and the tops just begin to show small cracks. For soft and chewy cookies, it’s always better to slightly underbake them.
- **Cool Completely:** Remove the baking sheets from the oven and let the cookies cool on the pan for a few minutes before transferring them to a wire rack to cool completely. This is crucial before frosting!
Step 3: Whipping Up the Peppermint Frosting
- **Combine Frosting Ingredients:** In a clean mixing bowl (or stand mixer), combine the sifted powdered sugar, softened unsalted butter, a pinch of salt, heavy whipping cream, and peppermint extract. Beat on low speed until the ingredients are just combined and start to come together.
- **Achieve Fluffy Texture:** Increase the mixer speed to high and beat for 2-3 minutes. Continue beating until the frosting is incredibly light, fluffy, and smooth. This aeration is what makes it so delightful.
Step 4: Preparing the Piping Bag for the Swirl
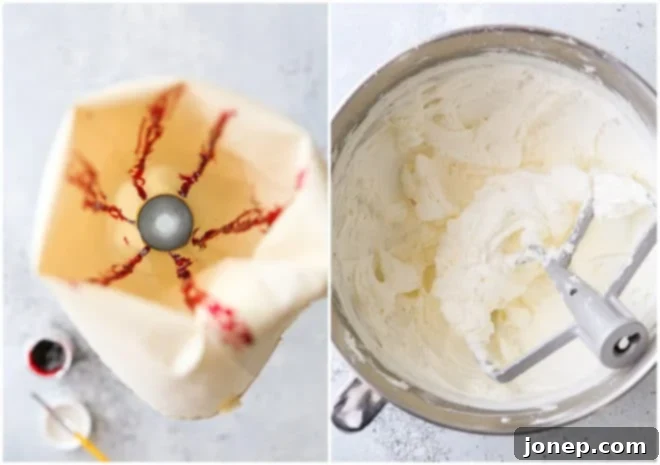
- **Paint the Piping Bag:** Take a large piping bag fitted with your desired tip (a round tip or star tip works well for sandwich cookies). Using a clean, food-safe paintbrush, carefully paint 4-6 vertical stripes of red gel food coloring along the inside of the piping bag, starting from the tip and going upwards. The gel coloring will adhere to the sides.
- **Fill with Frosting:** Gently spoon the prepared peppermint buttercream into the painted piping bag, taking care not to smudge the gel stripes too much.
Step 5: Assembling Your Chocolate Candy Cane Sandwich Cookies
- **Pipe Frosting:** Take one cooled chocolate cookie and turn it upside down. Pipe a generous swirl or dollop of the peppermint frosting onto the flat bottom of the cookie. As you pipe, the red gel will mix with the white frosting, creating beautiful candy cane stripes.
- **Top with Another Cookie:** Gently place another cooled chocolate cookie on top of the frosting, pressing down slightly to create a sandwich.
- **Repeat and Enjoy:** Continue this process with the remaining cookies and frosting. Once assembled, these delightful treats are ready to be devoured!

Expert Tips for Perfect Chocolate Peppermint Sandwich Cookies
Achieving bakery-quality results in your home kitchen is easier than you think with these expert tips. From ensuring the perfect cookie texture to mastering the vibrant candy cane swirl, these insights will guide you to success.
- Precision in Flour Measurement: The secret to soft, perfectly spread cookies is accurately measured flour. Avoid scooping flour directly from the bag with your measuring cup, as this compacts it, leading to too much flour. Instead, use the “spoon and level” method: gently spoon flour into your measuring cup until it overflows, then level it off with the back of a knife. Too much flour will result in dry, cakey cookies that don’t spread properly. Learn more about how to measure flour correctly for consistent results.
- The Power of Gel Food Coloring: For that striking red candy cane swirl, gel food coloring is absolutely essential. Unlike liquid food colorings, gel food coloring is highly concentrated and has a thicker consistency, allowing it to adhere beautifully to the inside of your piping bag. Liquid food colorings are too watery and will simply slide off, yielding a muddy or uneven color. You can typically find gel food coloring at specialty baking or craft stores, or easily purchase it online.
- Piping Bag Alternatives: No piping bag and tip on hand? No problem! You can easily create a makeshift piping bag using a sturdy plastic ziplock bag. Simply snip a small corner off the bag after filling it with frosting. While it might not offer the same precision as a dedicated piping tip, it works perfectly well for sandwich cookies. Check out this tutorial for guidance on using a ziplock bag.
- Embrace Parchment Paper: For effortless baking and cleanup, pre-cut parchment sheets are a game-changer. They prevent cookies from sticking, promote even baking, and make transferring cookies a breeze. If you don’t have pre-cut sheets, regular parchment paper works just as well.
- Achieve Uniformity with a Cookie Scoop: For professional-looking cookies that are all the same size and bake evenly, a cookie scoop is your best friend. It ensures consistent portioning of dough, leading to beautifully uniform sandwich cookies.
- Perfecting Cookie Shape: If your cookies come out of the oven slightly misshapen, don’t despair! Immediately after removing them from the oven, while they’re still warm and pliable, use the back of a spatula or the rim of a round cookie cutter (slightly larger than your cookies) to gently press and reshape them into perfect circles. This simple trick makes a huge difference in the final presentation. For more tips on achieving gorgeous cookies, explore my guide on baking picture-perfect cookies.
- Optimal Storage for Freshness: These chocolate candy cane sandwich cookies are best enjoyed within a few days of baking, when their flavors and textures are at their peak. Store them in an airtight container at room temperature for up to one week. If you need to store them longer, they can be frozen for up to a month. Thaw at room temperature before serving.
- Room Temperature Ingredients: Always ensure your butter and eggs are at room temperature for both the cookies and the frosting. This allows them to cream together properly, creating a smooth batter and a fluffy buttercream without lumps or separation.
- Do Not Overmix: After adding the dry ingredients to the cookie dough, mix only until just combined. Overmixing develops the gluten in the flour, which can lead to tough, dense cookies.
More Festive Chocolate Peppermint Delights
If you’ve fallen in love with the harmonious blend of chocolate and peppermint in these delightful sandwich cookies, you’re in for a treat! This classic holiday flavor combination can be enjoyed in a variety of other delicious desserts. Explore these other festive recipes to keep the peppermint cheer going all season long:
- Chocolate Peppermint Bars: A delightful layered dessert featuring a rich chocolate base and a creamy peppermint topping.
- Peppermint White Chocolate Chip Cookies: A lighter take on the classic, where white chocolate provides a sweet contrast to the cool peppermint.
- Peppermint Bark Cookies: Cookies inspired by the beloved holiday candy, often featuring crushed candy canes and chocolate.
- Peppermint Cookies and Cream Ice Cream: A refreshing and creamy indulgence, perfect for those who love ice cream year-round.

Shop Essential Tools for This Recipe
Having the right tools can make all the difference in your baking experience. Here are some recommended items that will help you achieve perfect results with these Chocolate Candy Cane Sandwich Cookies and other baking projects:
These tools, from quality mixing equipment to precise measuring instruments, will not only simplify the process but also enhance the consistency and presentation of your baked goods. Happy baking!
This recipe was originally published December 2015.

Chocolate Candy Cane Sandwich Cookies
Pin Recipe
Leave a Review
Ingredients
Cookies:
- ¾ cup unsalted butter , at room temperature (170 grams)
- 1 ½ cups granulated sugar (300 grams)
- 2 large eggs
- 1 teaspoon vanilla extract
- 2 ¼ cups all-purpose flour (270 grams)
- ⅔ cup unsweetened cocoa powder (56 grams)
- 1 teaspoon baking soda
- ½ teaspoon salt
Frosting:
- 3 cups powdered sugar , sifted (340 grams)
- ¾ cup unsalted butter , at room temperature (170 grams)
- Pinch salt
- 3 tablespoons heavy whipping cream
- 2 teaspoons peppermint extract
- Red gel food coloring
Instructions
To make the cookies:
-
Preheat oven to 350°F. Line a sheet pan with parchment paper.
-
In the bowl of stand mixer fitted with a paddle attachment, or in a large bowl with a hand-held mixer, beat the butter and sugar together on high speed until pale and creamy.
-
Add the eggs one at a time, mixing after each, followed by the vanilla.
-
In a separate bowl, combine the flour, cocoa powder, baking soda and salt. Add to the butter mixture all at once and mix until incorporated.
-
Shape into rounded tablespoons and place on prepared sheet pan. Bake until surface is cracked and edges are dry, about 10 minutes.
-
Repeat with remaining cookie dough. Let cookies cool completely.
To make the frosting:
-
Beat the powdered sugar, butter, salt, heavy cream, and peppermint extract on low speed until it comes together.
-
Increase speed to high and beat for 2-3 minutes until light and creamy.
-
Use a clean paintbrush to paint the red gel food coloring up the sides of a large piping bag fitted with a plain or star tip, making 4-6 lines total. Fill bag with frosting.
To assemble cookie sandwiches:
-
Pipe frosting onto the bottom of one cooled chocolate cookie and place another chocolate cookie on top.
-
Store cookies in an airtight container at room temperature for up to 7 days.
Disclosure: This recipe was originally created for Go Bold With Butter, a brand I still love and partnership with. Thank you for supporting partnerships with brands and campaigns I believe in, which make it easier for me to bring you new and creative content. All opinions are always my own.
