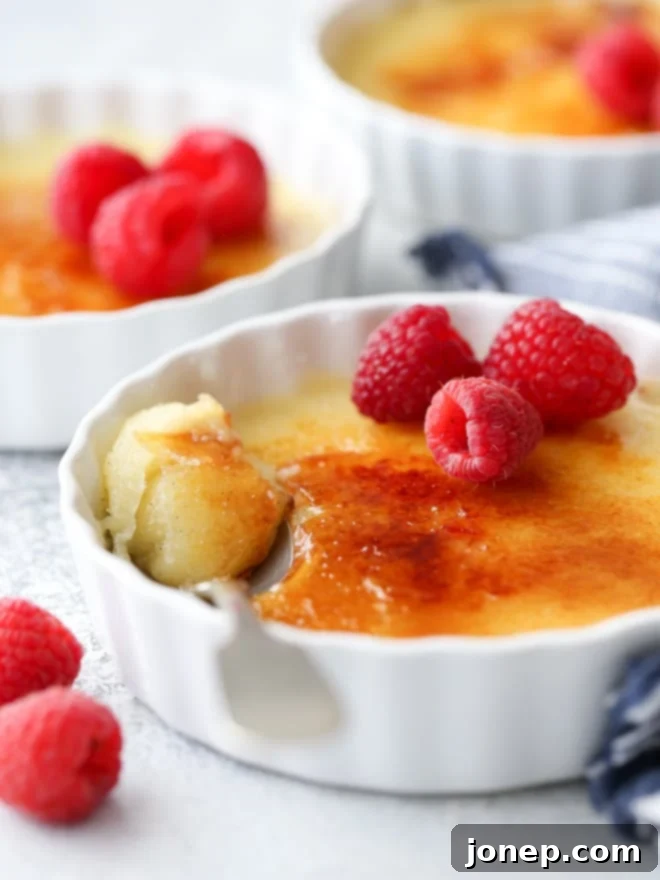
Effortless Elegance: Your Guide to the Best Easy No-Bake Crème Brûlée Recipe
Crème brûlée stands as a beacon of sophisticated desserts, traditionally demanding a delicate touch and a hot water bath in the oven. Its hallmark is a rich, silky vanilla custard crowned with a perfectly caramelized, crackly sugar crust. While this classic French dessert is undeniably impressive, the effort involved often reserves it for special occasions or the skilled hands of pastry chefs. But what if you could achieve that same luxurious experience with significantly less fuss?
Enter the world of no-bake crème brûlée! This innovative approach brings all the beloved characteristics of the classic – the smooth texture, the deep vanilla flavor, and the iconic crunchy topping – right to your home kitchen, without ever needing to turn on your oven. It’s a delightfully indulgent treat that comes together in a fraction of the time, making it perfect for impromptu gatherings or when you simply crave something extraordinary.
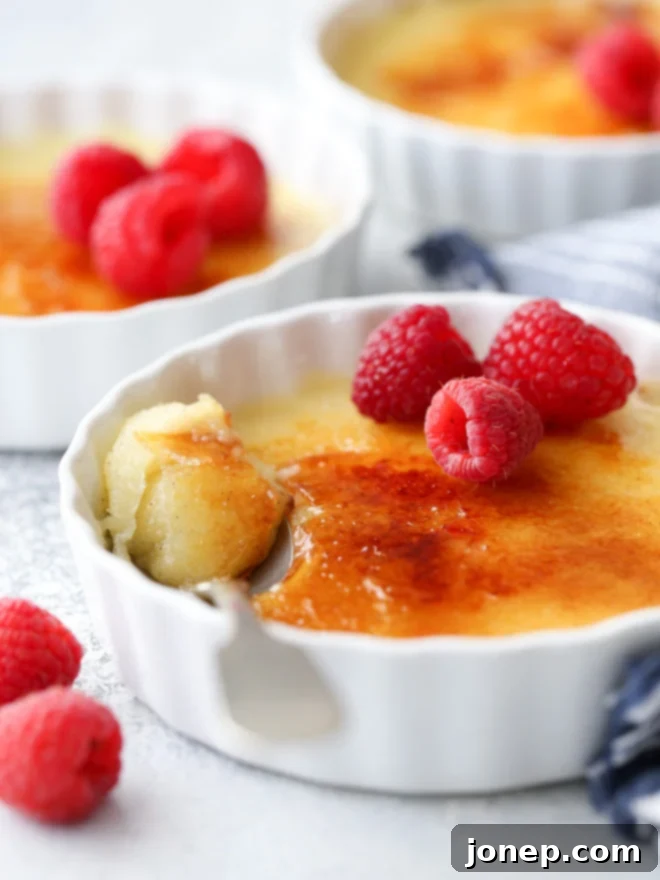
Why Choose a No-Bake Crème Brûlée?
Traditional crème brûlée recipes, while exquisite, can be quite intimidating for home bakers. They typically involve tempering egg yolks, carefully baking individual custards in a water bath to ensure even cooking, and then chilling them perfectly. This process is time-consuming and requires precision to avoid a curdled or overly firm custard.
Our no-bake version simplifies everything without compromising on flavor or texture. By adjusting the thickening agents, we create a custard that sets beautifully in the refrigerator, bypassing the oven entirely. This means:
- **Speed and Simplicity:** Drastically cut down on preparation and cooking time. No more waiting for water baths or oven preheating.
- **Foolproof Results:** The method is more forgiving, making it ideal for beginners or those who want a stress-free dessert.
- **Consistent Texture:** Achieves an incredibly smooth, creamy, and rich custard that rivals its baked counterpart, thanks to a careful balance of egg yolks and cornstarch.
- **Effortless Elegance:** You still get that “wow” factor with the signature caramelized sugar crust, making it perfect for entertaining without the added stress.
This recipe is essentially a luxurious vanilla pudding, elevated by its rich ingredients and, most importantly, that irresistible burnt sugar topping. Once chilled and adorned with its signature crackly lid, even the most discerning palate will struggle to tell the difference from a traditional baked crème brûlée.
Table of Contents
- How to Make No-Bake Crème Brûlée: The Process
- What You’ll Need for Your No-Bake Crème Brûlée
- Key Ingredients Explained
- Essential Equipment for Success
- Brûlée Torching Tips for the Perfect Crust
- Pro-Tips for Perfect No-Bake Crème Brûlée
- Flavor Variations and Serving Suggestions
- More Special Homemade Treats
- Easy No-Bake Crème Brûlée Recipe
How to Make No-Bake Crème Brûlée: The Process
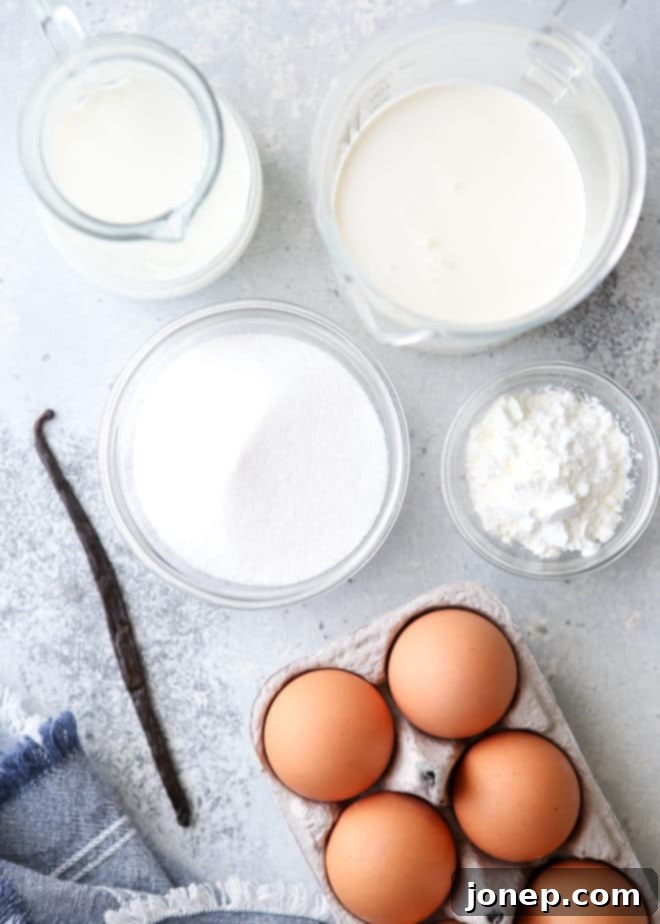
The core of this recipe lies in creating a rich, smooth custard that sets without baking. We achieve this by slightly increasing the amount of thickeners – both egg yolks and a touch of cornstarch – compared to a traditional baked recipe. This ensures a beautifully firm and creamy texture once chilled, perfectly mimicking the classic.
The process is surprisingly straightforward. You’ll begin by gently heating a luxurious mixture of heavy cream, whole milk, and sugar infused with fragrant vanilla. While this is warming, you’ll whisk together the egg yolks and cornstarch. This creates a thickening base that will give the custard its body. The magic happens when you gradually temper the hot cream mixture into the egg yolk blend, then return it all to the saucepan to cook until it visibly thickens. Continuous stirring is key here to prevent scorching and ensure a perfectly smooth consistency. If you can separate eggs and stir a pot at the stove, you are more than capable of mastering this elegant dessert!
What You’ll Need for Your No-Bake Crème Brûlée
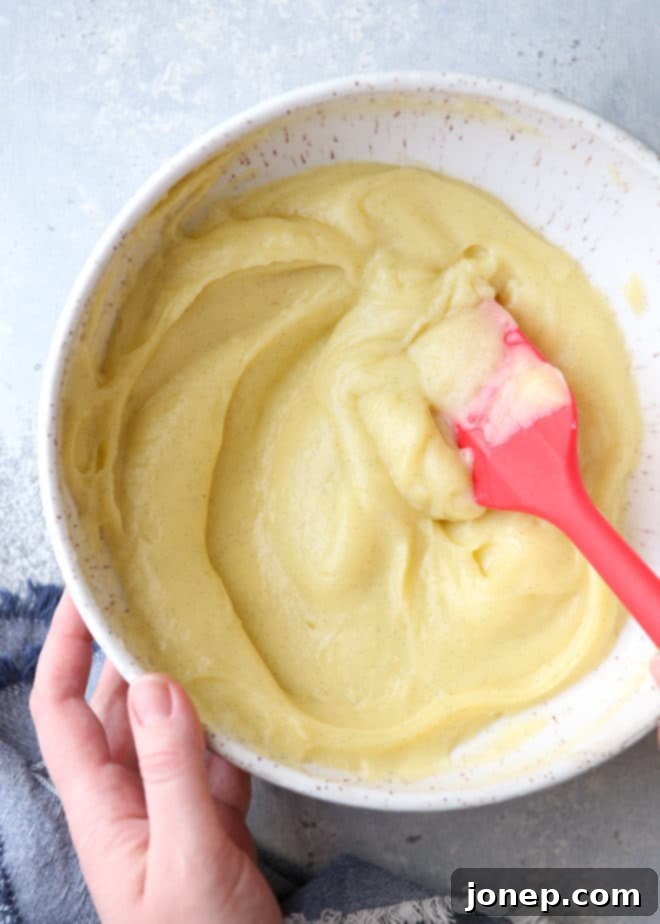
Gathering your ingredients and equipment beforehand will make the cooking process seamless and enjoyable. Here’s everything you’ll need to create this irresistible no-bake crème brûlée.
Key Ingredients Explained
Each ingredient plays a crucial role in achieving the signature taste and texture of crème brûlée:
- Heavy Cream: The foundation of any rich crème brûlée, heavy cream provides the luxurious mouthfeel and decadent flavor. Don’t skimp on this for best results.
- Whole Milk: Balances the richness of the cream, contributing to the custard’s smooth consistency without making it overly heavy.
- Granulated Sugar: Sweetens the custard and, most importantly, caramelizes into that iconic crunchy topping.
- Vanilla Bean or Vanilla Extract: The soul of crème brûlée! A vanilla bean provides a deeper, more aromatic flavor, but high-quality vanilla extract is a perfectly acceptable and convenient substitute.
- Egg Yolks: Essential for richness, color, and thickening the custard. They provide much of the classic custard texture.
- Cornstarch: This is our secret weapon for the no-bake method. It acts as an additional thickener, ensuring the custard sets perfectly in the fridge without needing to be baked.
Essential Equipment for Success
Beyond your standard kitchen tools like mixing bowls, spatulas, and whisks, a few specific items will greatly enhance your crème brûlée making experience:
- Ceramic or Porcelain Ramekins: Preferably wide and shallow ones. These are ideal for crème brûlée as they allow for a larger surface area for the sugar to brûlée, creating more of that delightful crunch in every bite. Their individual portions also make for an elegant presentation.
- A Kitchen Torch: While not strictly essential (see our tip below), a kitchen torch is the most effective and fun way to create that perfectly crisp, caramelized sugar crust. It gives you precise control over the browning process.
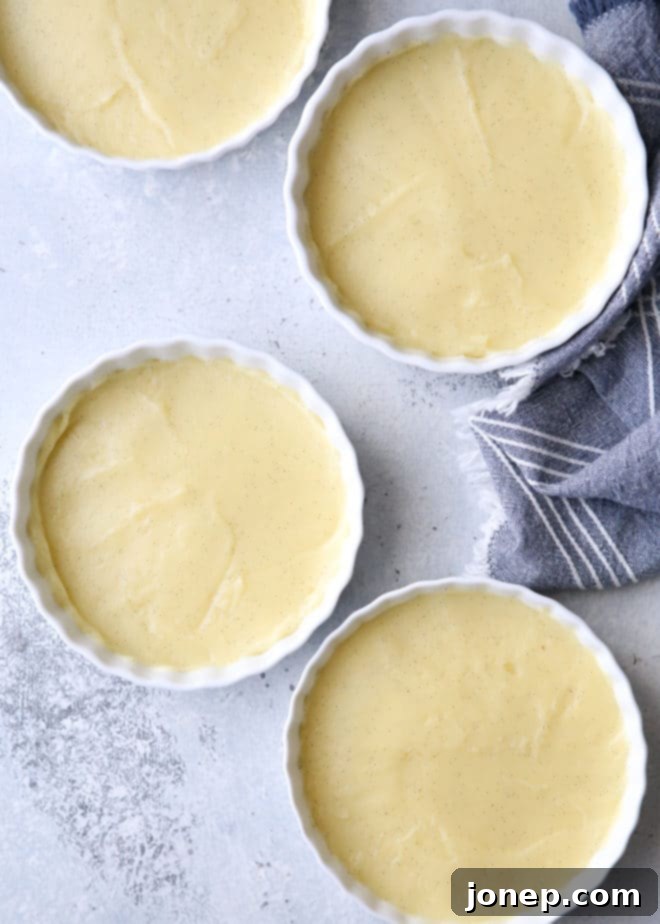
baking tip:Brûlée Torching Tips for the Perfect Crust
Achieving that iconic, perfectly crisp, golden, caramelized sugar shell on your crème brûlée is easier than you think with these simple tips:
- Ensure Thorough Chilling: Your custard (or any dessert you plan to brûlée) must be completely cold and firm. A cold surface helps the sugar melt and caramelize without heating the custard underneath.
- Torch Just Before Serving: For the ultimate crispness, caramelize the sugar right before you plan to serve the dessert. The sugar crust can soften over time if left too long.
- Even Sugar Layer: Sprinkle a thin, even layer of granulated sugar over the entire surface of your chilled custard. Avoid clumping, as this can lead to uneven caramelization or burning.
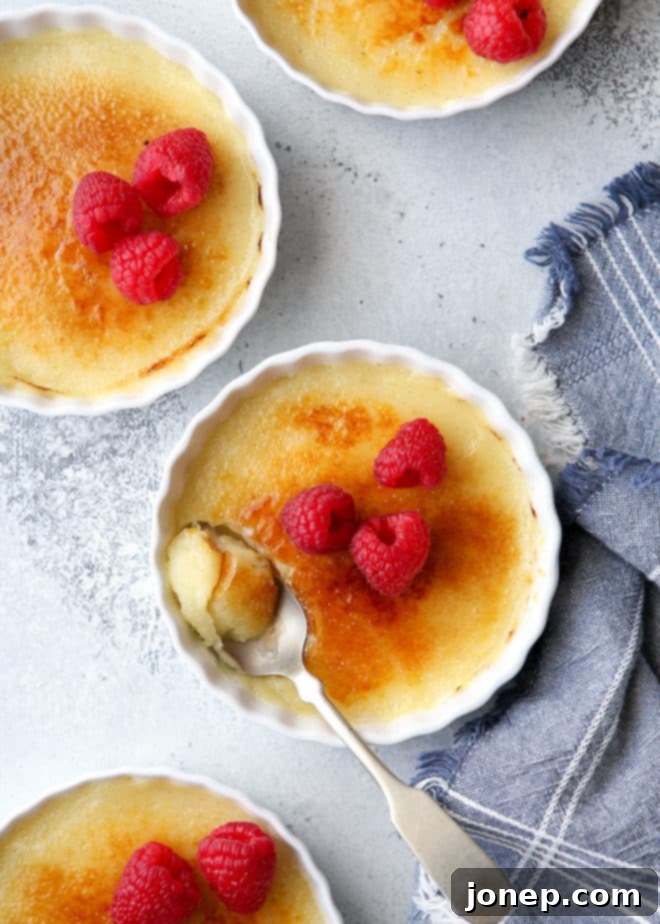
- Consistent Torch Movement: Pass a kitchen torch evenly over the sugar surface. Keep the flame moving constantly to prevent scorching. Pause just long enough in certain spots as needed to melt and caramelize the sugar to a beautiful golden-amber hue, without allowing it to burn or turn black. Burnt sugar will taste bitter.
- Serve Immediately: Once the crust is perfectly formed and cooled for a minute or two, serve and enjoy the satisfying crack!
No Kitchen Torch? No Problem! Use Your Oven Broiler:
If you don’t have a kitchen torch, your oven broiler can achieve similar (though perhaps not quite as perfect) results. Here’s how:
- Place your oven rack on the highest setting, ensuring the ramekins will be directly under the broiler element.
- Preheat your broiler to high.
- Carefully place the sugar-topped ramekins directly under the hot broiler.
- Watch them constantly! This process is quick and can vary significantly by oven. Wait for the sugar to melt and caramelize, rotating the ramekins as necessary for even browning. This can take anywhere from 1 to 5 minutes. Remove them as soon as the desired golden crust forms to prevent burning.
- Let cool for a moment before serving.
Pro-Tips for Perfect No-Bake Crème Brûlée
- Strain for Silkiness: Don’t skip passing the cooked custard through a fine-mesh strainer. This crucial step catches any small lumps of egg yolk or cornstarch, ensuring your final custard is unbelievably smooth and silky.
- Whisk Vigorously While Tempering: When adding the hot cream mixture to the egg yolks, pour in a slow, steady stream while whisking continuously and vigorously. This prevents the eggs from scrambling and helps create a homogenous mixture.
- Stir Constantly During Cooking: Once the custard is back on the stove, continuous stirring with a spatula that scrapes the bottom of the pan is essential. This prevents the custard from sticking and ensures even thickening, leading to a smooth finish.
- Thorough Chilling is Key: Allow at least 2 hours for your custards to chill in the refrigerator, preferably longer (up to 4 hours or overnight). This is vital for the custard to set properly and achieve its firm, creamy consistency.
- Prepare Ahead: This dessert is fantastic for meal prep! The custard can be made up to 24 hours in advance and stored in the fridge. Simply brûlée the topping just before you’re ready to serve for maximum impact.
Flavor Variations and Serving Suggestions
While classic vanilla is always a winner, don’t hesitate to experiment with different flavors to personalize your no-bake crème brûlée:
- Coffee Crème Brûlée: Add a tablespoon or two of instant espresso powder to the milk and cream mixture for a delightful coffee-infused custard.
- Citrus Zest: Infuse the cream and milk with lemon or orange zest for a bright, refreshing twist. Remove the zest before straining the custard.
- Chocolate Crème Brûlée: Stir in some melted dark chocolate after the custard has thickened but before straining for a rich, decadent version.
- Spiced Crème Brûlée: Add a pinch of cinnamon, nutmeg, or cardamom to the cream mixture during heating for a warming, aromatic dessert.
Serve your no-bake crème brûlée simply in its ramekin, perhaps with a fresh berry or two on the side to add a touch of color and tartness. A small spoon for cracking the crust is a must!
More Special Homemade Treats
If you enjoyed making this elegant dessert, explore these other delightful recipes perfect for any occasion:
- Molten Chocolate Cakes for Two
- Chocolate Zabaglione (Chocolate Wine Sauce)
- Brownie Bottom Mini Cheesecakes
- Flourless Chocolate Almond Cake
This recipe was originally published February 2014, and has been updated and expanded for clarity and ease of use.
Easy No-Bake Crème Brûlée Recipe
Easy No-Bake Crème Brûlée
Pin Recipe
Leave a Review
Ingredients
- 1 cup (250 ml) heavy whipping cream
- ½ cup (125 ml) whole milk
- ½ cup (100 grams) granulated sugar
- 1 vanilla bean , split lengthwise (or 1 tbsp good quality vanilla extract)
- 4 large egg yolks
- 2 tablespoons cornstarch
- Granulated sugar , for brûléeing the topping
Instructions
-
In a medium saucepan, combine the heavy cream, whole milk, and granulated sugar. If using a vanilla bean, use a sharp knife to scrape the fragrant seeds from the pod and add both the seeds and the pod to the saucepan. Place the saucepan over medium heat and stir constantly with a whisk to ensure the sugar fully dissolves. Heat the mixture just until small bubbles begin to appear around the edges and it is steaming gently; do not allow it to come to a full rolling boil.
-
Meanwhile, in a separate medium bowl, whisk together the egg yolks and cornstarch until completely smooth and no lumps remain. This creates a slurry that will thicken our custard.
-
Carefully temper the hot cream mixture into the egg yolk mixture. To do this, slowly pour the hot cream into the egg yolks in a thin, steady stream while whisking the egg mixture constantly and vigorously. This prevents the egg yolks from scrambling. Once combined, pour the entire mixture back into the saucepan. Return the saucepan to medium heat. Cook, stirring constantly with a heat-resistant spatula (making sure to scrape the bottom and sides of the pan) until the mixture just comes to a gentle boil and visibly thickens to a pudding-like consistency. This usually takes about 3-5 minutes, and you may increase the heat slightly if needed, but keep a close eye on it. Once thickened, continue to cook and stir for an additional 1 minute to ensure the cornstarch is fully cooked out and the custard is stable.
-
Remove the saucepan from the heat. If you used a vanilla bean pod, remove and discard it. Pass the hot custard through a fine-mesh strainer into a clean bowl or directly into your individual ramekins. This step is crucial for achieving an ultra-smooth, silky texture. Spoon the custard evenly into the ramekins. Place the ramekins in the fridge, uncovered, to chill and set up for at least 2 hours, or preferably until fully firm (up to 4 hours or overnight).
-
When you are ready to serve, remove the chilled ramekins from the fridge. Sprinkle a thin, even layer of granulated sugar generously over the surface of each custard. Working with one ramekin at a time, ignite your kitchen torch and pass the flame evenly over the sugar surface until it melts, bubbles, and caramelizes into a beautiful golden-amber, crackly crust. (Refer to our “Brûlée Torching Tips” above for detailed instructions if using a torch or broiler). Serve immediately to enjoy the contrast between the warm, crisp crust and the cold, creamy custard.
Video
Notes
- Vanilla Substitution: If you don’t have a vanilla bean, you may substitute with 1 tablespoon of good quality vanilla extract. Stir the vanilla extract into the custard *after* it has thickened on the stove and *before* passing it through the mesh strainer.
- Make Ahead: This no-bake crème brûlée can be prepared and chilled up to 24 hours in advance. For the best crunchy topping, make sure to brûlée the sugar just before you plan to serve. Store the un-brûléed custards covered lightly in the refrigerator.
- Storage: Leftover brûléed crème brûlée can be stored in the refrigerator for up to 2 days, though the sugar crust will lose some of its crispness over time.
There you have it – the ultimate guide to creating a truly spectacular no-bake crème brûlée. This recipe proves that you don’t need fancy techniques or hours in the kitchen to enjoy a dessert that feels incredibly luxurious. With its creamy vanilla custard and signature crackly topping, this easy version is sure to impress everyone who tries it. Go ahead, give it a try and transform your dessert game!
